

Your Cooking Lesson
Advice, explanation, and in-depth information to help you achieve recipe success.
Wanting to keep your kitchen cool doesn’t mean that your summer dinners can’t be exciting and sophisticated. With average temperatures getting ever hotter and heat waves coming earlier, it’s time to broaden your grilling repertoire and complement your grilled proteins with cool, crunchy, colorful salads to make healthful and delicious entrées. This recipe tops a tangy, colorful Catalan-style bean salad with garlicky, paprika-spiced shrimp for a satisfying summer meal.

Catalonia, or Cataluña, is an autonomous community of Spain located in the northeastern part of the Iberian peninsula adjacent to France. With almost four hundred miles of Mediterranean coastline, the region’s cuisine features a vide variety of seafood. Grilled shrimp, or gambas a la plancha, is a summer favorite. Seasoning with Spanish smoked paprika augments the char-grilled flavor.
Catalonia’s warm, sunny, Mediterranean climate enables farmers to harvest a bounty of vegetables such as tomatoes, peppers, beans, and garlic over a long growing season. Empedrat, a traditional Catalan summer salad, combines tender white beans with Mediterranean vegetables and poached salt cod in a garlicky sherry vinegar and olive oil dressing.
Our recipe swaps out the salt cod with skewers of grilled shrimp, blending the best of both dishes.
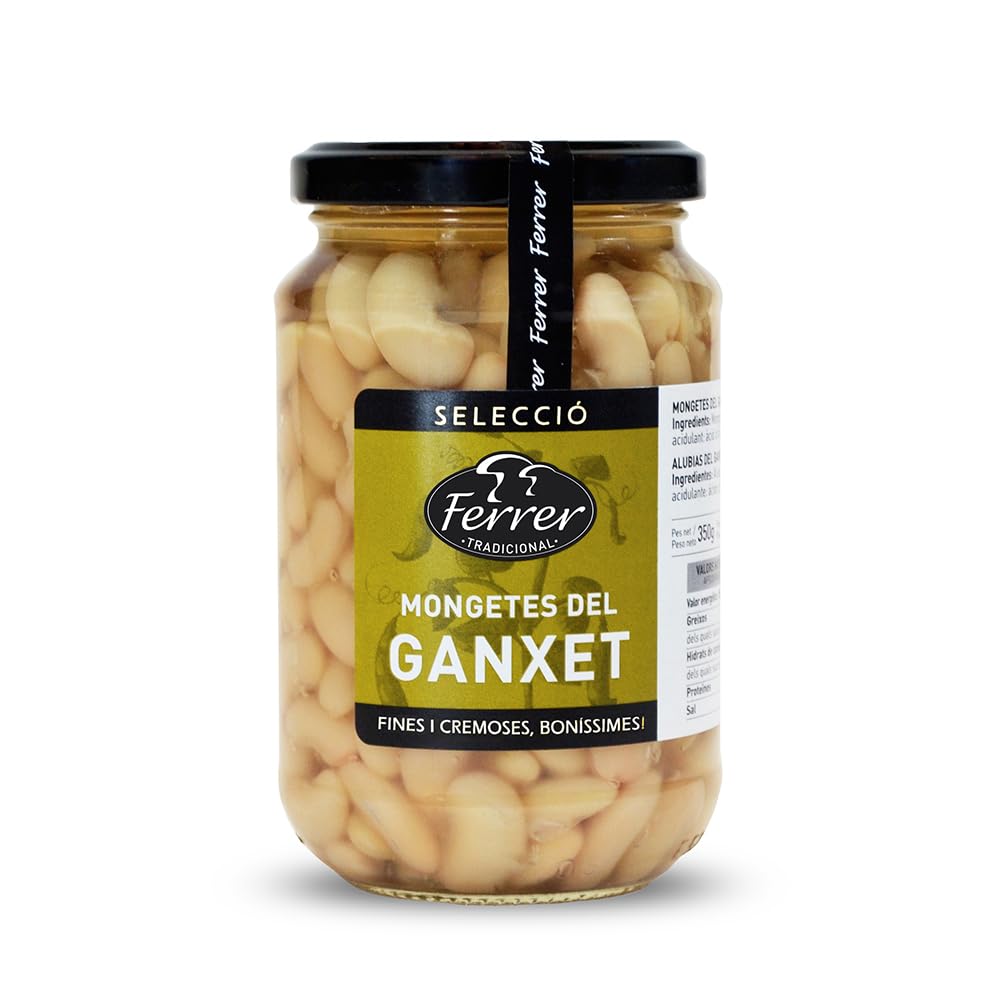
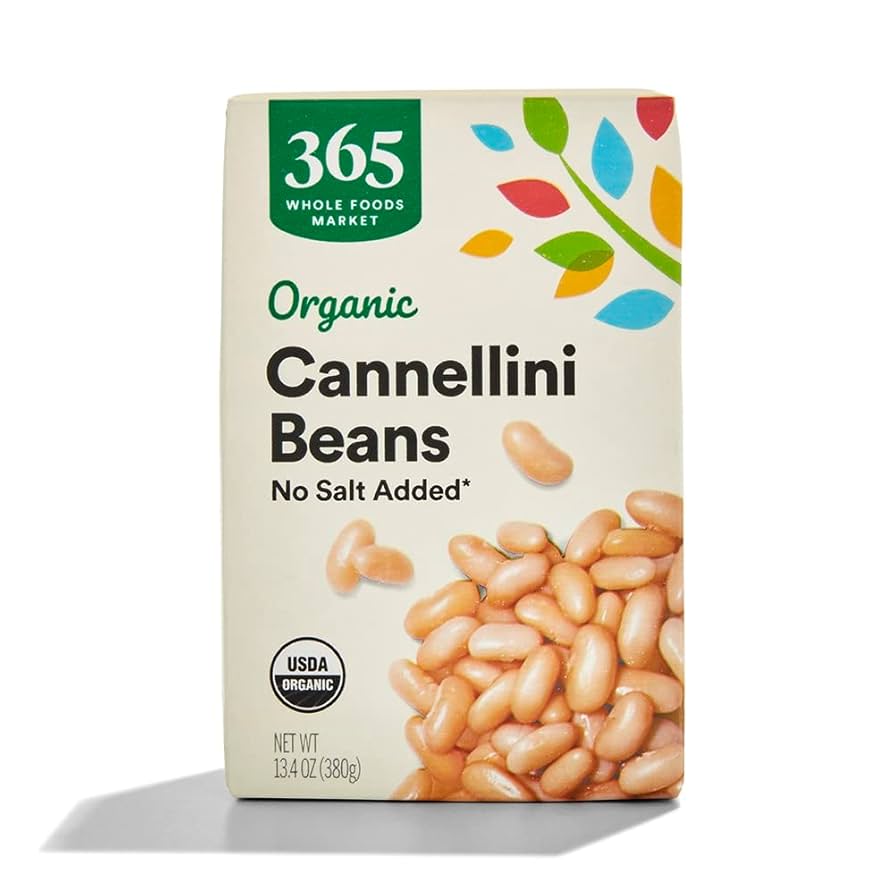
In Catalonia the beans of choice for empedrat salad are mongetes, a large, meaty-fleshed white bean. These are rarely offered in North American groceries, but can be purchased online at a hefty price. However, more widely available cannellini beans make a fine substitute.
Although in cool weather there’s a lot of satisfaction in having a slow simmering, made-from-scratch pot of beans on the stove, in the heat of summer it’s far more convenient to use a cooked bean product—especially in a salad for which there’s no further application of heat that can cause overcooking. Instead of canned beans, consider purchasing beans sold in cartons; they have a fresher flavor and none of the “tinny” metallic taste sometimes found in the canned variety.

Our Catalan salad is dressed in Sherry Vinaigrette, an essential ingredient for the PrepHoldCook community. https://prepholdcook.com/recipes/essentials/sherry-vinaigrette/ If you don’t already have a bottle of this dressing in your refrigerator, make a batch to use in this recipe. It keeps almost indefinitely, and you’re sure to love it on many other types of salad. But if you’re short on time, you can substitute a different vinegar-based dressing.
As the name implies, sherry vinaigrette is made from sherry vinegar, a product made in Jerez, Spain as a complementary product to Spanish sherry wine. Sherry vinegar is aged in oak barrels to attain a distinctive nutty, caramel-like flavor with mellow acidity. For best flavor don’t settle for a copycat version produced elsewhere; make the effort to find an authentic, aged Jerez brand. https://amzn.to/4lnGxpB
Because our sherry vinaigrette features a high-quality vinegar as its starring flavor, team it with a lighter, more mild-tasting extra-virgin olive oil. A drop of honey adds its mellow sweetness.
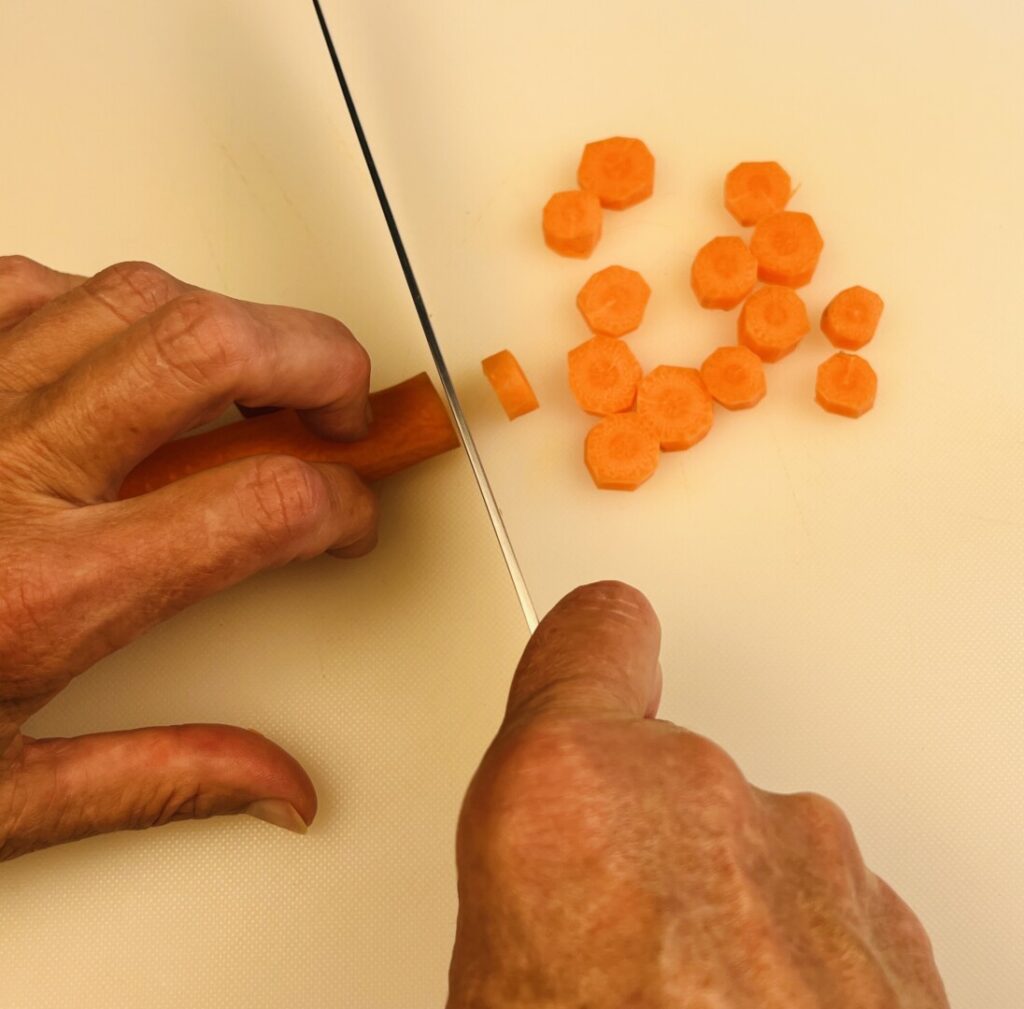
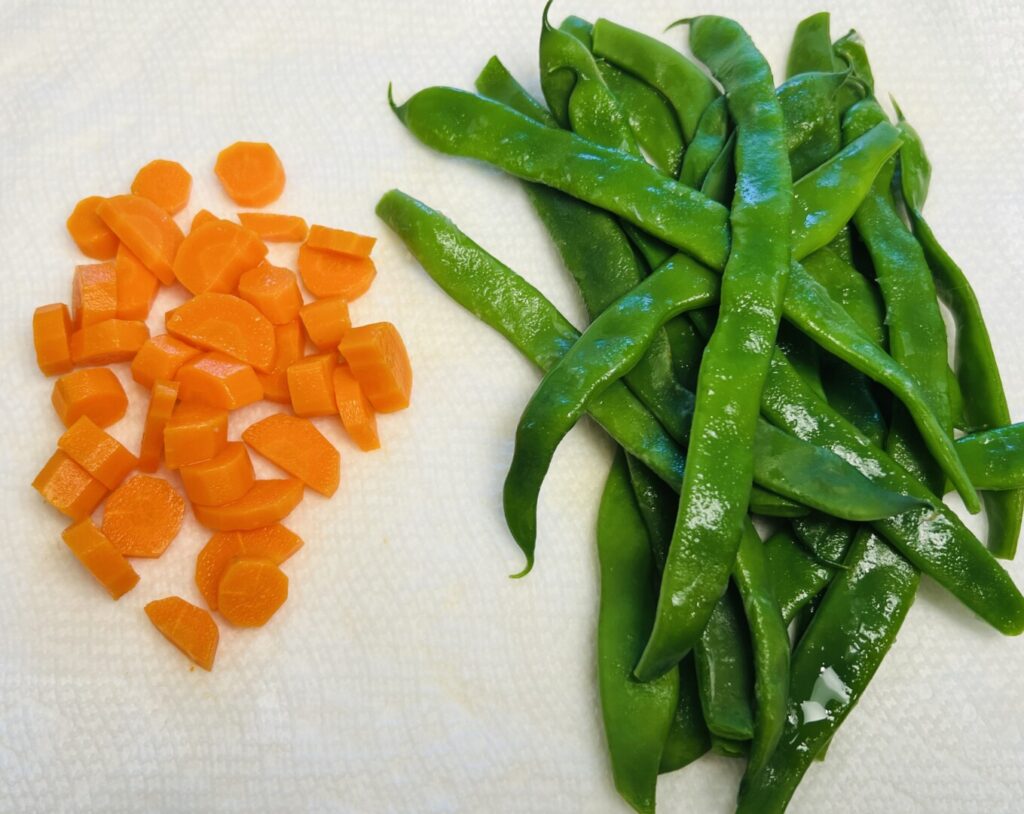
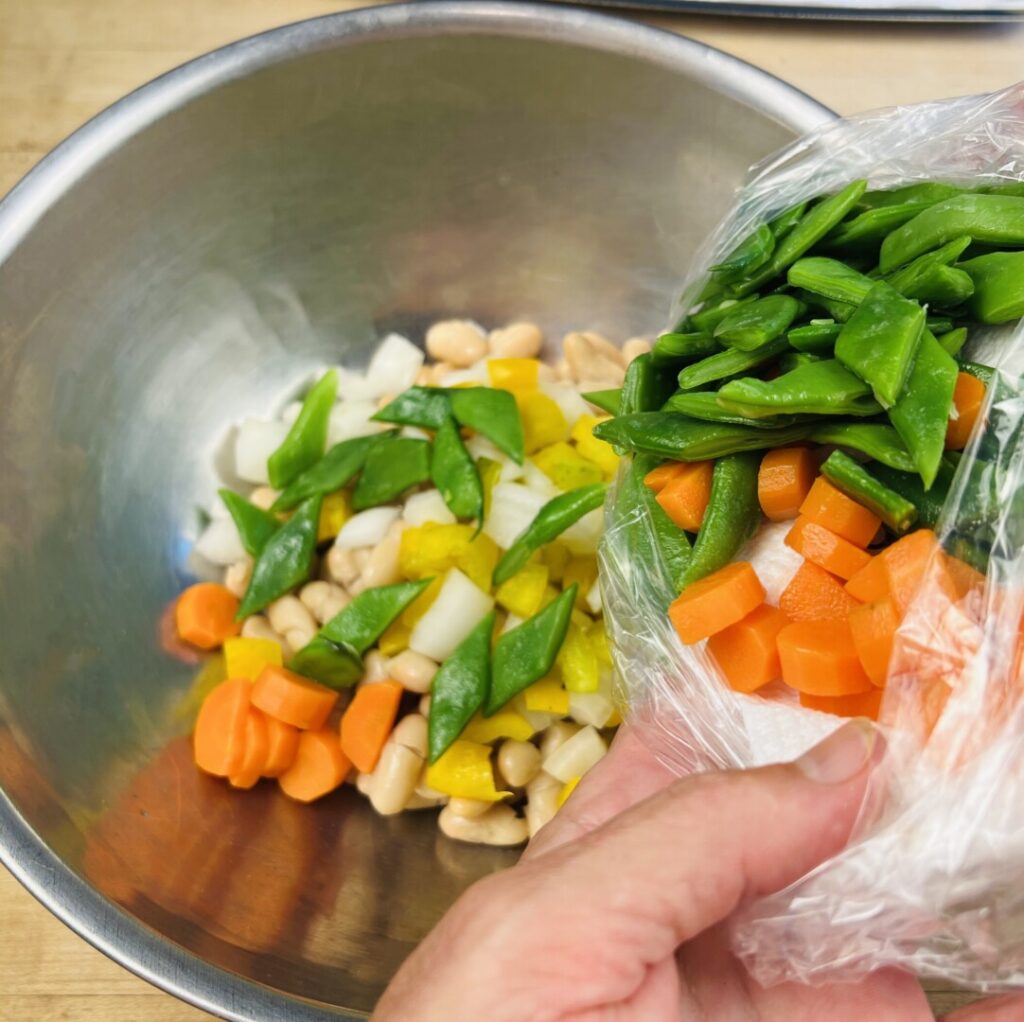
Your first step in ahead-of-time prep is to fabricate and cook the vegetables. Precise cutting gives your salad a professional appearance and also helps to hone your knife skills.
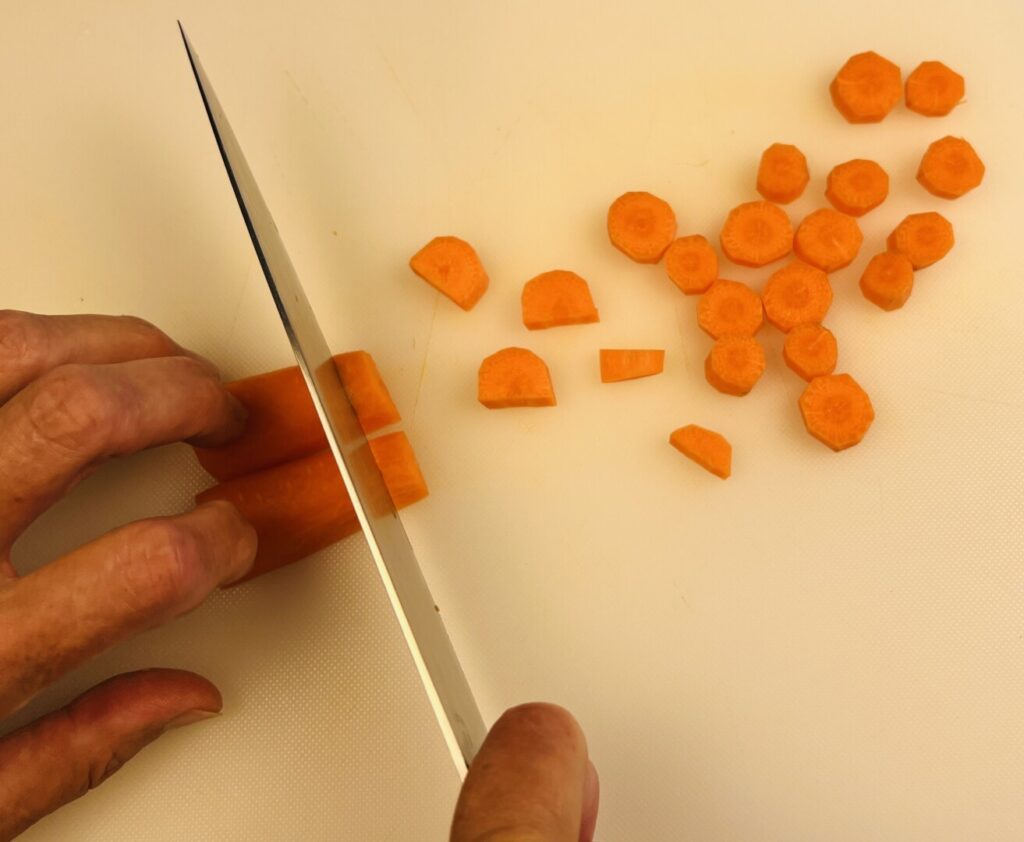
Try to purchase young, slender carrots (the kind sold with their tops intact), which have a more tender texture and a sweeter flavor than older, storage carrots. Slice the smaller ends into rounds a little less than 1/4-inch thick. To keep the pieces of similar size, cut the thicker ends in half lengthwise and then slice into half-rounds.
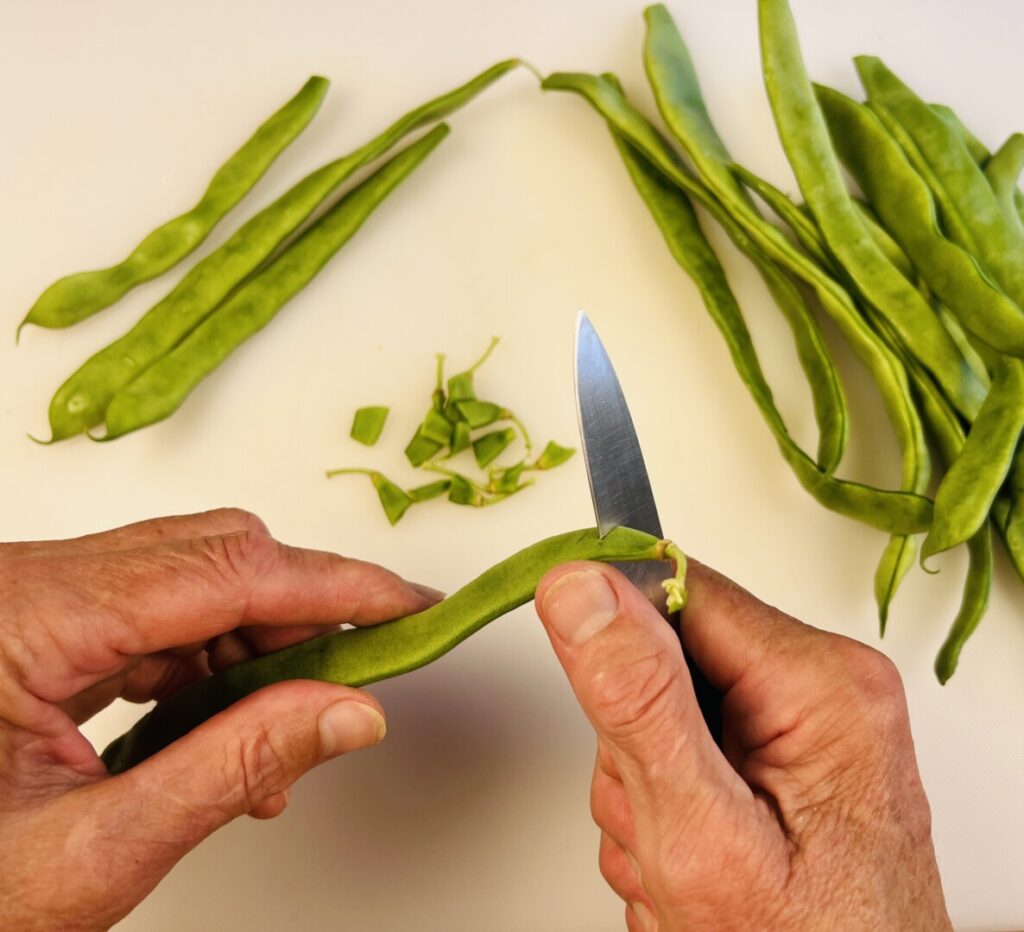
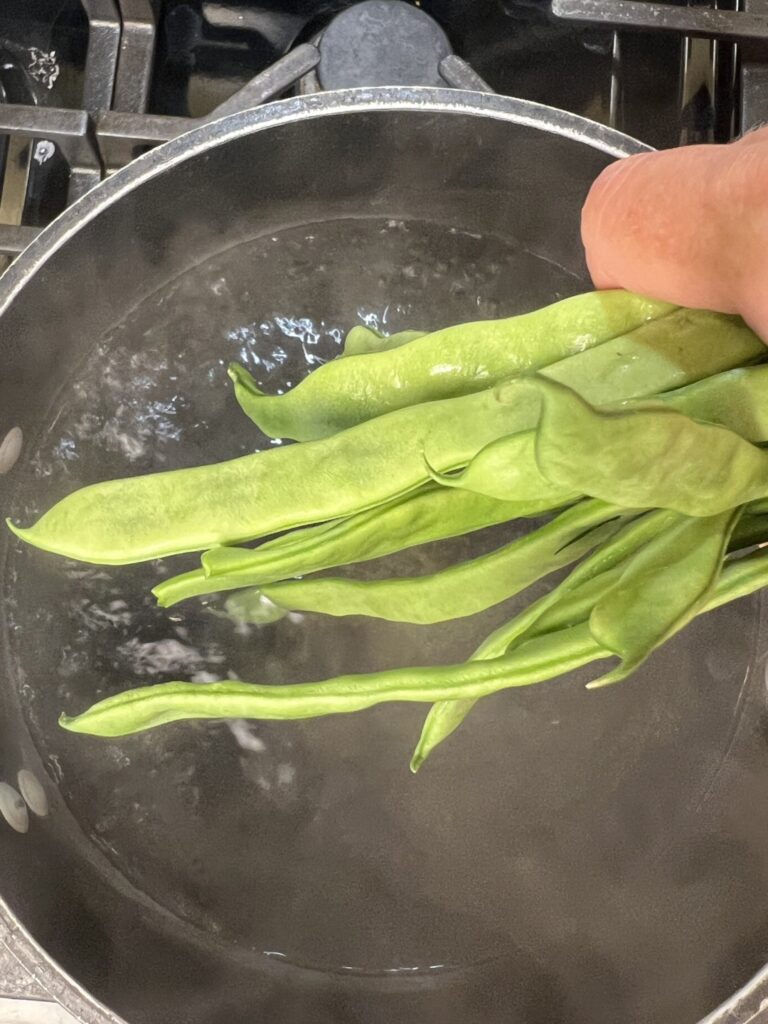
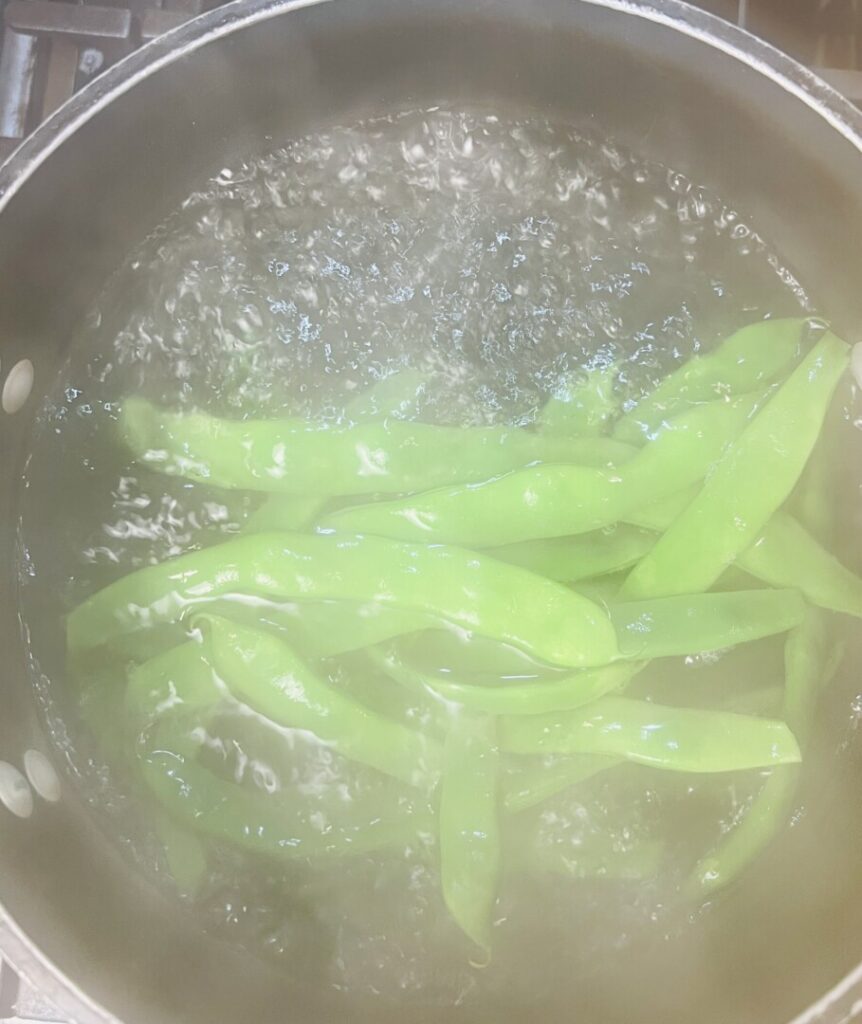
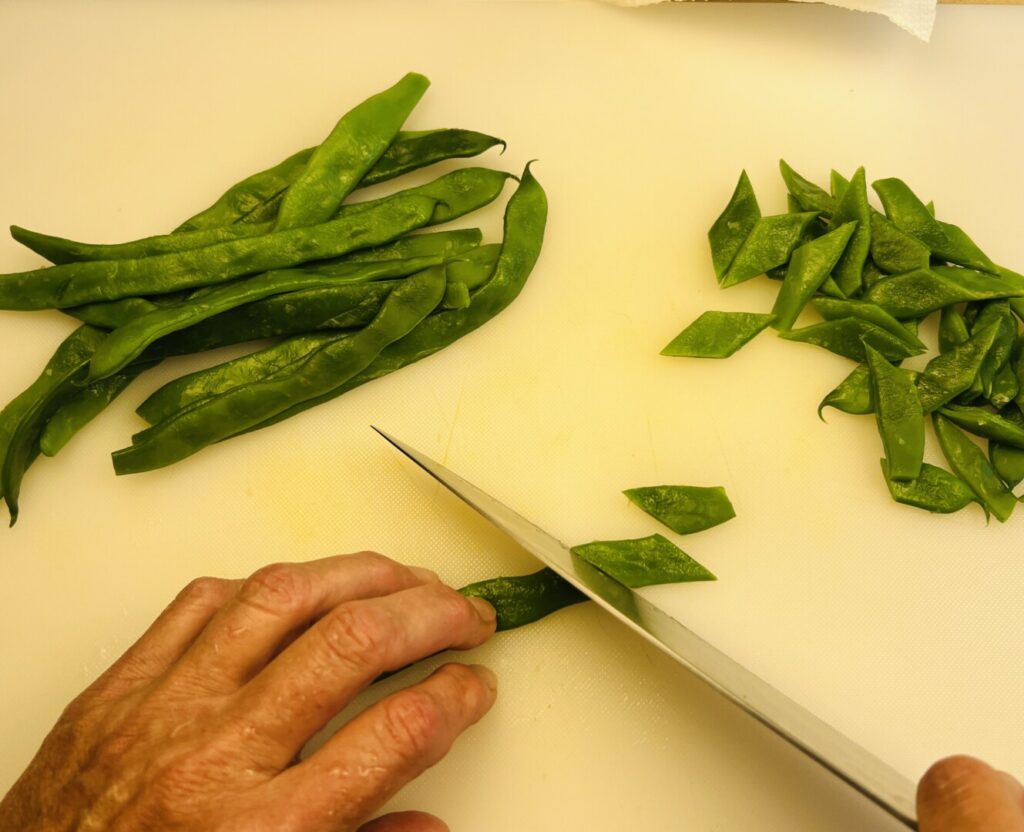
The most popular type of green bean in Spain is a flat variety, similar to the Italian “Roma” cultivar. If you can find Roma beans in your local farmer’s market use those not only for authenticity, but also for their old-fashioned “beany” taste and lush texture. Because these beans are hollow inside, when cut open they can lose flavor in boiling water. The best practice for these beans is to trim off the stem ends, blanch them whole, and then fabricate them after cooking. If you’re working with standard green beans either method works.
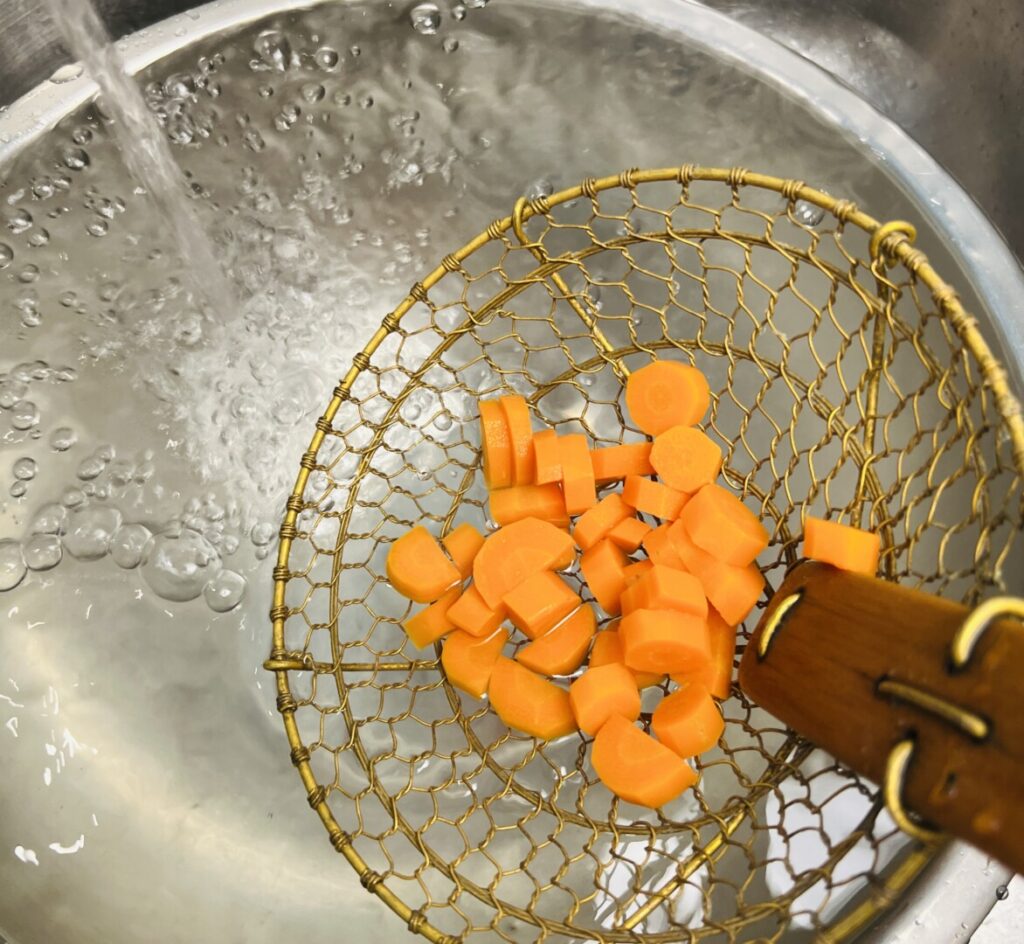
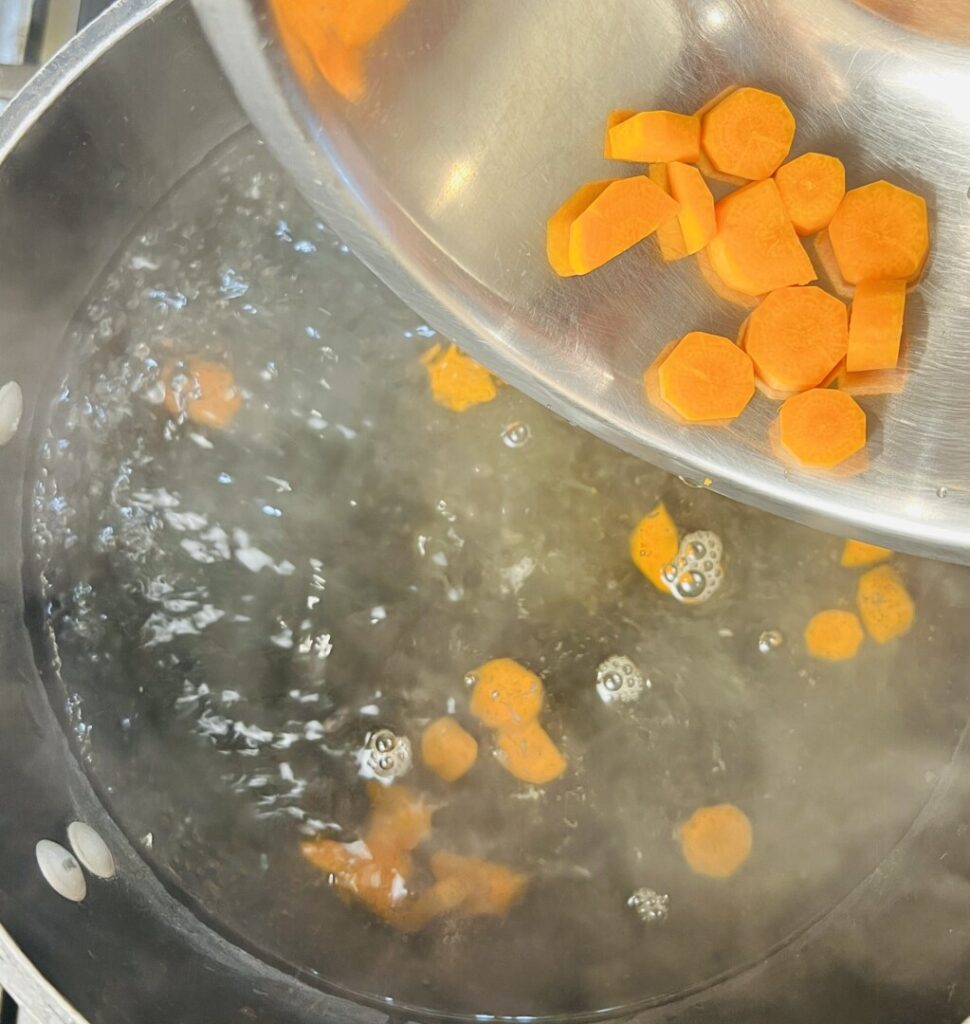
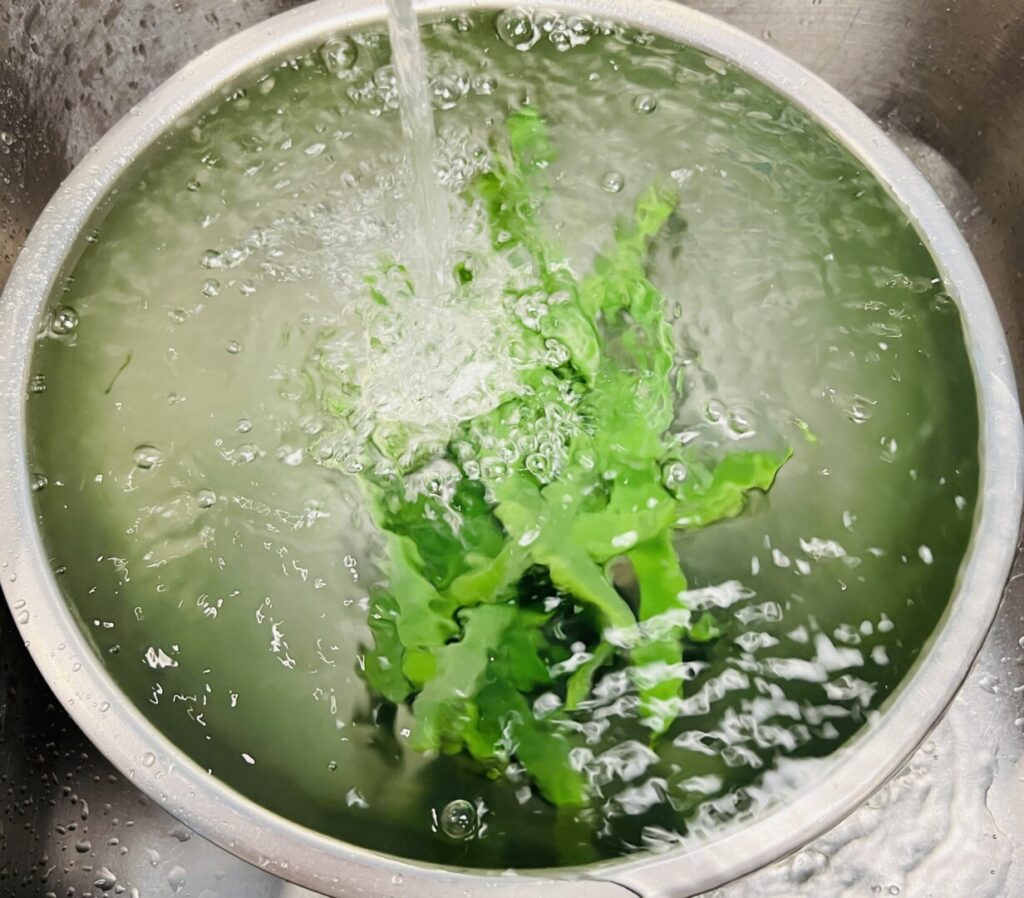
Making cooked vegetable salads requires careful attention to doneness. Whereas for an Asian-style cooked vegetable salad you’d want a crisp texture, for an authentic European-inspired dish you want them just a little softer: barely tender, but not crunchy. Use a “spider” strainer to separately blanch and refresh the vegetables. https://amzn.to/47d3YyF or https://amzn.to/45SkMZd Blot dry on paper towels, then cut the beans on the diagonal into 3/4-inch pieces.
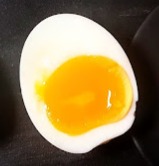
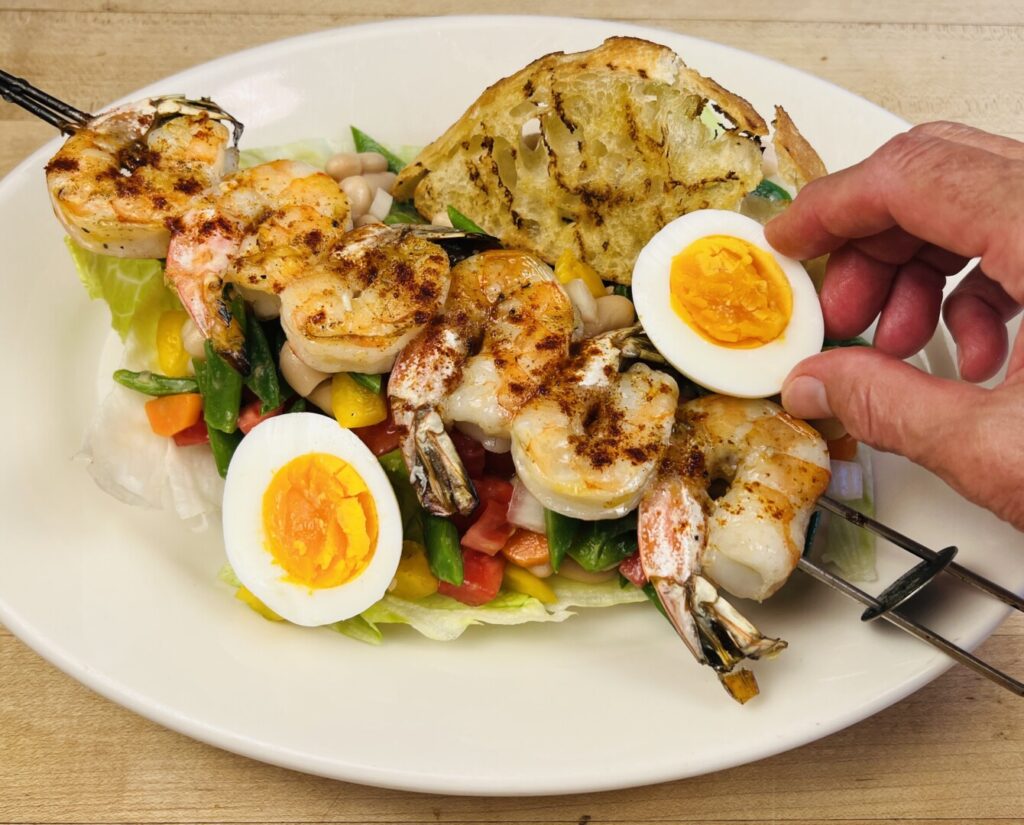
Empedrat salad typically is garnished with hard-boiled eggs. But I’d like to introduce you to a different—and, I think, better—type of cooked-in-shell egg. Mollet eggs (pronounced MOH-lay) are eggs simmered in their shells for about seven minutes. This cooking time results in whites that are set, but yolks that are soft and jammy with none of the chalky texture of hard-boiled yolks. In addition to maintaining a luscious mouthfeel, the shorter cooking time really brings out the yolk’s flavor. Local, free-range eggs are the best choice for mollet preparation. Of course, if this doneness doesn’t appeal to you, you can always hard-boil your eggs. (But c’mon—give it a try!)
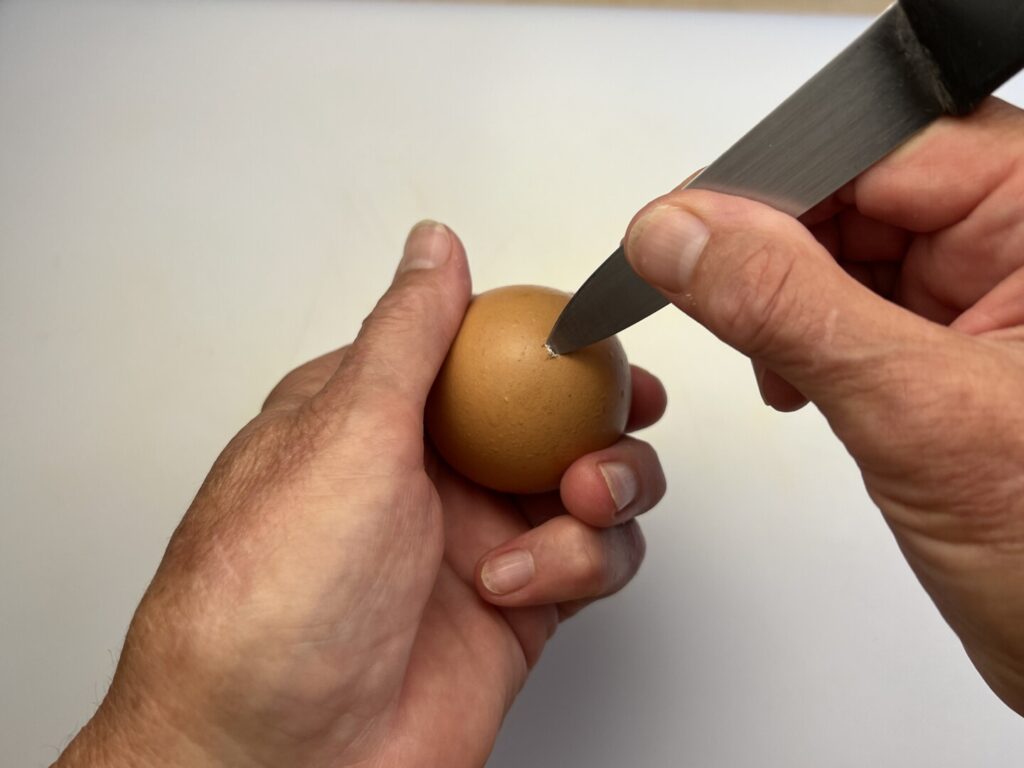
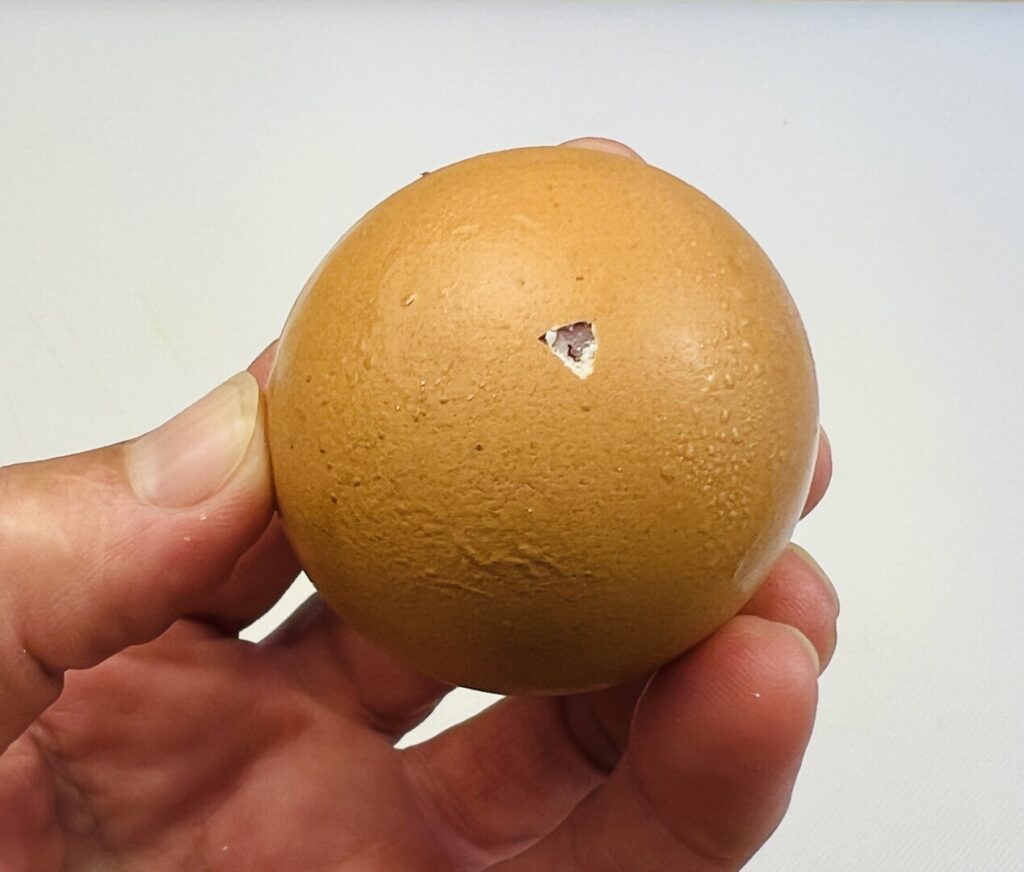
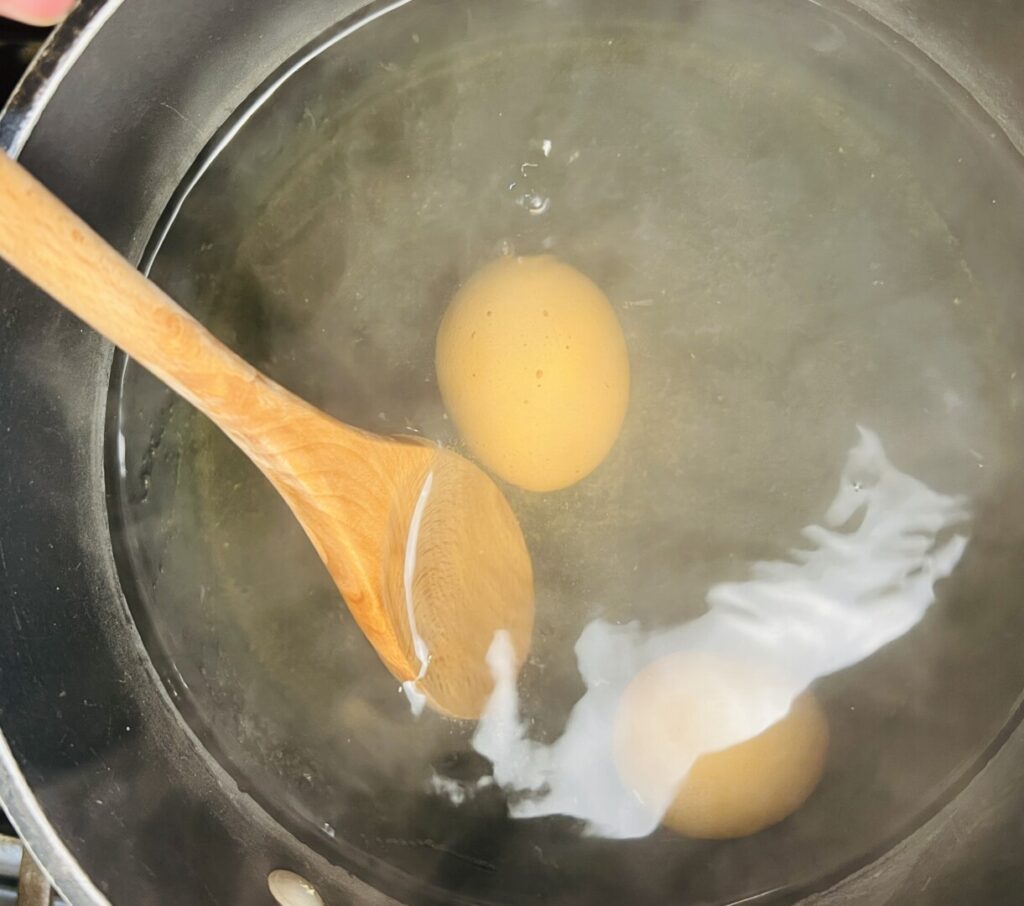
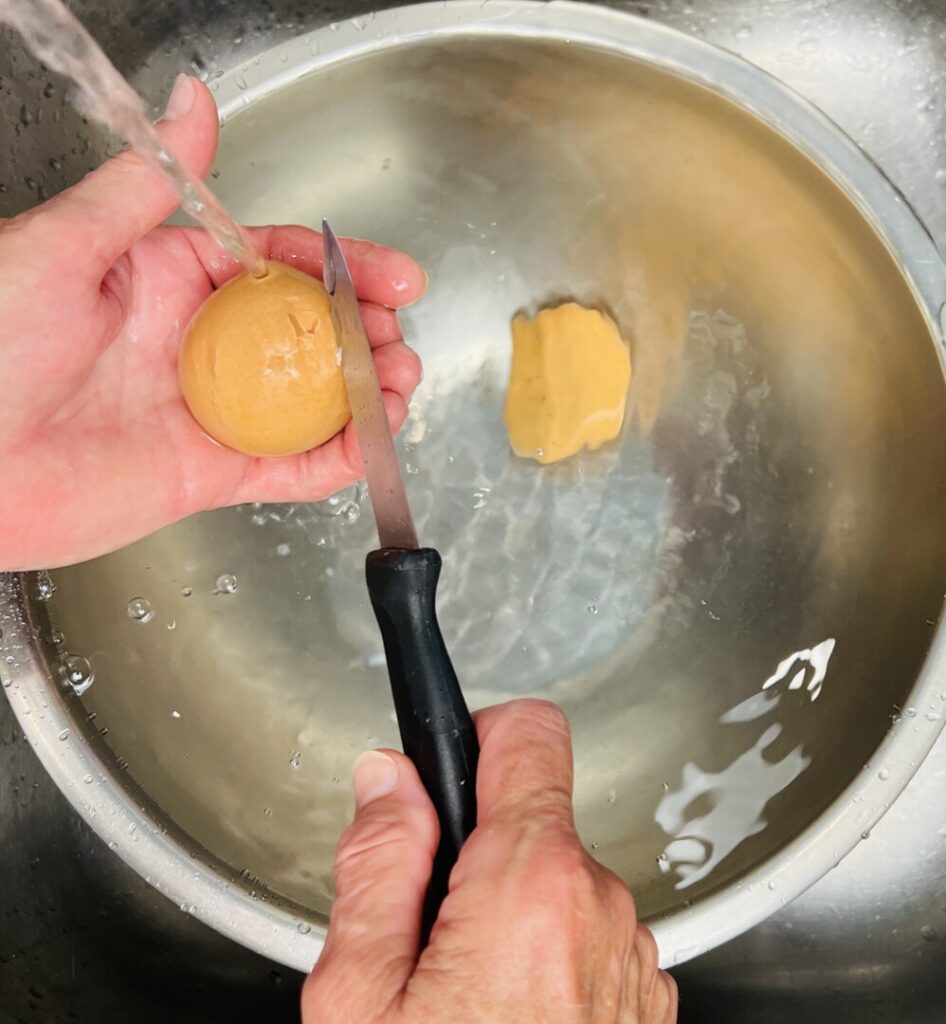
Whether making mollet eggs or hard-boiled ones, use a pro tip to prevent the eggs from cracking while they cook. All eggs contain some air and other gases inside them; the older the egg, the more gas will form. You likely know from a past science class that gases expand when heated. When a cold egg is placed into boiling water, the expansion of its interior gases can cause the egg to crack, leak out some albumen, and become malformed. To prevent this, give the gases an escape hatch! Cradle the egg in one hand with the rounded side up. Use the tip of a paring knife, with light rotating pressure, to “drill” in a hole just a millimeter or two through the shell and membrane.
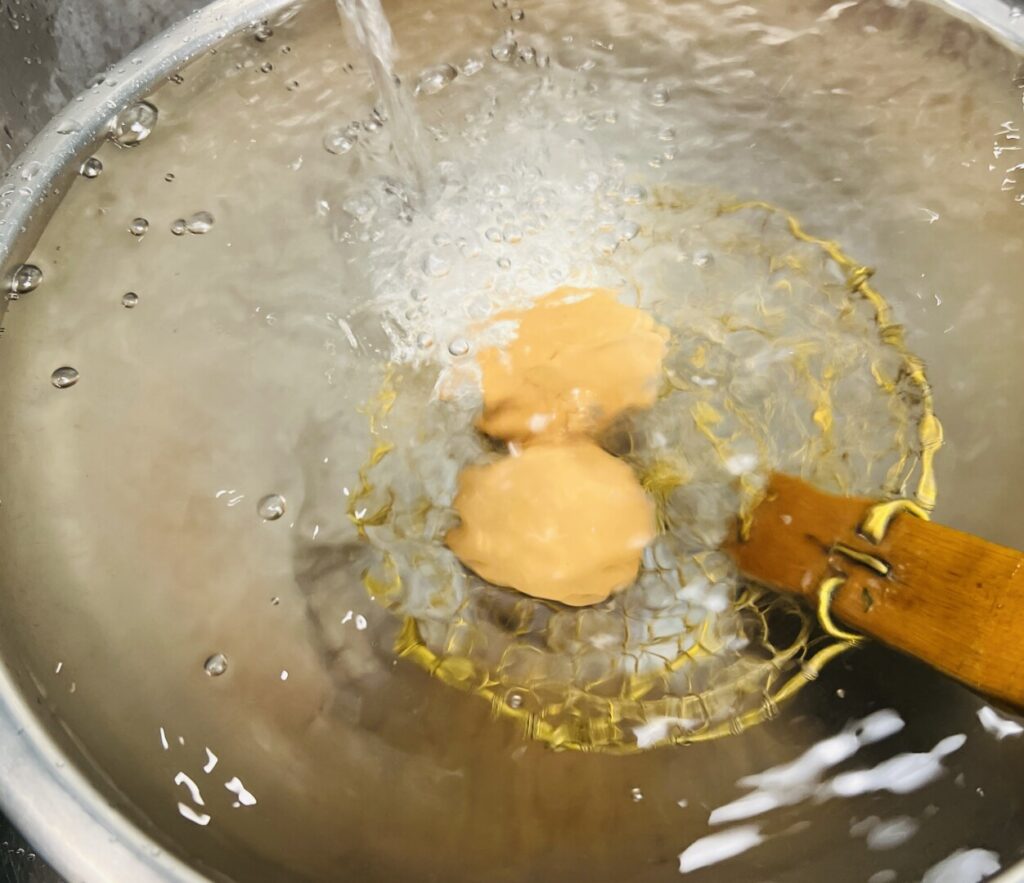
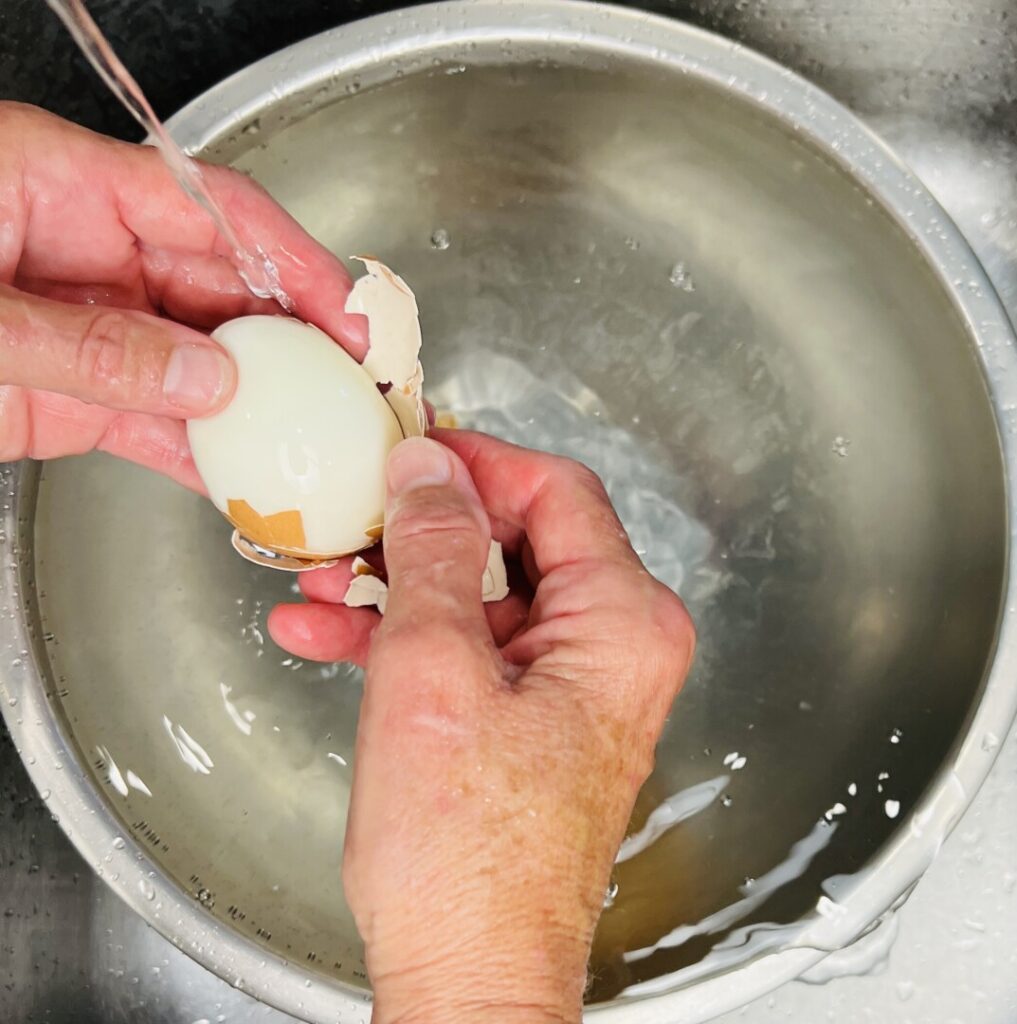
Gently lower the eggs into boiling water and recover a lively simmer. To keep the yolks centered, stir occasionally to keep them moving around in the cooking water. A large-size egg fresh out of the refrigerator will take about 7 1/2 minutes to cook to the mollet stage. After that time, lift the eggs out into a bowl and refresh under cold running water. For easier peeling, use the back of a paring knife to gently tap cracks into the shell. This allows water to seep between the cooked egg white and the shell membrane, allowing the shell to slip off more easily. Take care and be gentle when peeling, as the eggs will still be somewhat soft and squishy.
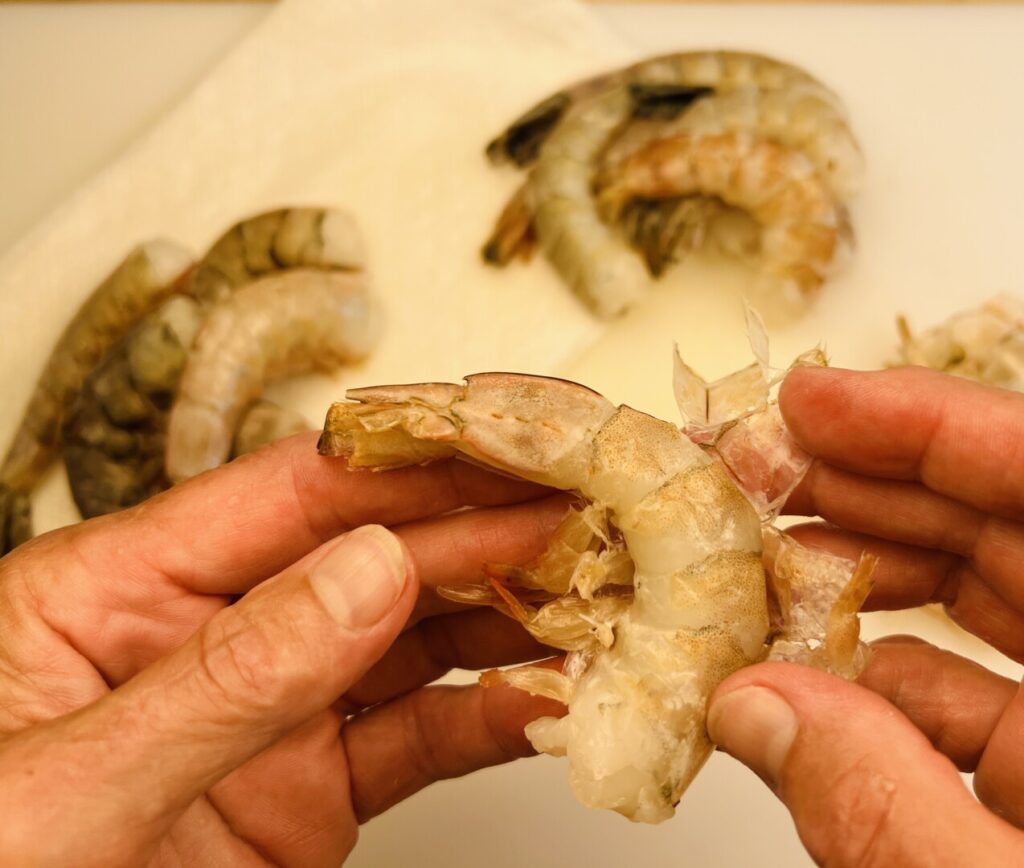
Next you’ll prep the shrimp. Large shrimp are best for grilling, because their size allows for the exteriors to acquire a light char without the insides becoming overcooked. Shrimp are size-graded by a system called “count-per-pound.” For this recipe I recommend 21-25 count shrimp—meaning that there are between 21 and 25 shrimp to the pound. For best flavor and mouthfeel (as well as for sustainability and ethical labor practices) seek out domestic wild-caught shrimp from the Gulf of Mexico or the southern US Atlantic coast. Avoid peeled and deveined shrimp. Shells protect shrimp from freezer damage, so shrimp sold shell-on cook up moister and with more flavor. It’s worth the effort to peel them yourself.
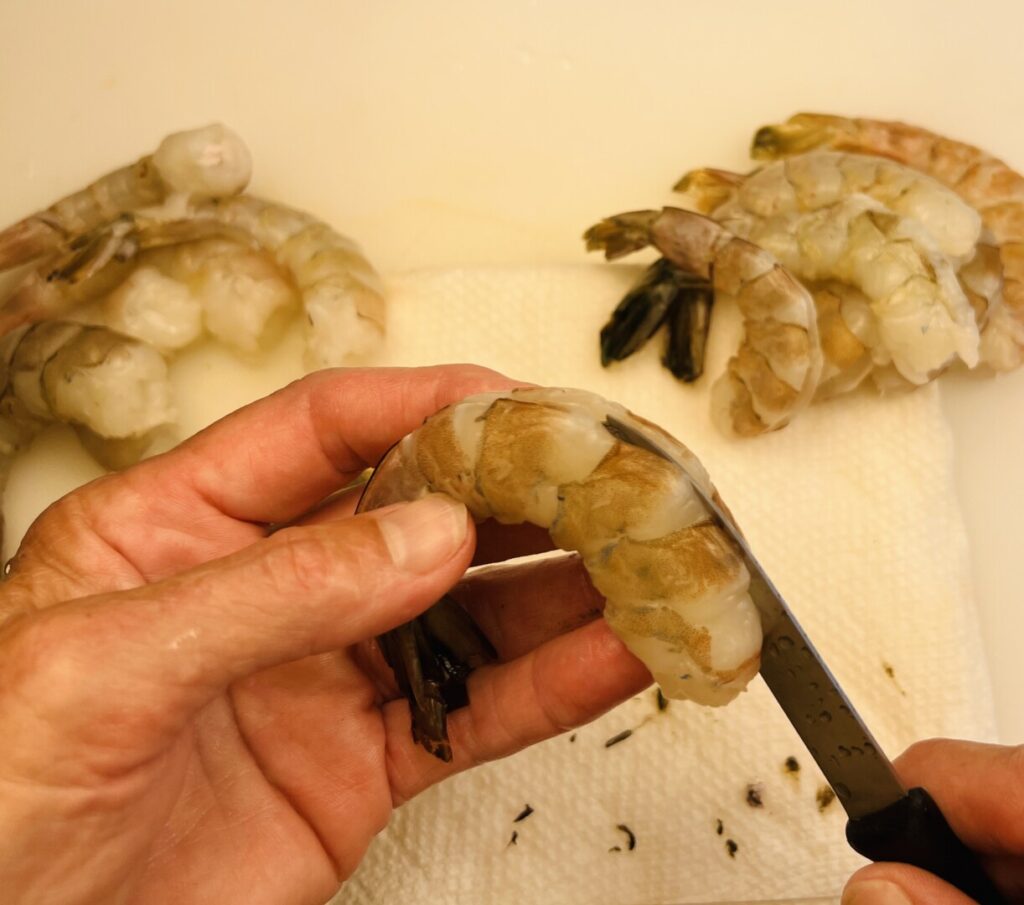
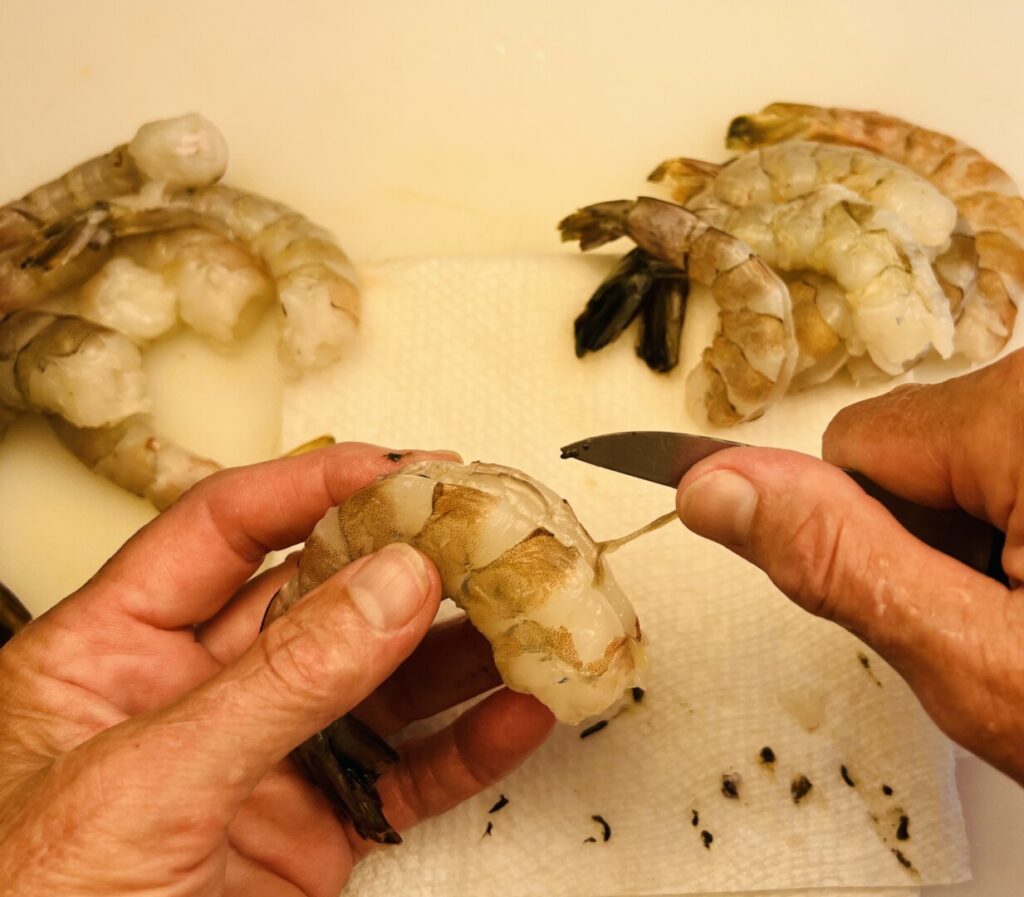
For this recipe we’re leaving the tails on, as for shrimp cocktail. Peel the shrimp and then devein them: Cut a shallow slit down the back of each shrimp and pull out the intestinal vein.

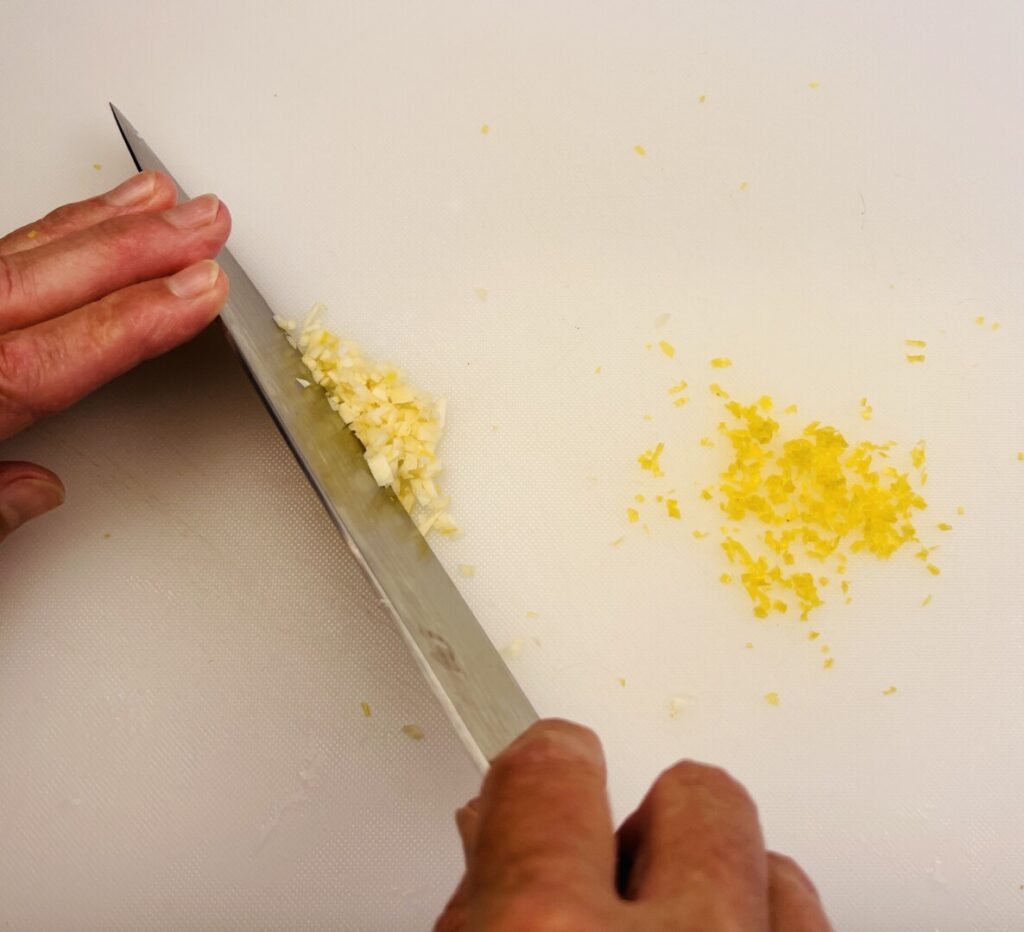
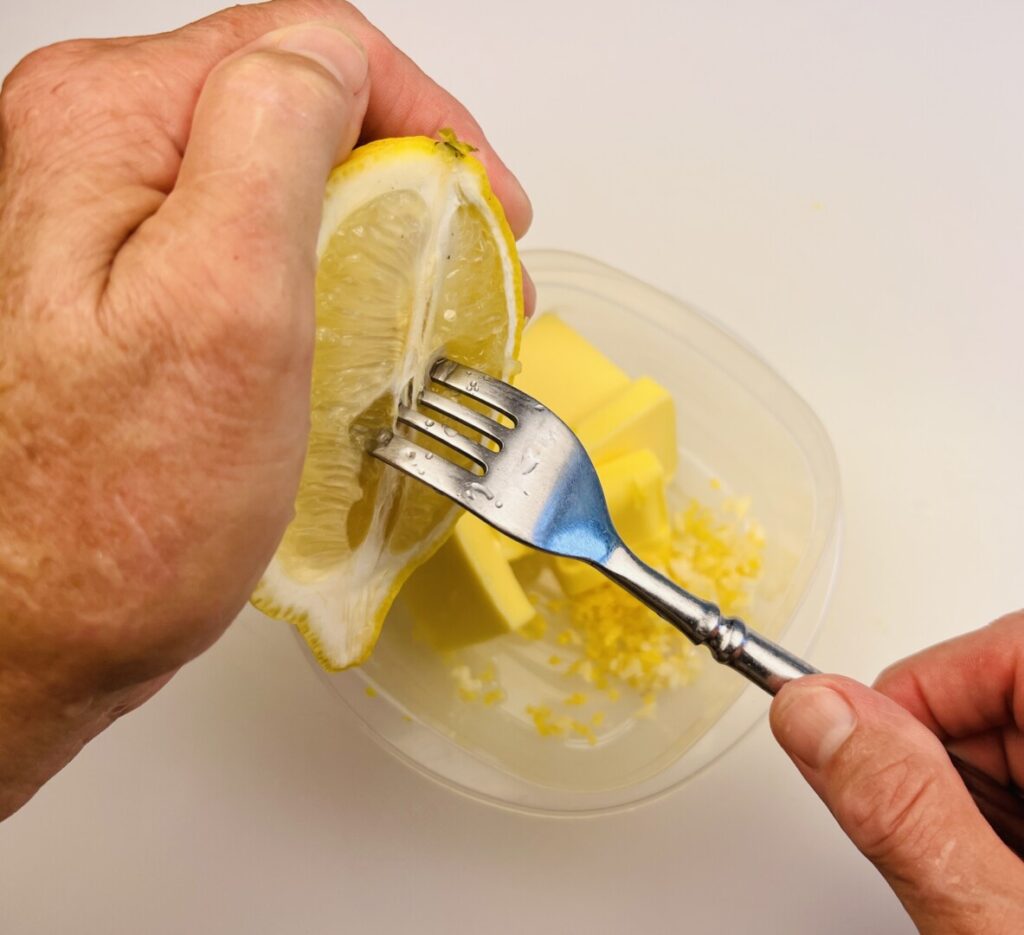
You’ll be basting the shrimp skewers and ciabatta bread slices with lemon-garlic butter flavored with both lemon juice and zest. Mincing the zest is more efficient than grating it, with no waste and no nicked knuckles. Use a swivel peeler to scrape off strips of just the yellow outer rind, then mince it fine. Mince the garlic and add it along with the lemon zest and juice to a container holding cubed butter. Melt the mixture on low heat in a microwave oven, and then add salt to taste.


If necessary, make a batch of our essential Sherry Vinaigrette, and then assemble the remaining ingredients. Here’s your mise tray:
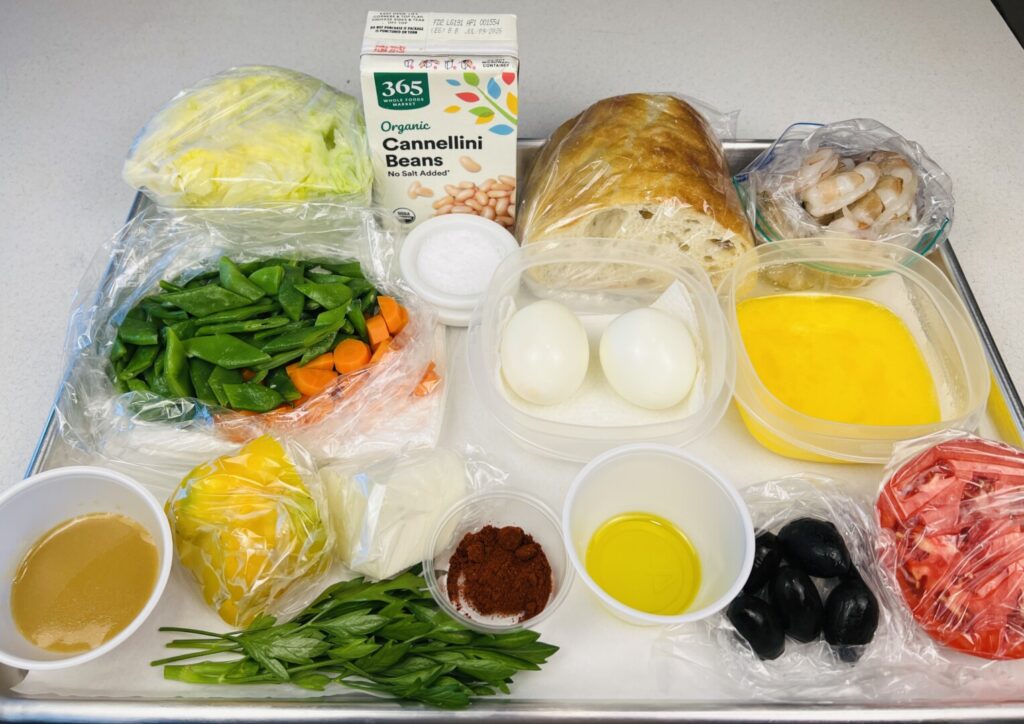
It’s dinnertime—let’s COOK!
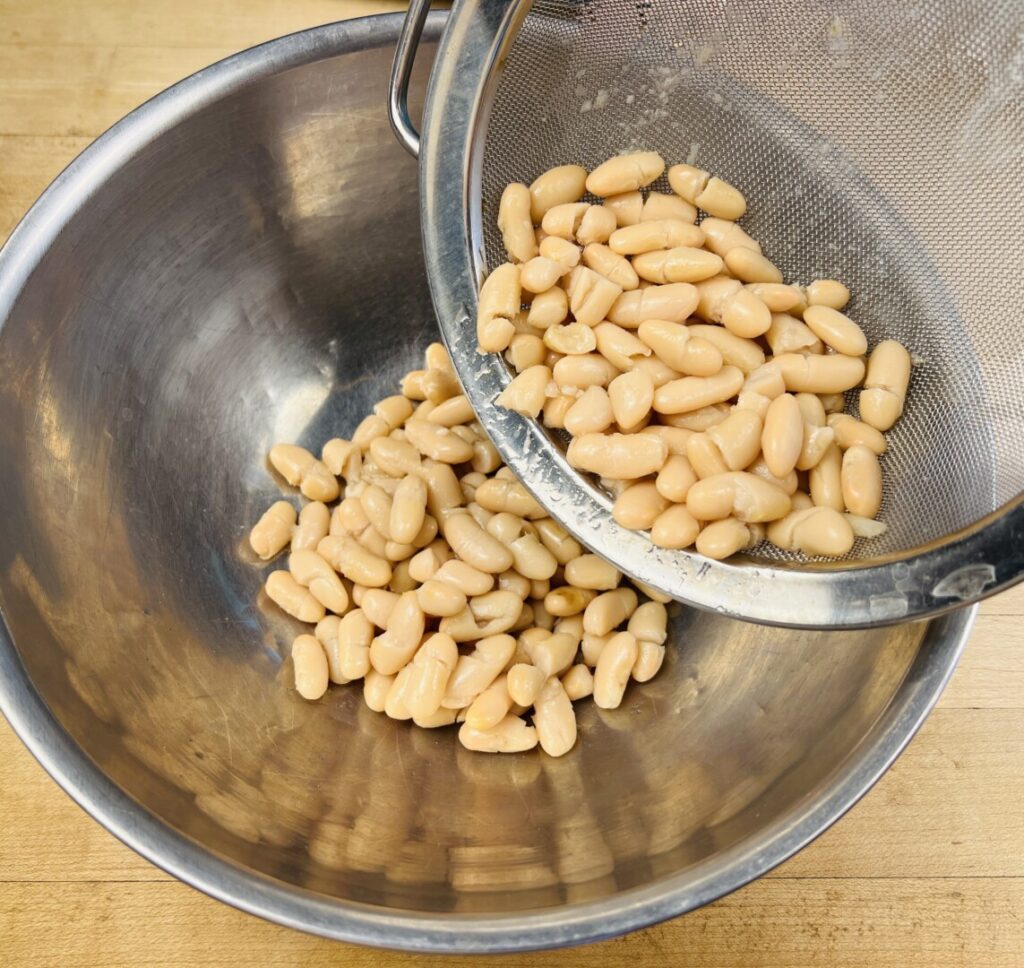
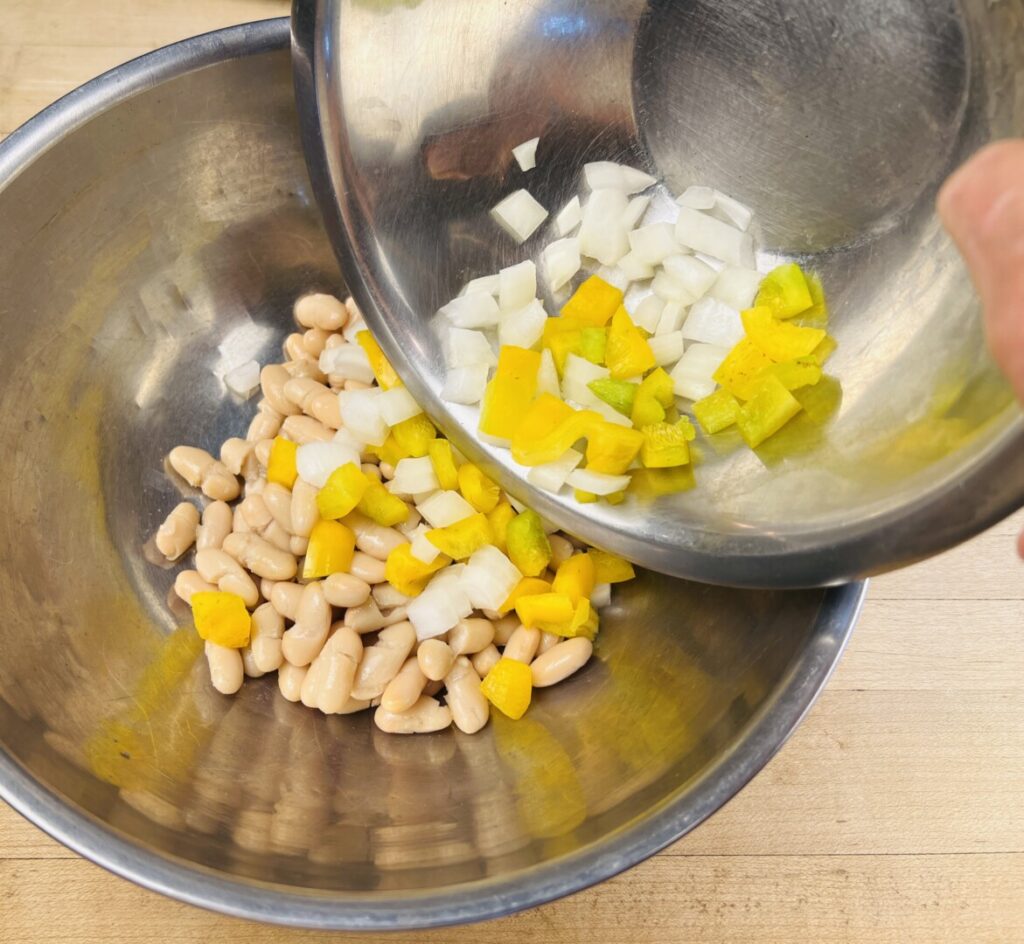
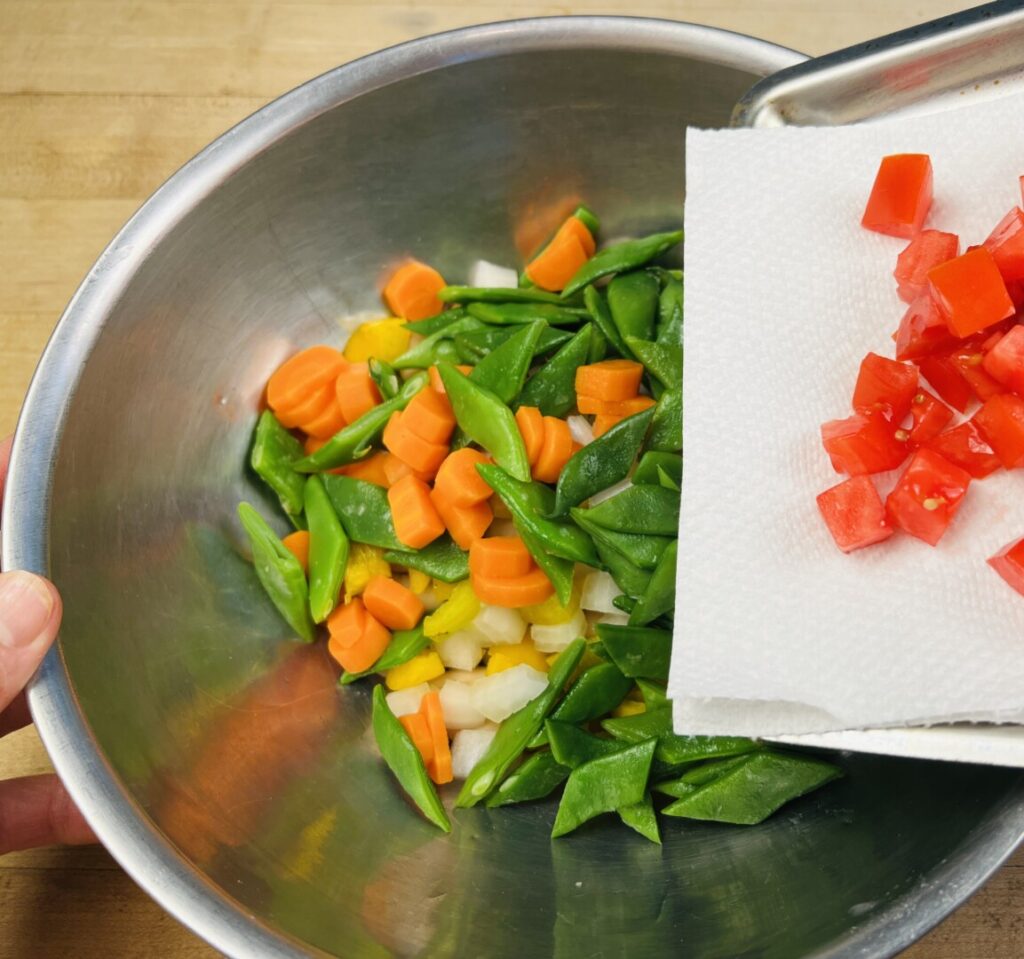
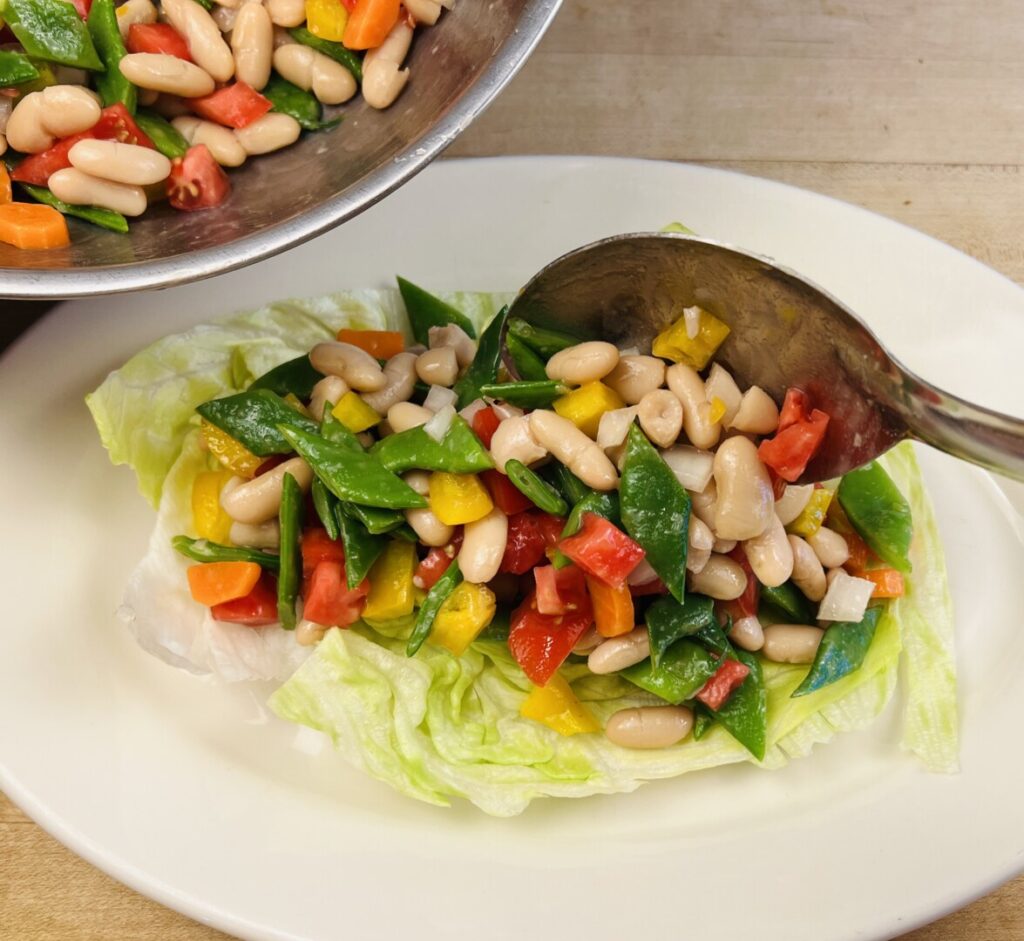
To begin your last-minute preparations, assemble the salad. Pour the white beans into a strainer set in the sink, shake gently to drain off the packing liquid, and then place them in a bowl. Whereas the cooked vegetable components kept well when prepped ahead, for fresh texture the raw peppers, onions, and tomatoes are fabricated at the last minute. Dice them into pieces similar in size to the cooked vegetables and spread the tomatoes onto folded paper towels for a few minutes to blot excess moisture. Then combine the salad ingredients in a bowl and hold at room temperature.
To prepare for grilling, melt the lemon-garlic butter. Slice the ciabatta and place it on a tray along with the butter and all of the tools you’ll need.
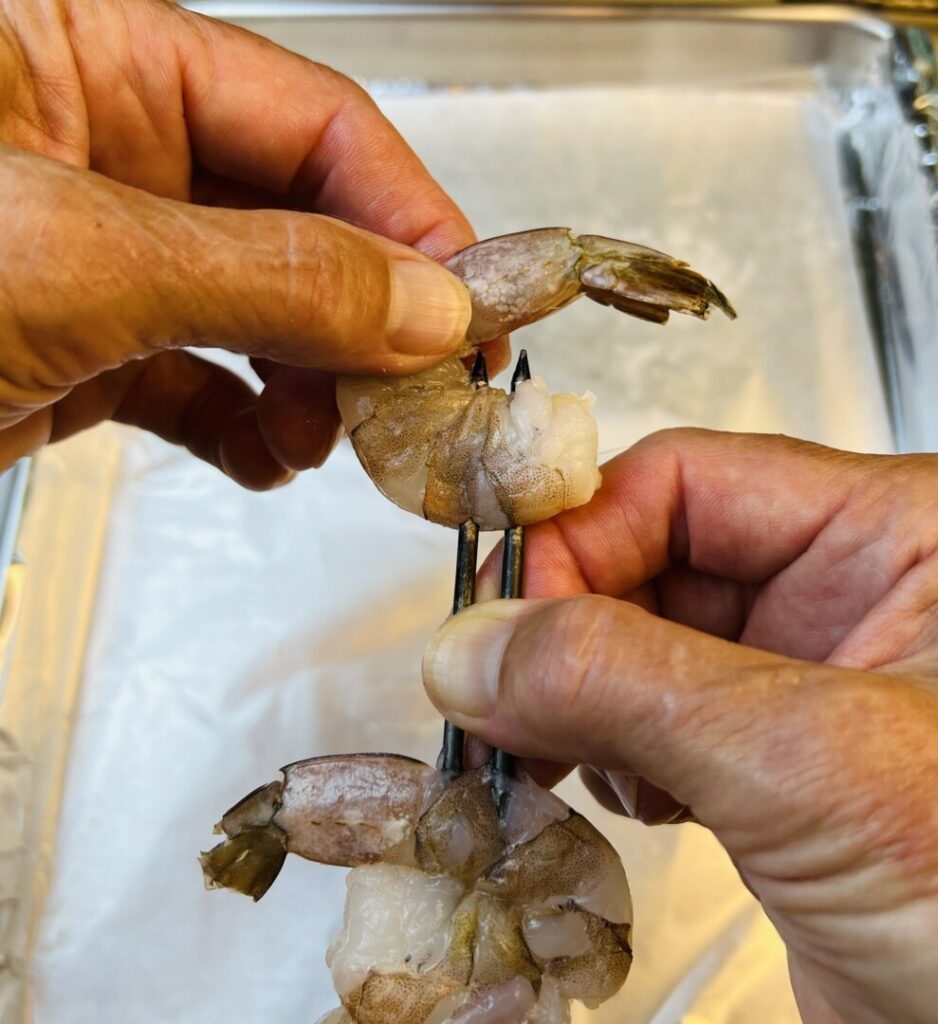
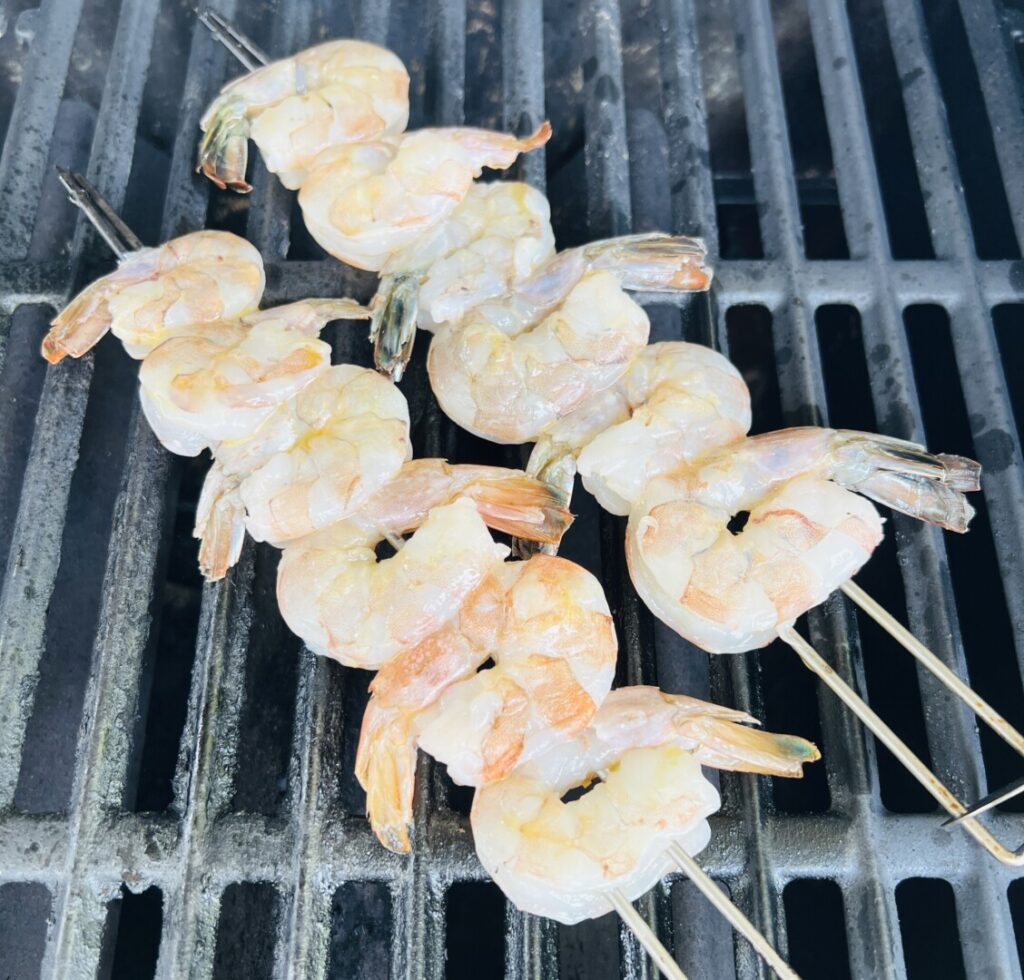
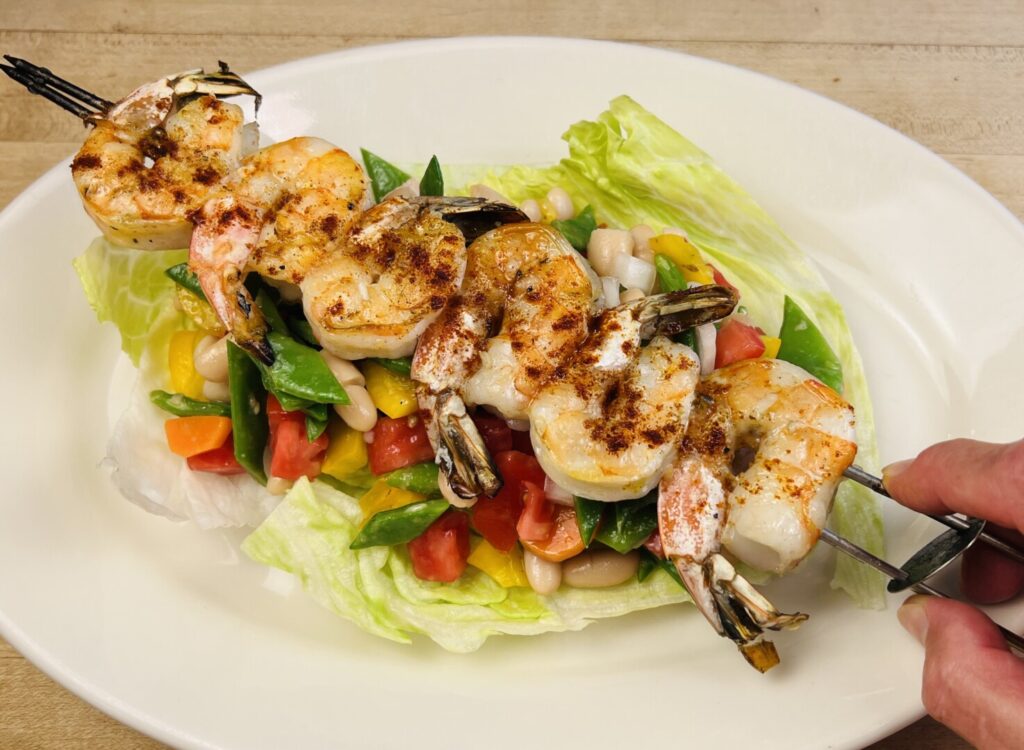
For ease of handling and to prevent losing shrimp down through the grill grids, it’s best to skewer them before grilling. I recommend double-pronged skewers because they hold foods securely in place and prevent foods from rotating on the skewers. https://amzn.to/4lTnELF For good balance, both physically and aesthetically, alternate the direction of the shrimp tails.
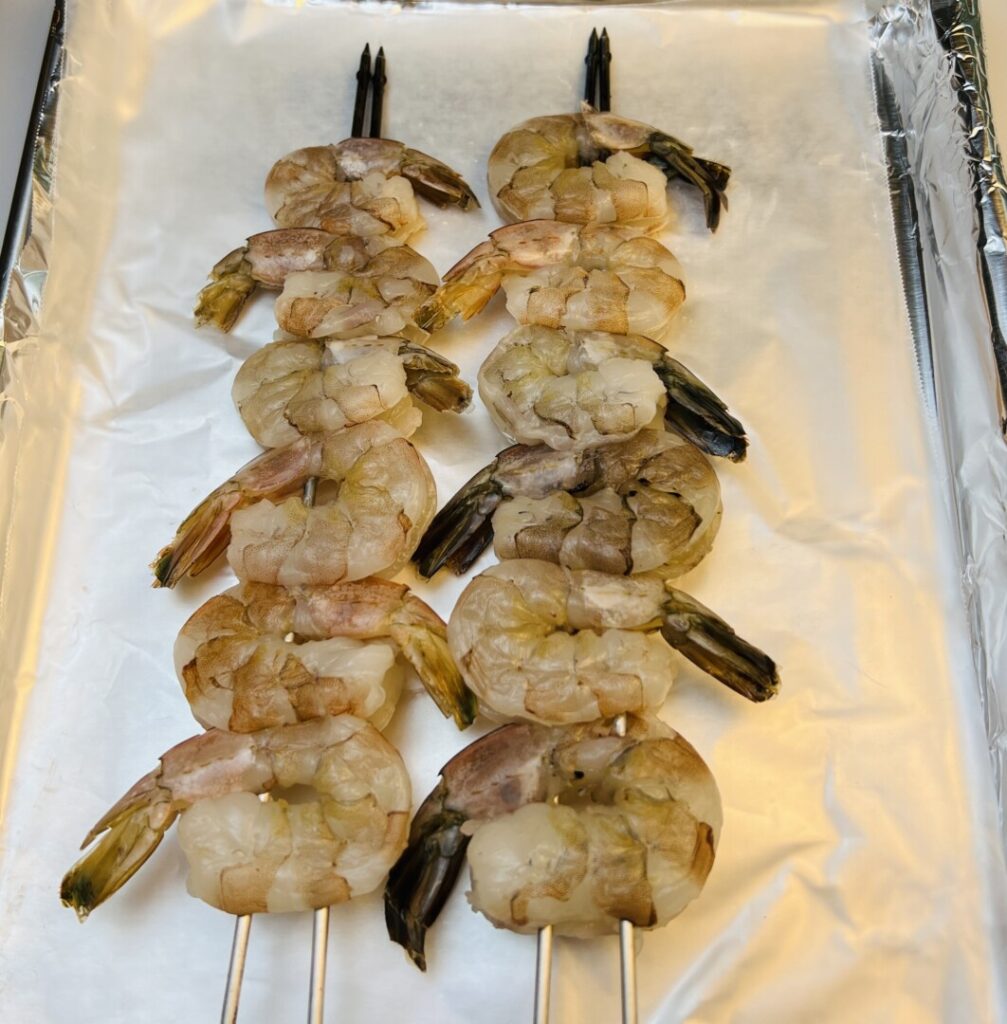
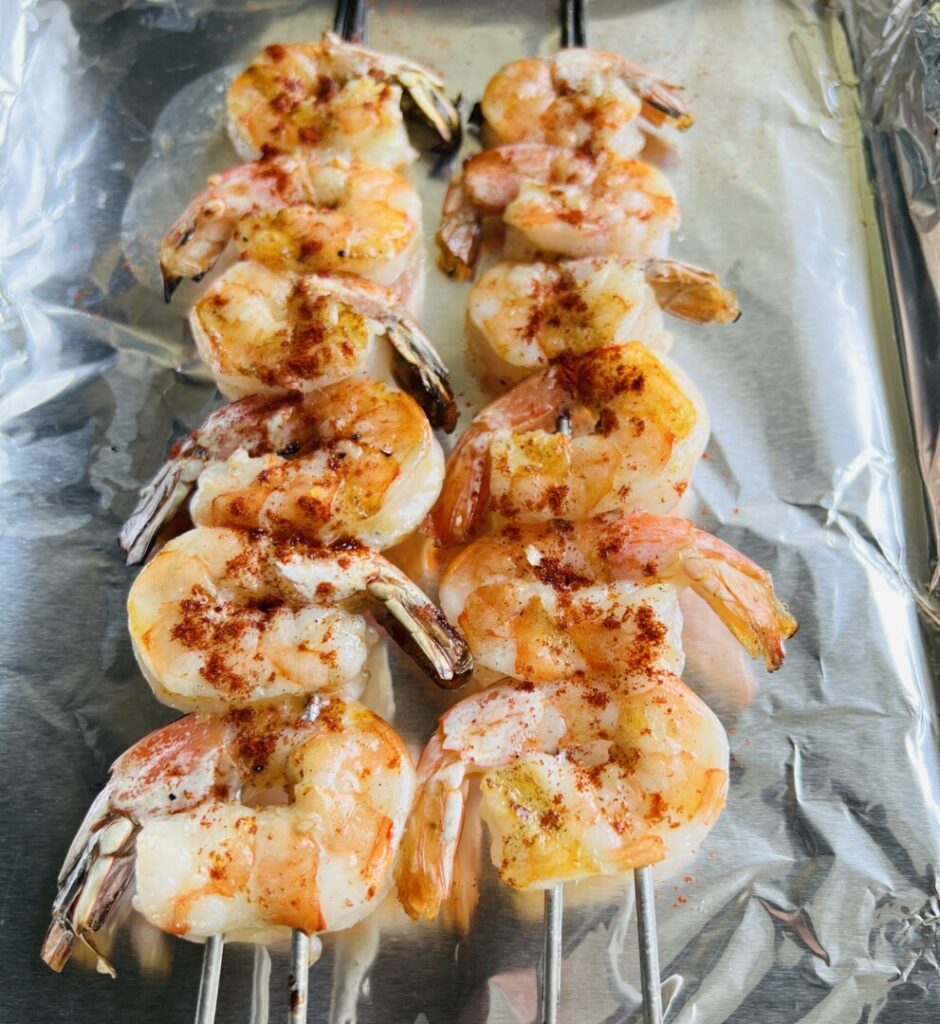
Line a sheet tray with aluminum foil, but then place a sheet of parchment or waxed paper on top of the foil. Place the shrimp skewers on the parchment. (Here’s why: The raw shrimp will contaminate the top sheet of parchment with bacteria; after you put the skewers on the grill you can discard the parchment and you’ll have clean, non-contaminated aluminum foil on which to place the grilled skewers.)
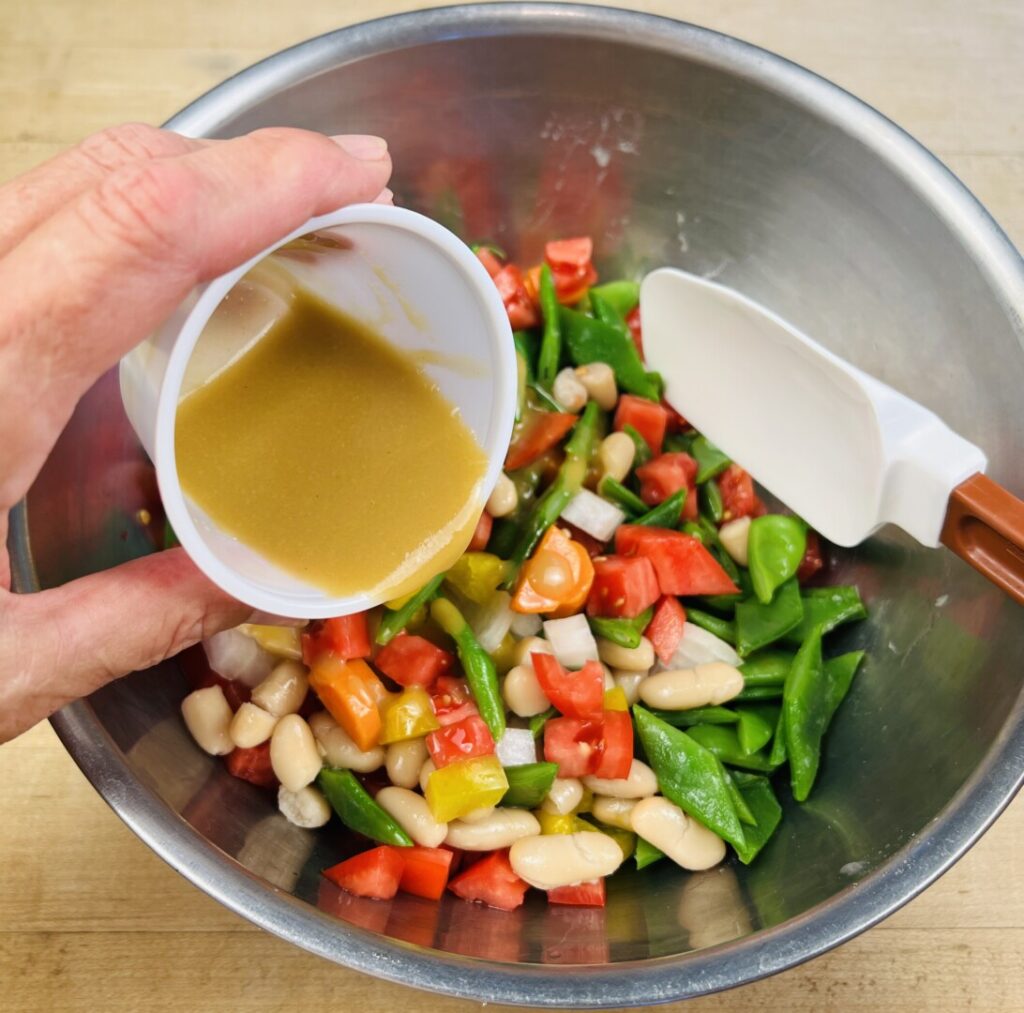
Just before you start grilling, dress the salad with the sherry vinaigrette. Gently mix to generously coat all of the vegetables with the dressing.
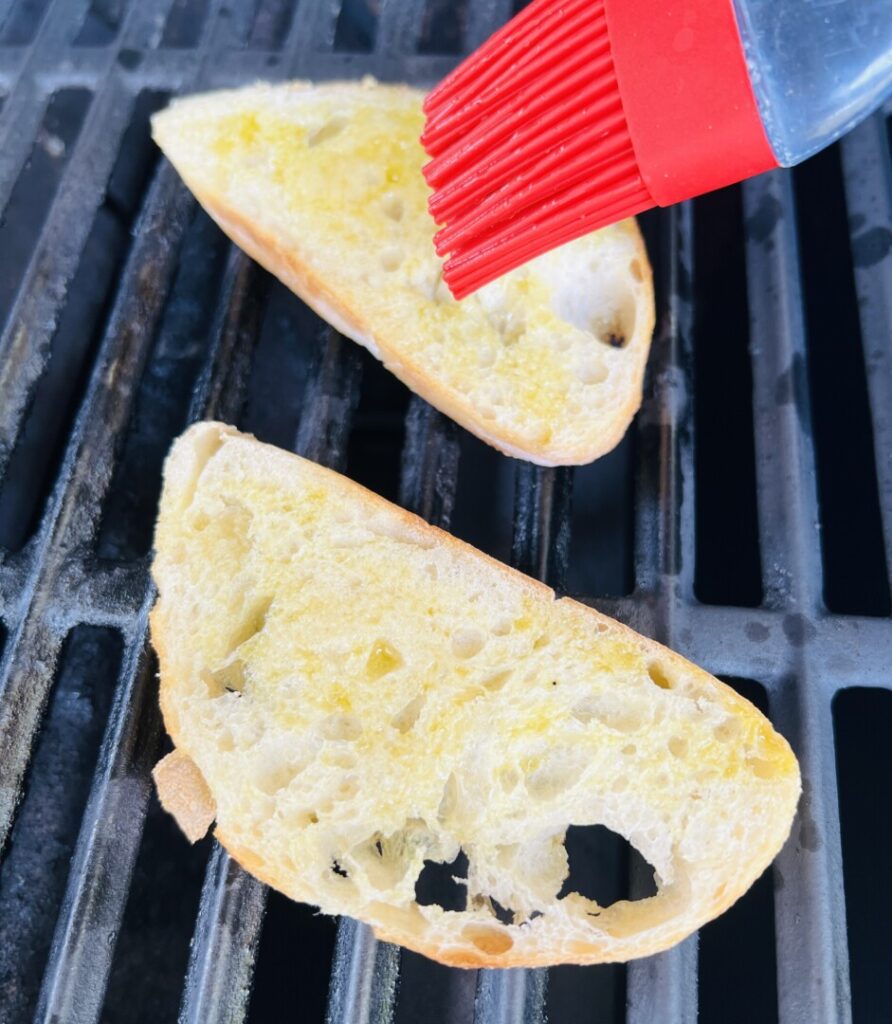
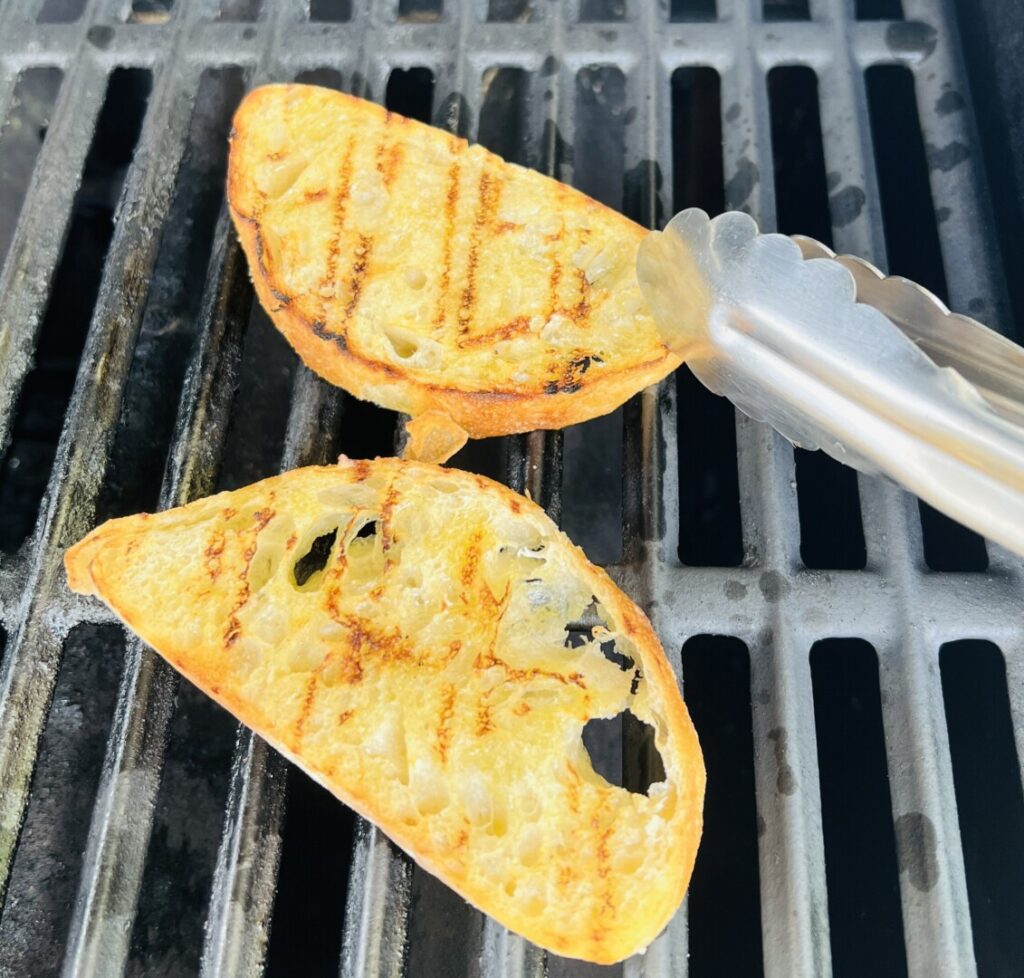
Ensure that you have all of the necessary ingredients and tools at your fingertips near the grill. Lightly brush the tops of the ciabatta slices with lemon-garlic butter, then place them butter-side-down on the grill grids. When they’ve toasted golden brown, turn over, brush the new tops with butter, and finish toasting. Wrap loosely with aluminum foil to keep warm.
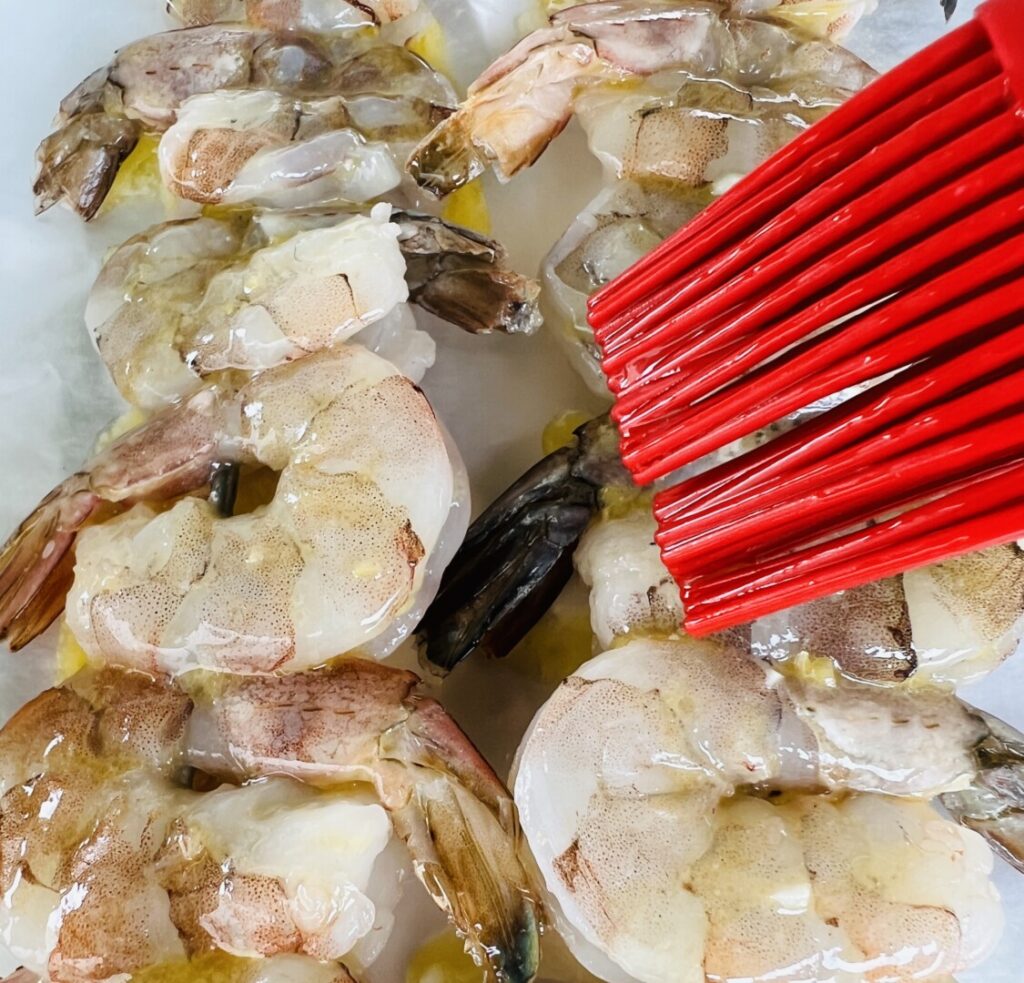
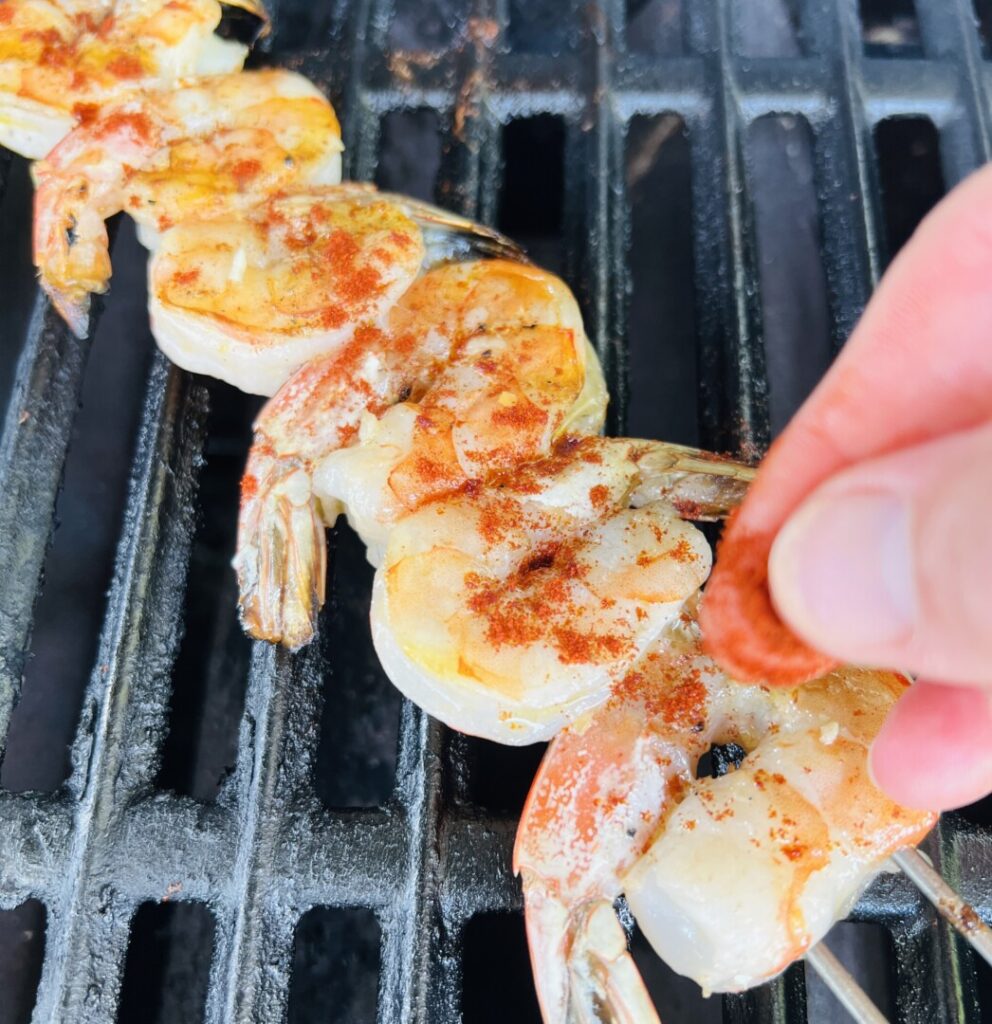
Brush the tops of the shrimp skewers with lemon-garlic butter, then place them butter-side-down on the grill. Cook for about 1 minute, until the shrimp release from the grill grids. Baste with butter and turn over, then grill for about 40 seconds longer. Baste with more butter, and then season with paprika and salt. Discard the parchment from the tray, transfer the shrimp skewers to the aluminum foil liner, and then wrap loosely in the foil to keep warm. Transfer any remaining lemon-garlic butter to a microwave-proof serving pitcher or ramekin.
Now you’re ready to plate.
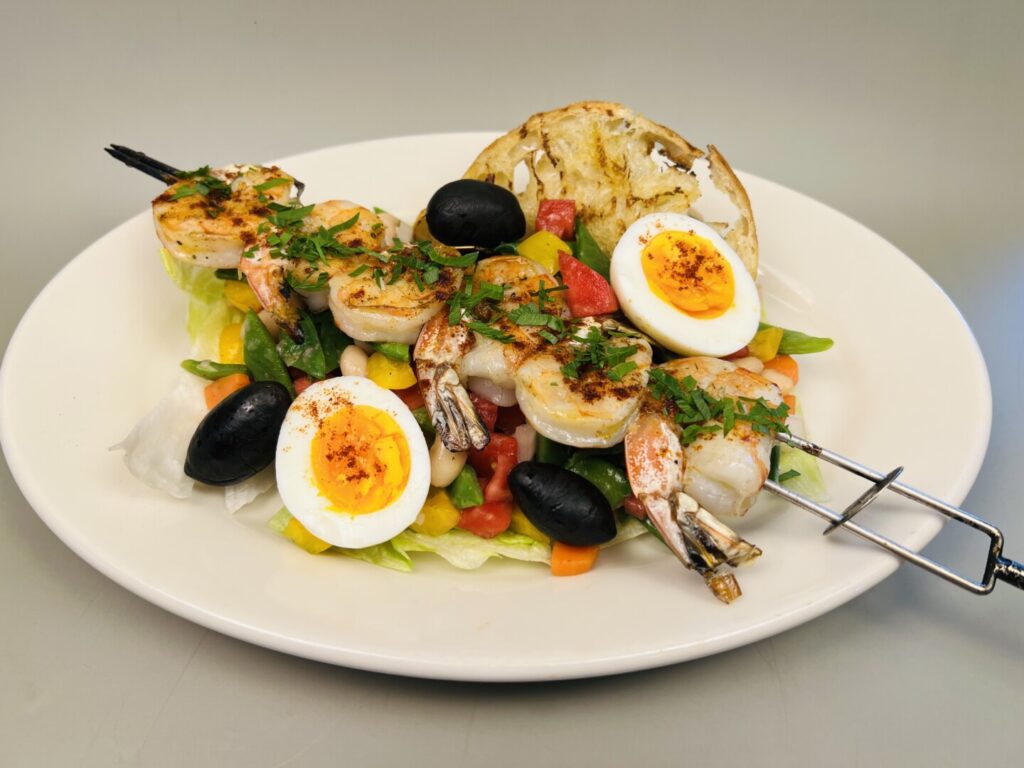
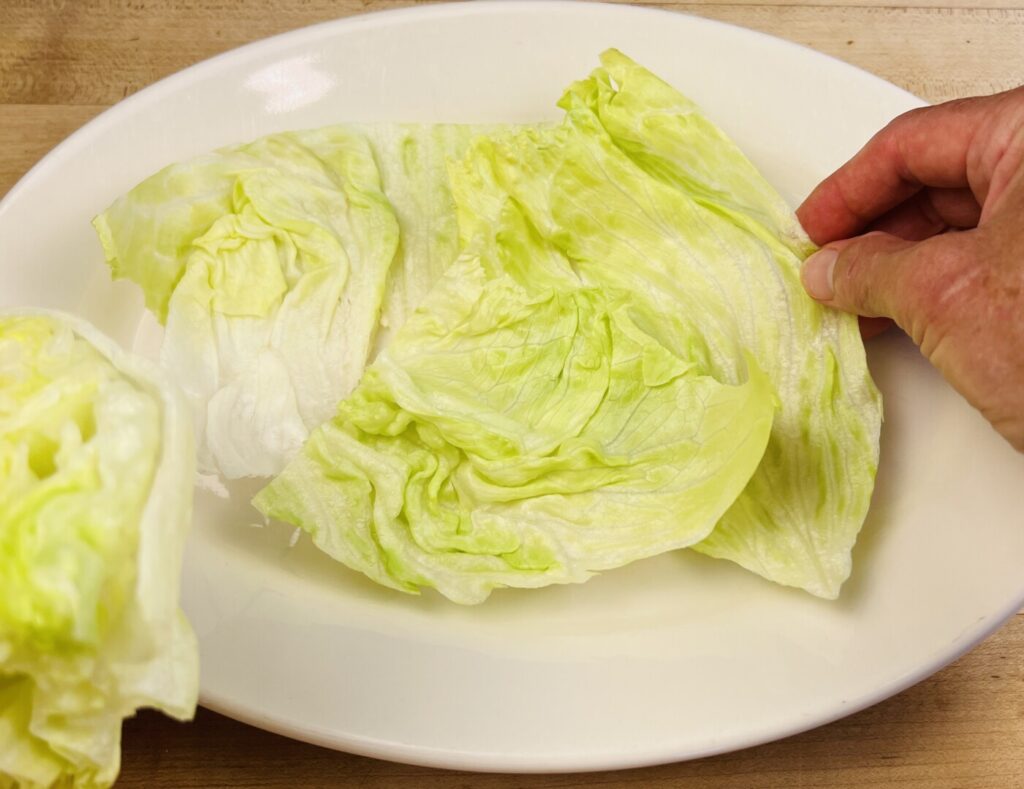
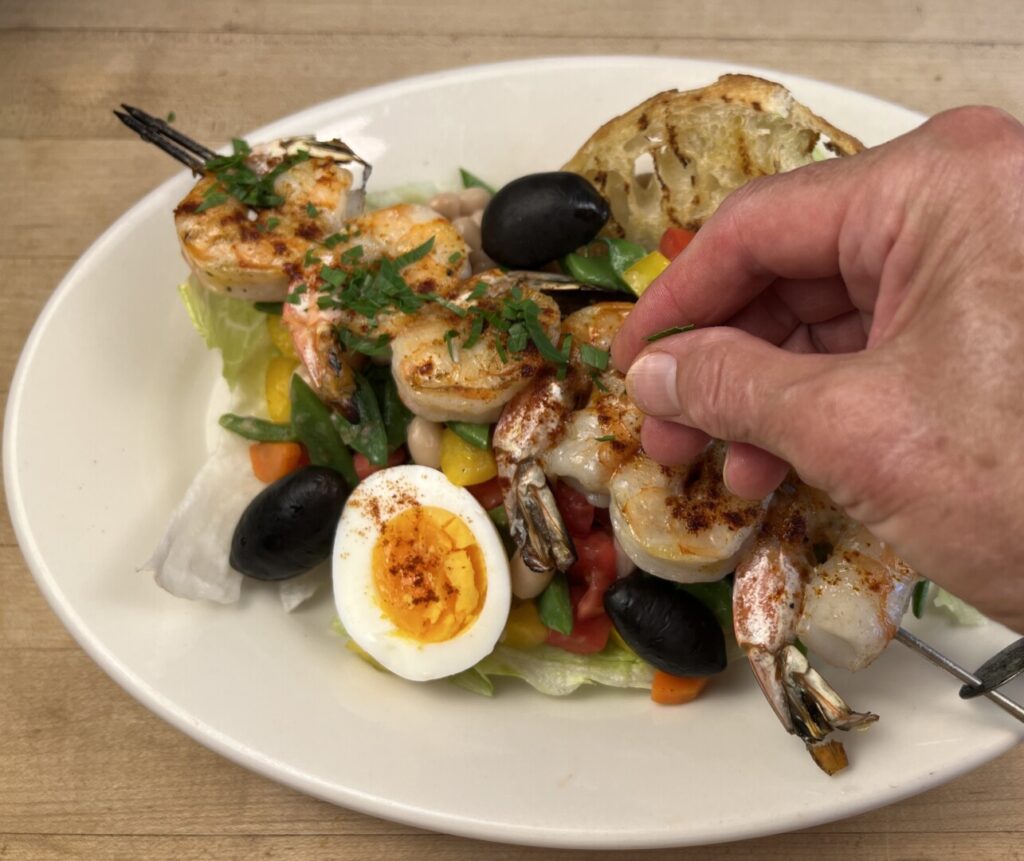
Line a dinner plate with lettuce leaves and spoon a portion of the salad on top. Place a shrimp skewer diagonally across the plate. Plant a grill-toasted bread slice upright behind the skewer. Garnish with seasoned egg halves, olives, and parsley. (To ensure food safety, be sure to reheat any remaining lemon-garlic butter in the microwave oven before serving it on the side.)
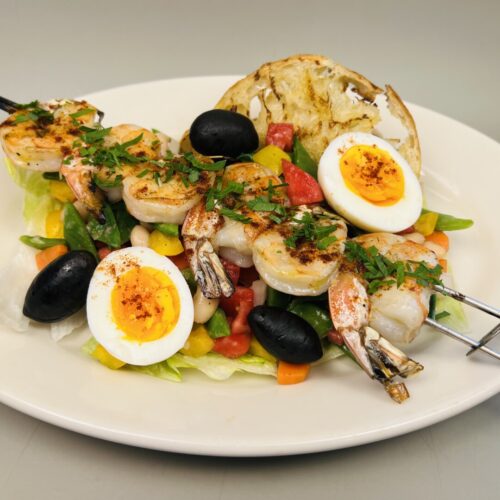
Smoked Paprika Grilled Shrimp Skewers on Catalan White Bean Salad
Ingredients
step 1 ingredients
- 5 oz green beans, preferably flat beans, such as Roma
- 1 small carrot, preferably fresh with top intact
step 2 ingredients
- 2 large eggs, preferably free-range
step 3 ingredients
- 12 oz Gulf shrimp, 16-20 count size
step 4 ingredients
- 2 oz butter
- 1/2 lemon
- 1 garlic clove
- to taste kosher salt
step 5 ingredients
- 1/4 c Sherry Vinaigrette
step 8 ingredients
- 1 13-oz carton or 15-oz can white beans, preferably cannellini
- 1/2 ripe local tomato
- 1/4 yellow bell pepper
- 1/8 sweet onion, preferably Vidalia
- 2 Italian parsley sprigs
step 9 ingredients
- 1/4 ciabatta bread loaf, or other crusty artisan white bread
step 12 ingredients
- to taste smoked Spanish paprika
- to taste sea salt or kosher salt
step 13 ingredients
- 4 iceberg lettuce leaves
- to taste Spanish smoked paprika
- to taste sea salt or kosher salt
- 6 black olives, preferably Arbequina or Kalamata
Instructions
PREP: Mise the recipe ahead of time.
1. Fabricate and par-cook the vegetables:
- Bring about 2 qt water to a boil. Place a bowl near the stove.
- Trim off the stem ends of the green beans.
- Peel the carrot. To make even-sized pieces, cut the pointed end into rounds a little less than ¼ inch thick. Where the carrot becomes wider in diameter, cut it in half lengthwise and then cut it into half-rounds of the same thickness.
- Immerse the beans in the boiling water and blanch about 1 minute until crisp-tender, then use a “spider” strainer to transfer them into the bowl. Place the bowl in the sink under cold running water for about 1 minute.
- Blanch and refresh the carrots in the same way. (Reserve the blanching and refreshing water for use in step 2.)
- Lift the vegetables out of the refreshing water and onto paper towels to blot dry.
- Cut the beans on the diagonal into ¾-inch lengths.
- If prepping ahead, store the vegetables in a plastic bag with a folded towel at the bottom.
2. Prepare mollet eggs:
- Return the vegetable blanching water to the boil.
- Use the tip of a paring knife to pierce a tiny hole in the rounded end of each egg shell. (This allows air to escape from inside the shell, preventing cracking.)
- Lower the eggs into the water and cook at the simmer. If the eggs are cold from the refrigerator, cook for 7 ½ minutes to achieve deep-yellow, jammy-textured yolks. (Room-temperature eggs will take about 6 minutes.)
- Transfer the eggs to the bowl under cold running water. Use the back of a paring knife to gently tap on the egg shells, making tiny cracks that will allow the water to penetrate inside the shells. Keep the eggs in cold water for a total of about 5 minutes.
- Holding each egg under a stream of water, gently peel it. The eggs will be soft and pliable, so take care not to squeeze too hard lest you crack or puncture the whites.
- If prepping ahead, place the eggs in a container lined with a folded paper towel.
3. Peel and devein the shrimp:
- Rinse the shrimp under cold water and then blot dry on paper towels.
- Peel the shrimp, removing the shells but leaving the tail sections on.
- Use a paring knife to cut a shallow slit down the back of each shrimp. Remove the dark vein running along the back.
- If prepping ahead, place the shrimp in a plastic bag.
4. Make the lemon-garlic butter:
- Place the butter into a microwave-proof container.
- Use a swivel peeler to remove 2 or 3 strips of zest from the lemon. Mince the zest, and add it to the container.
- Squeeze the lemon juice into the container.
- Mince the garlic and add it to the container.
- Heat the lemon-garlic mixture in the microwave oven just until melted.
- Season with salt.
5. If necessary, make the Sherry Vinaigrette.
HOLD: Store all ingredients in the refrigerator up to 3 days.
COOK! Finish and plate your dinner.
6. If necessary, bring the sherry vinaigrette to room temperature.
7. Preheat a gas or charcoal grill to high heat; alternatively, preheat a grill pan on the stovetop.
8. Assemble the salad and fabricate the parsley garnish:
- Place a strainer in the sink and pour the white beans and their cooking liquid into it. Shake the strainer to remove as much liquid as possible. Handle the beans gently to keep them intact.
- Cut the tomato into rough ¼-inch dice and spread on a paper towel to drain.
- Cut the yellow bell pepper into rough ¼-inch dice.
- Cut the onion into rough ¼-inch dice.
- Combine the white beans, yellow bell pepper, onion, green beans, carrots, and tomatoes in a bowl and gently mix together.
- Chop the parsley and place it in a small container.
9. Prepare the ciabatta for grilling:
- Cut the ciabatta into ½-inch-thick slices and place them on a sheet tray lined with aluminum foil.
10. Assemble the shrimp skewers:
- If you prepped ahead, rinse the shrimp under cold water and then blot dry on a paper towel.
- Line a sheet tray with aluminum foil and then place a sheet of parchment or wax paper on top.
- Thread the shrimp onto doubled skewers, portioning them evenly. (For an attractive presentation, refer to the photo in the lesson portion of this post.) Place the shrimp skewers on the sheet tray.
11. Dress the white bean salad:
- Drizzle the sherry vinaigrette into the bowl of salad vegetables, and then toss gently to generously coat all of the vegetables with the dressing.
- Evaluate the seasoning and, if necessary, adjust the salt.
12. Grill the bread and the shrimp skewers:
- If necessary, re-melt the lemon-garlic butter in a microwave oven.
- Brush the top of the bread slices with a little of the lemon-garlic butter . Place the slices on the grill, butter-side-down, and toast them until crisp and showing some grill marks. Brush the tops with butter and turn over. Grill until toasted on both sides. Place the slices back on the tray, and wrap loosely with foil to keep warm.
- Brush the top of the shrimp skewers with the lemon-garlic butter, then lightly season them with smoked paprika and salt.
- Place the shrimp skewers on the grill, seasoned-side-down, and grill for about 1 minute. Remove the parchment from the tray and discard it.
- Turn over the shrimp skewers, baste with the butter, season with paprika and salt, and grill about 40 seconds longer until the shrimp intensify in color, show some grill marks, and are gently curled.
- Pour any remaining lemon-garlic butter into a small pitcher or ramekin.
- Transfer the skewers to the tray and wrap loosely with the aluminum foil.
13. Plate:
- Line each cool dinner plate with 2 lettuce leaves.
- Mound a portion of the white bean salad onto each plate.
- Place a shrimp skewer diagonally across the salad on each plate.
- Pour any juices from the shrimp onto the shrimp skewers.
- Plant a bread slice upright in the white bean salad, placing it behind the shrimp skewer on each plate. Place the remaining bread in a bread basket.
- Cut each egg in half and place one half on either side of the skewer on each plate
- Sprinkle each egg half with paprika and some salt.
- Sprinkle a line of parsley atop each shrimp skewer.
- Garnish each plate with black olives.
- Reheat the lemon-garlic butter in a microwave oven.
- Serve the extra bread and lemon-garlic butter on the side.