

Your Cooking Lesson
Advice, explanation, and in-depth information to help you achieve recipe success.
When the nights get chilly, it’s time for chiles!
Chile is the Mexican Spanish term for hot-and-spicy members of the capsicum family—otherwise known as hot peppers. Sometime this word is spelled “chili” in English. But, here in North America, we have the Tex-Mex dish chili that is made with certain Mexican chiles plus meat and (sometimes) beans. Confusing! So, English-speaking chefs and food writers have adopted the term “chile” when referring to the vegetable, and use “chili” when referring to the dish. Anyway… when it’s cold outside, most any dish featuring spicy chiles is both warming and satisfying.
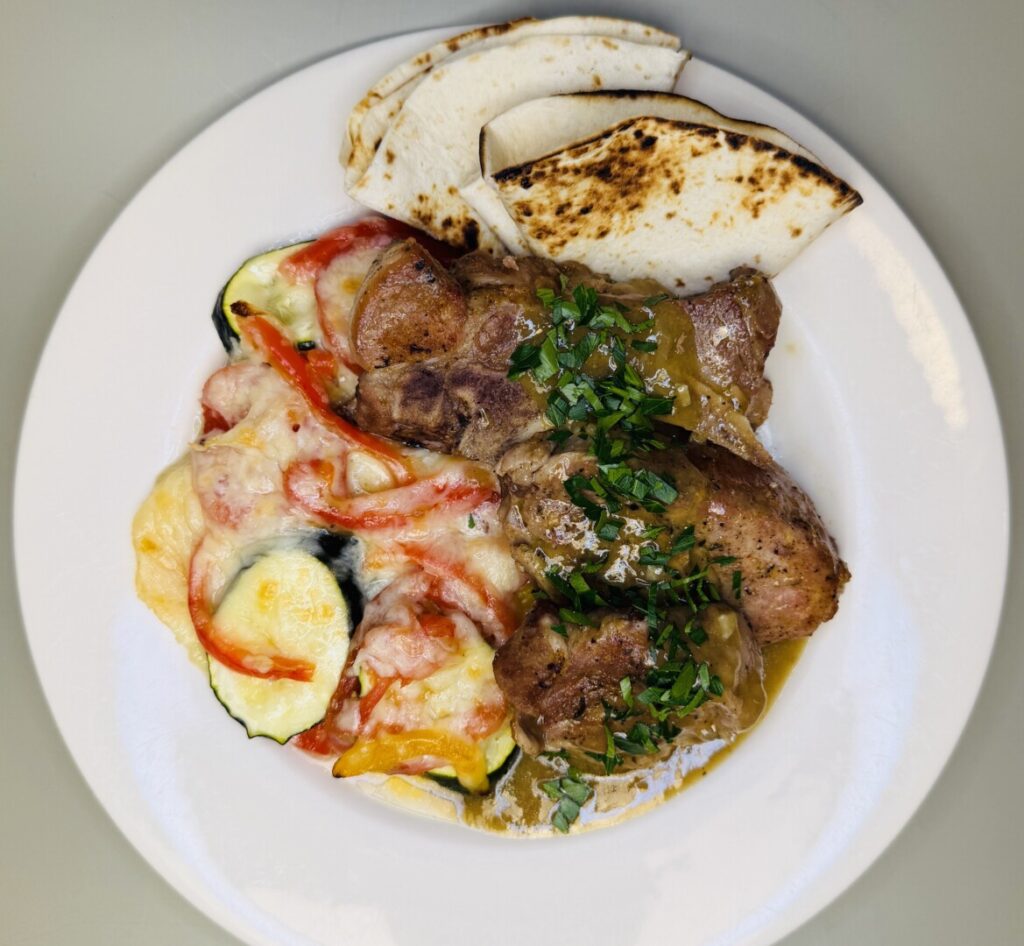
Although a big bowl of standard red Tex-Mex chili is a welcome treat, at this time of year I also crave its New Mexican cousins: dishes made with New Mexico green chile. This bright and spicy autumn entrée features pork country spareribs braised in a savory green chile sauce and complemented with a rich vegetable gratin topped with two types of cheese. In keeping with its Southwest heritage, our green chile dish is served with warm flour tortillas fresh off the flame.
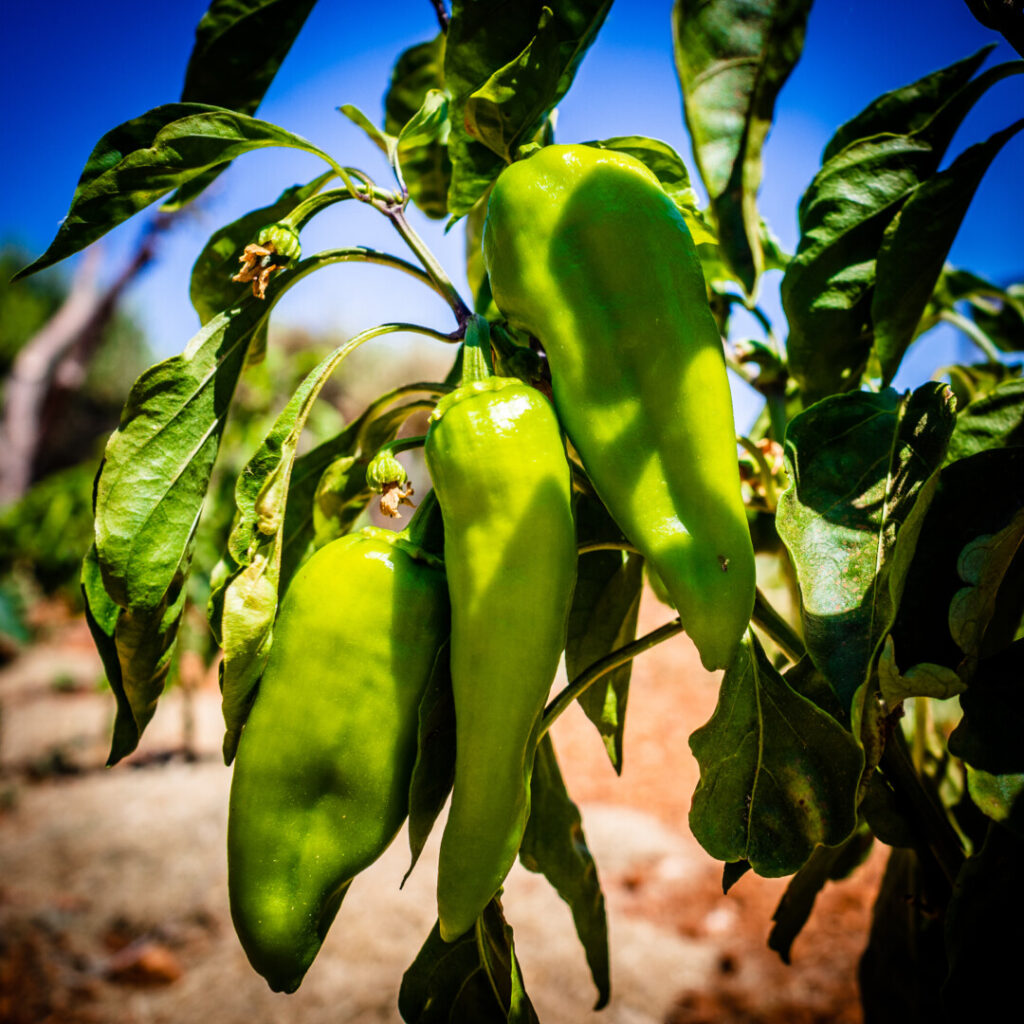
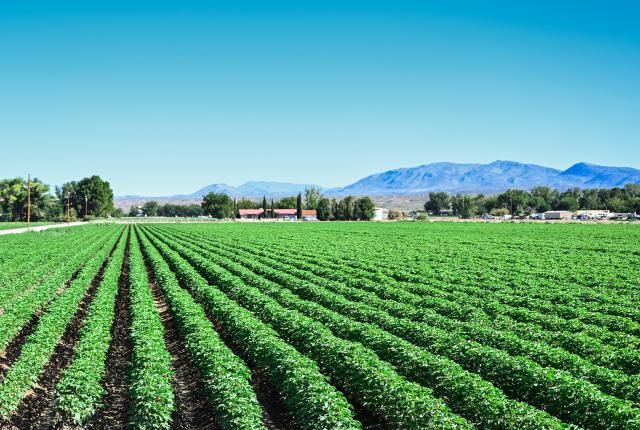
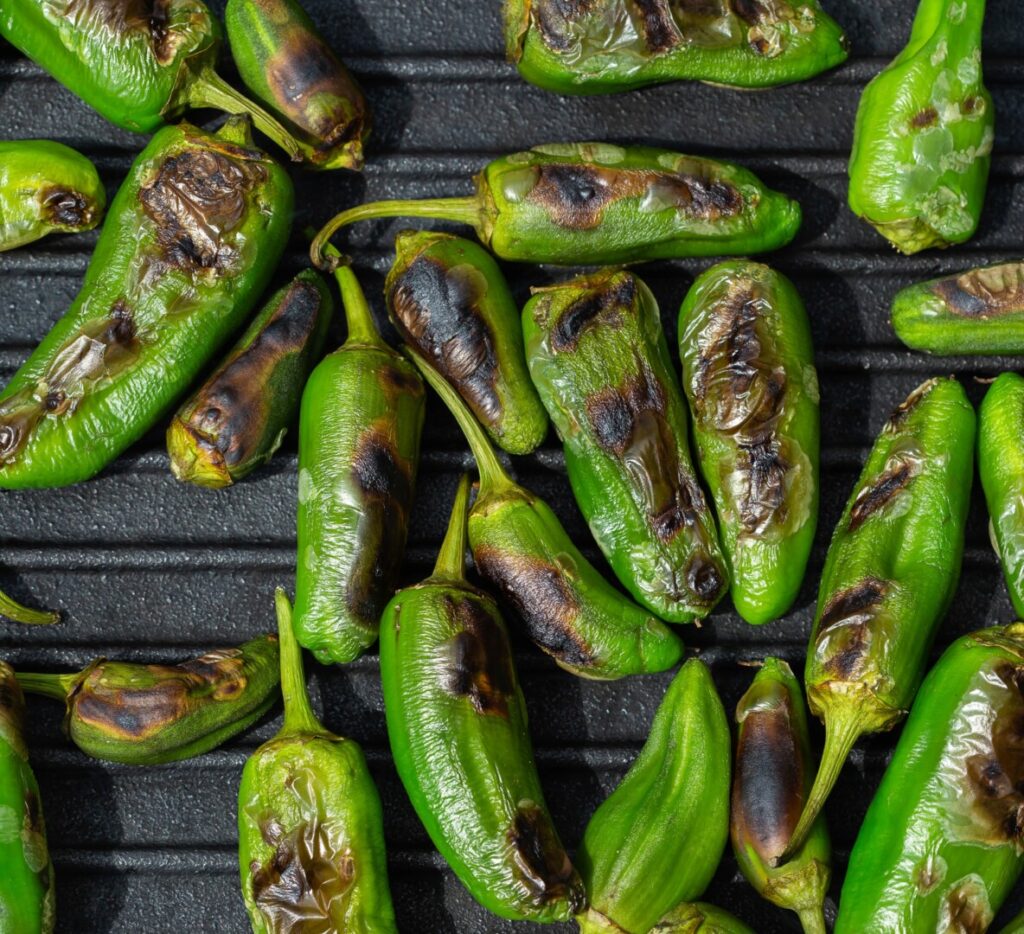
Throughout the American Southwest—and especially in New Mexico—fall is chile harvest season. After a summer thriving on hot, dry days and cool nights, the region’s famous green chiles are bursting with flavor and ready to pick. Iconic of Southwestern cuisine, green chiles are used in many ways: they spice up soups, stews, sauces, and salsas; and also are stuffed and deep-fried or baked in a northern variation of the Mexican dish chiles rellenos.
New Mexico chiles are a group of cultivars developed from indigenous capsicums grown by Native Americans in the American Southwest for thousands of years. These pale-green, elongated chiles have a distinctive tangy, earthy-fruity flavor that ranges from mild to extremely hot depending on cultivar type. Although chiles are grown in various locations throughout the American Southwest, those grown in New Mexico’s Hatch Valley are widely considered the best. Some of the crop is allowed to ripen bright red and is used fresh, or dried to make chile powders and purées; however, the majority is harvested green.
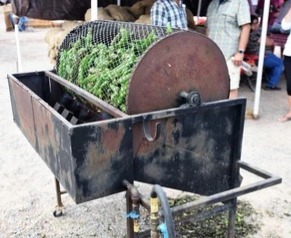
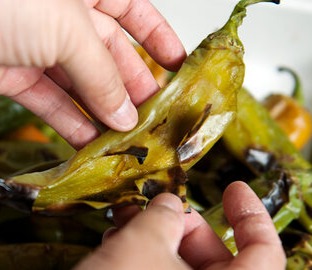
New Mexico chiles have thick, fibrous skins that must be removed before eating. The best way to do this is to roast them, a process that additionally adds a delicious smoky flavor. Throughout the region, from September through October the air is perfumed by the irresistible scent of roasting chiles. Some cooks do this at home on a gas or charcoal grill, or over a gas stove burner. But many entrepreneurial chile growers offer the service of roasting their customers’ chiles outdoors in a revolving mesh drum that looks something like a lottery-draw spinner. After the chiles are roasted and cooled, cooks take home their cache of chiles and process them to freeze for use throughout the year. The chiles are peeled, seeded, and then chopped or puréed to use in scores of traditional New Mexican dishes in late fall and beyond.
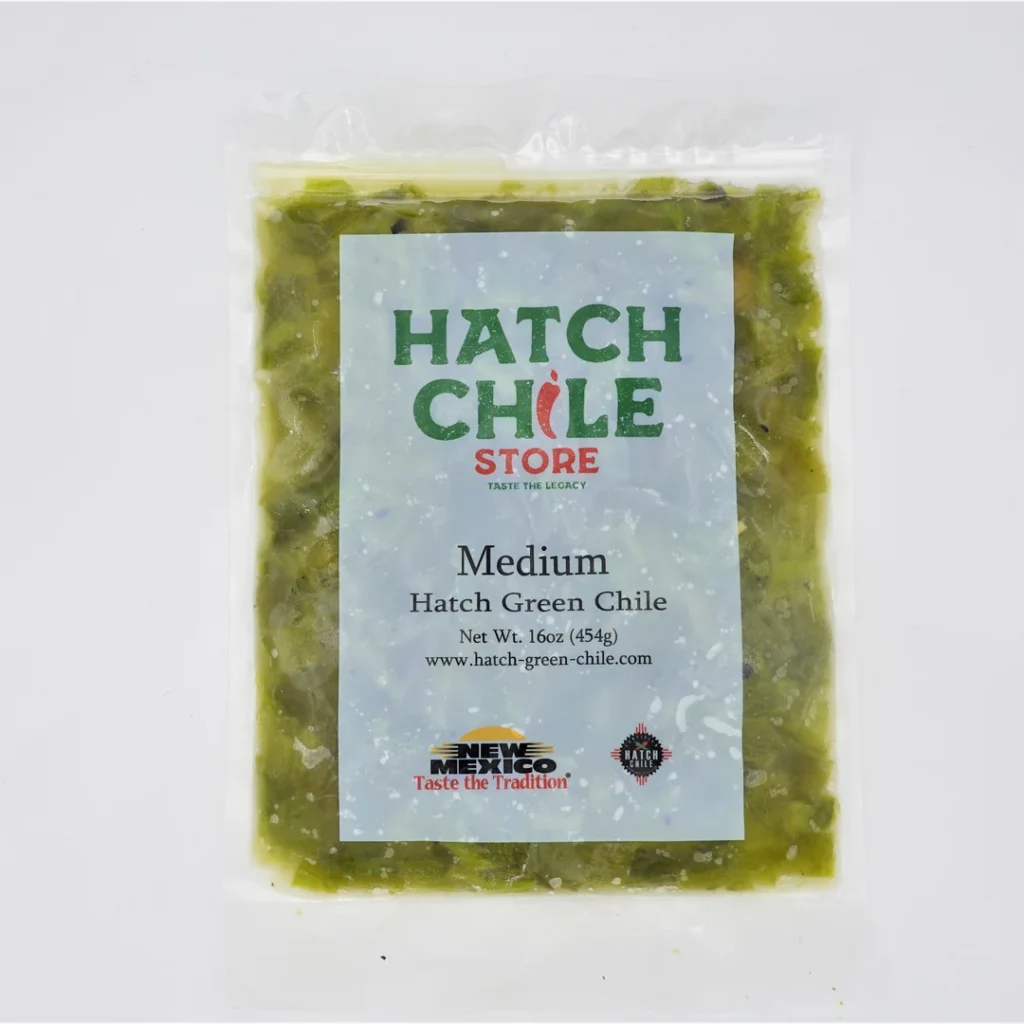
Not so long ago, American Southwestern cuisine was virtually unknown in other parts of the country, and it was difficult to source green chiles and green chile products outside the region. New Mexico expats and other green chile enthusiasts had to mail-order their case of fresh green chiles in the fall and process them at home. But now, we don’t have to purchase, roast, peel, and clean fresh green chiles to make green chile dishes. Southwestern food companies make a variety of quality green chile sauces and salsas, and most supermarkets throughout North America carry them. Or, they’re just a click away if you purchase online.


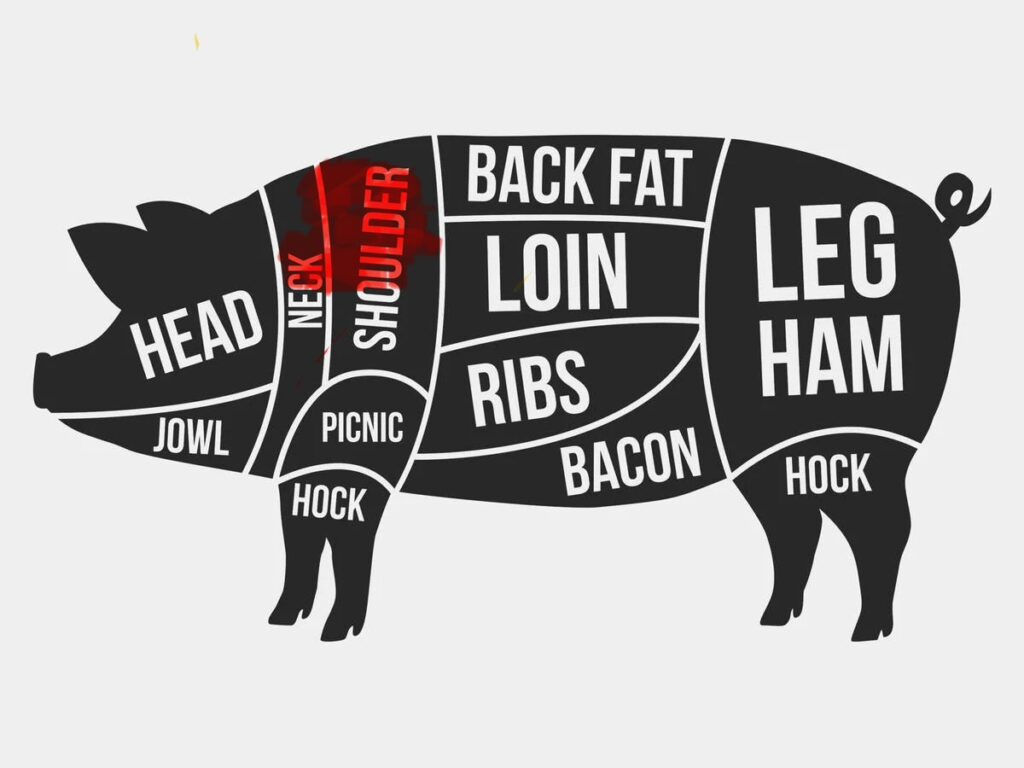
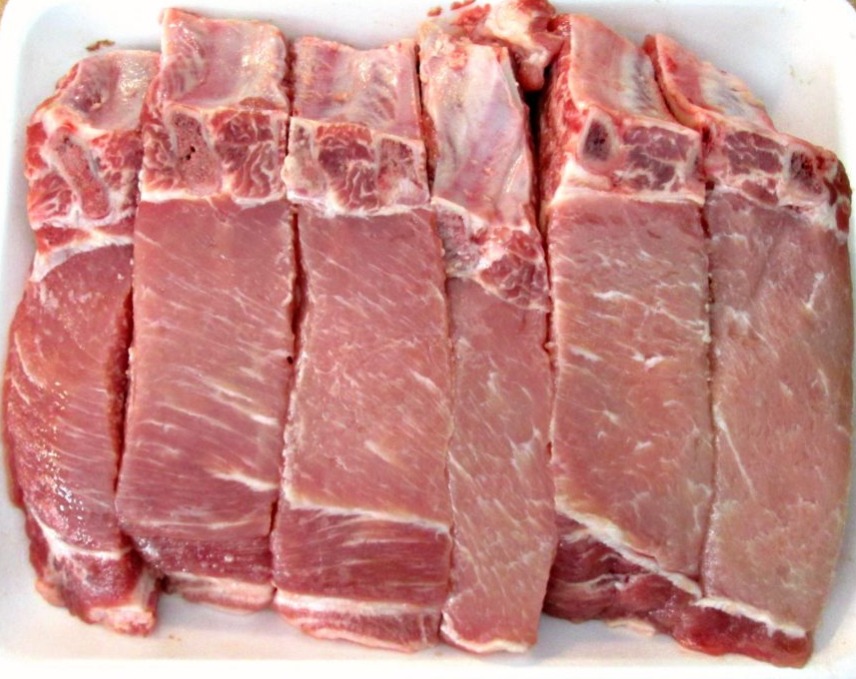
In this recipe we’re featuring pork country-style spare ribs. Country spare ribs aren’t really spare ribs at all—they are long, narrow strips of meat and bone cut from the pork shoulder/neck area of the carcass. The location of country spare ribs is shown highlighted in red on the pork cuts diagram on the left.
True bone-in country ribs are cut from the area nearer the loin, so they include a short section of back rib bones and sometimes a section of the blade bone. They contain some lighter, leaner, loin meat and some darker, fattier meat from around the ribs and blade. These can be cut in half crosswise to help them fit better into a casserole and on your plate.
Western-style country ribs contain no rib bones at all but, instead, are cross-cut through the shoulder blade. They’re all dark meat, making them more succulent and more forgiving of overcooking. Because their bones are in the center of the meat, they can’t be cut in half. That’s OK—you just need to use a larger or oval-shaped casserole in which to cook them.
For some interesting information about the history of pork country spare ribs, visit this site: https://www.discusscooking.com/threads/clarification-of-country-style-ribs


Side dishes are a great way to add seasonal flair to any protein dish. To complement our green chile pork, we’re combining two types of squash—zucchini and butternut—in a gratin enhanced with bell peppers, tomatoes and lots of tangy, gooey cheese.
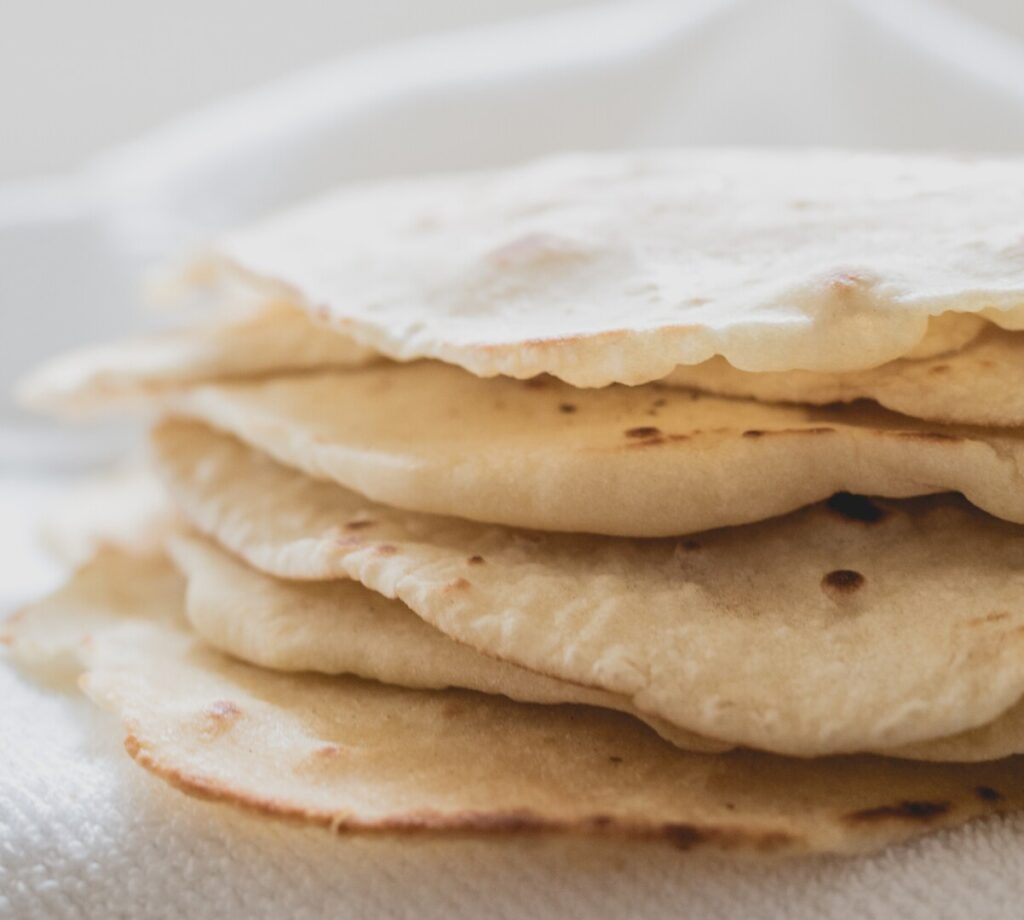
Toasted flour tortillas complete the presentation and mop up the spicy green chile sauce.
Let’s prep!
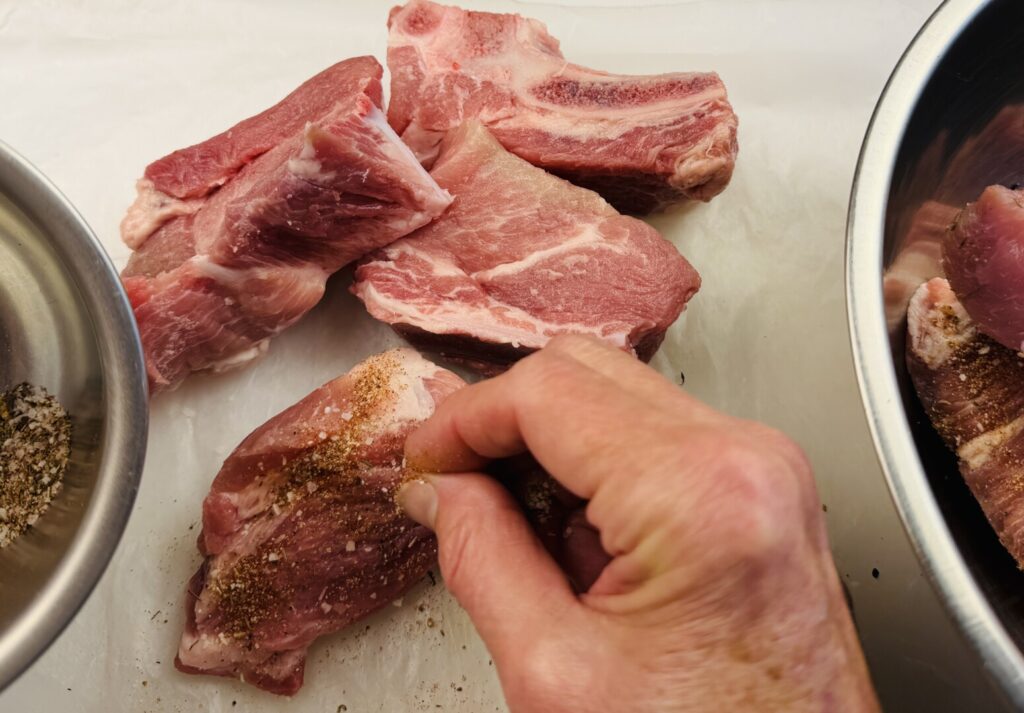
You’ll start by making a Southwestern-style dry seasoning rub. A dry rub is a seasoning mixture that typically contains salt, granulated dried aromatics such as onion and garlic, dried herbs, and ground spices. The salt penetrates into the flesh of whatever protein it’s used on, and carries the other seasonings in along with it. Although dry rubs can be applied for lengthy periods of time to cure (preserve) meats, our rub is a short-term application for flavor only.
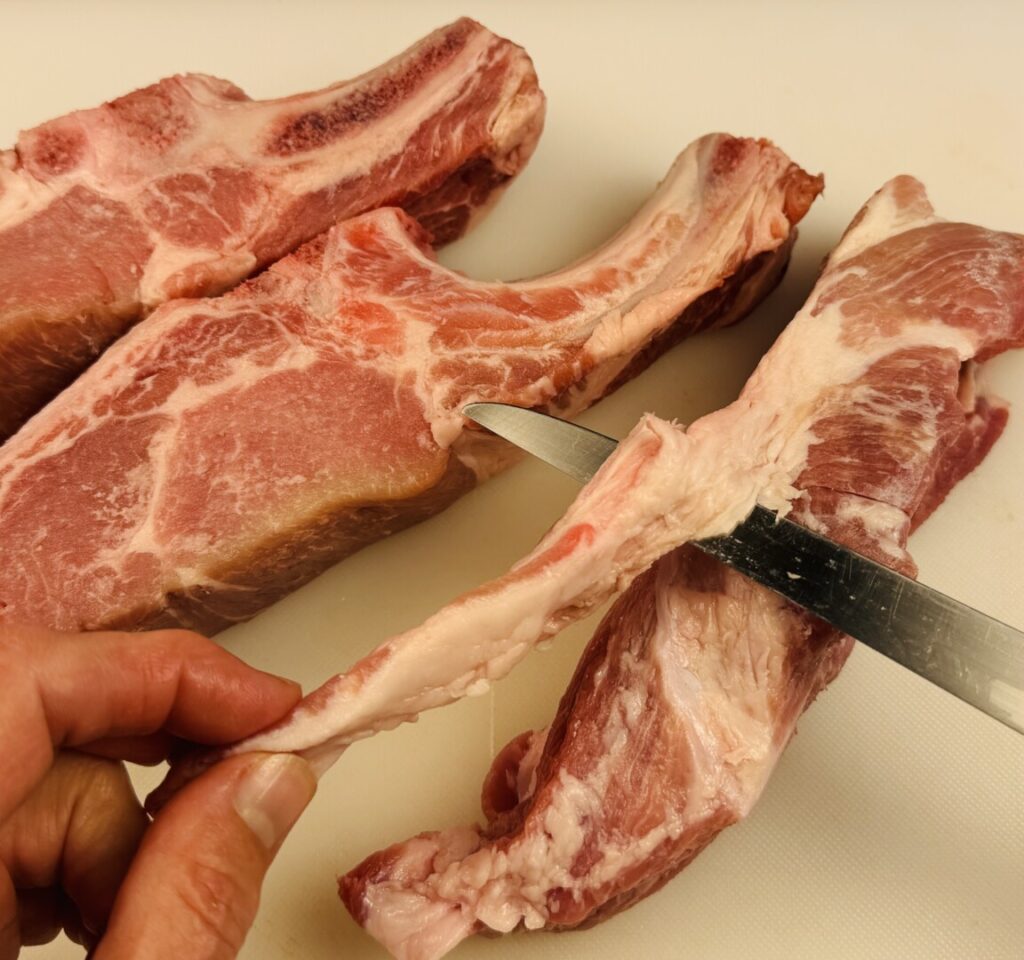
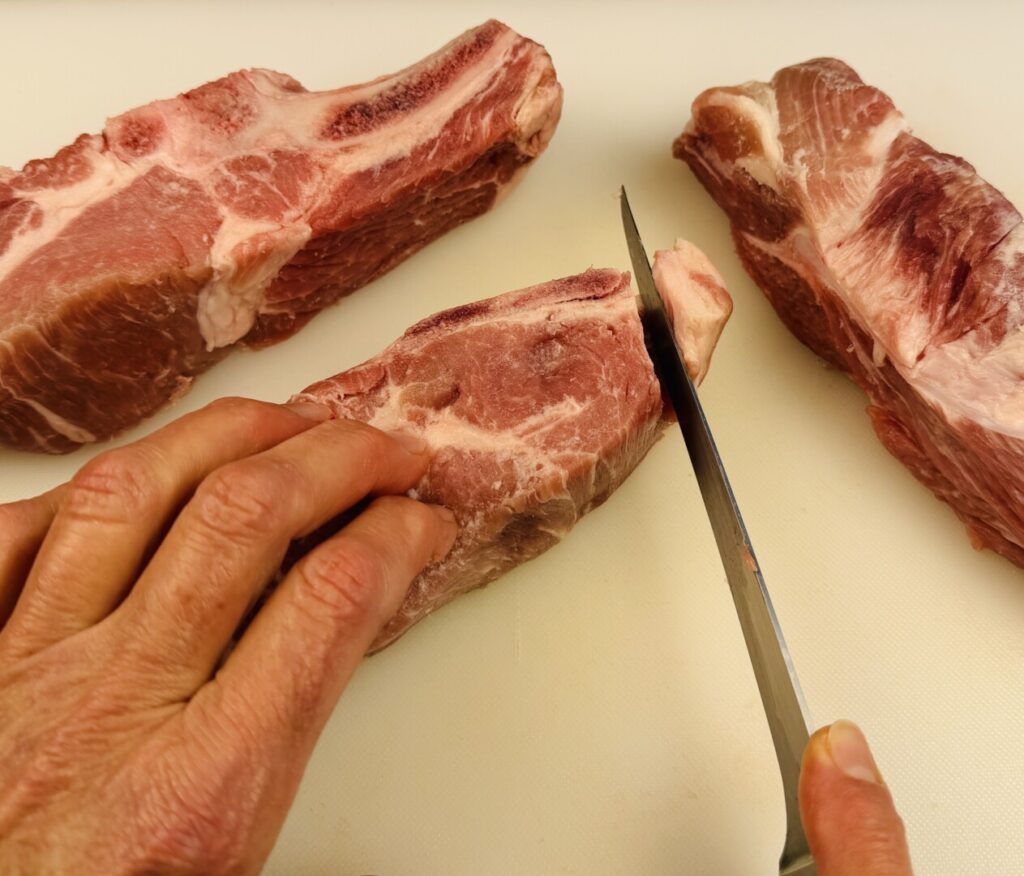
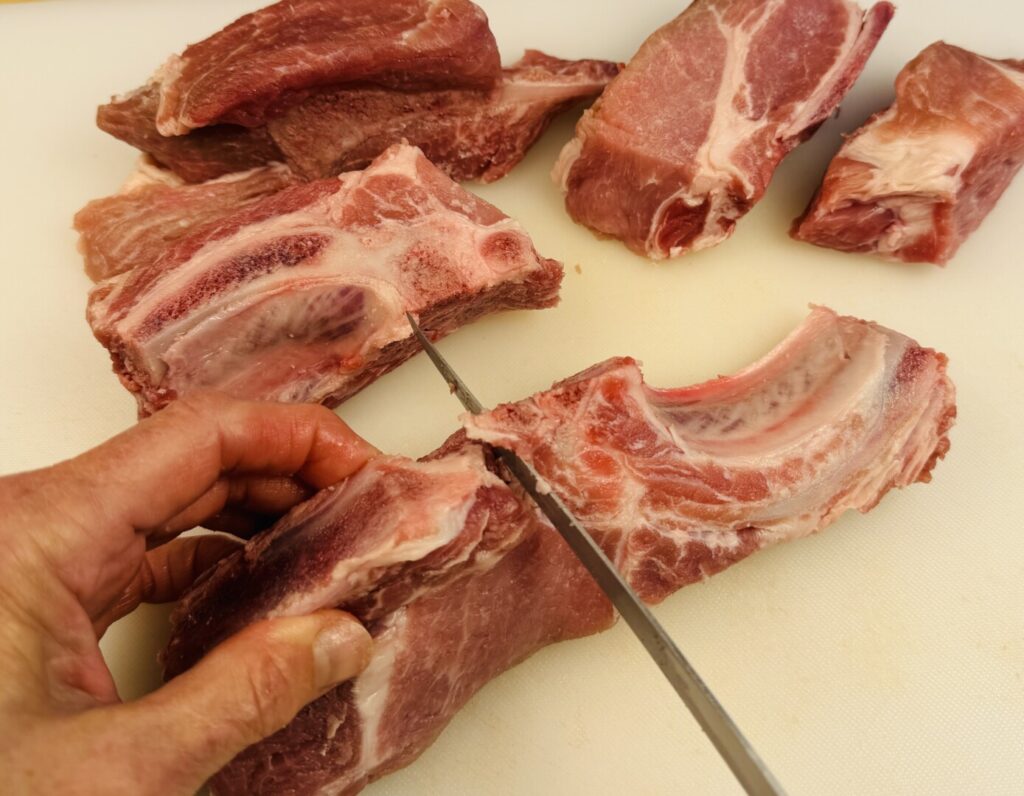
Country spare ribs can be excessively fatty in some areas; look yours over and trim off any large fat deposits but leave a little for flavor and lush mouthfeel. For easier cooking and plating, cut the pieces in half by finding the junction between the curved rib bone and the flat blade bone. (If you’re using western-style country ribs that have a center bone, omit this step.) Allow the rub to season the meat while you prep the onion and garlic for braising.
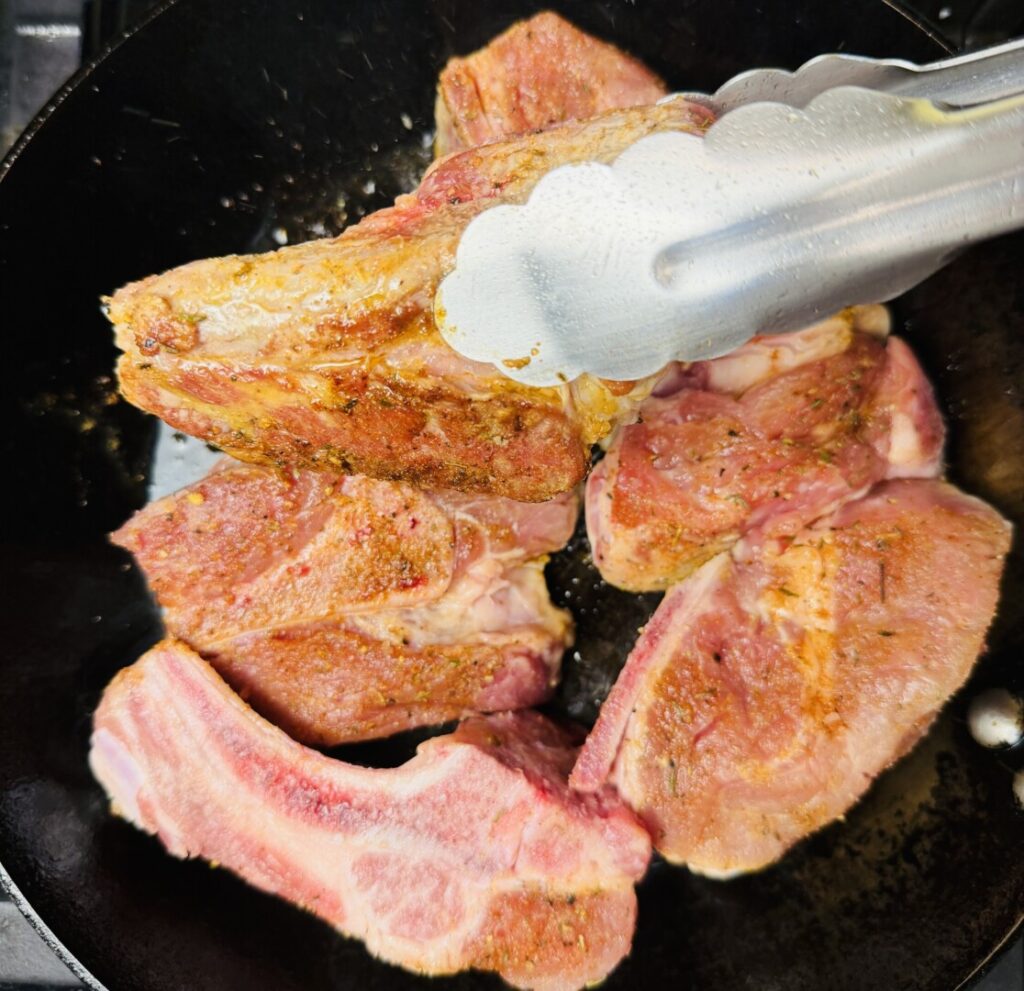
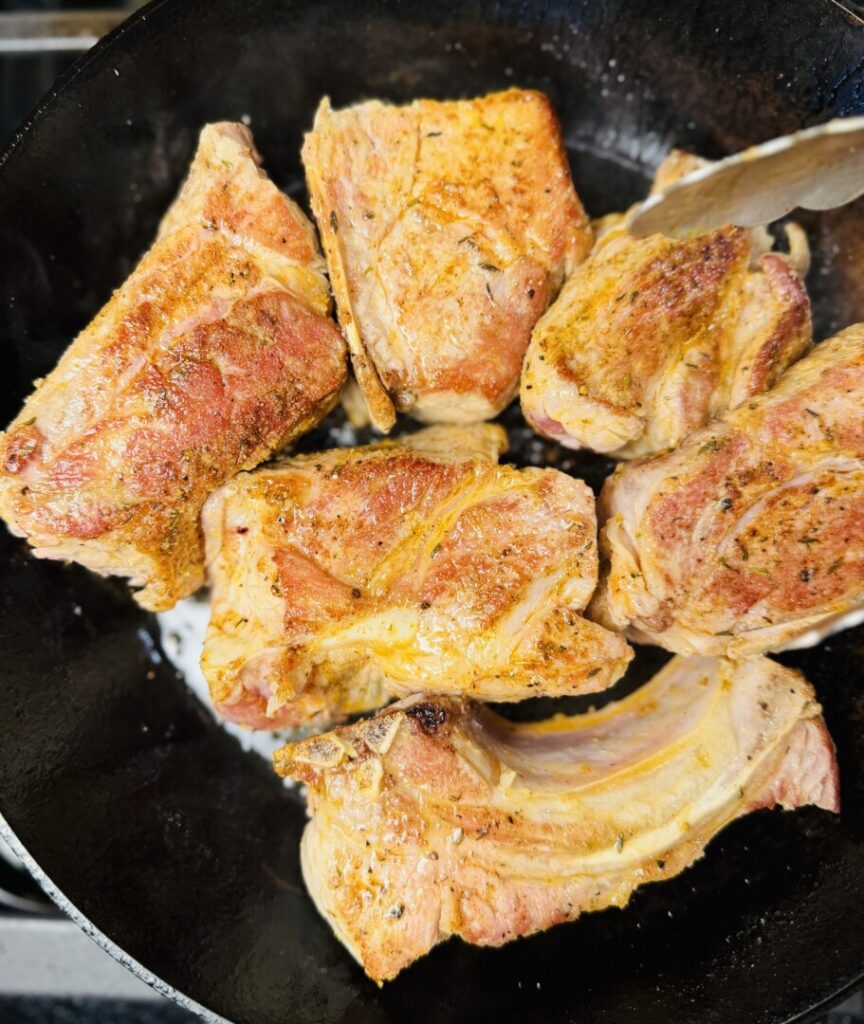
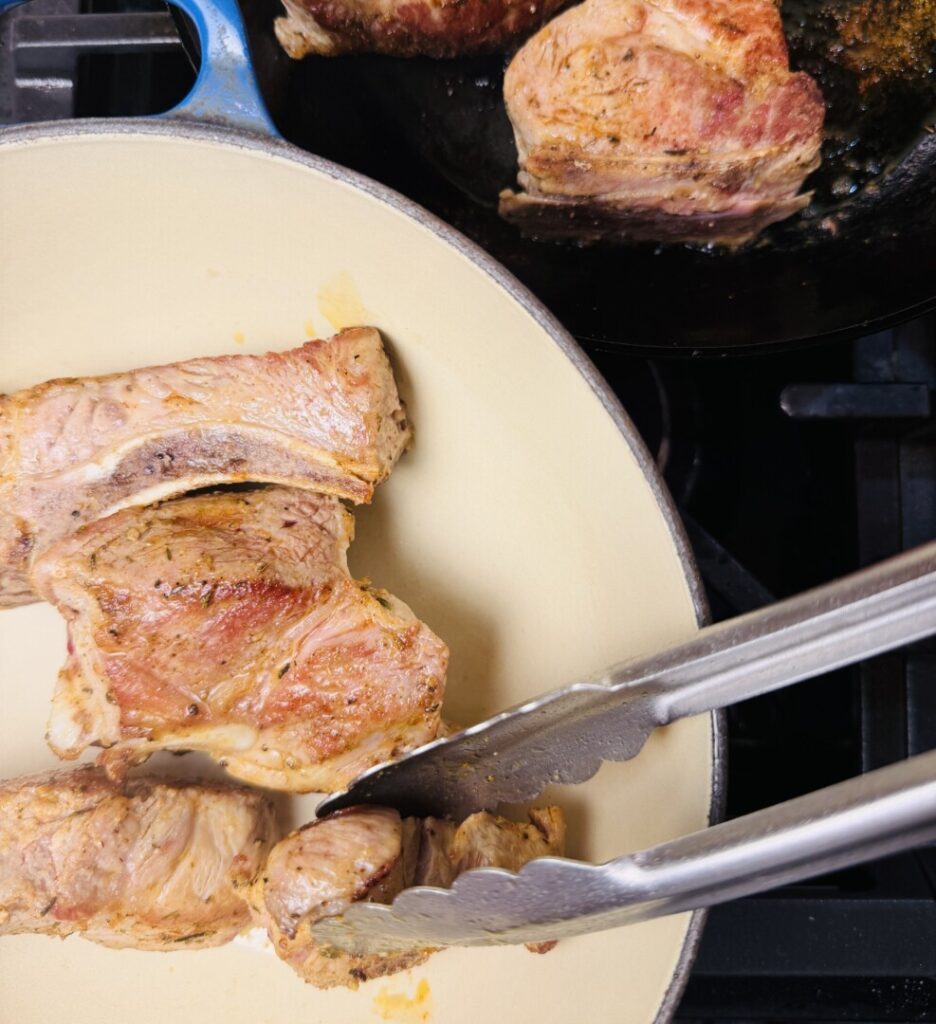
Braising is a combination cooking method that begins with dry-heat sautéing to brown the exterior of whatever protein you’re using. The resulting Maillard reaction, similar to caramelization but involving proteins, gives the meat an attractive, deep color and a savory, umami flavor. When browning meat that has been dry-rubbed, use medium heat and watch carefully to avoid scorching the seasonings on the surface of the meat. To proceed to the second phase of braising, transfer the pork to a heavy, lidded casserole, such as the vintage Le Creuset cocotte I use.

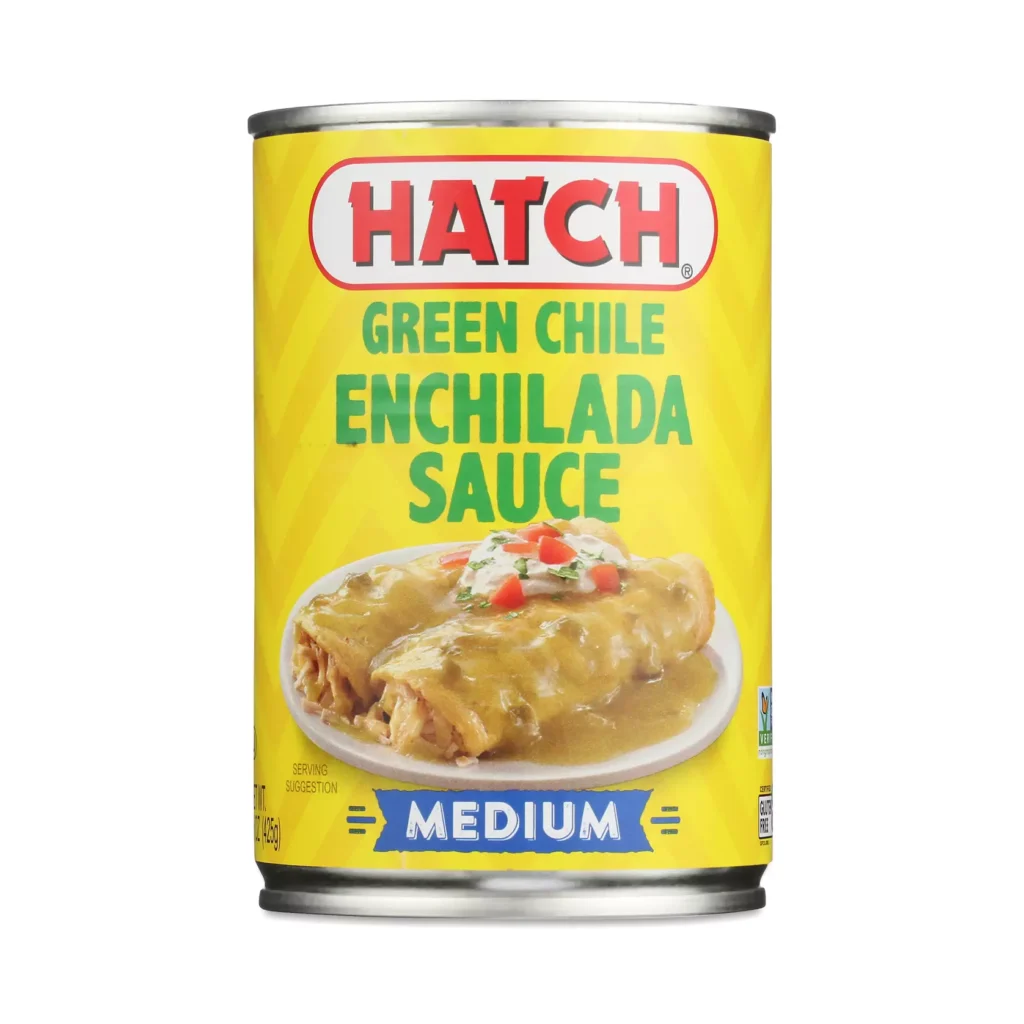
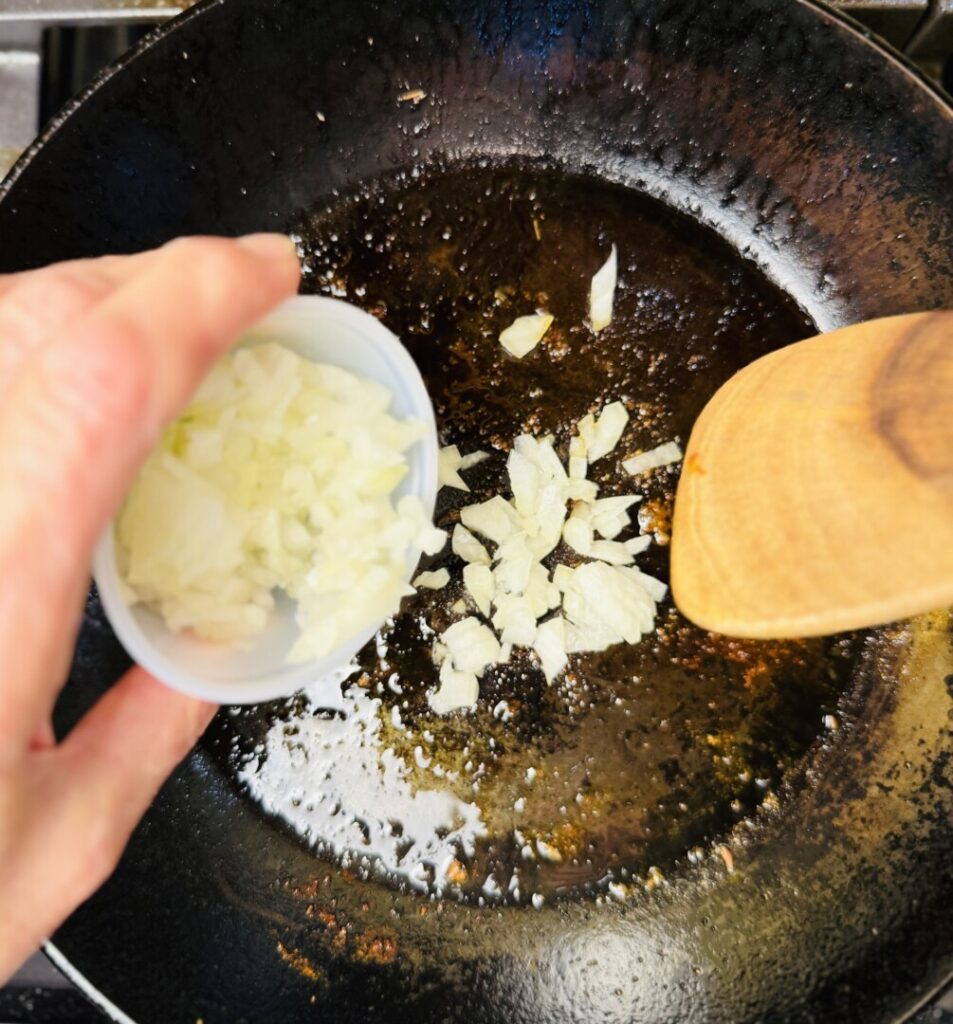
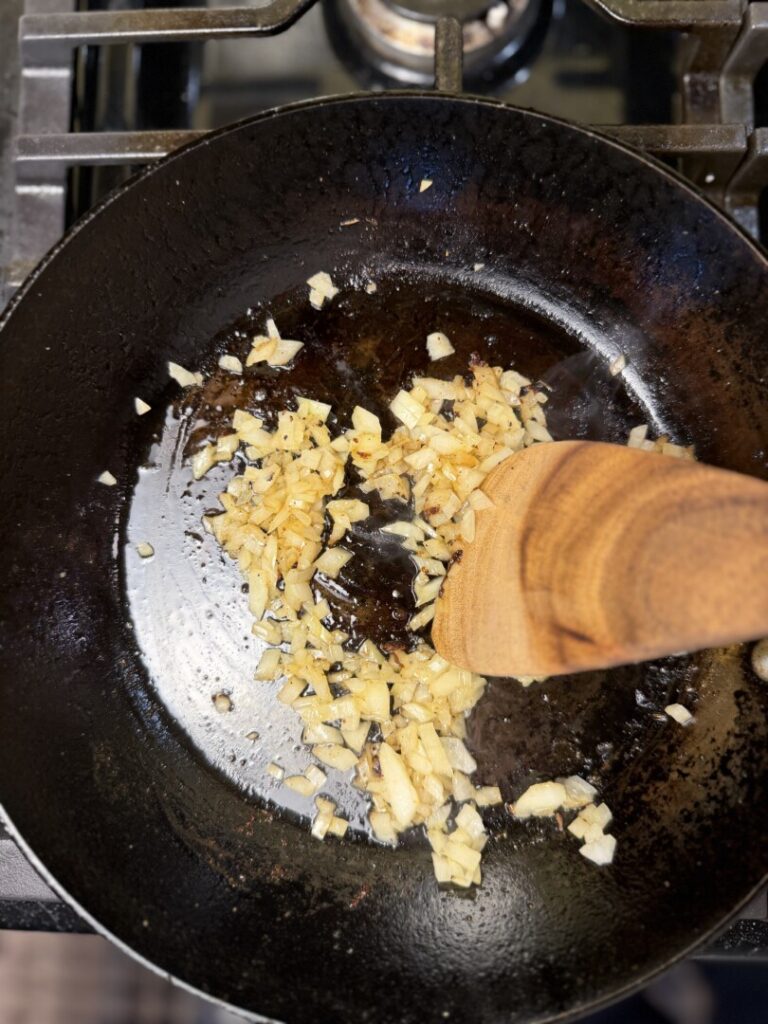
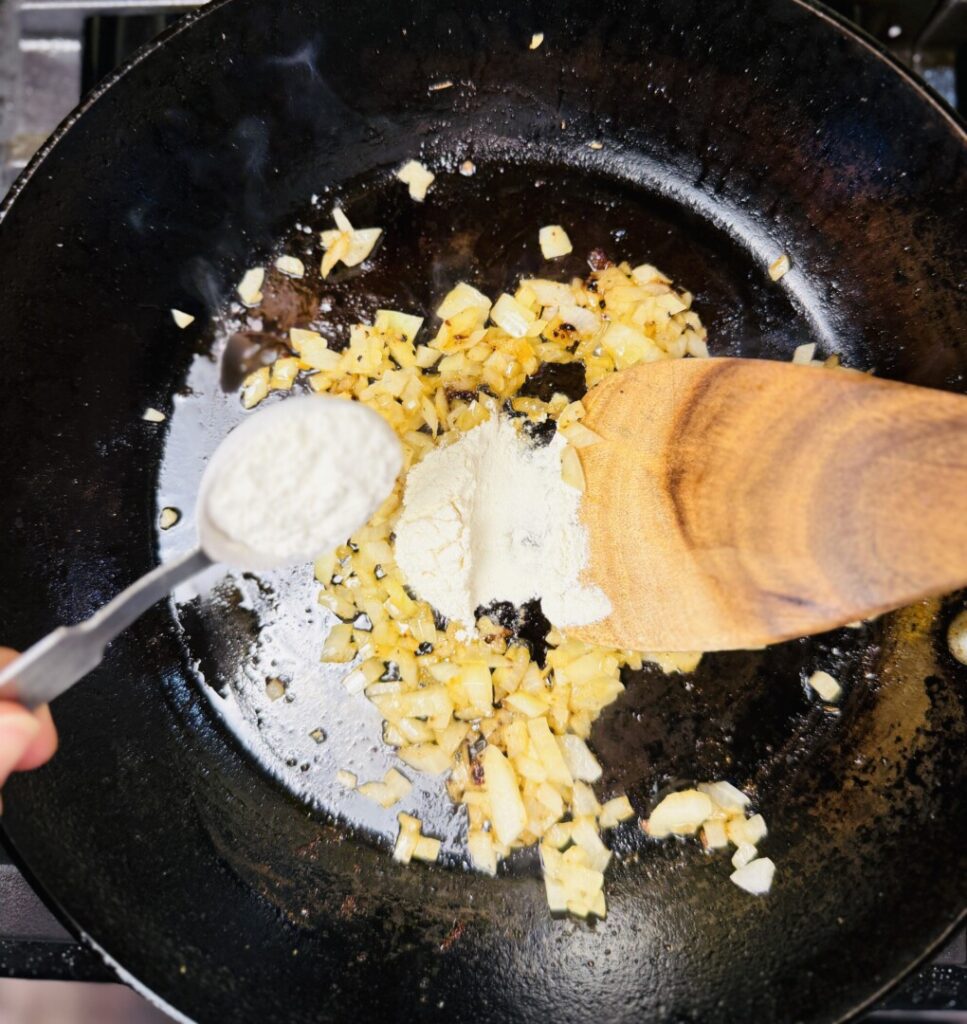
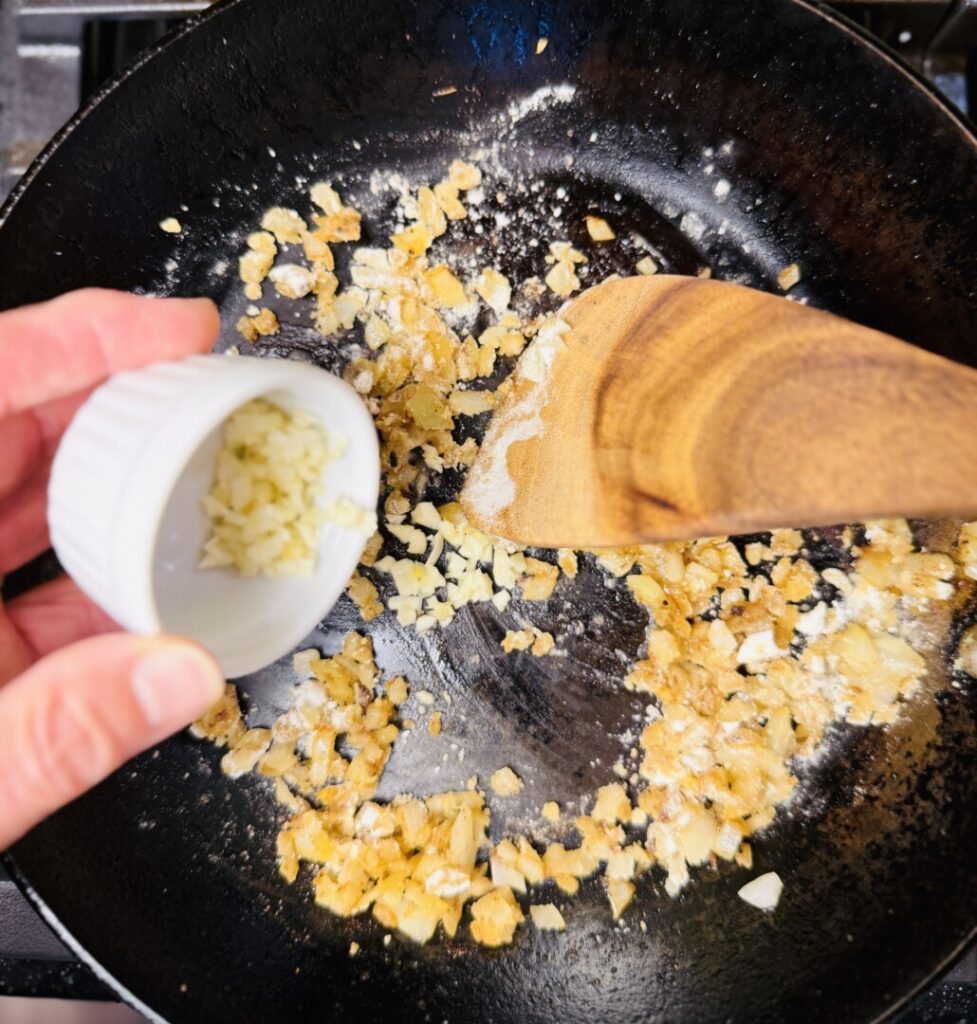
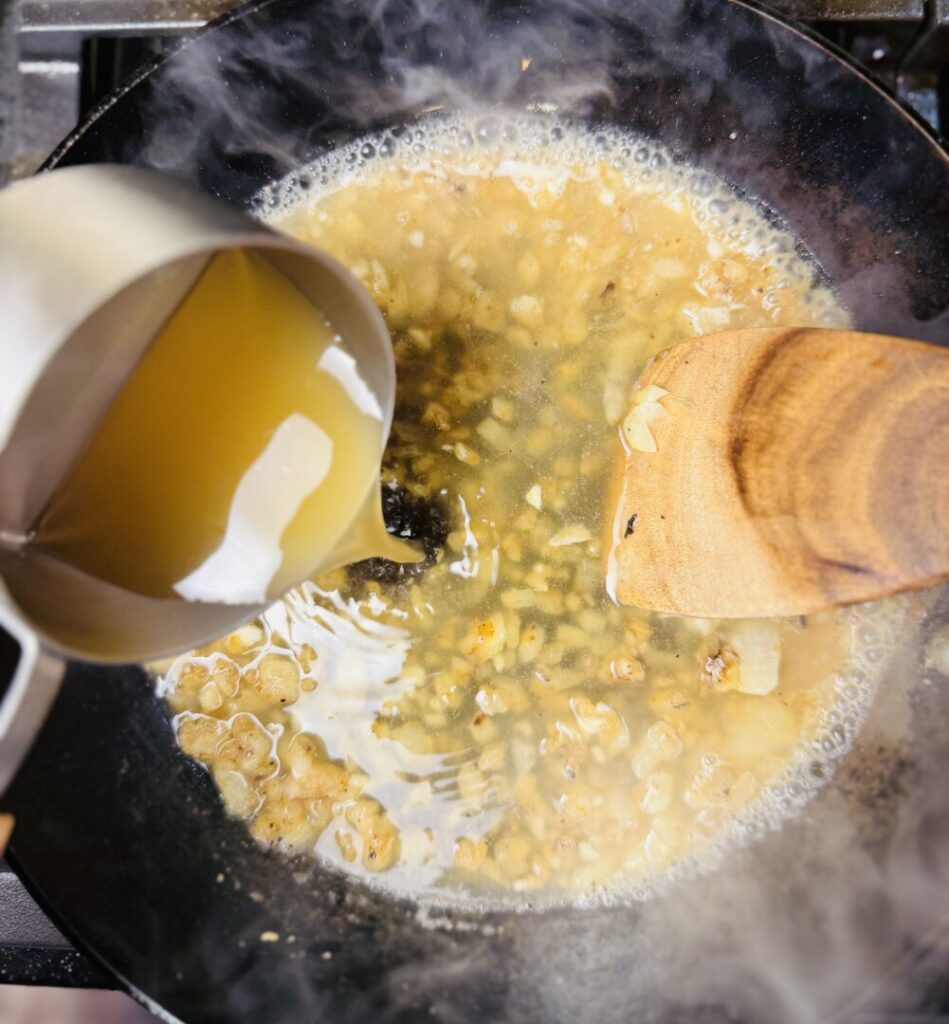
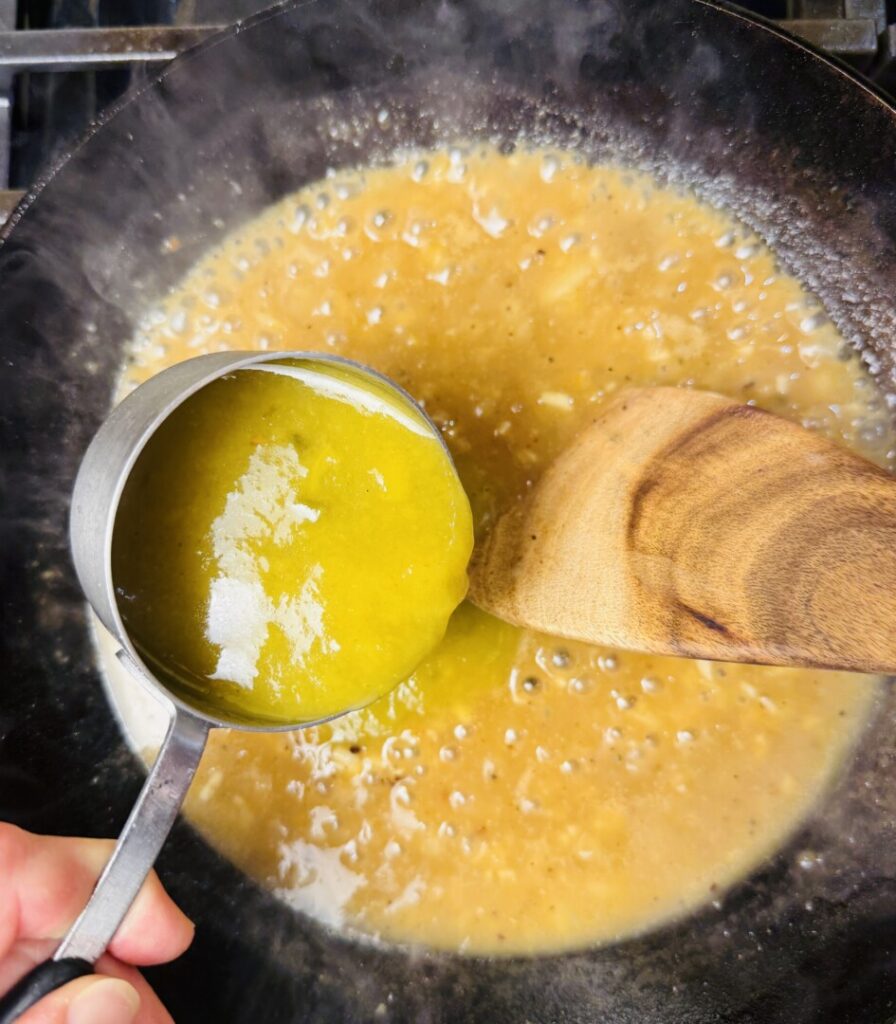
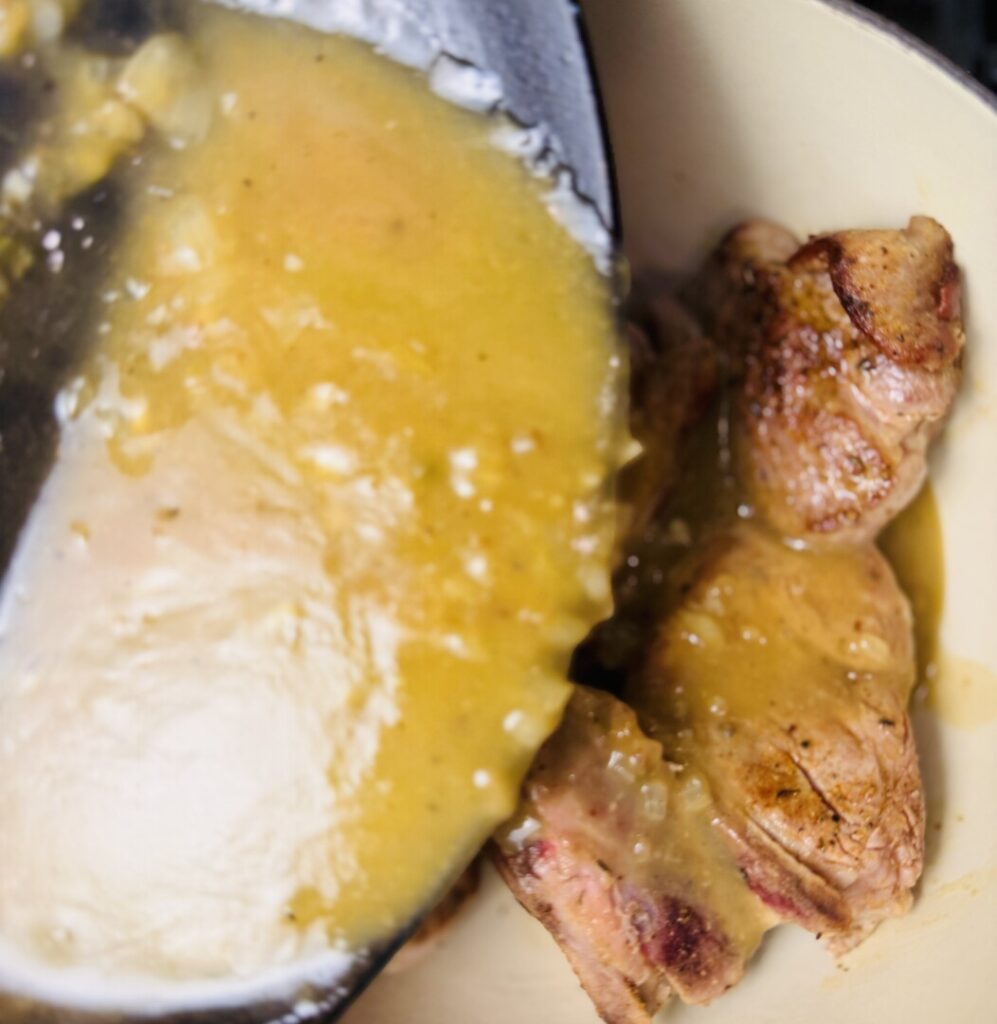
The second phase of braising is simmering in flavorful liquid to cook through and tenderize the meat. So, next, you’ll make the sauce in which the pork will simmer. This recipe begins with a basic pan velouté sauce. Gently sauté chopped onions in the fat from the pork until golden brown, then stir in some flour to make a roux. Add minced garlic and then slowly stir in chicken stock to make a smooth sauce. When developing this recipe I used Hatch brand green chile enchilada sauce, which is lightly thickened with cornstarch. I added half of the total amount for the braising sauce, reserving the other half to add to the sauce just before serving. If the green chile product you’re using is unthickened, you’ll need to use about 50% more flour in your roux (and probably add a little more oil to the pan while making the roux). Check the salt content in your green chile sauce and season accordingly.
In the second phase of braising you’ll apply moist heat in the form of simmering/steaming in a closed vessel. While this can be done on the stovetop, using the oven prevents bottom-scorching. Pour the sauce into the casserole on top of the pork, cover with the lid, and place the casserole in a 350°F oven for about 30 minutes. Your ribs will slowly tenderize while gently simmering and absorbing the flavors of the sauce. Like most braises and stews, this dish is even better when made ahead and then refrigerated for a day or two.
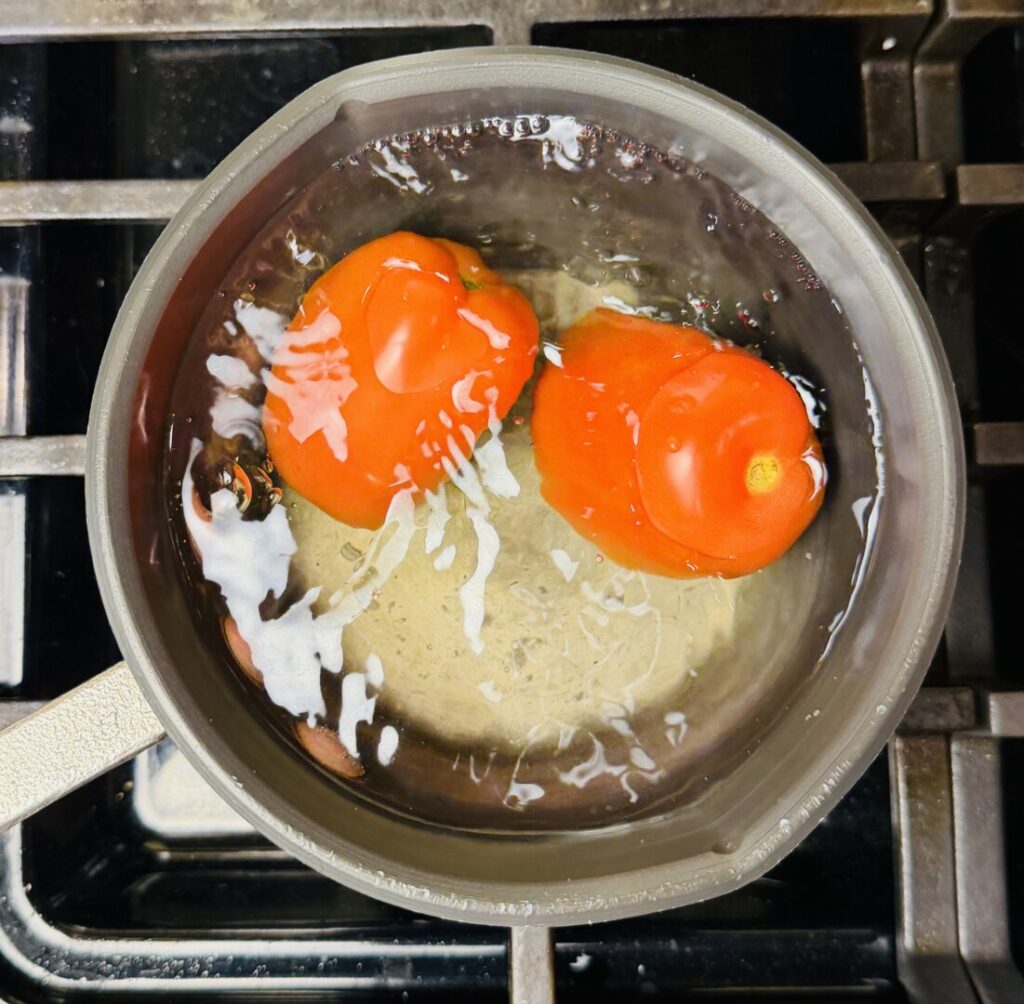
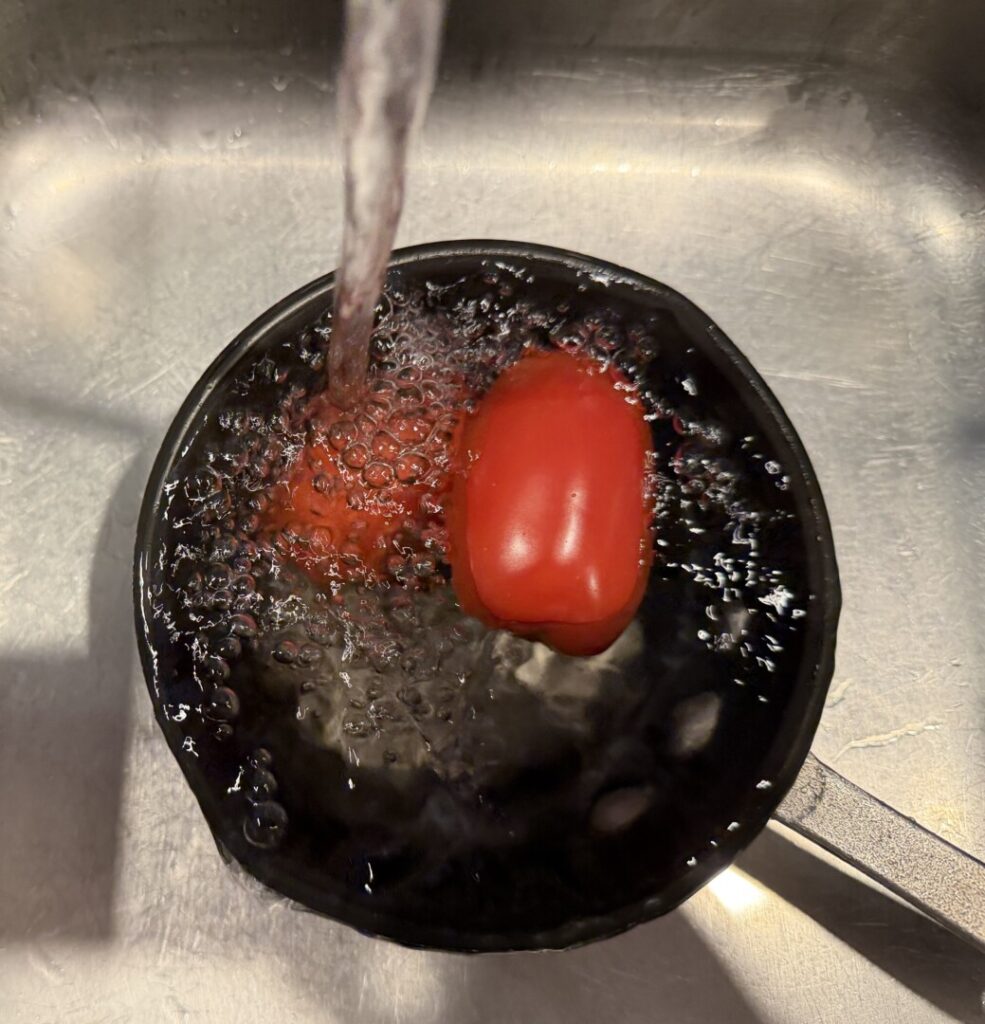
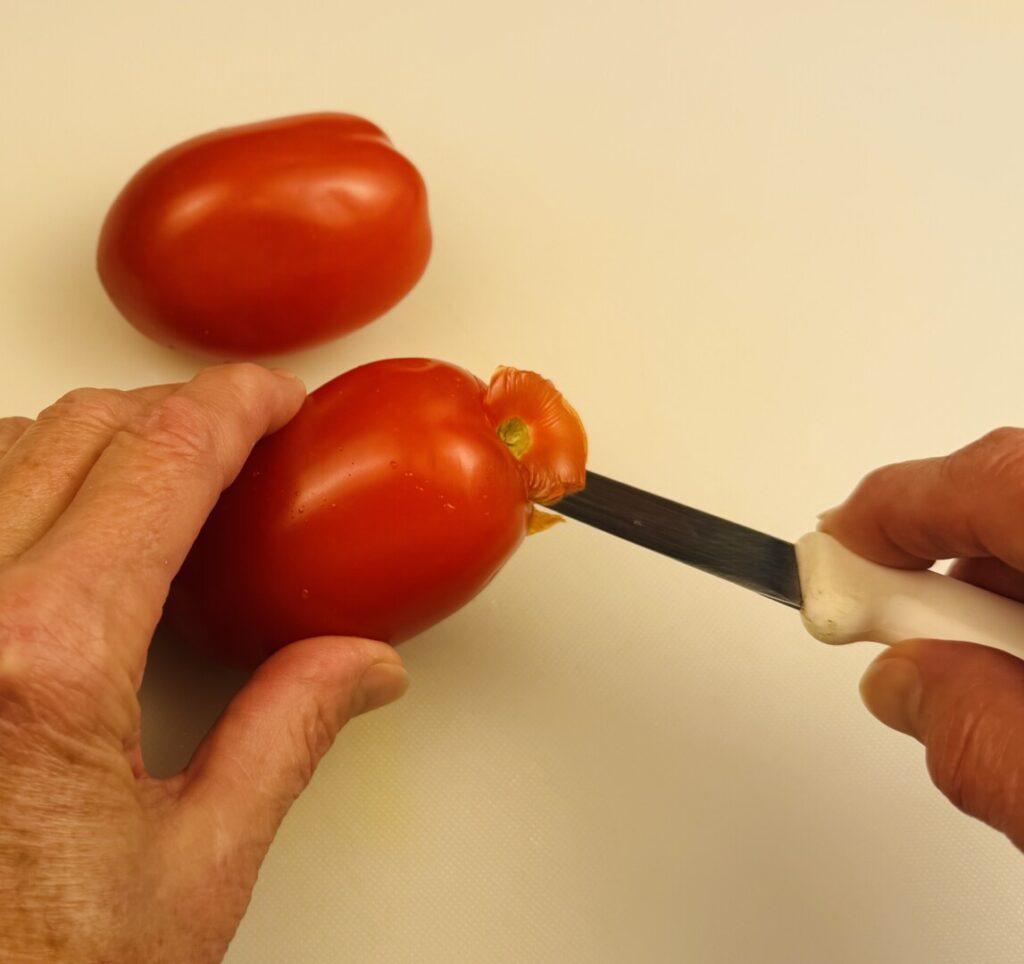
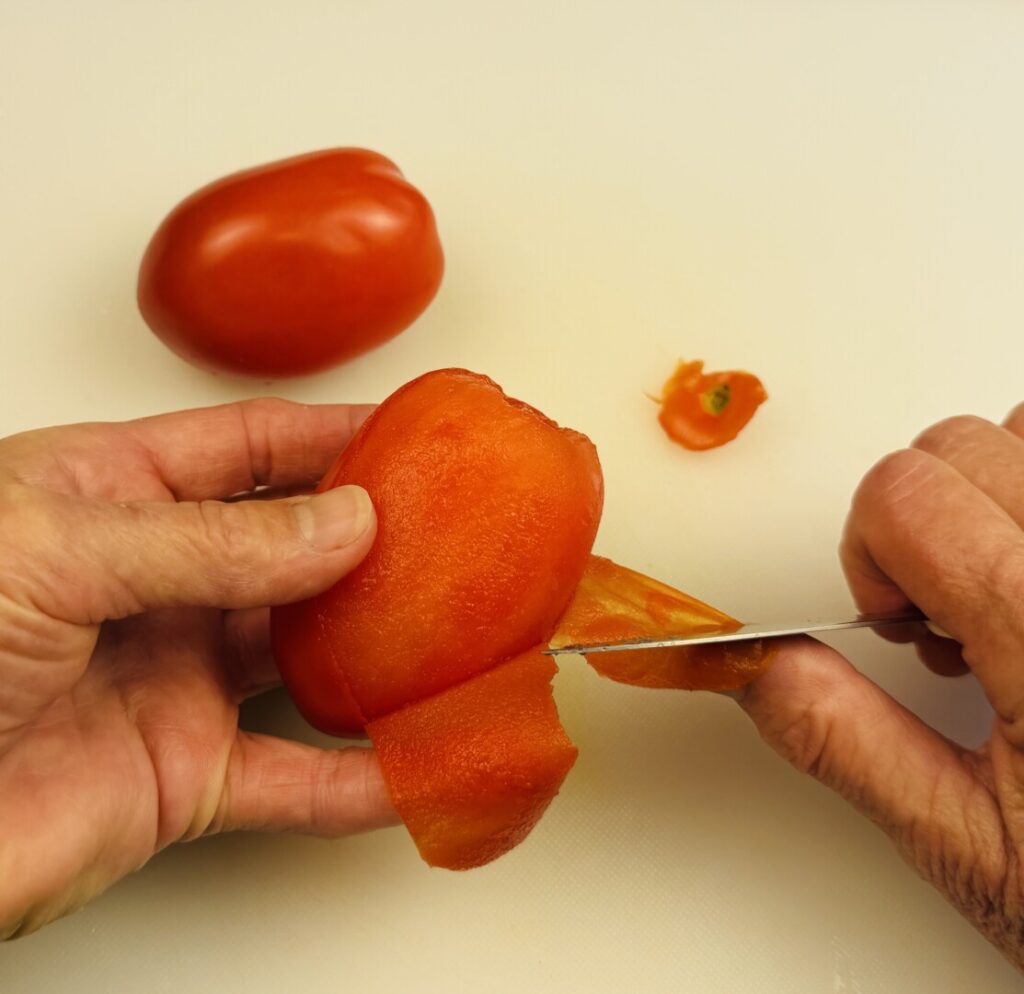
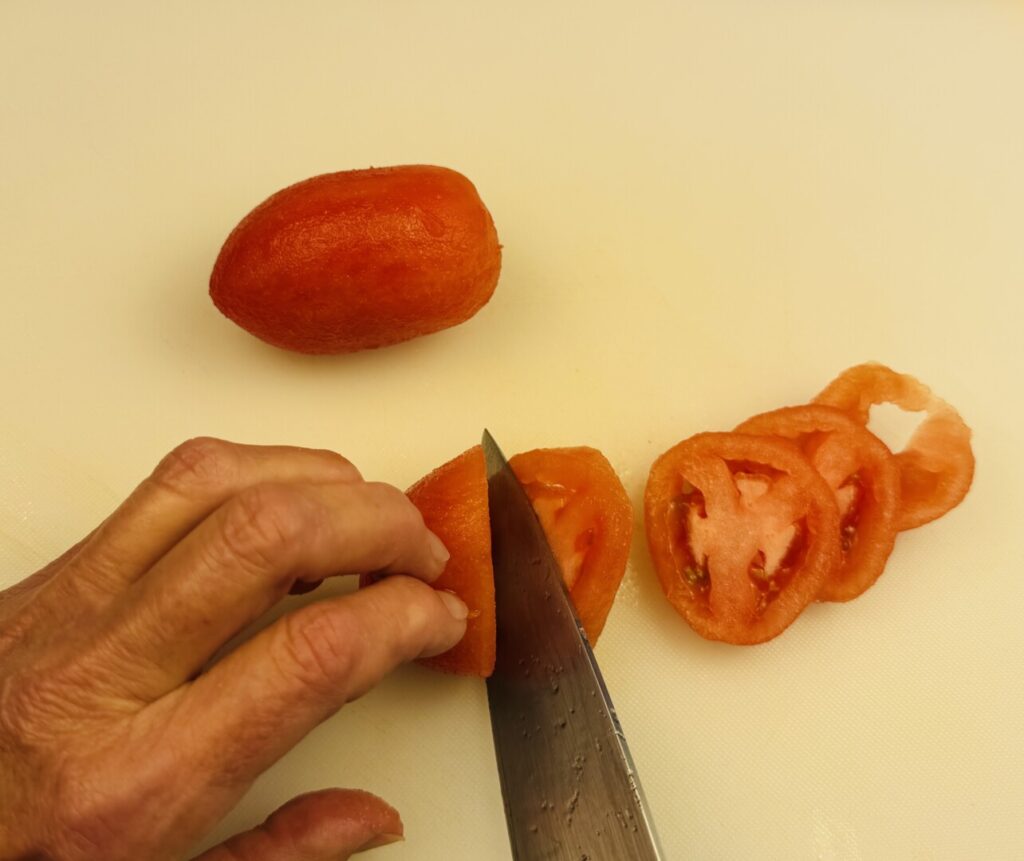
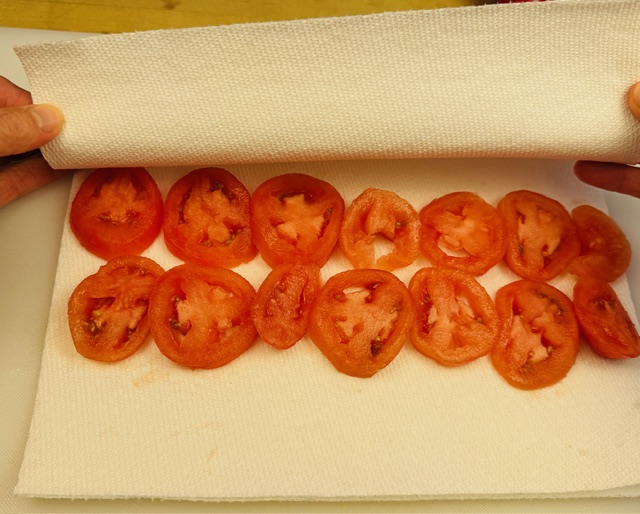
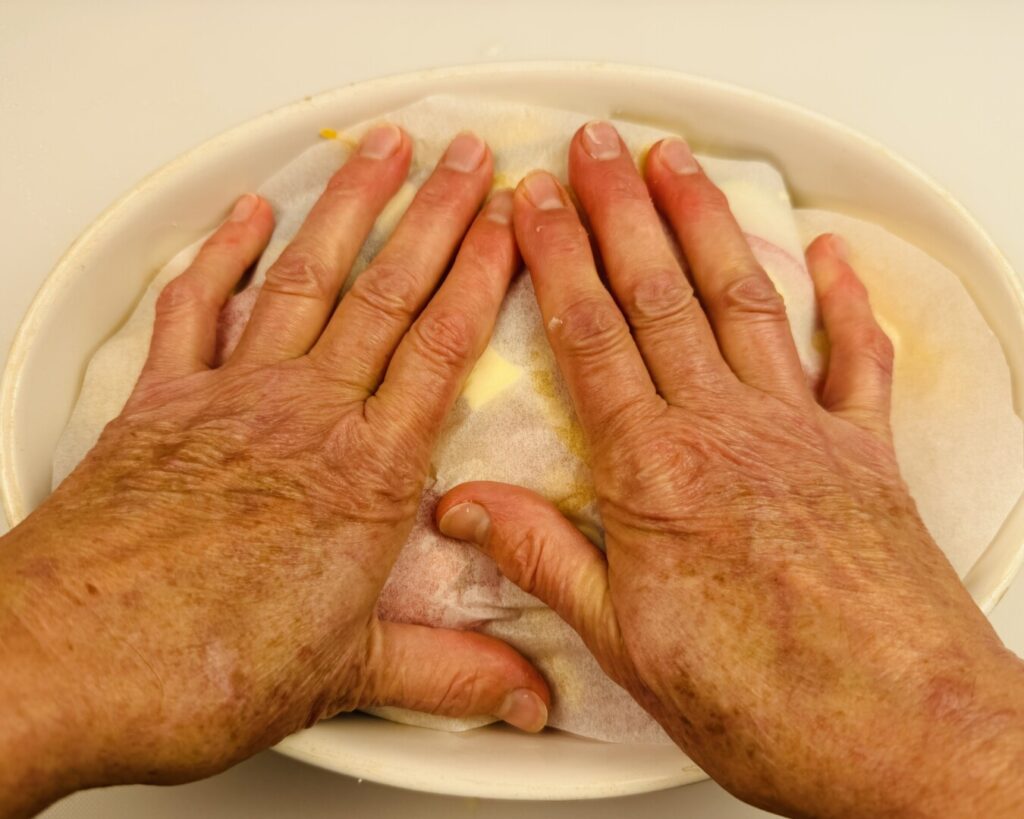
Your next prep task is to fabricate the vegetables for the gratin. Start with the plum tomatoes: blanch, refresh, core, peel, and slice. Blotting the tomato slices on paper towels removes excess moisture that can result in a watery gratin.
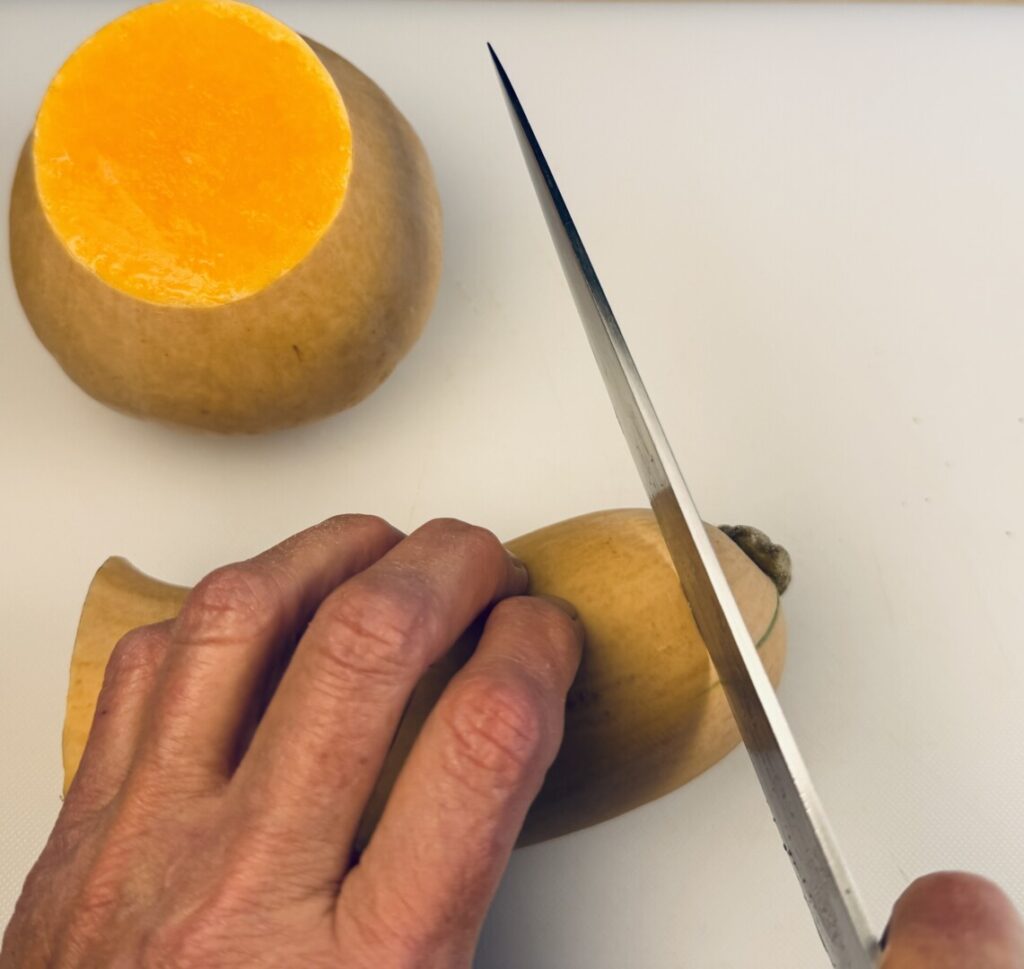
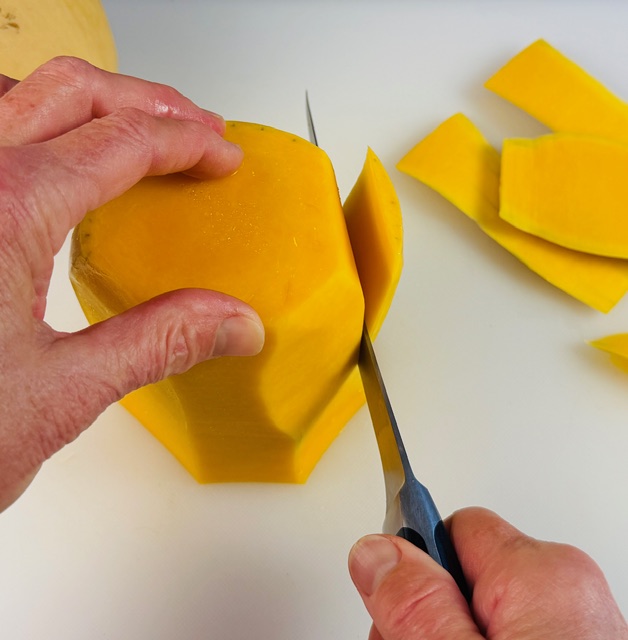
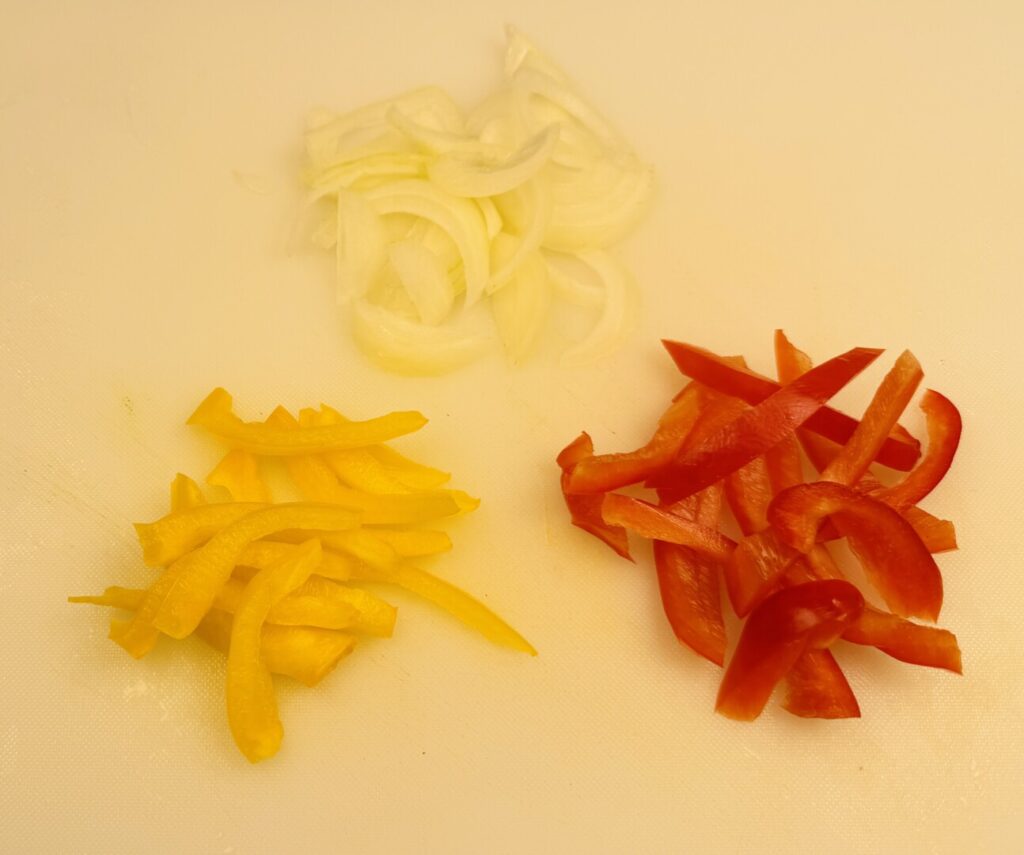
For your gratin, the best part of the butternut squash is the solid neck. Separate it from the hollow, bulbous bottom section; slice off the hard outer skin, and then slice the flesh into thin disks. (You’ll have the remaining squash to use in another dish. For more in-depth instruction on fabricating butternut squash, refer to this post: https://prepholdcook.com/recipes/late-fall/autumn-rigatoni-with-butternut-squash-tuscan-kale-and-pan-seared-duck-breast/.) Because it’s softer and cooks more quickly than the butternut squash, cut the zucchini into thicker slices. Cut the peppers and onions into large, rough juliennes.


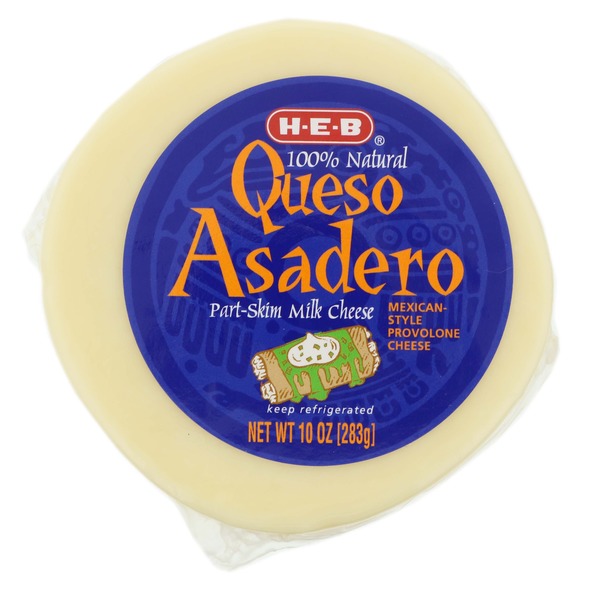
When enhancing a gratin with a cheese topping, you want to provide both great flavor and a sumptuous mouthfeel. For flavor, you’ll use the sharpest white cheddar you can find. To achieve that molten, ooey-gooey, stretchy quality, choose a Mexican asadero, or melting cheese. If your market doesn’t stock an asadero, they likely offer a similar cheese generically called “quesadilla” cheese (often pre-grated). Or, you can use Monterrey jack. To finish your prep, grate the cheeses.
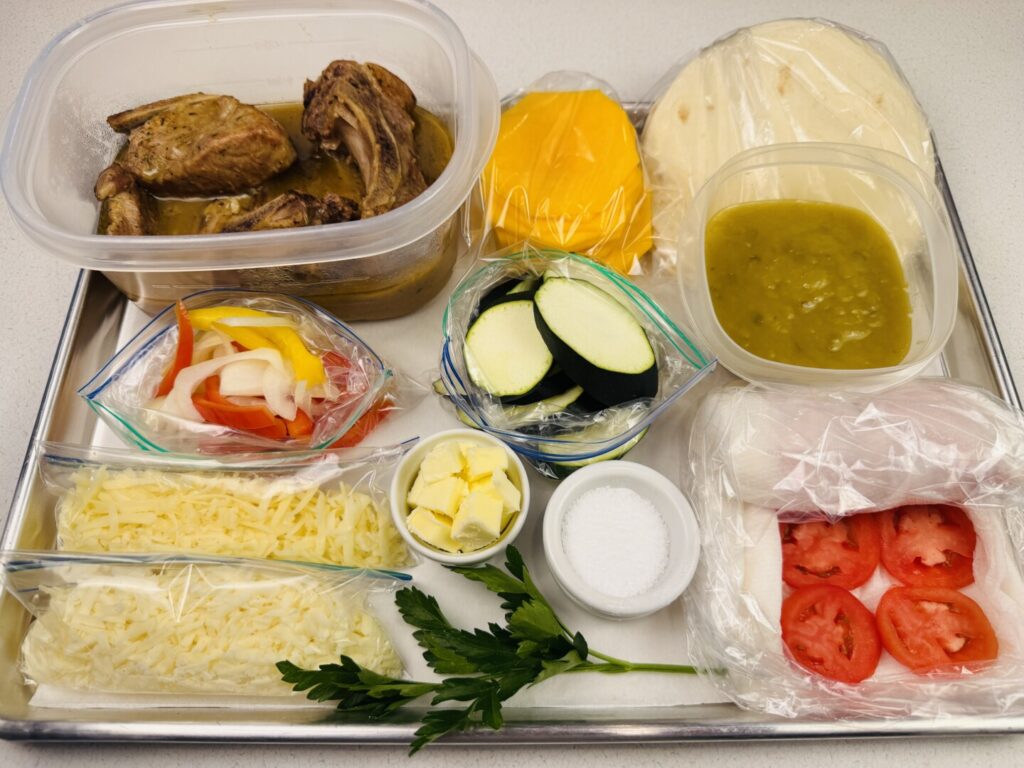
Here’s your mise tray:
It’s dinnertime—let’s COOK!
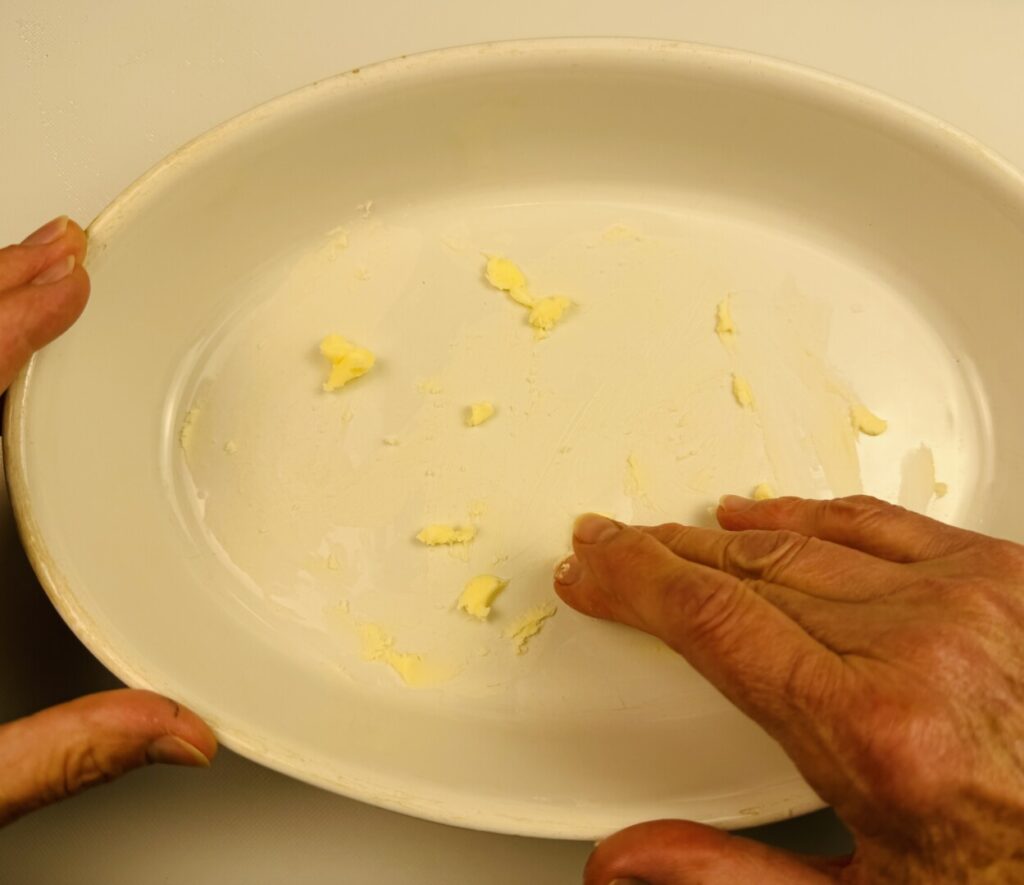
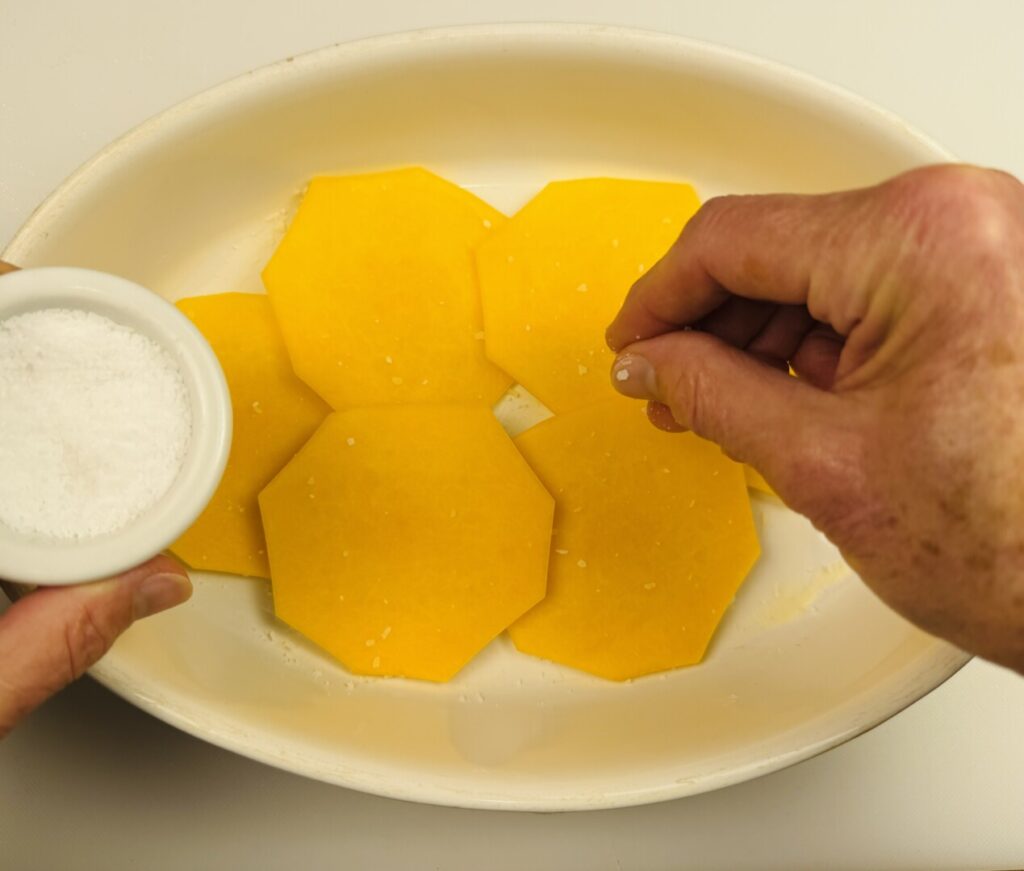
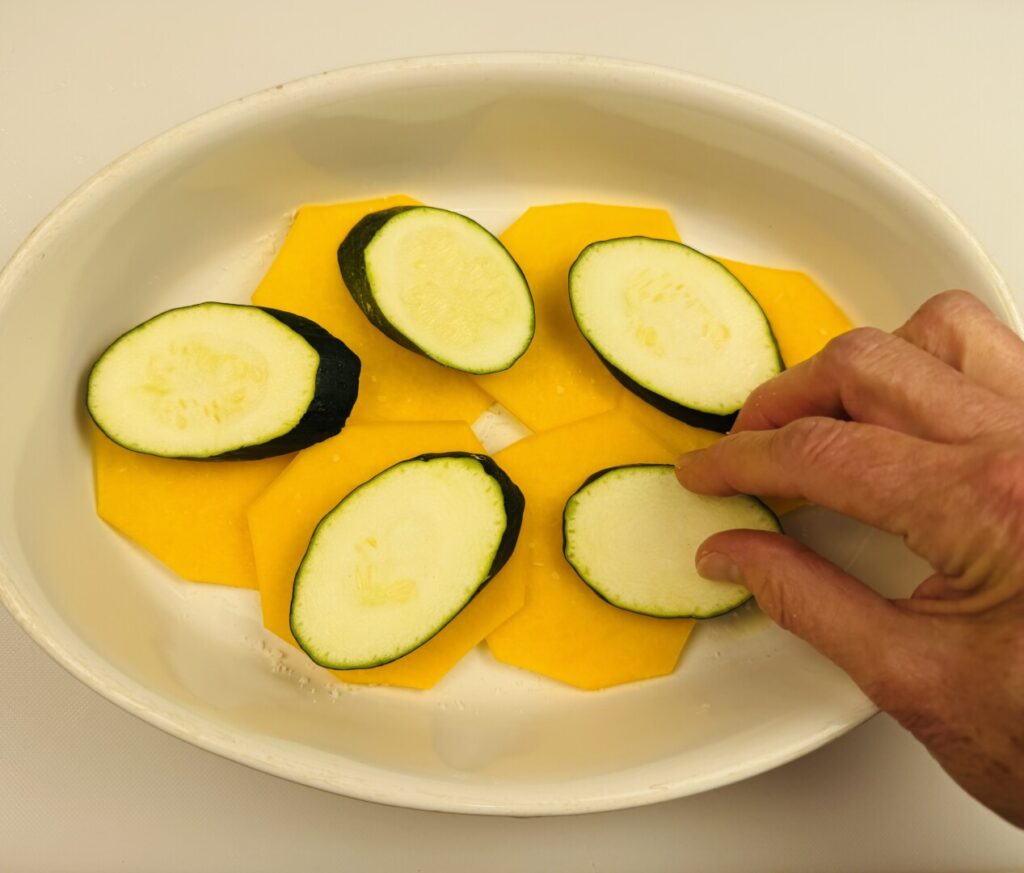
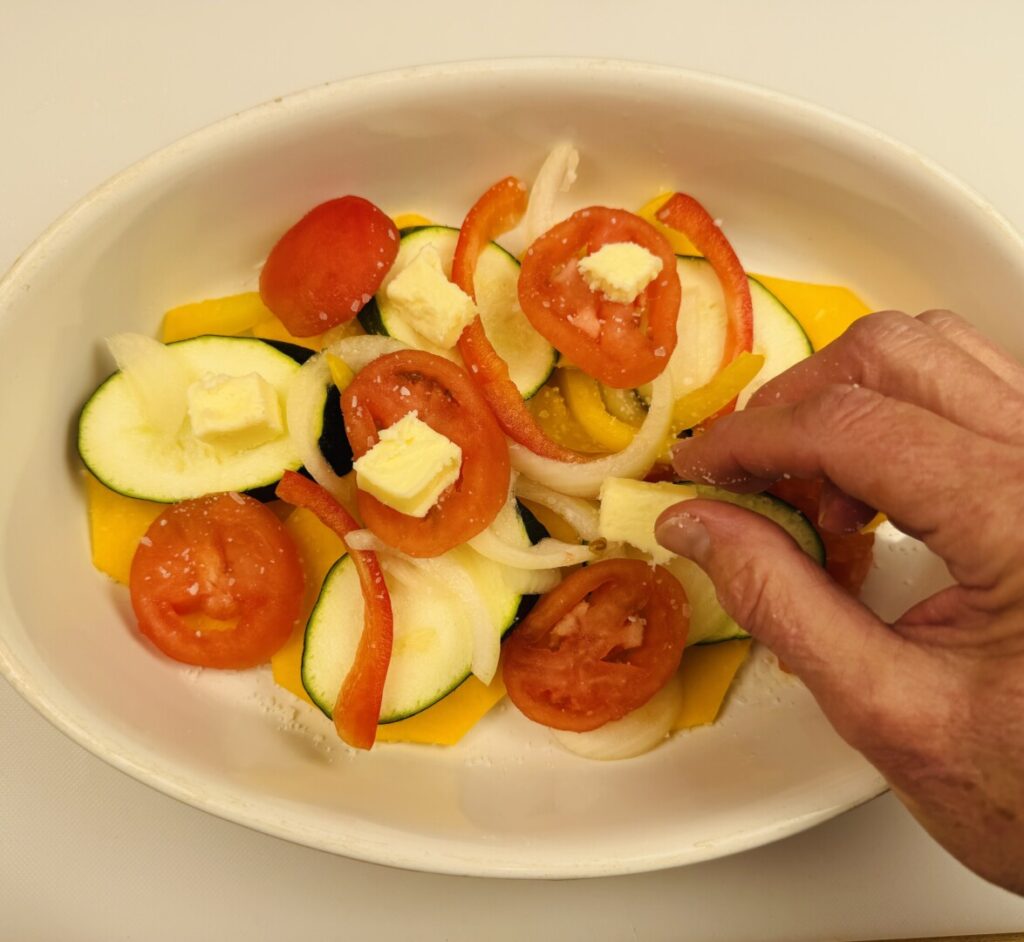
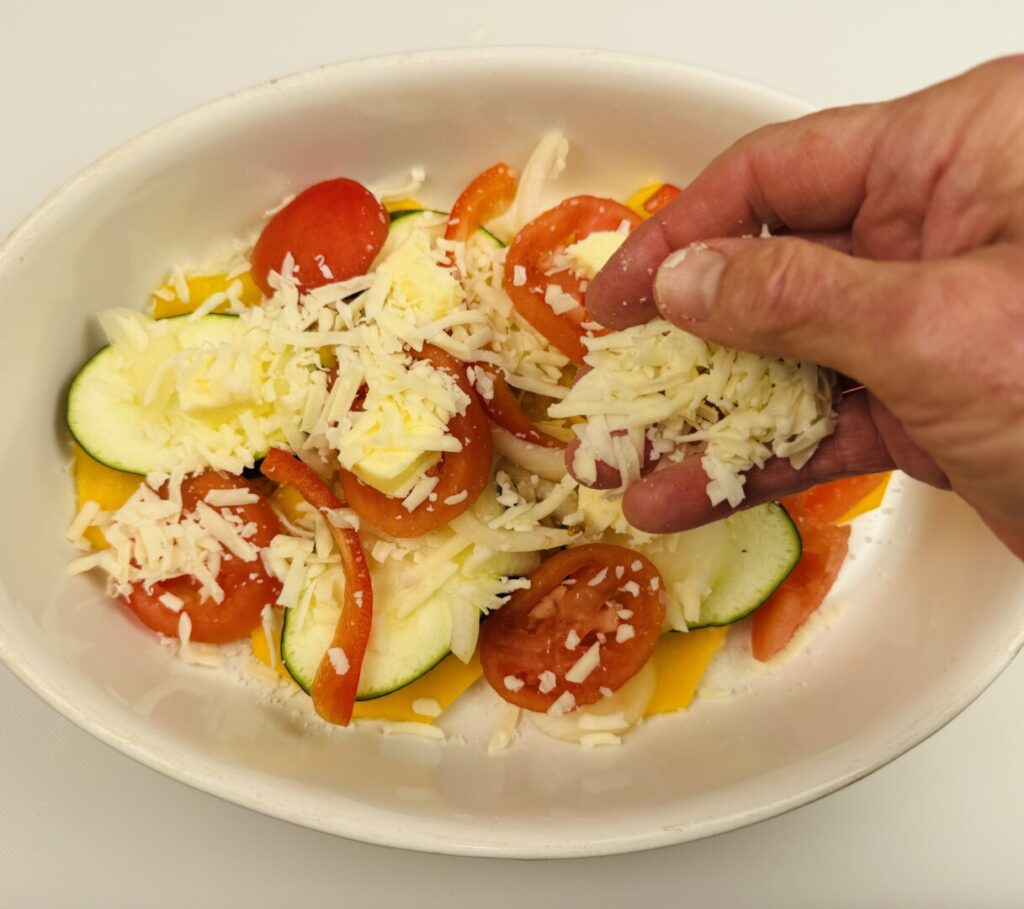
Preheat your oven to 475°F. For this gratin, you want high heat not only to quickly cook the vegetables but, also, to evaporate as much moisture as possible. Arrange a first layer of half the vegetables in a buttered gratin dish, salting them evenly but very sparingly. Dot with butter and sprinkle with half the cheeses
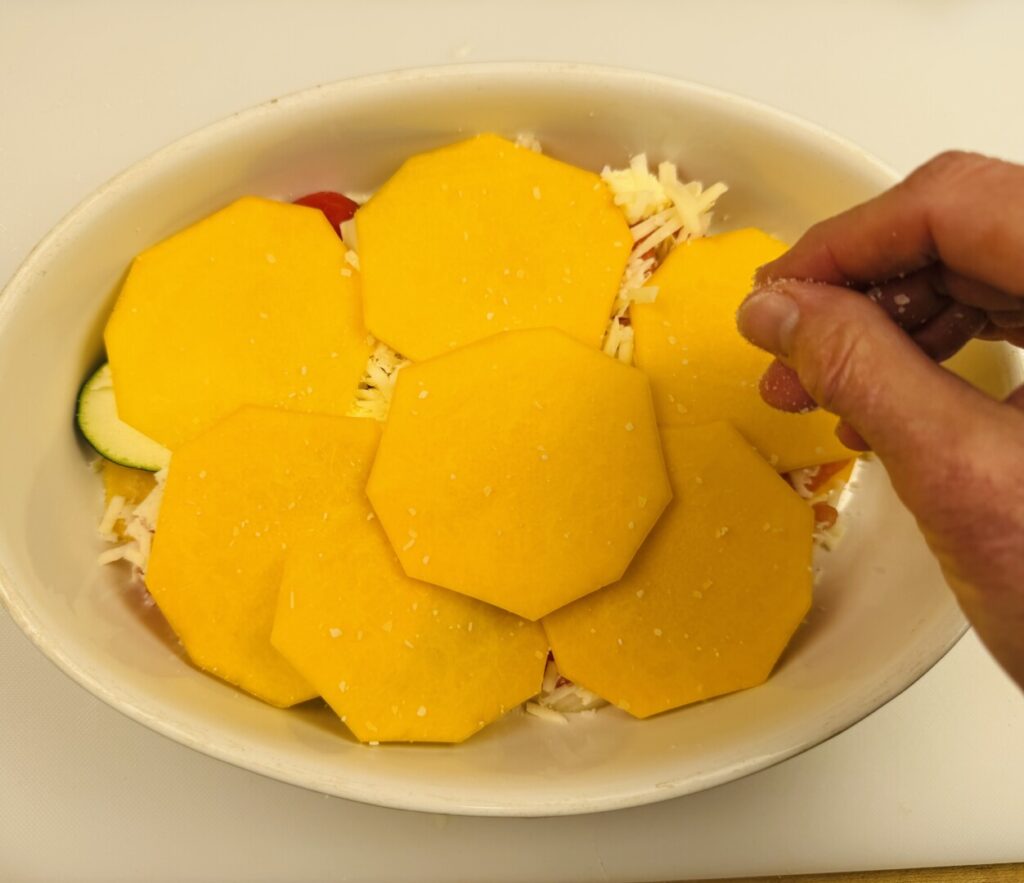
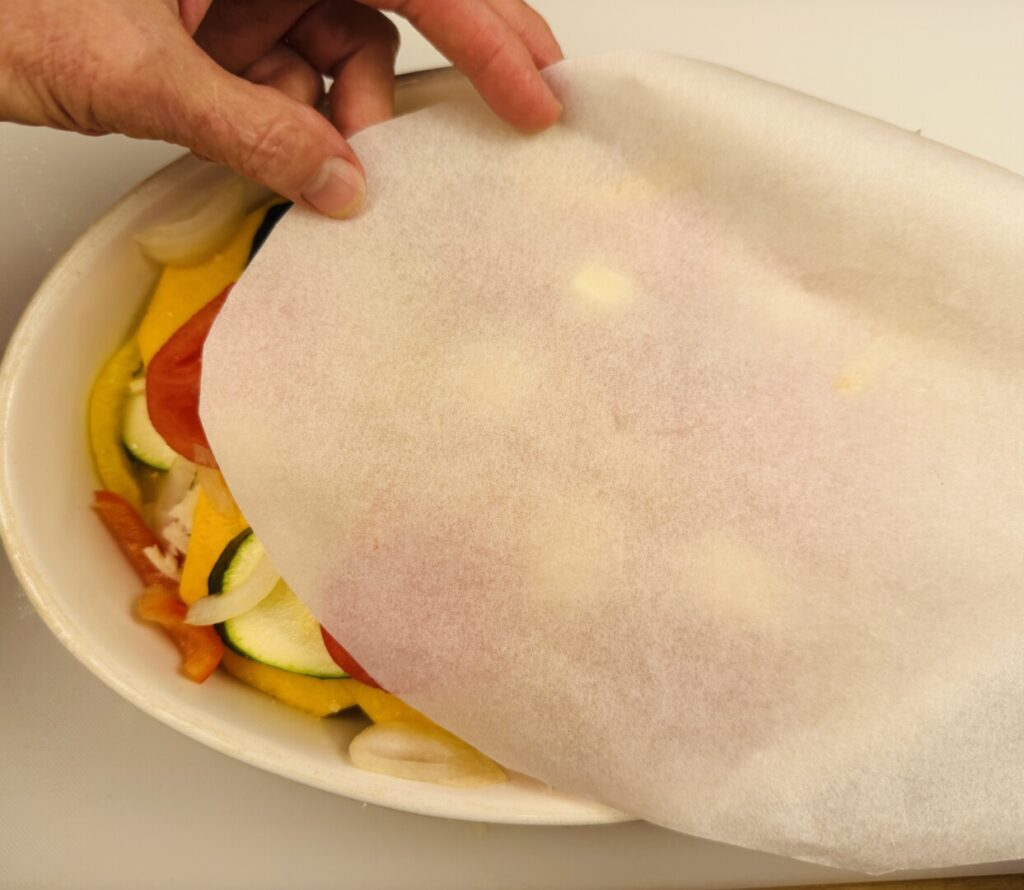
Then repeat with the remaining vegetables, salt, and butter, but don’t add the cheese topping. Cut out a piece of parchment to fit the top of the gratin, and press it down to firm the vegetable layers. Bake for about 20 minutes, until a knife inserted into the vegetable meets no resistance.
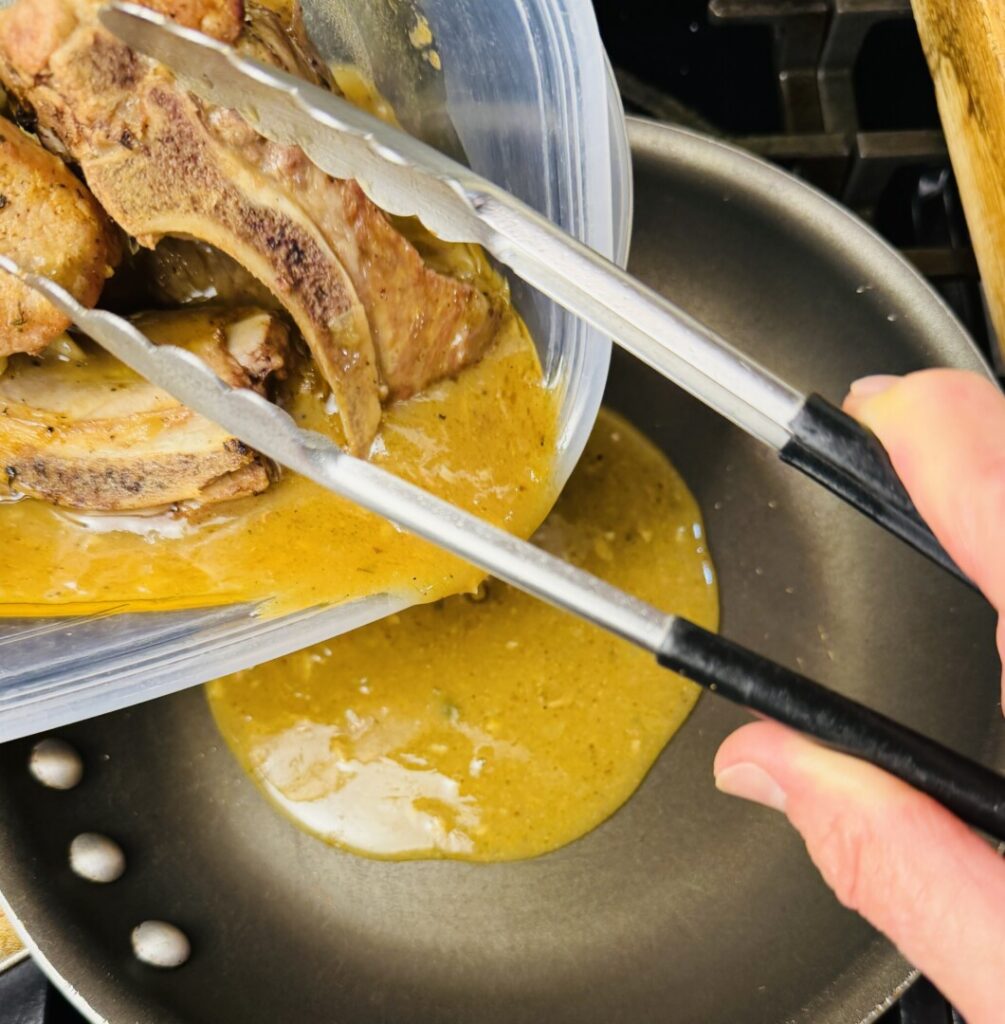
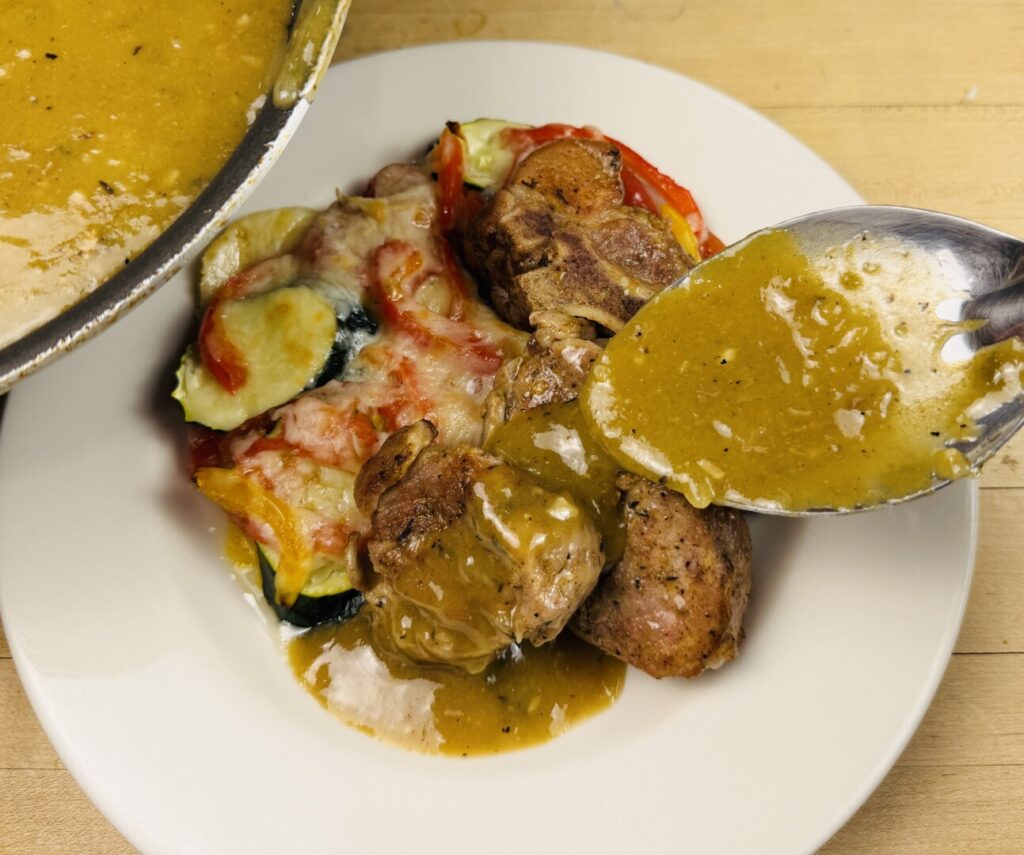
While the gratin is baking, reheat the pork in its sauce. If using a microwave, to ensure that the meat is hot through heat it and then allow it to rest; then heat again. Pour the sauce into a sauté pan and reduce it over high heat, stirring often, until it thickens into your preferred consistency. Consider the thickness of the green chile sauce you’ll be adding: If the chile sauce is pre-thickened, reduce the pork sauce to a medium consistency; If the chile sauce is thin, reduce the pork sauce to a thicker consistency as the chile sauce will thin it.
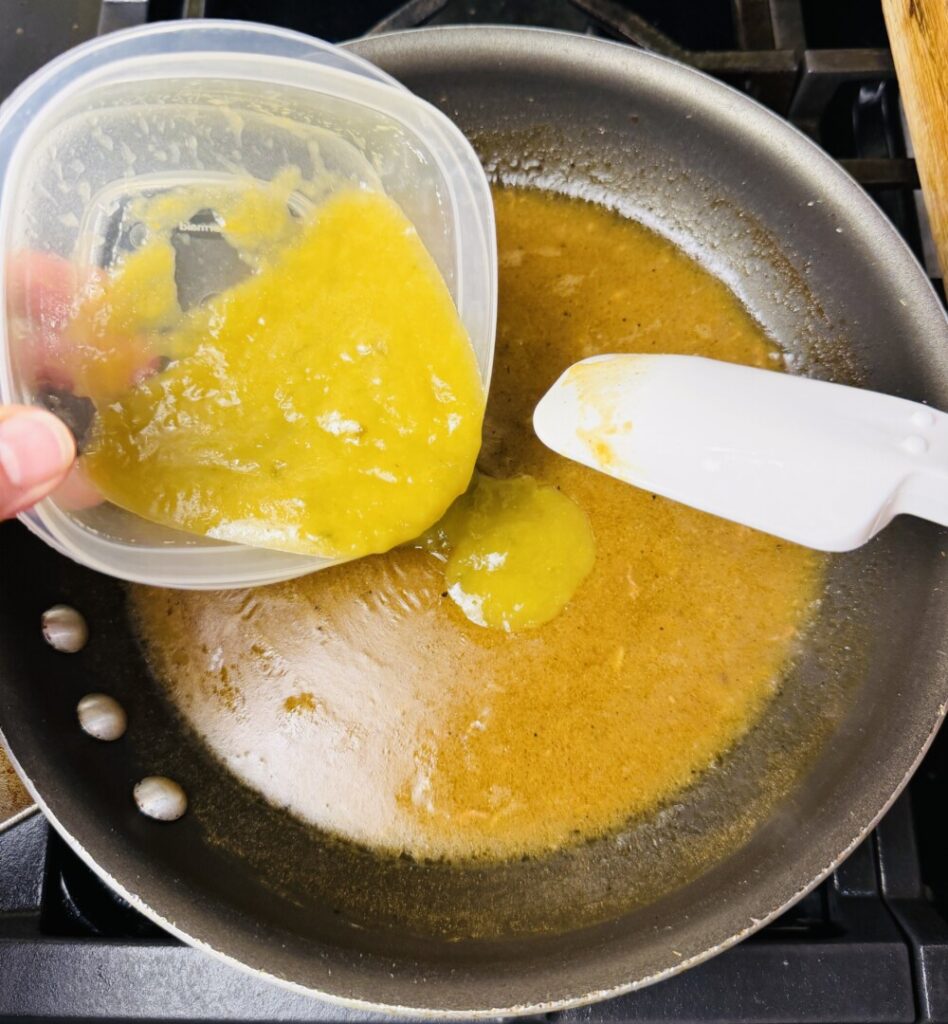
To finish your sauce with an extra kick of flavor and heat, stir in the remaining green chile sauce. Evaluate the flavor and season with salt if needed.
Remove the parchment from the gratin and top it with the remaining cheese. Run the gratin under the broiler (or use a food torch) to melt the cheese and lightly brown it.
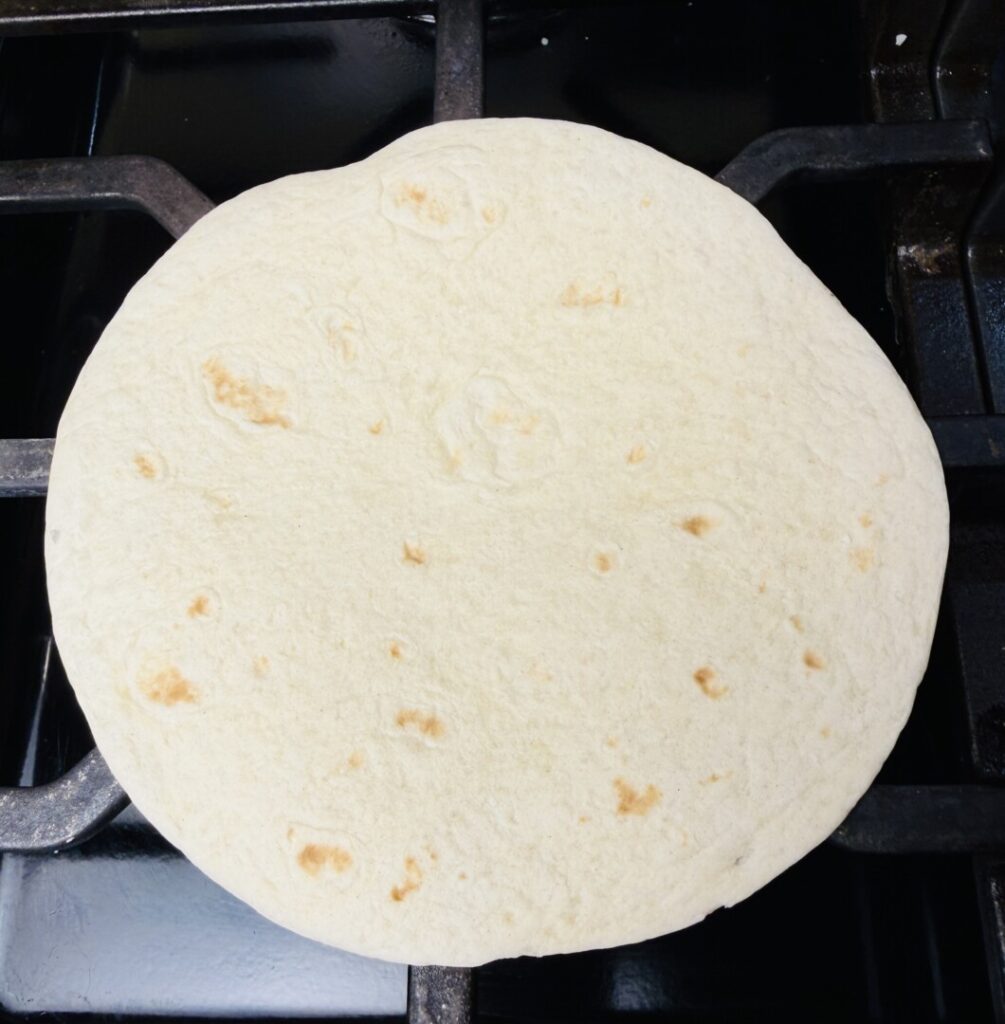
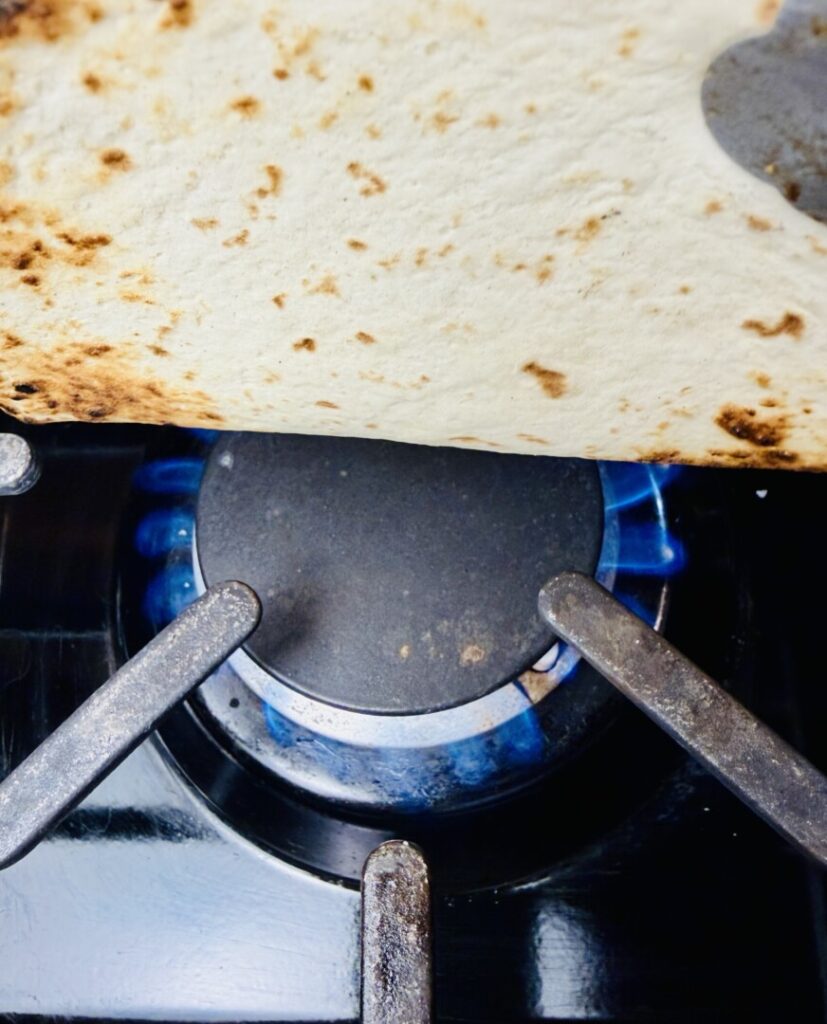
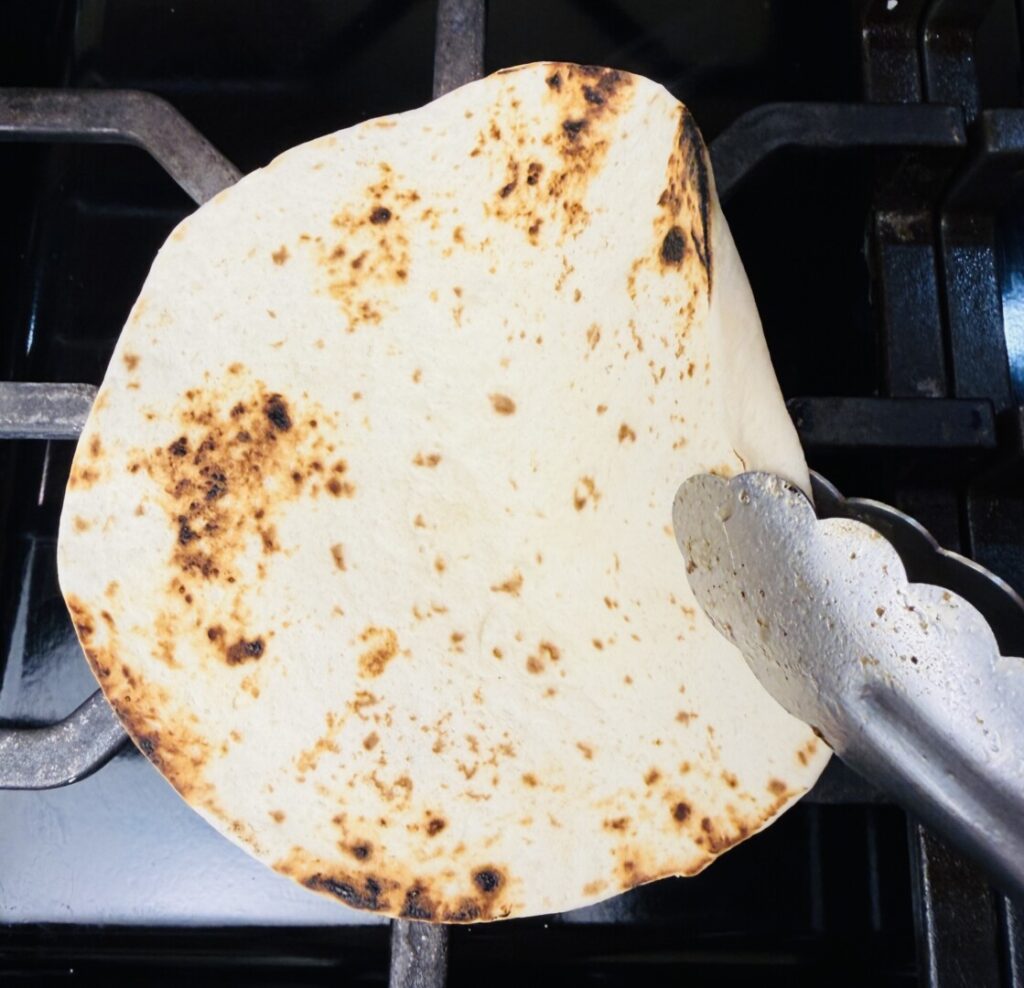
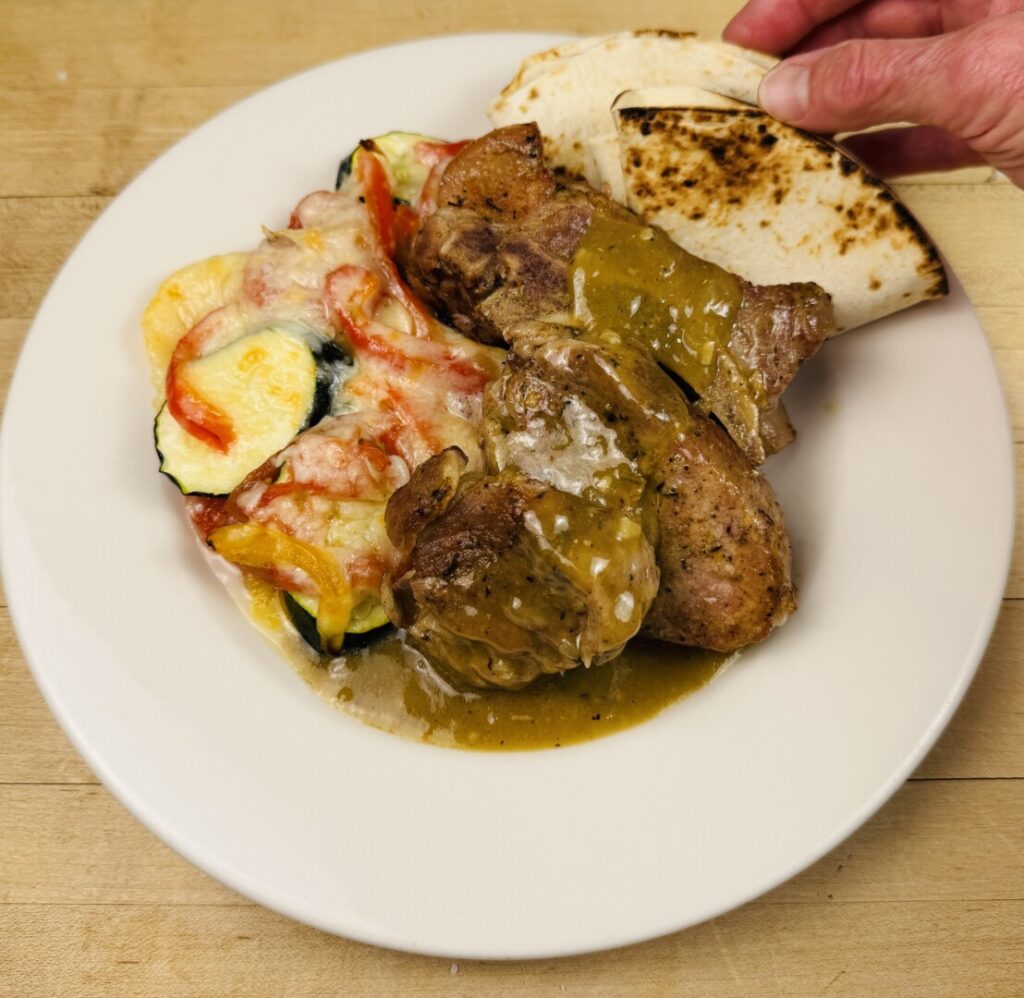
Lightly toast the tortillas directly on the stove top burner grid over a medium flame. Transfer to a napkin-lined basket to stay warm.
Now you’re ready to plate.
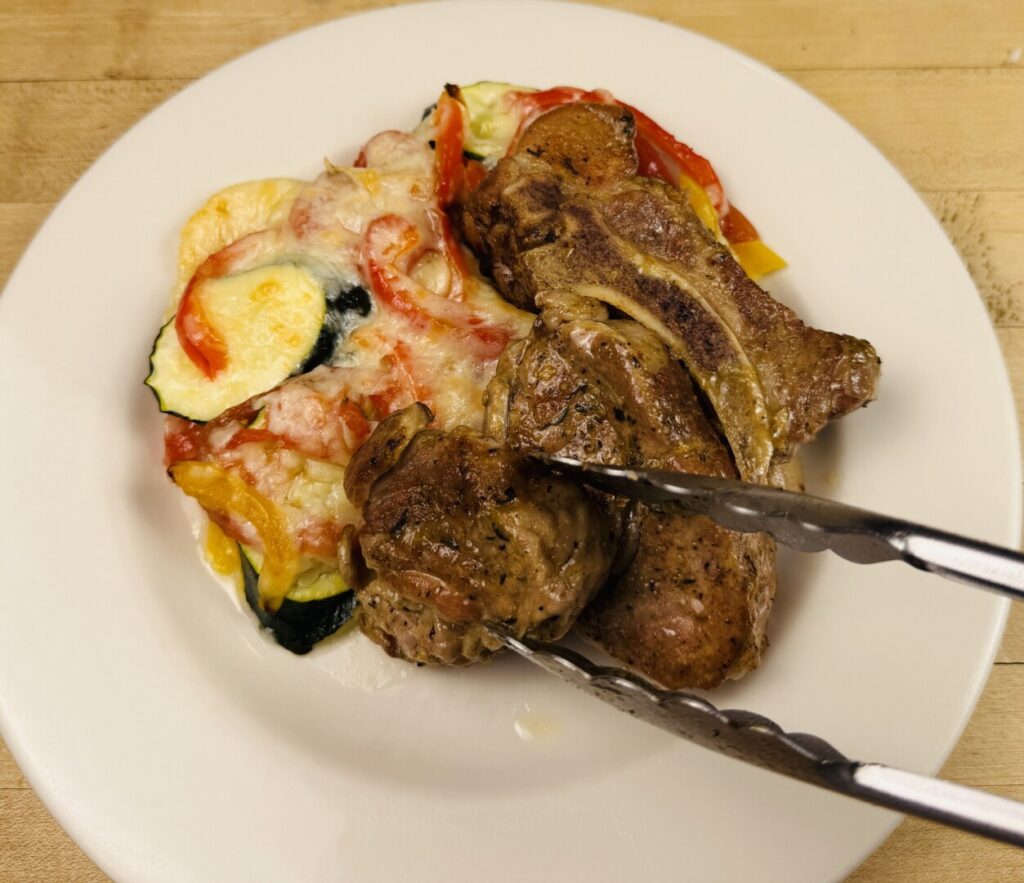
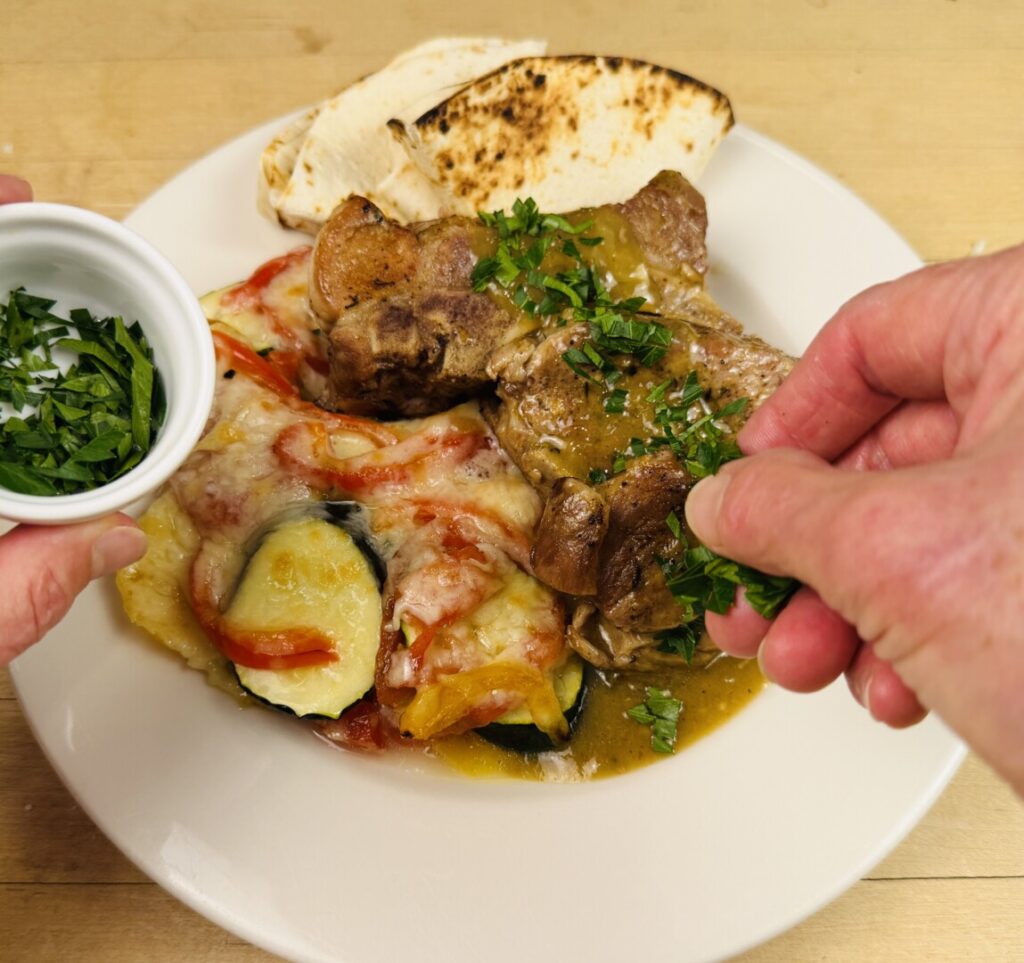
Divide the gratin into equal portions and place one on the back left of each warmed plate. Arrange pieces of pork country spareribs on the front right. Nap the pork with sauce. Fold two tortillas into quarters and tuck them under the pork at the back of the plate. Sprinkle a line of parsley on the pork.
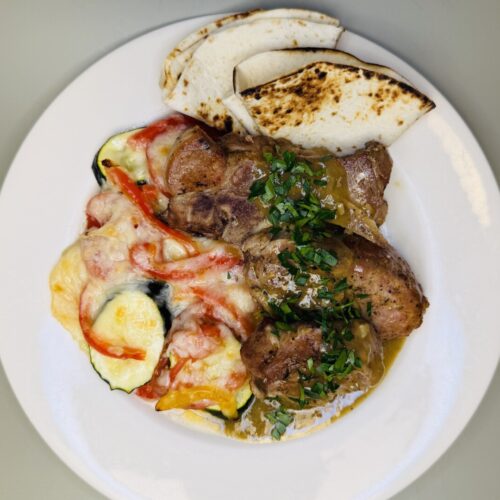
Green Chile Pork Country Spare Ribs with Cheesy Roasted Vegetable Gratin and Toasted Tortillas
Ingredients
step 1 ingredients
- 1/4 tsp granulated onion
- 1/8 tsp granulated garlic
- 1/8 tsp ground dried sage
- 1/8 tsp dried thyme
- 1/8 tsp ground black pepper
- 1/8 tsp smoked paprika or standard paprika
- 1/2 tsp kosher salt
- 2 lb pork country spareribs
step 2 ingredients
- 1/8 yellow onion
- 1 garlic clove
step 3 ingredients
- 2 Tbsp canola oil
- 2 Tbsp flour
- 1 c chicken stock or chicken bone broth
- 1/2 c green chile enchilada sauce, preferably Hatch brand
step 4 ingredients
- 2 Italian plum tomatoes
- 1 7-oz zucchini
- 10 oz intact butternut squash, preferably the neck section
- 1/8 yellow onion
- 1/6 red bell pepper
- 1/6 yellow bell pepper
step 5 ingredients
- 1 oz extra-sharp white cheddar cheese
- 1 oz Mexican asadero or quesadilla melting cheese
step 9 ingredients
- 1 parsley or cilantro sprig
step 10 ingredients
- 1 oz butter
- to taste kosher salt
step 11 ingredients
- 1/2 c green chile enchilada sauce, preferably Hatch brand
step 13 ingredients
- 6 6-inch flour tortillas, preferably a regional artisan brand
Instructions
PREP: Mise the recipe ahead of time.
1. Trim and season the pork:
- To make the seasoning rub, combine the granulated onion, granulated garlic, sage, thyme, pepper, paprika, and salt in a small bowl.
- Wipe the country spareribs dry with paper towels and trim off any thick surface fat. If the spareribs are long, cut them in half widthwise. To help with this, find the articulation place on each sparerib’s bone by bending and/or twisting it until the bones begin to separate; then cut through. (Refer to the photos in the lesson section of this post.)
- Coat all sides of each sparerib piece with seasoning rub, and massage it in. Refrigerate for at least 20 minutes.
2. Fabricate the braising aromatics:
- Fine-chop the step 2 onion.
- Mince the garlic.
3. Braise the pork:
- Preheat an oven to 350°F.
- Place a sauté pan over medium heat and wait for it to get hot. Add the oil, swirl the pan to coat the surface, and then add the spareribs. Sauté them, turning to brown all sides, for about 4 minutes total. Remove the spareribs to an ovenproof casserole.
- There should be about 2 Tbsp fat remaining in the pan; if not, add a little more oil. Add the chopped onion and sauté for about 30 seconds, then stir in the garlic and flour. Stir for a few seconds until smooth, then stir in the chicken stock. Bring to the simmer and cook, stirring occasionally, for about 1 minute until the sauce thickens.
- Stir in the step 3 green chile sauce and bring to the simmer.
- Pour the sauce into the casserole over the spareribs, and cover the casserole.
- Bake for about 30 minutes until the spareribs are cooked through to an internal temperature of 150°F.
- If prepping ahead, uncover the casserole and cool to room temperature.
4. Fabricate the gratin vegetables:
- Bring about 3 c water to the boil in a small saucepan. Lower in the tomatoes and blanch them for about 20 seconds, then place the pan in the sink and pour out the water. Run cold water in the pan for about 1 minute to refresh the tomatoes. Core and peel them, then cut them on a slight diagonal into slices a little less than ¼ inch thick. Lay out the slices on one side of doubled paper towels, fold the towels to encase them, and allow them to drain.
- Trim off the ends of the zucchini and cut it on the diagonal into slices slightly less than ¼ inch thick. (Don’t peel it.)
- Trim and peel the butternut squash and, if using the bulbous end, scrape the seeds and pulp out of its cavity. (Refer to the cooking lesson section of this post for more information about this task.) Slice the squash, preferably into rounds, about ⅛ inch thick.
- Cut the onion and peppers into large juliennes about 1 ½ inch in length.
5. Grate the cheddar and asadero cheeses.
6. Assemble the remaining ingredients.
7. If prepping ahead, store your mise-en-place in containers and/or plastic bags; keep the tomatoes in the towels; bag the peppers and onions together but keep the remaining gratin vegetables separate.
HOLD: refrigerate all ingredients up to 4 days.
COOK! Finish and plate your dinner.
8. Preheat an oven to 475°F.
9. Coarse-chop the parsley or cilantro.
10. Assemble and bake the gratin:
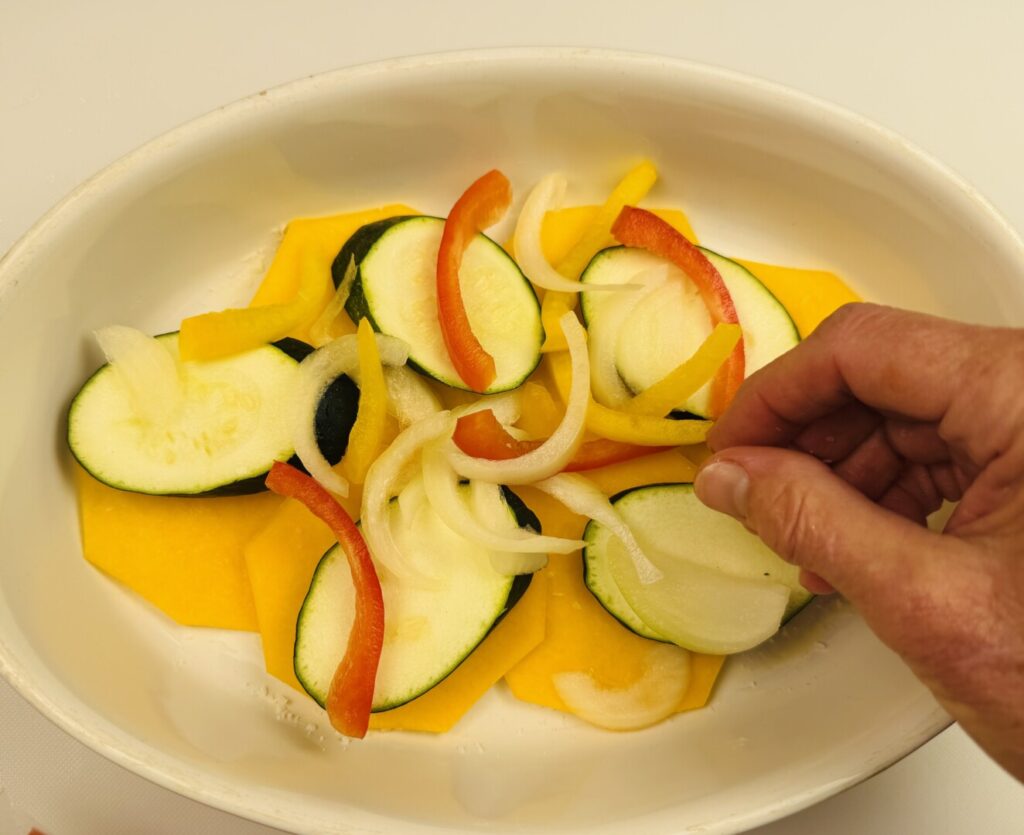
- Rub the bottom of a 10-inch gratin dish or pie pan with a thin coating of butter. Add half of the butternut squash in a single layer and sprinkle it with a very small amount of salt. (Salt very lightly as you proceed.) Add half the zucchini and salt it, then add half the peppers and onions with salt, and finish with half the tomatoes and salt. Dot the top of the first layer with half of the remaining butter and sprinkle with half of the cheeses. Repeat, using the remaining vegetables and butter, but don’t put any cheese on top. Reserve the remaining cheese for later.
- Cut a sheet of parchment to exactly fit the top of the gratin, place it on top of the vegetables, and press firmly to compact them.
- Place the gratin in the oven and bake for 20 minutes until browned at the edges and a knife pierces the vegetable layers with no resistance.
11. Reheat the pork and finish the sauce:
- Heat the pork and sauce in a microwave oven or on the stovetop over medium heat.
- When hot, pour the sauce off into a sauté pan and reduce it over high heat, stirring often, until moderately thick.
- Stir in the step 11 green sauce. Keep the sauce hot, but don’t let it boil or simmer.
- Evaluate the seasoning and, if necessary, add salt.
12. Finish the gratin:
- Change the oven setting to broil.
- Remove the parchment from the gratin and evenly spread the remaining grated cheese on top.
- Place the gratin under the broiler for about 1 minute until the cheese is melted and just beginning to brown.
13. Toast the tortillas:
- Line a basket with a cloth napkin.
- Turn on a stove burner to medium heat.
- Place a tortilla on the burner for 8 to 10 seconds until it softens and begins to acquire brown flecks. Use tongs to turn it over and toast for a few seconds longer. Transfer to the basket and cover with the napkin. Repeat with the remaining tortillas.
14. Plate:
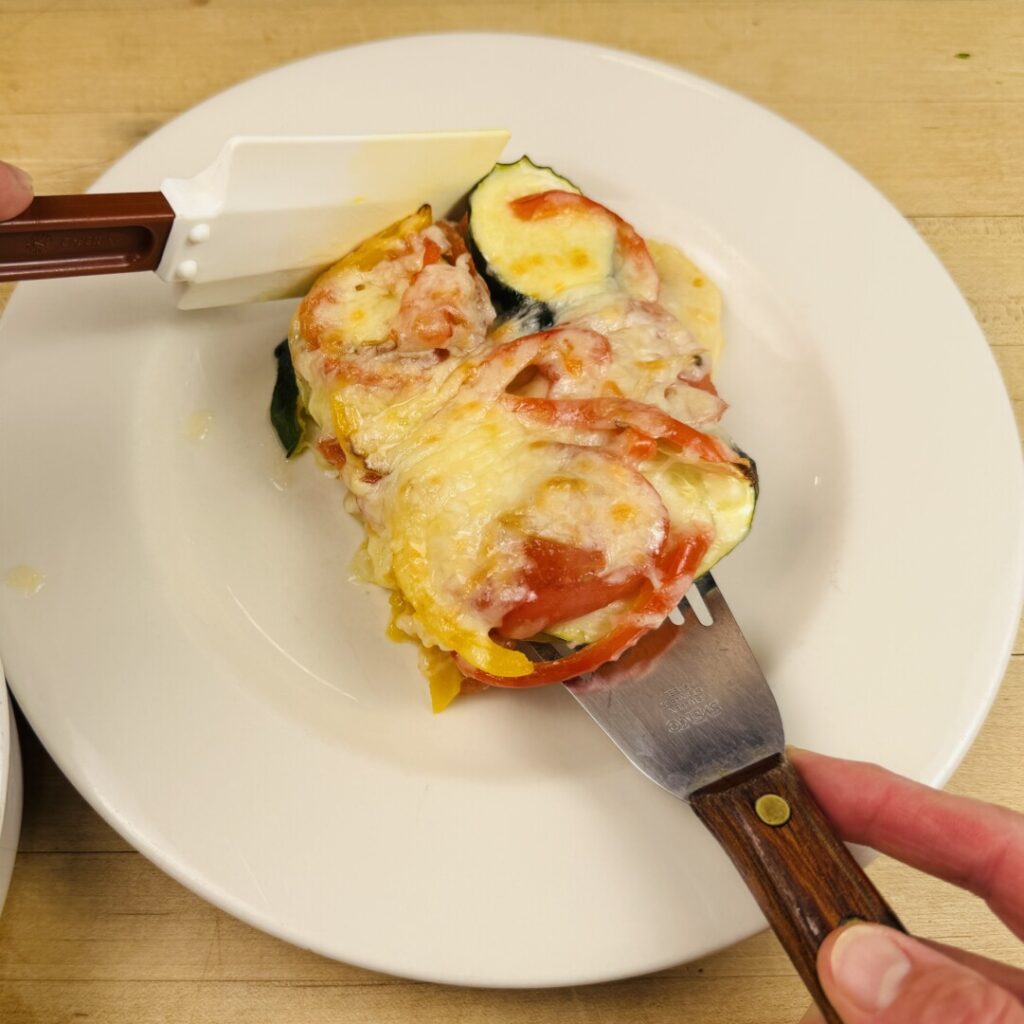
- Use a spatula to lift a portion of the gratin onto the back left of each warmed dinner plate, ensuring that the cheese is on top.
- Place a portion of spare ribs on the right front of each plate and spoon the sauce overtop.
- Fold 2 tortillas into quarters and prop them upright at the back of each plate. Serve the remaining tortillas in the basket.
- Sprinkle a line of parsley or cilantro across the ribs.