


Your Cooking Lesson
Advice, explanation, and in-depth information to help you achieve recipe success.
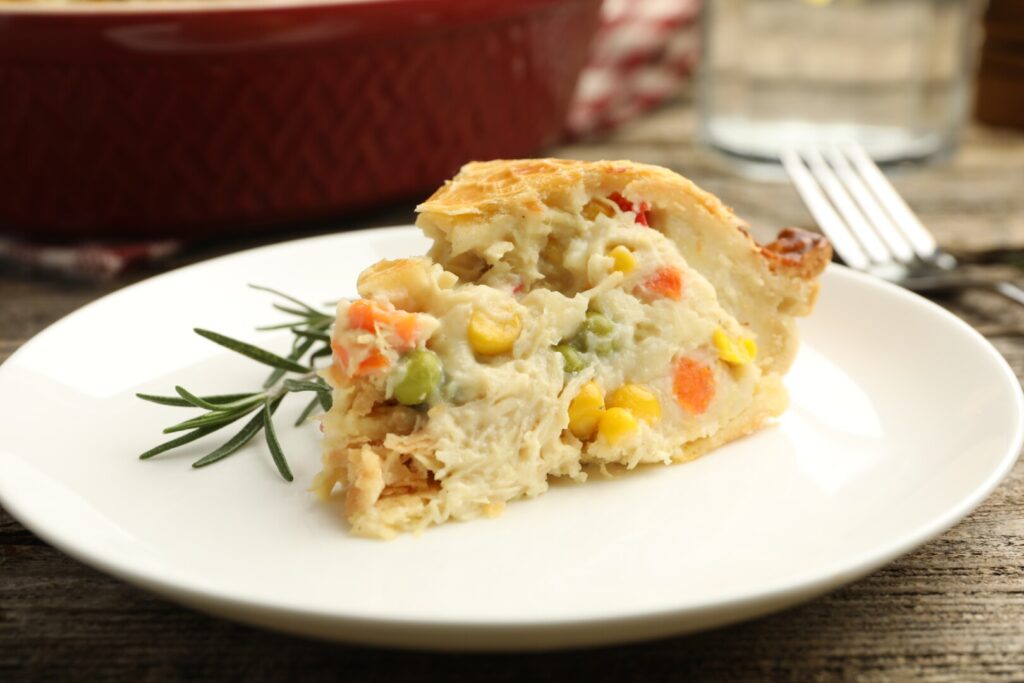
This recipe started out with a craving for traditional chicken pie. Big chunks of moist, tender chicken and colorful springtime vegetables simmered in a rich, thick sauce—then baked in a golden pastry crust—chicken pie represents the best of Americam regional home cooking. But the time and skill required to mix and chill pastry dough, and then roll out a perfect double crust, makes traditional chicken pie seem rather daunting, especially for a weeknight dinner. So, instead, make chicken cobbler!
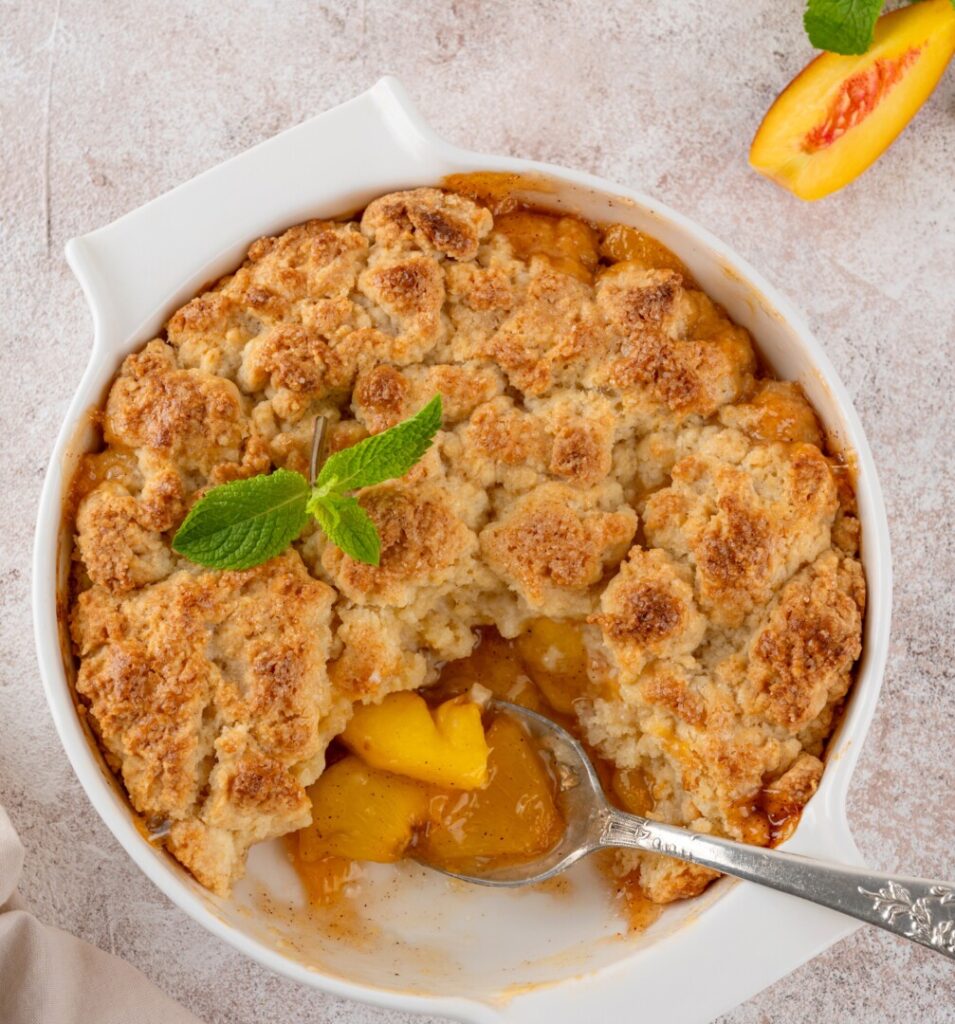
Yes, the name cobbler conjures up images of fruit baked under a crunchy biscuit topping—think apple cobbler and peach cobbler. But these fast and easy desserts were created as shortcut substitutes for traditional pastry crust fruit pies. Mixing a sweet drop-biscuit dough and then scooping it onto a casserole of fruit is far faster and easier. The resulting dish is called “cobbler” because when baked, the scoops of biscuit dough look like the cobblestones on a colonial street.
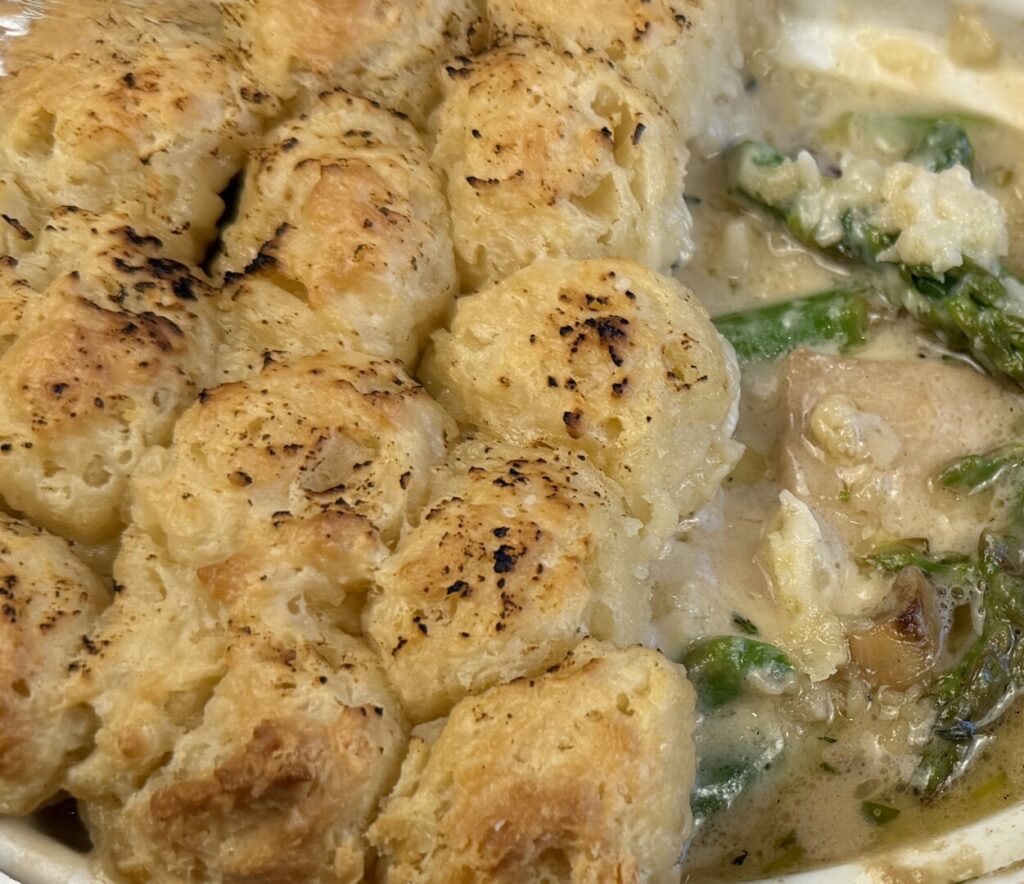
The same idea can be applied to savory pies, as well. Put your savory chicken filling in a casserole dish, top it with scoops of our easy no-roll biscuit dough, and then bake the whole thing golden brown.
There are several advantages to making a chicken cobbler rather than a chicken pie. First, there’s no bottom crust to get soggy. Second, a casserole dish can accommodate much more sauce than a bottom crust, so there’s no chance your cobbler filling will be dry. Finally, if you mise the ingredients ahead of time, you can mix the dough in less than a minute—and scoop the dough “cobbles” onto the casserole just as quickly.
Let’s learn a little about some of the ingredients, and about an important prep concept:
Jumbo Chicken Breast
As you likely know, chicken breast is a tender poultry cut that cooks very quickly and that, when overcooked, can be dry and tasteless. Because your chicken cobbler needs to bake long enough to achieve a golden-brown crust, your chicken cubes must be quite large to survive half an hour in the oven without becoming overcooked. To enable cutting the large, 1 1/2-inch chicken breast cubes required for this recipe, you need to purchase “jumbo” boneless, skinless chicken breasts, each weighing at least 14 oz.
Large chicken breasts traditionally are fabricated from roaster chickens (birds around 8 months of age when harvested). Today, poultry breeders have developed fryer chickens that grow exceptionally large breasts at a younger age. Packaging rarely informs consumers which type chicken they are buying. Usually you can discern the difference only after cooking and eating: Roaster breasts typically have a firmer texture and more flavor than jumbo fryer breasts.

Mushrooms
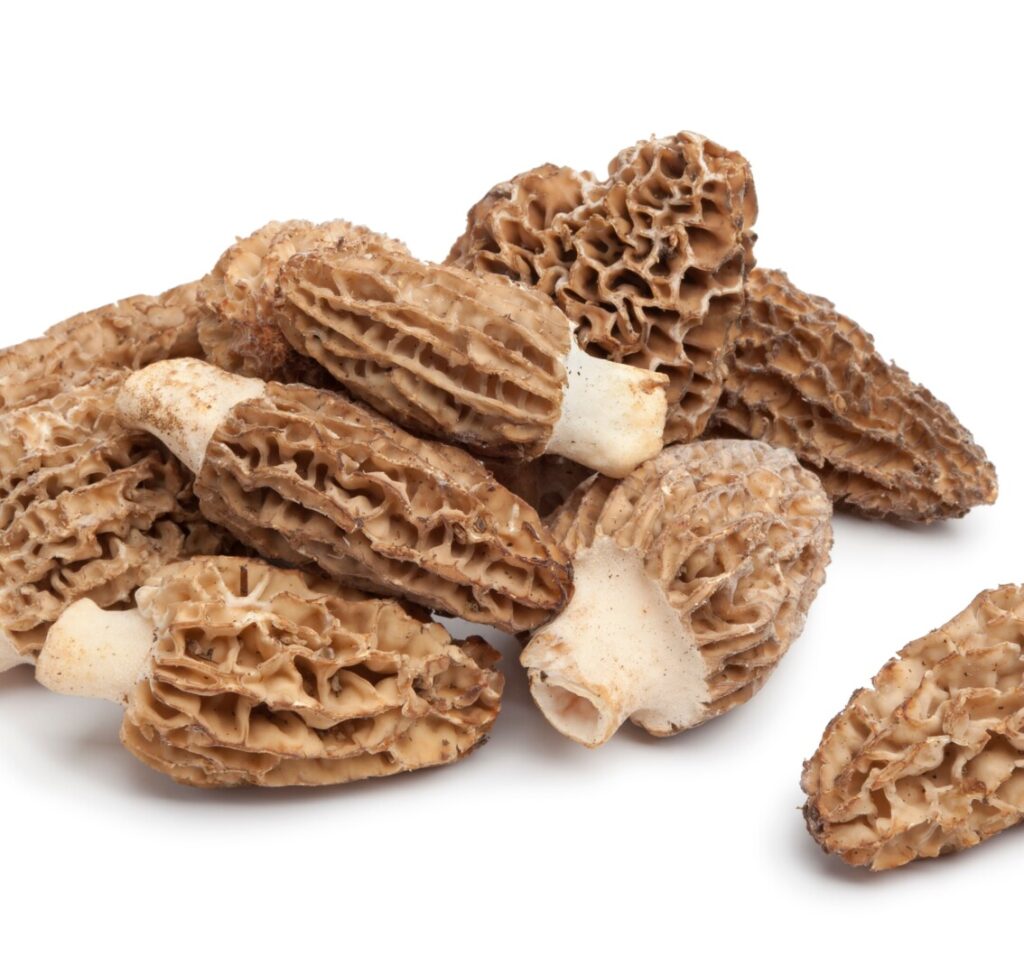
To make this recipe truly seasonal, we’d make it with morels, the iconic wild mushrooms of early spring. Here in the Mid-Atlantic, morel season runs roughly from tax day until Mother’s Day—depending on the weather. They are found in woodland areas, typically under elm, apple, ash, and tulip poplar trees (although I once found hundreds in a pine grove). Morels have a distinctive, deep, rich, umami flavor and irresistible aroma that intensifies with high-heat searing and thorough cooking. Both rare and highly perishable, morels are very expensive to buy. For food safety, never eat foraged wild mushrooms that have not been approved by a trained mycologist, and be sure that they are fully cooked before eating them.
If you—like me at the moment—don’t have access to morels, the good news is that domestic mushrooms purchased from a supermarket make a delicious dish, as well!
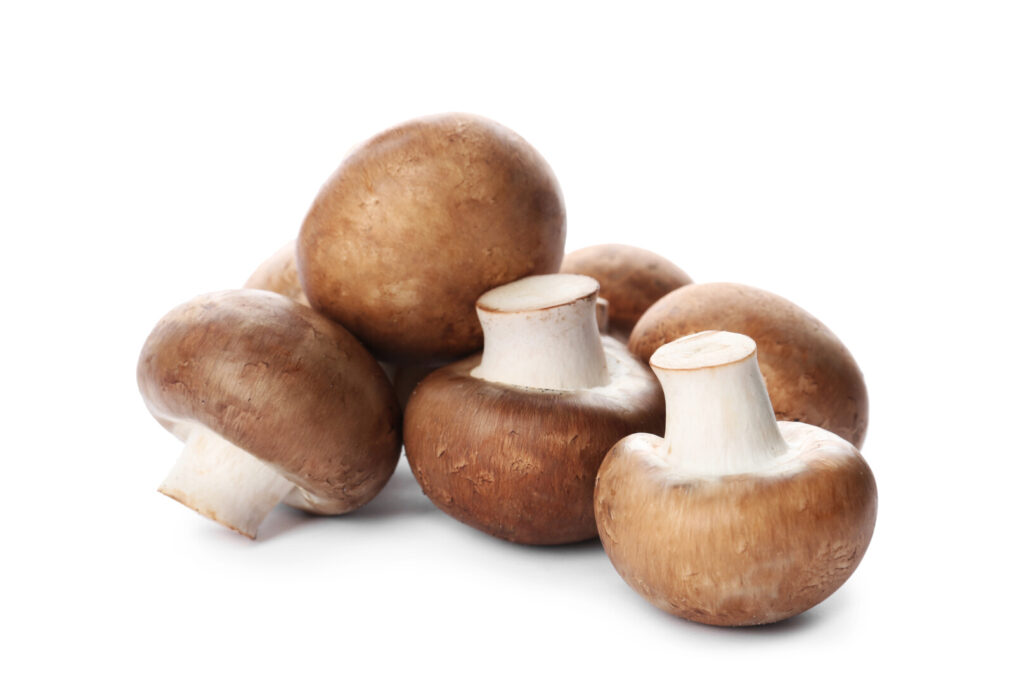
The botanic name for standard domestic mushrooms is Agaricus bisporus. These mushrooms are sold in three market forms based on maturity: white button, brown cremini (aka baby bella), and brown portobello.
- White button mushrooms are the immature form, picked soon after they emerge from the growing medium. Their cap size ranges from 1/2-inch to 2 inches in diameter. When fresh, their caps are closed with no visible gills. They have thin and tender, pale ivory skins and tender flesh. Their flavor is delicate.
- Cremini mushrooms have thicker, brown-color skins and firm flesh, with closed cap sizes ranging from 1 to 2 1/2 inches in diameter. Creminis are full-flavored, with a chewy texture.
- Portobello mushrooms are the most mature of the domestic mushrooms, ranging in cap size from 4 to 6 inches. Their brown-skinned caps are fully open, revealing dark-brown gills. (My personal preference is to scrape out and discard portobello gills that, in my opinion, have a spongy texture and contribute a murky color to sauces.)
Cremini mushrooms are recommended for this recipe, but you can use any type of domestic mushroom to good effect.
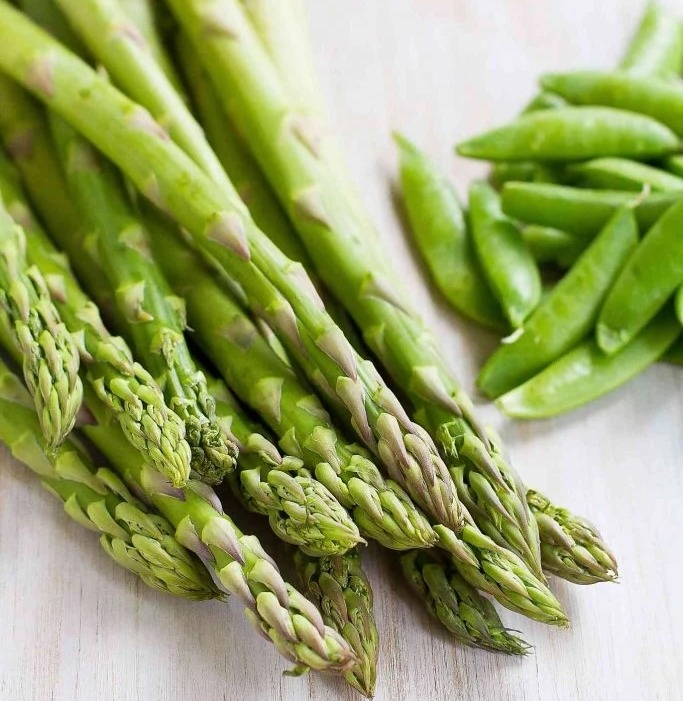
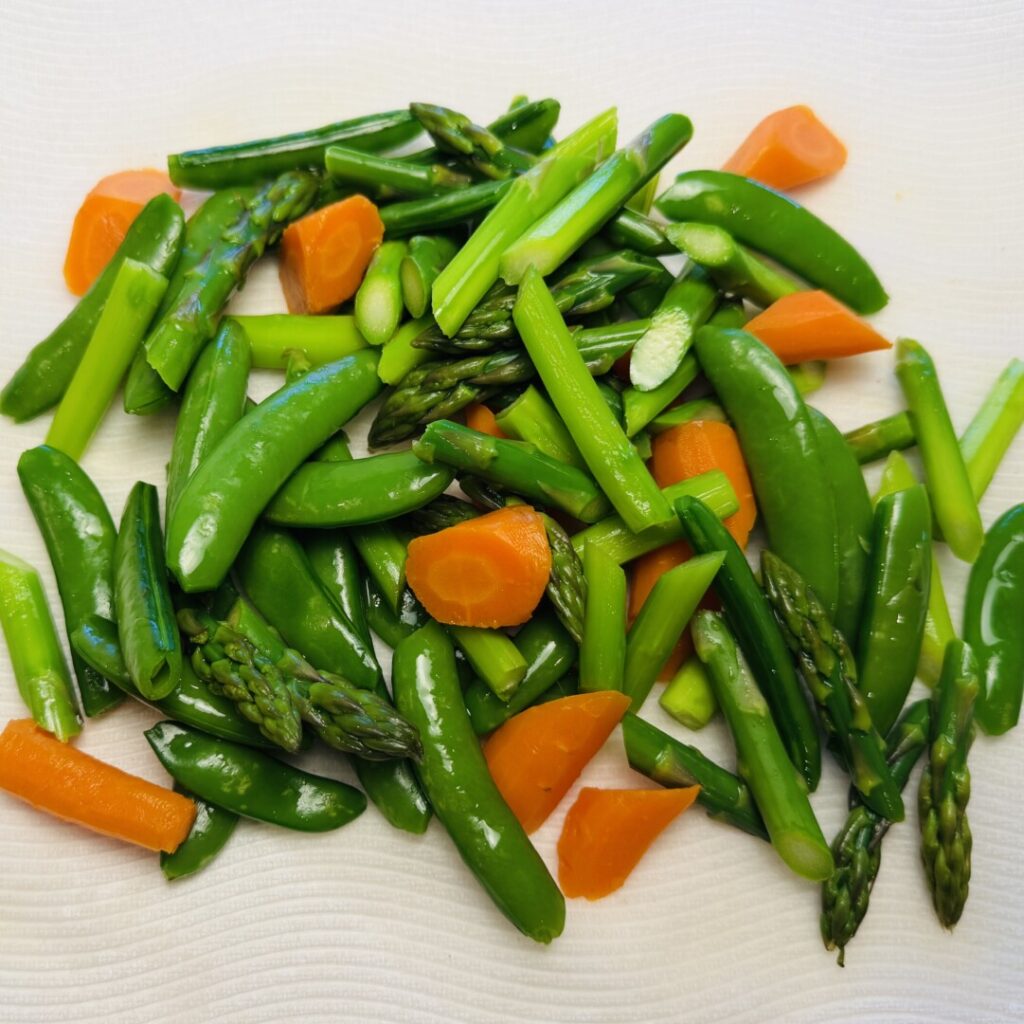
Spring Vegetables
Snap peas, asparagus, and young carrots are vegetables featured in this recipe and many others in the early spring repertoire.
For background information about snap peas and asparagus, refer to the lesson section of the Orecchiette with Lamb and Spring Vegetables recipe post: https://prepholdcook.com/recipes/early-spring/orecchiette-with-lamb-and-spring-vegetables/
Young carrots are harvested when they’re slightly immature, characterized by their slender shape and more tender texture. They’re sold soon after picking, with their green tops intact to demonstrate their freshness. You can use older, storage carrots for this recipe, as well, but likely you’ll need to increase the blanching time.
Understanding Par-Cooking
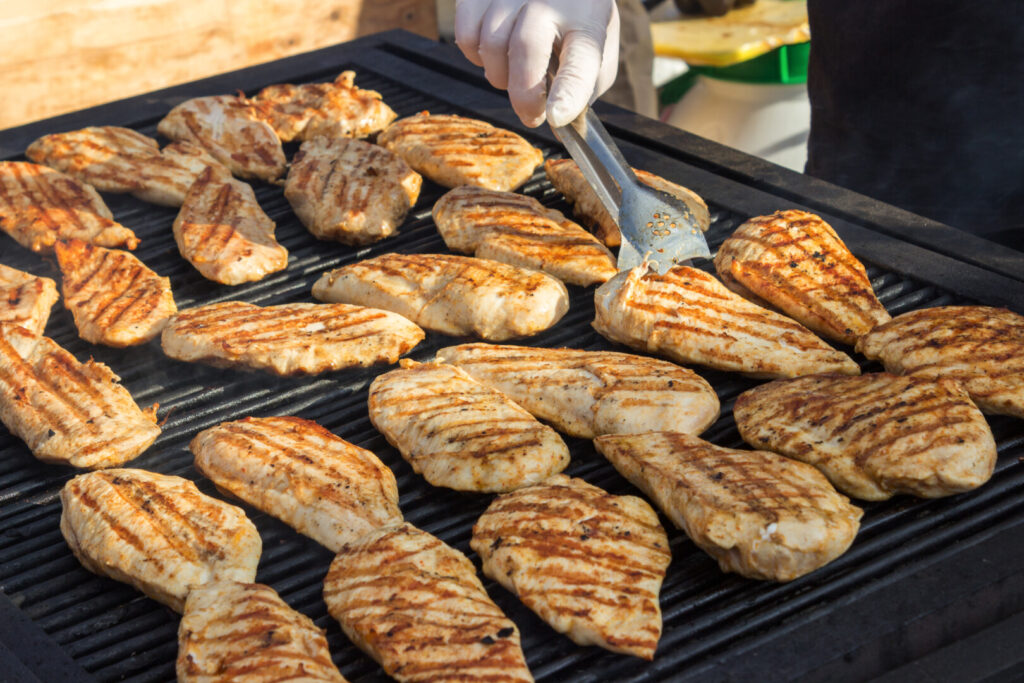
Making this recipe is a great lesson in par-cooking, one of the professional chef’s best-kept secrets. The “par” in par-cooking stands for “partial.” Par-cooking is an important element of prep, especially when getting ready for a high-volume event such as a large banquet or buffet. For example, to make grilled chicken breasts for a crowd, a chef would “mark off” the breasts on a grill as part of prep (leaving them raw inside), refrigerate them, and then at serving time finish them to the desired doneness in the oven. But par-cooking is not just for professionals. This practice is an integral part of the PrepHoldCook concept, for when you’re just making dinner at home for family and friends.
It’s important to differentiate the professional chef’s definition of prep from the now commonly used term “meal prep,” which refers to completely cooking a dish ahead of time so that it can be reheated and served later. The definition of the culinary term prep is to do as much work ahead of time as possible without sacrificing the ultimate quality of the dish. While some foods (think soups and stews) aren’t harmed by fully pre-cooking and reheating, most other dishes lose quality if “meal prepped”. Par-cooking enables you to do the initial, exterior browning or color-setting first, and then finish the cooking later. Successful par-cooking depends first on understanding the required cooking time for each ingredient, and then determining how to successfully divide that length of time into the par stage and the finishing stage. This ability comes with experience—but working with this recipe (and many other recipes on our site) helps you learn.
For food safety when par-cooking proteins, make sure to refrigerate them immediately or else finish the cooking within one hour’s time.
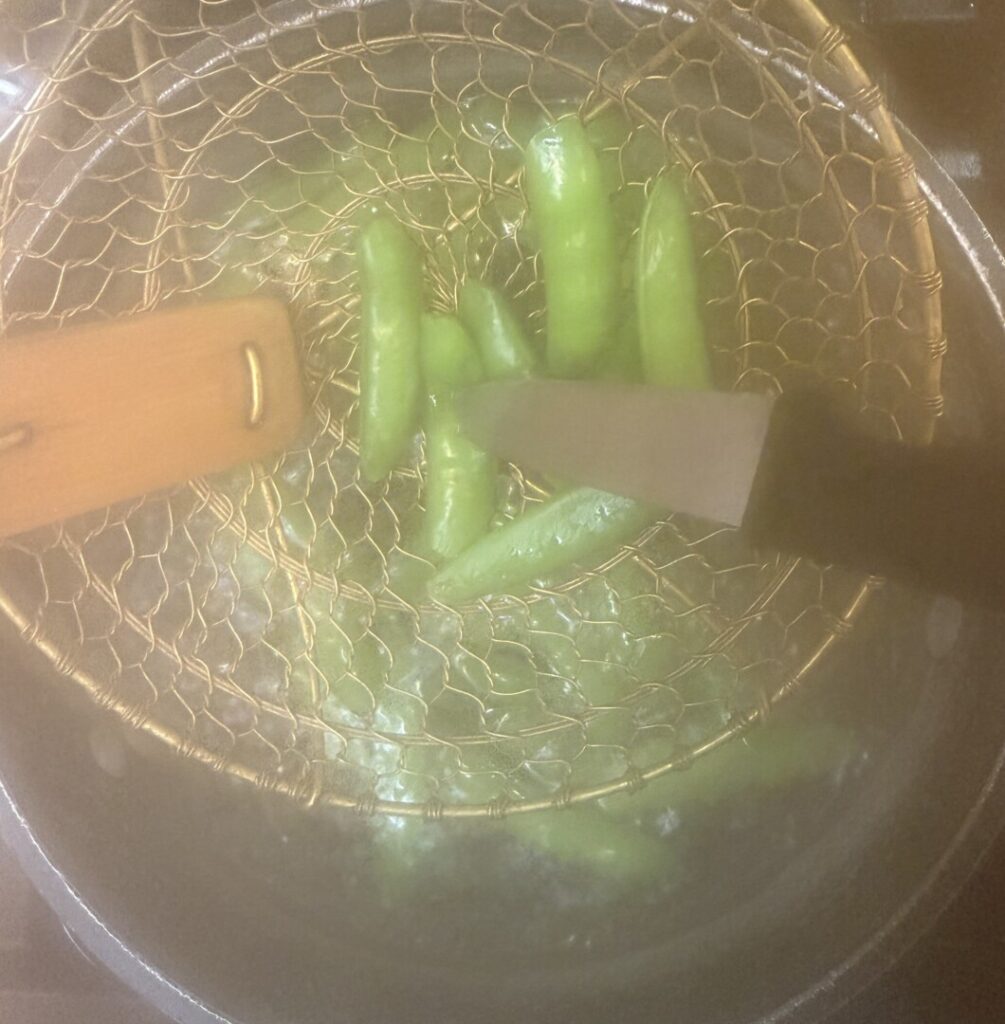
If you’ve made other recipes from this site, you’ve almost certainly used the blanching-and-refreshing par-cooking method for vegetables. When using this method we usually boil our vegetables just slightly under the desired textural doneness and stop the cooking with a cold-water bath. Then we reheat them in a microwave oven or sauté pan for a few seconds only, just until heated through. However, in this recipe the vegetables, chicken, and sauce must remain in a hot oven for 30 minutes so that the cobbler crust fully bakes. So, the vegetables need just a few seconds of blanching, only long enough to heighten and set their colors. Textural softening happens later, in the oven. We’re using a very short par-cooking time balanced with the required longer finishing cooking time to get the best result: vegetables that are vividly colored yet tender, but not limp or mushy.
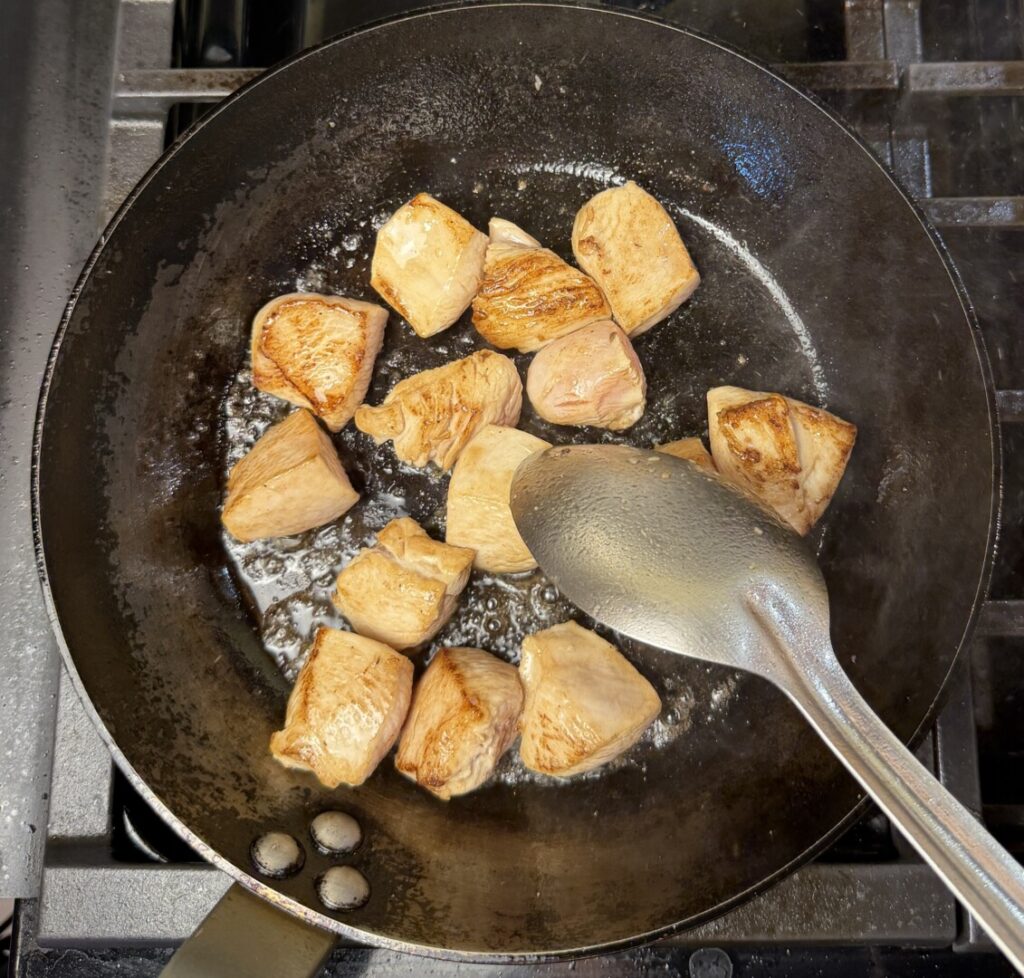
Likewise, the chicken breast also must bake for 30 minutes under the cobbler topping. As stated earlier, chicken breast is a very tender cut that overcooks quickly. Because 30 minutes of high-heat baking is required for the crust, remember that the chicken cubes must be cut large enough to withstand that amount of cooking time. (Small-diced chicken would quickly overcook.) To enhance flavor and appearance, we usually sauté the exterior of meats and poultry, causing Maillard reaction browning, before any moist-method finishing. Here, as in other recipes, it’s essential to use high heat and not crowd the pan, so that the exteriors of the cubes brown but the interiors remain raw. The chicken then cooks to the required doneness in the oven.
Let’s prep!
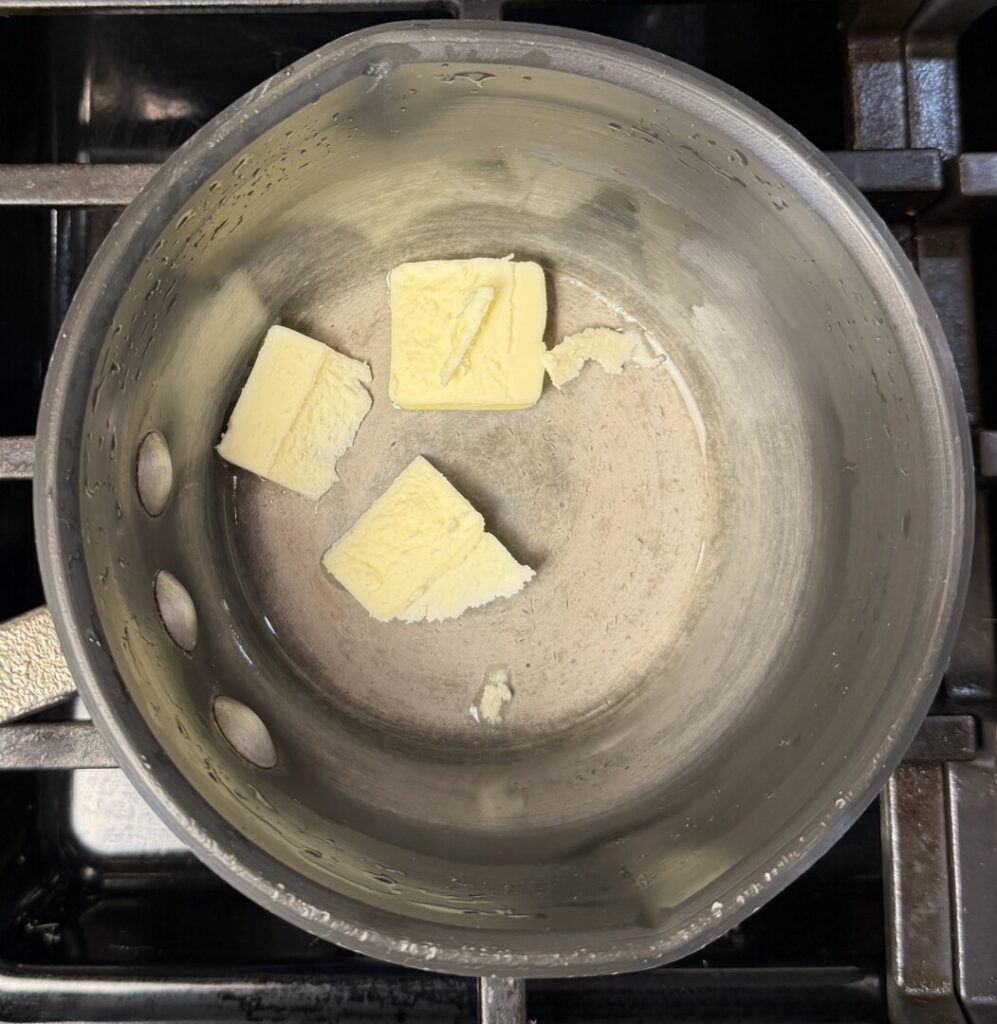
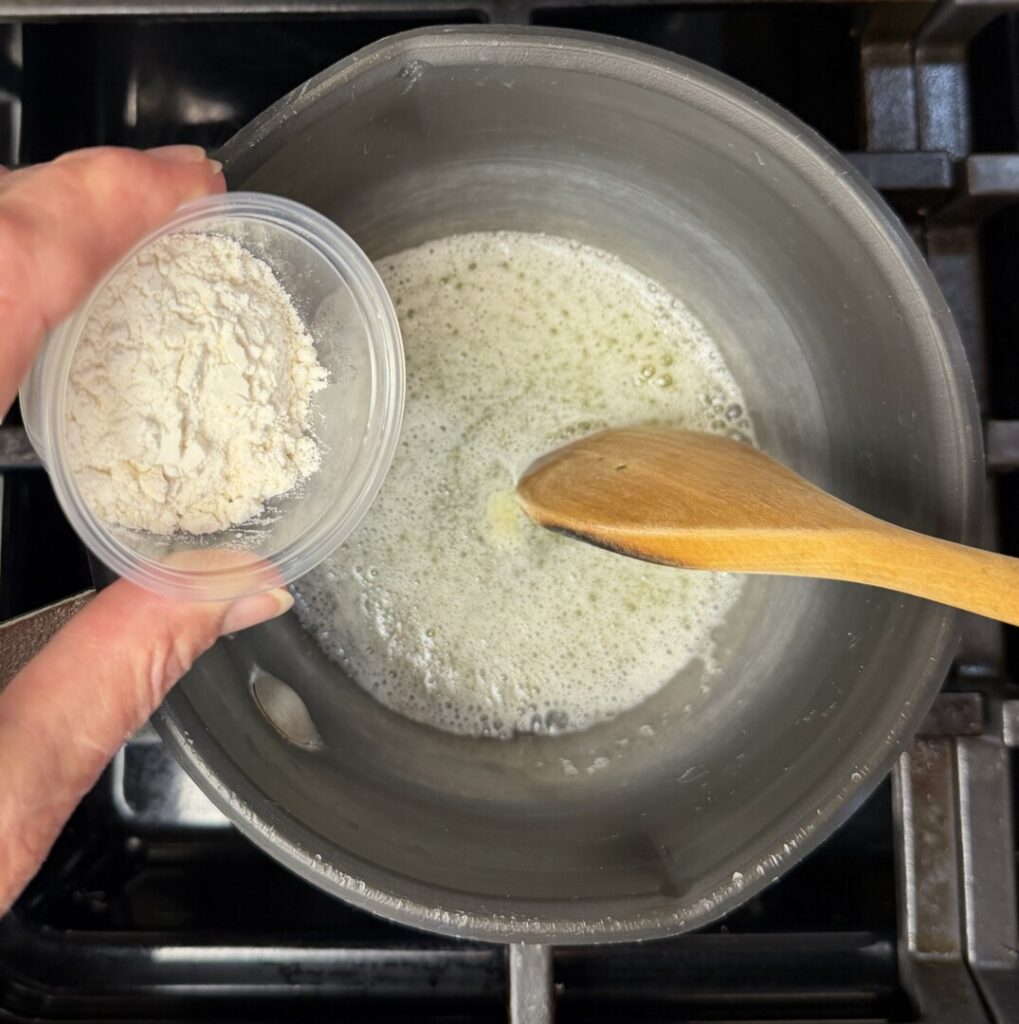
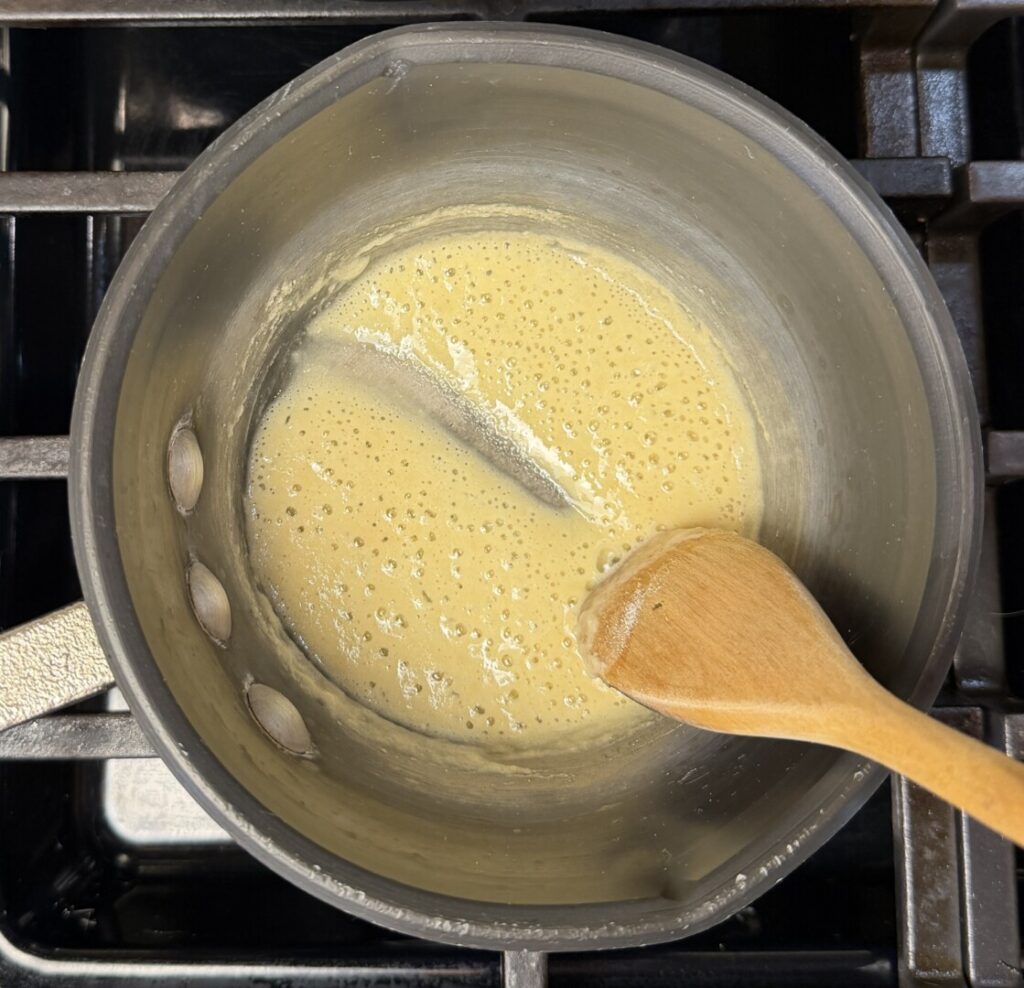
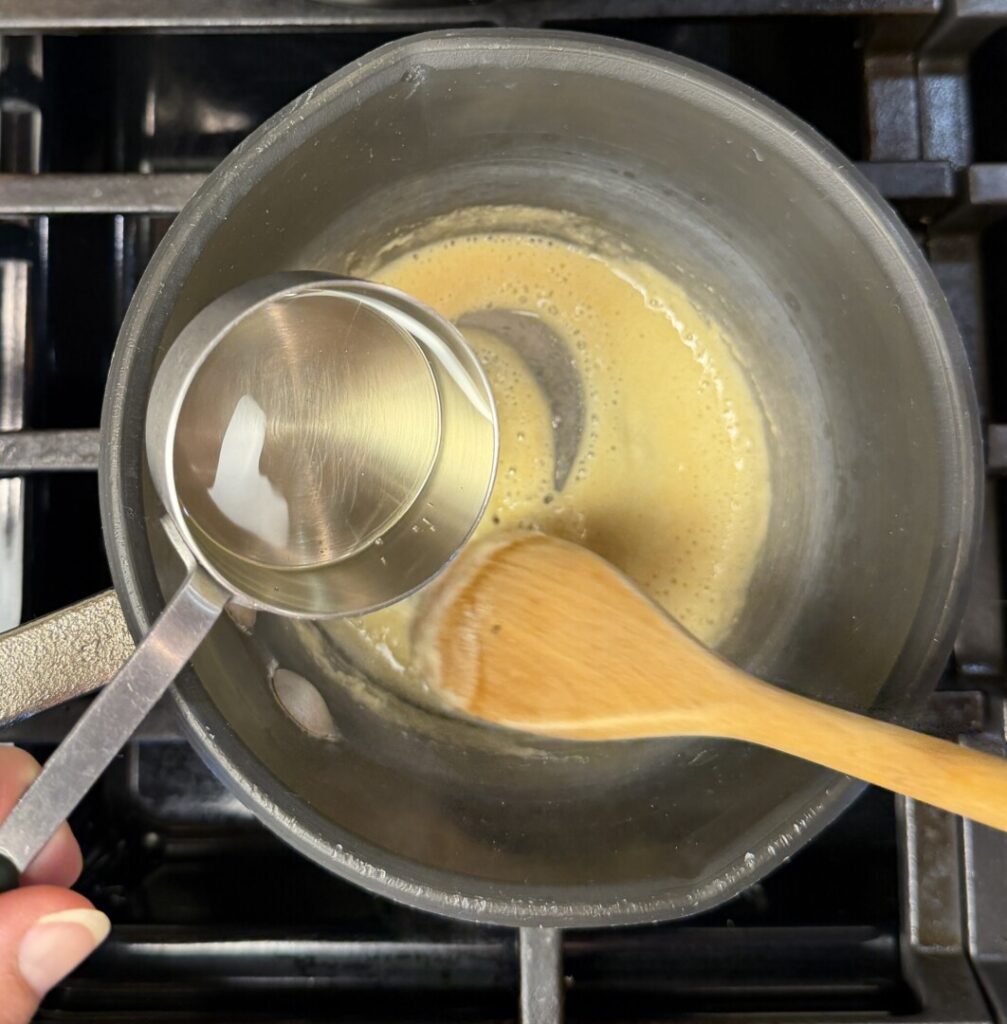
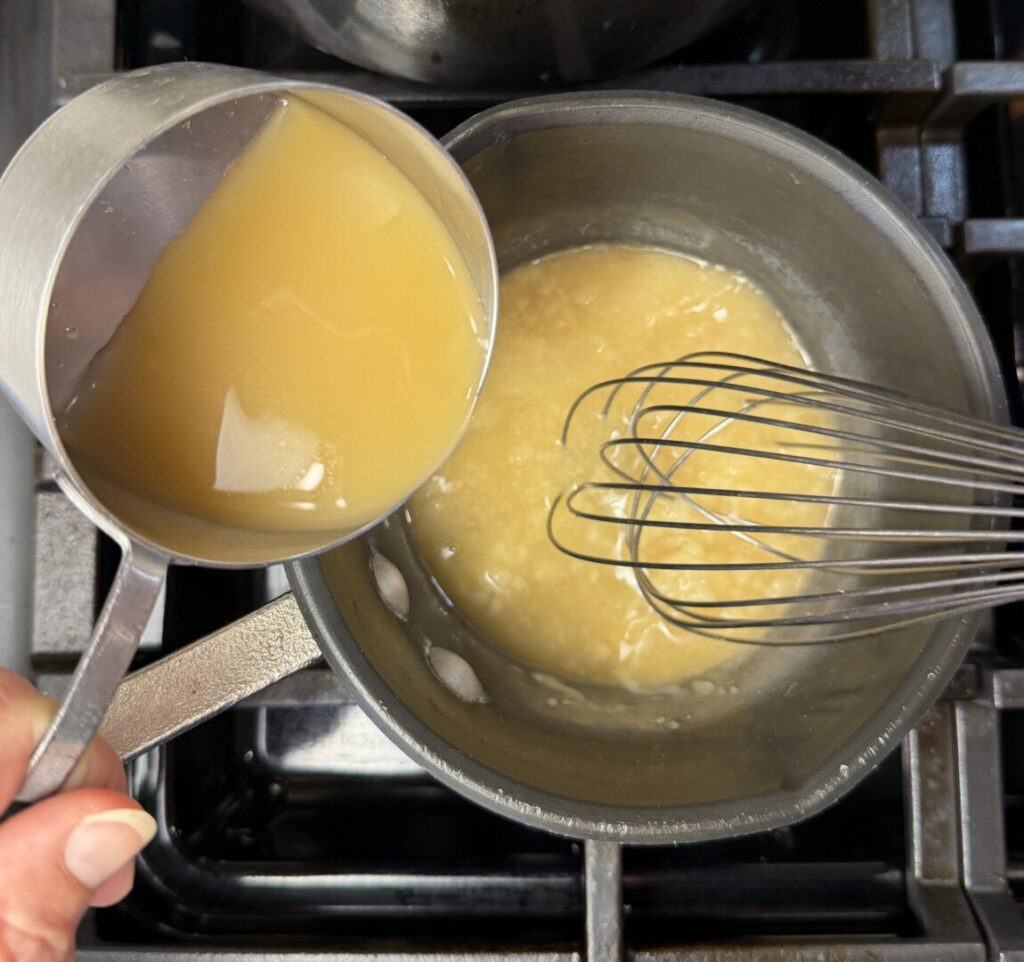
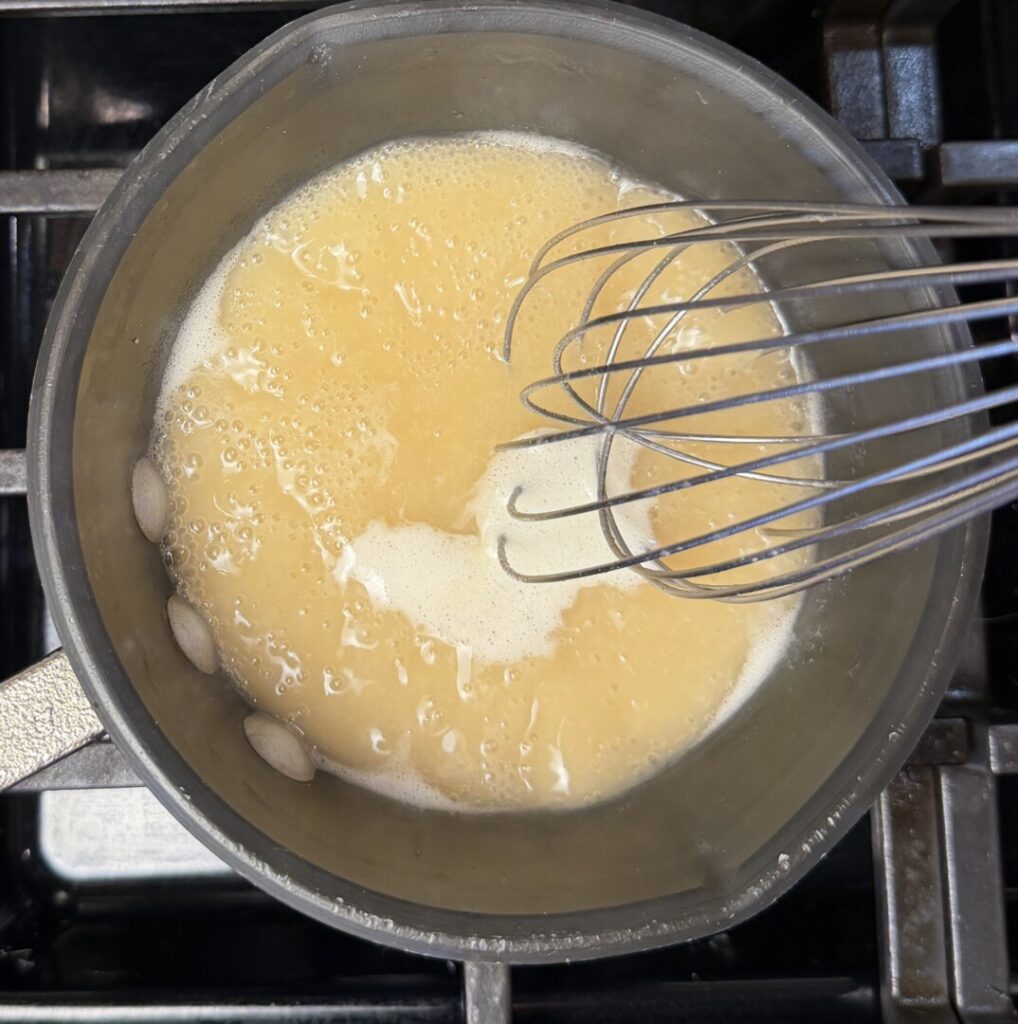
We’ll start by making a classic chicken vèlouté, the base for our sauce. The French term vèlouté means “velvety,” which is a good description of its desired texture. One of the five mother sauces of classical French cuisine, vèlouté begins with a blonde roux, made by cooking roughly equal parts butter and flour together. Melt the butter, add the flour and then stir over low heat for about a minute until the mixture acquires a light tan color and a slightly nutty aroma. Stir in white wine, adding it in a slow stream to prevent lumping. Change to a whisk and stir in the stock with a little salt. As it cooks for about 20 minutes, the mixture will thicken into a velvety sauce.
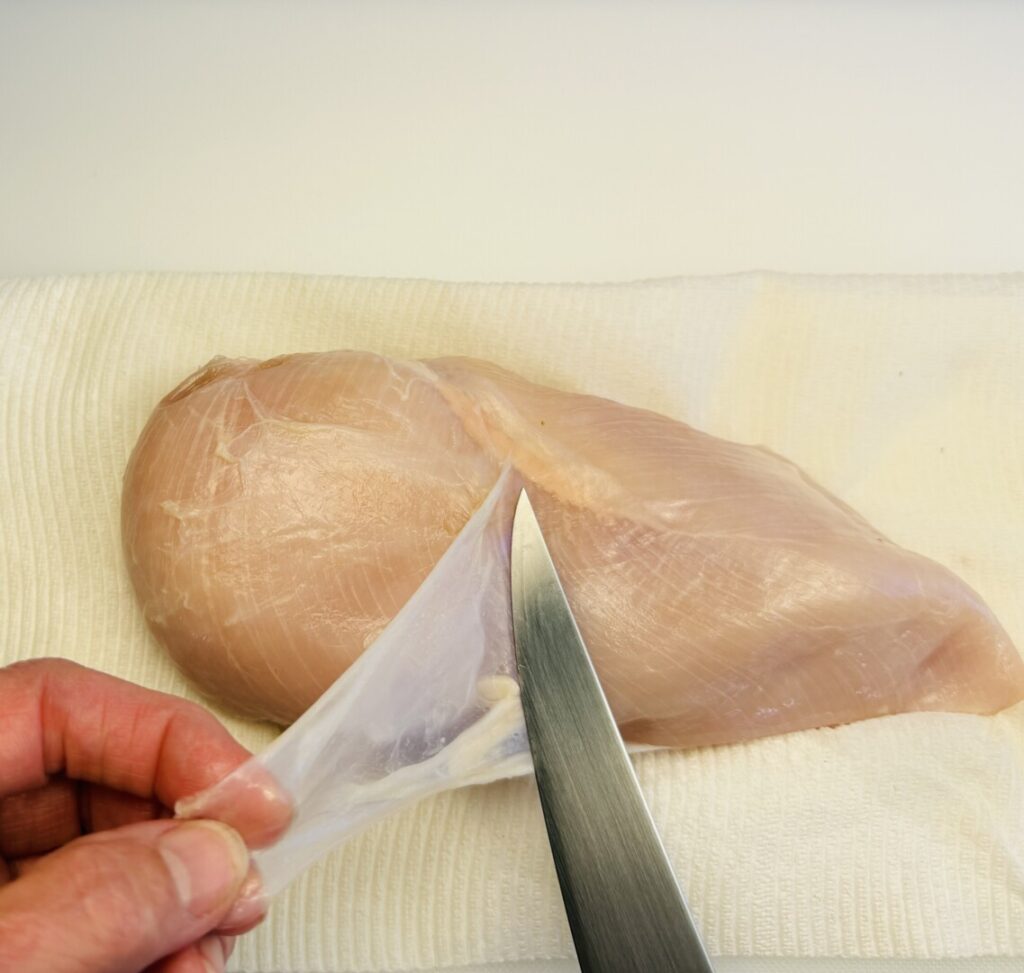
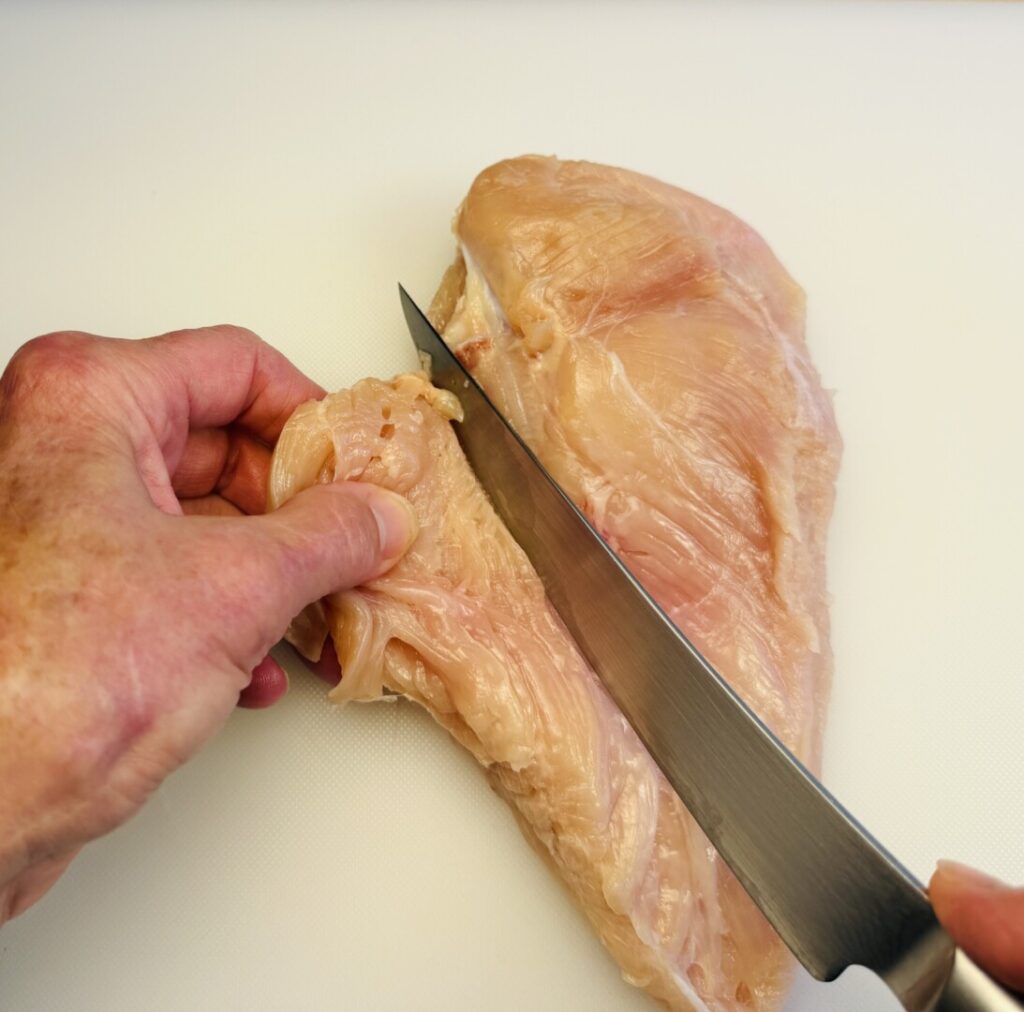
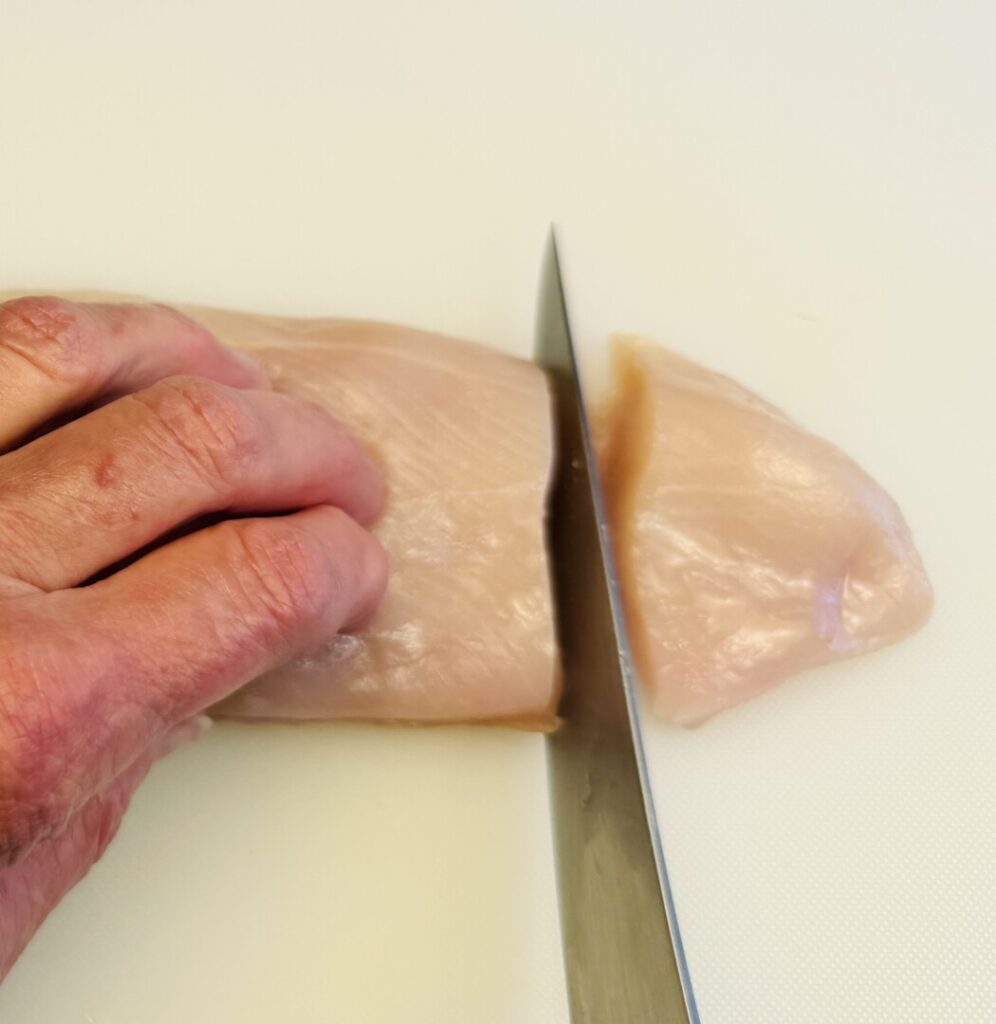
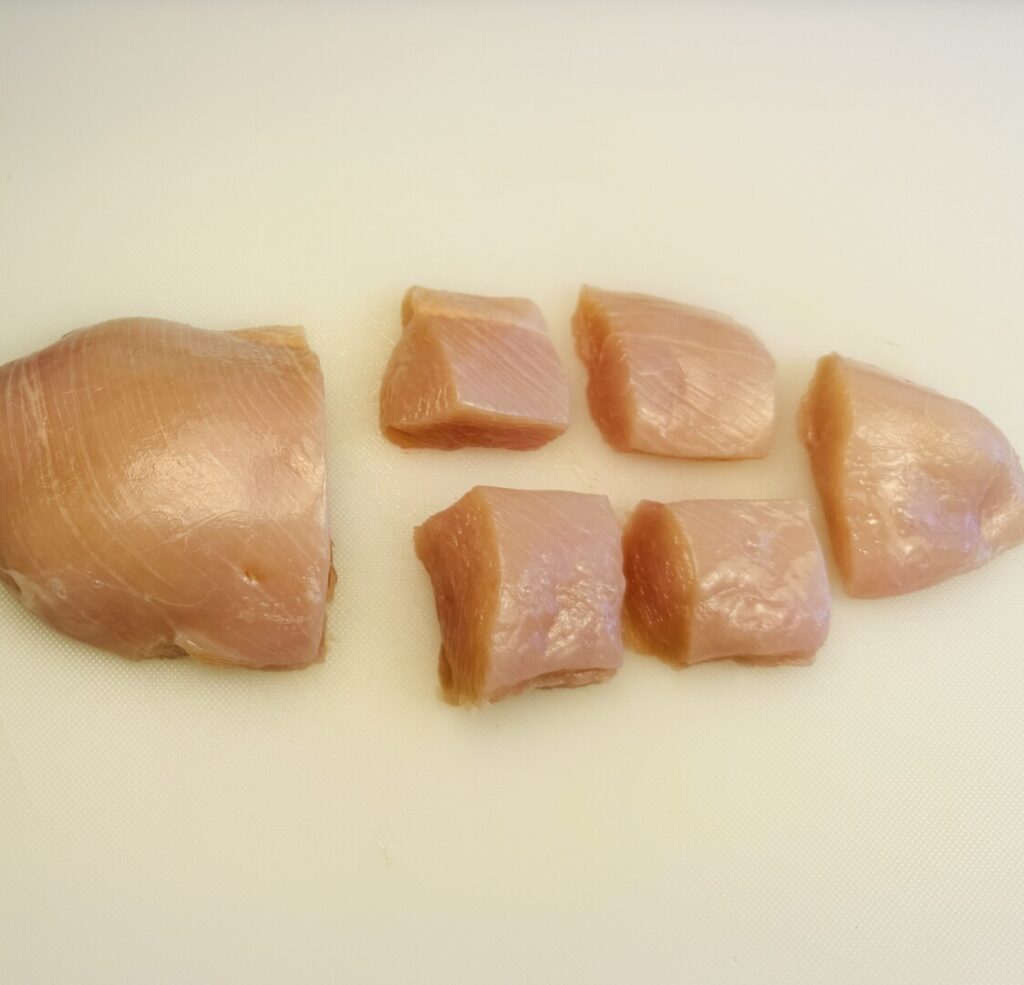
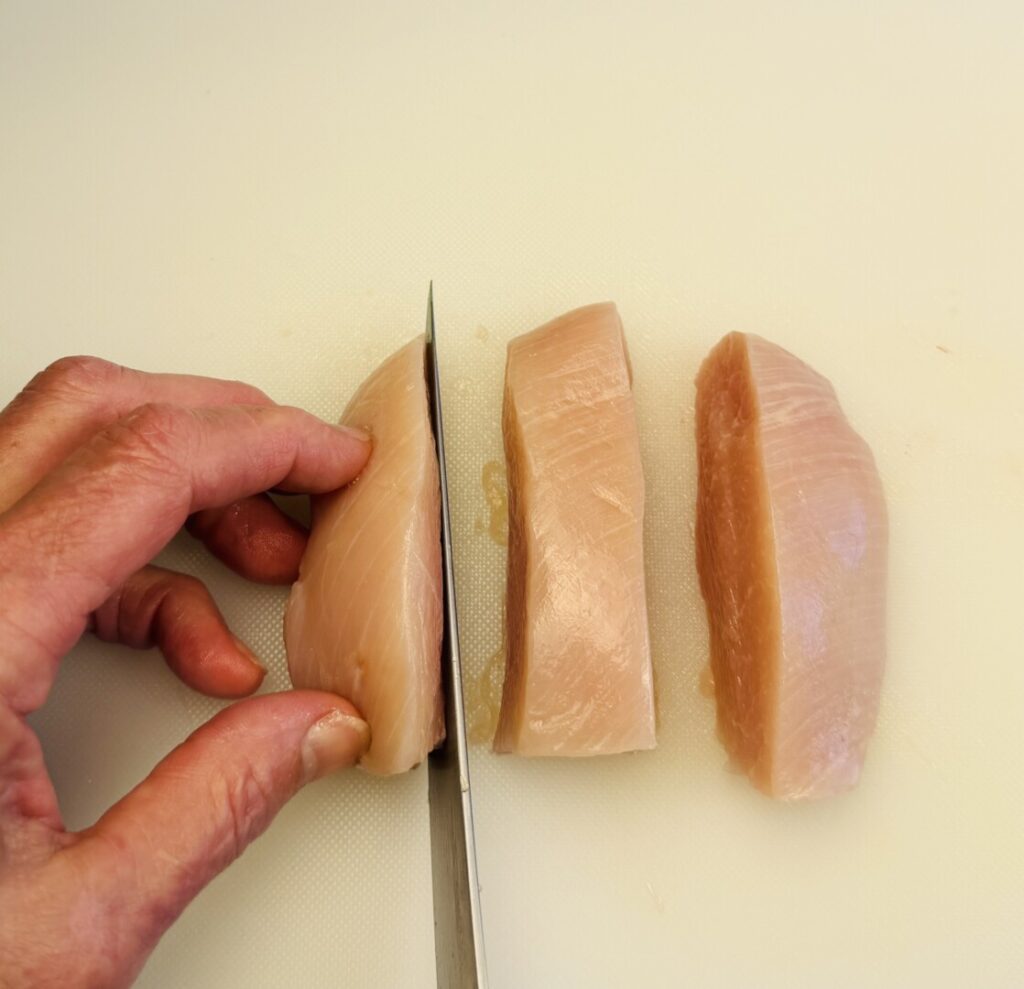
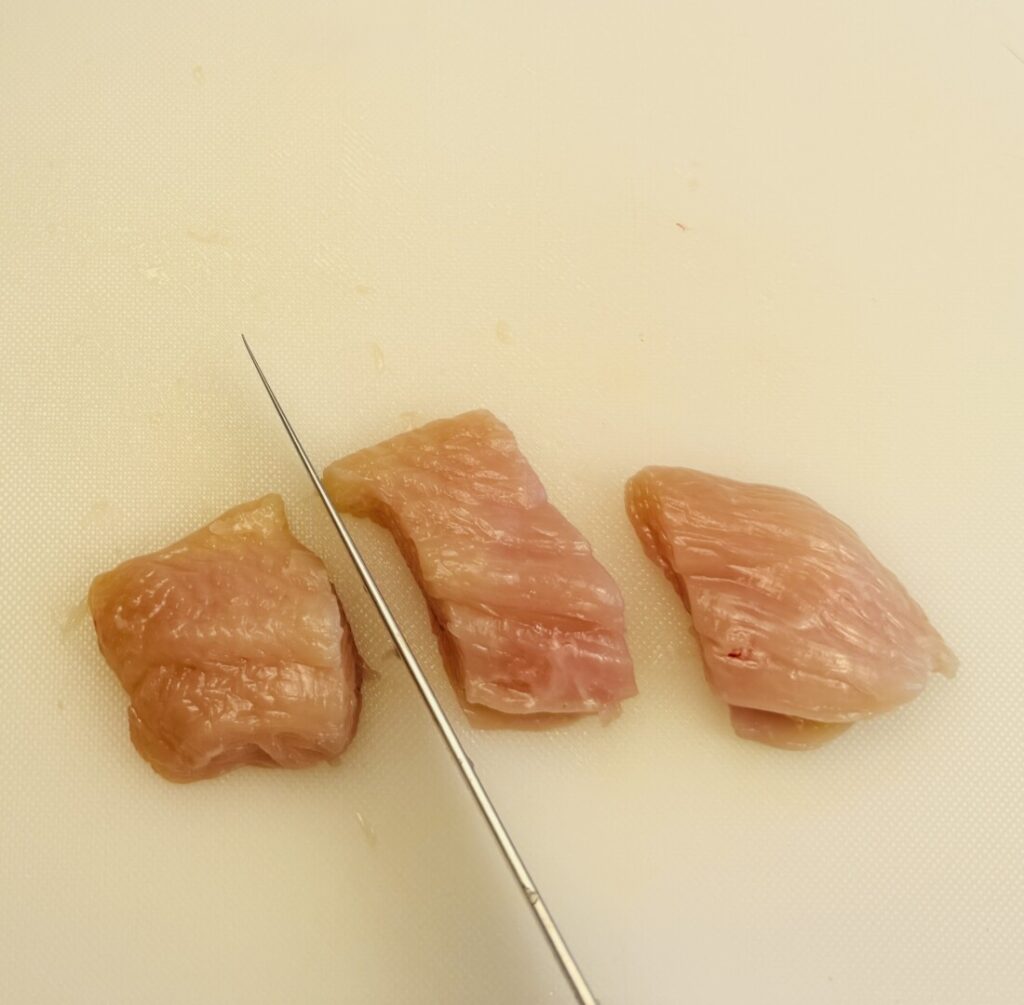
To fabricate the chicken breast, first trim off any visible fat and peel away the silverskin (membrane) from the surface. Remove the tender from the underside of the breast and trim away any connective tissue. Cut the clean breast meat into large cubes roughly 1 1/2-inch in size.
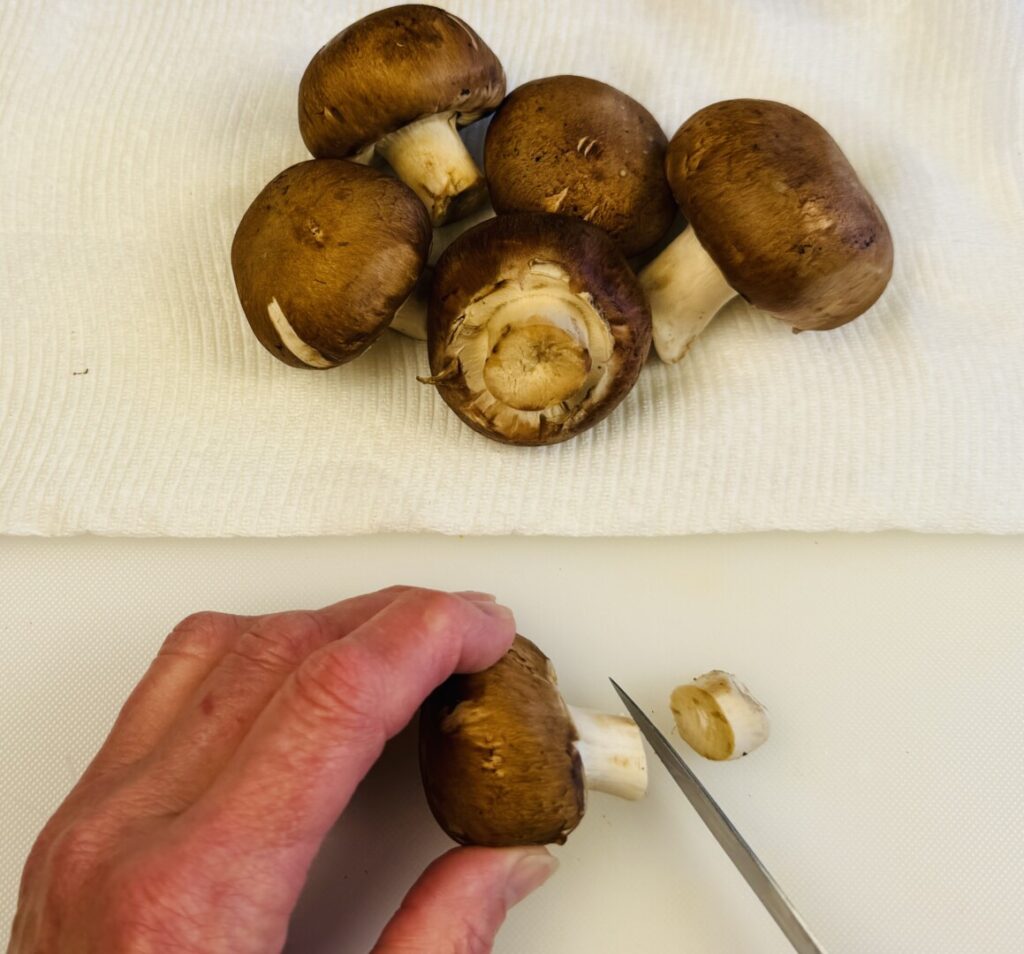
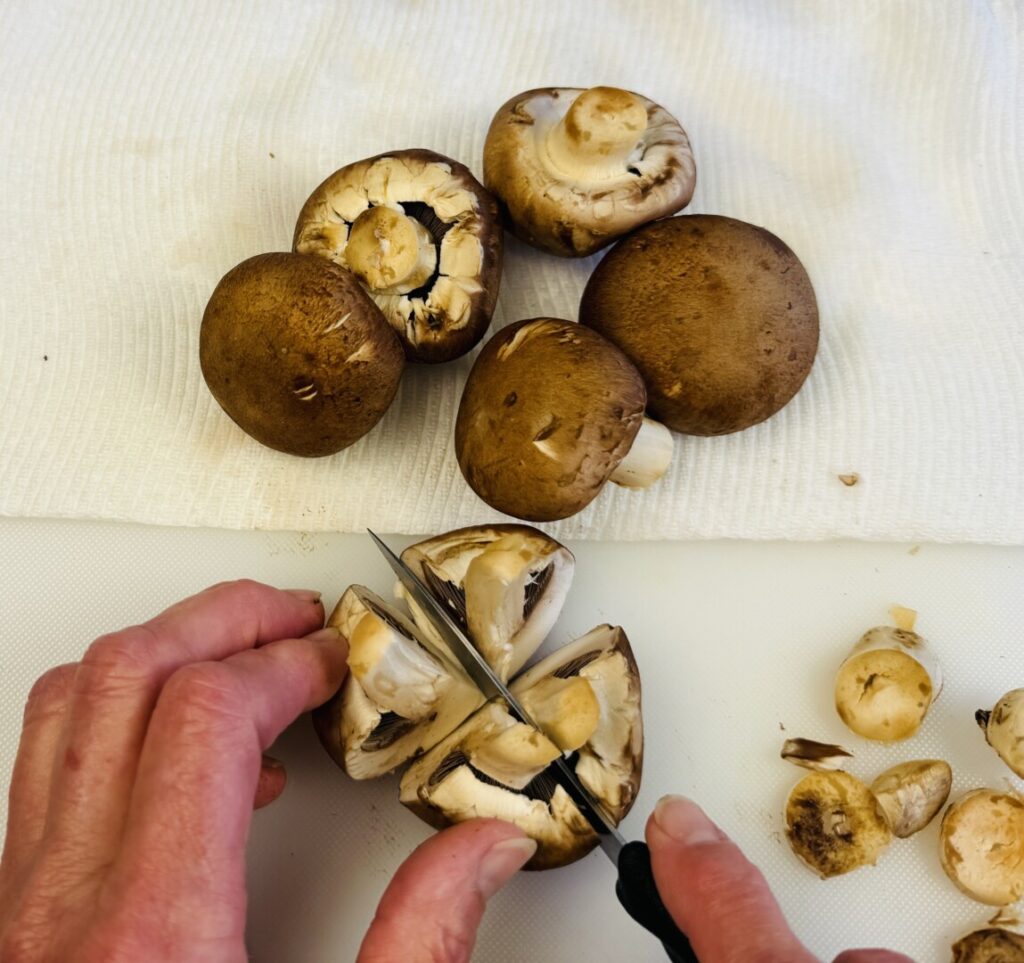
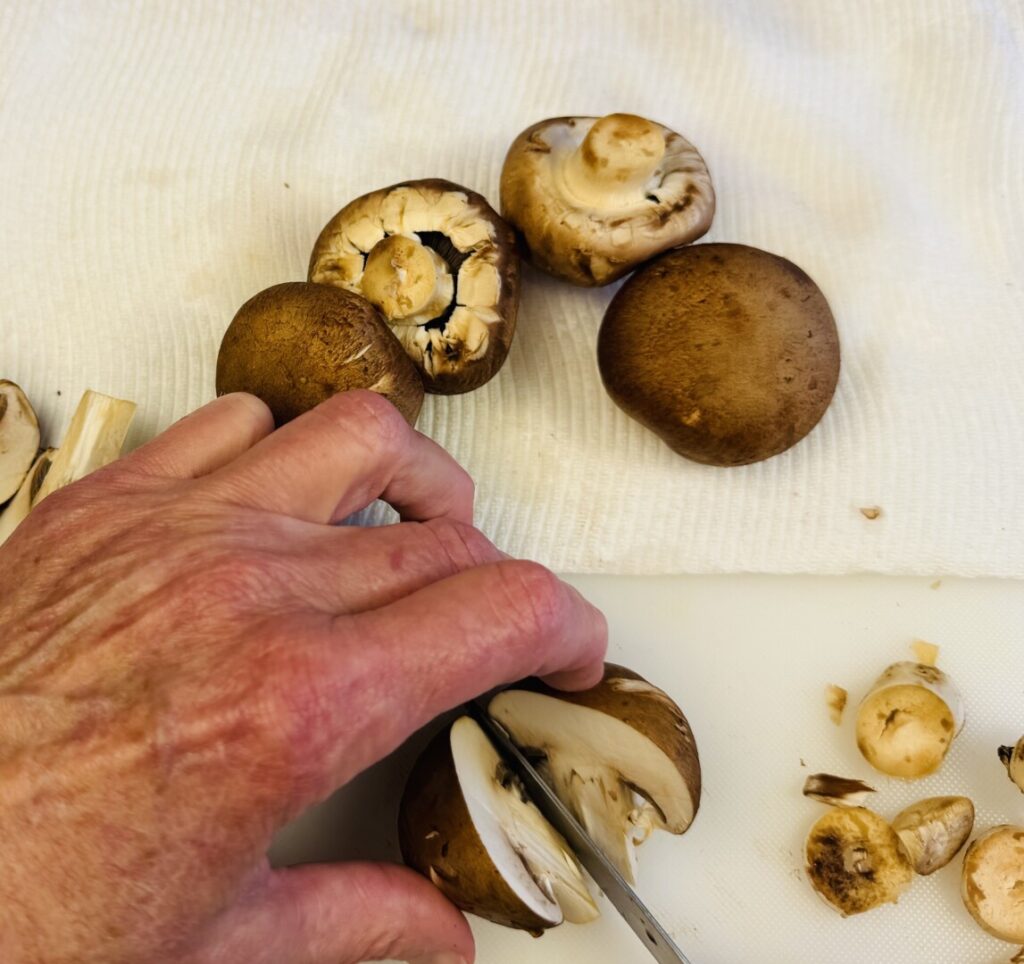
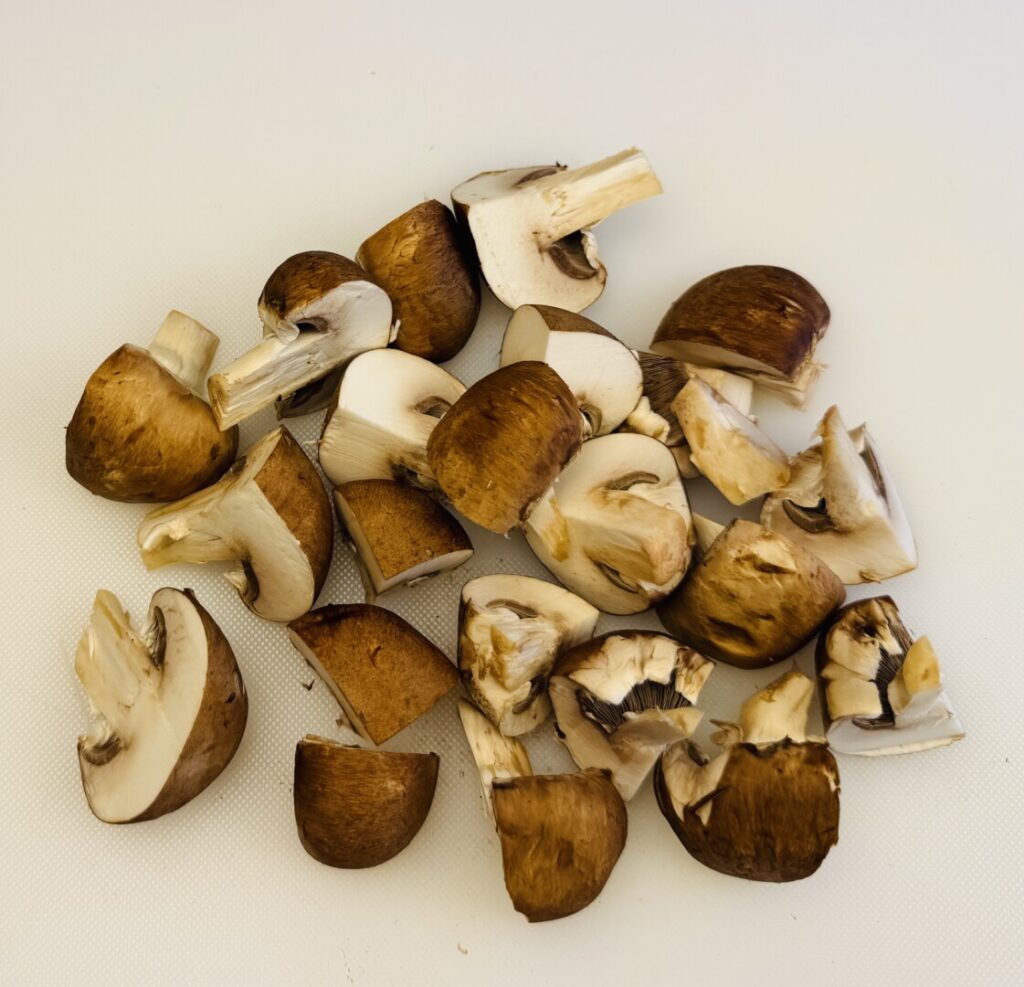
Wash the mushrooms under a stream of cool running water, examining for soil particles and rubbing them away with your fingers. (To keep the mushrooms from absorbing water, work quickly and never soak them). Blot dry on paper towels. Trim off the hard stem ends and then cut: large mushrooms into quarters and smaller ones in half.

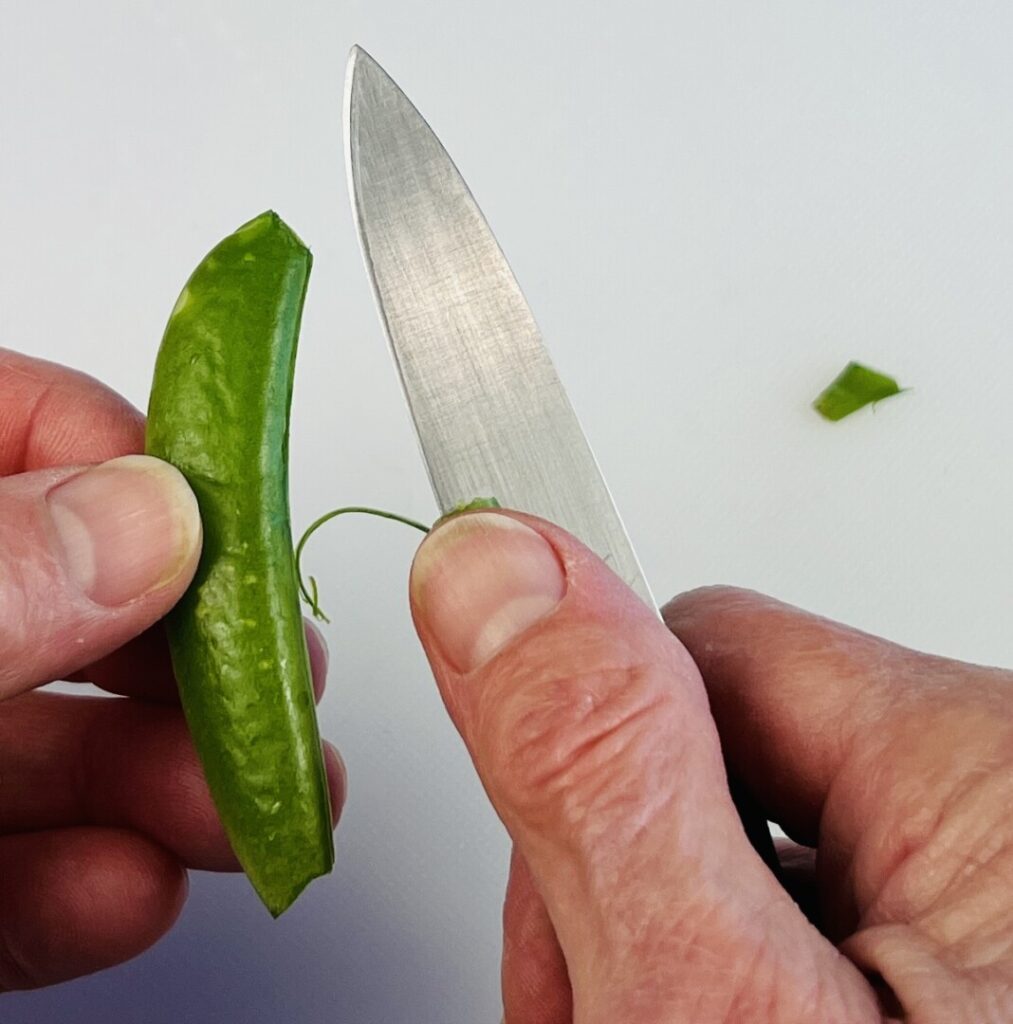
Next you’ll fabricate the remaining vegetables. Some snap pea varieties have tough strings on both sides of the pods, whereas others don’t. Always check each snap pea and, if necessary, remove its strings. To do so, make a partial diagonal cut on one tip and then pull downward; if there’s a string it will pull off. Repeat this technique on the other side of the pod, starting with the opposite tip.
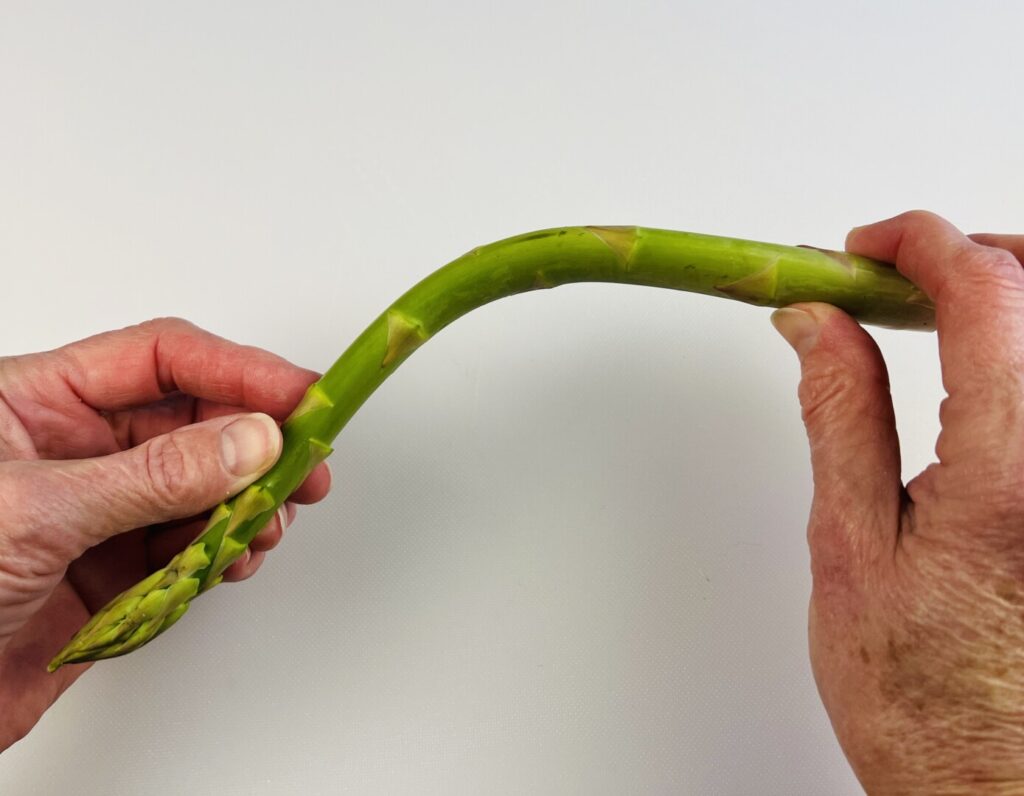
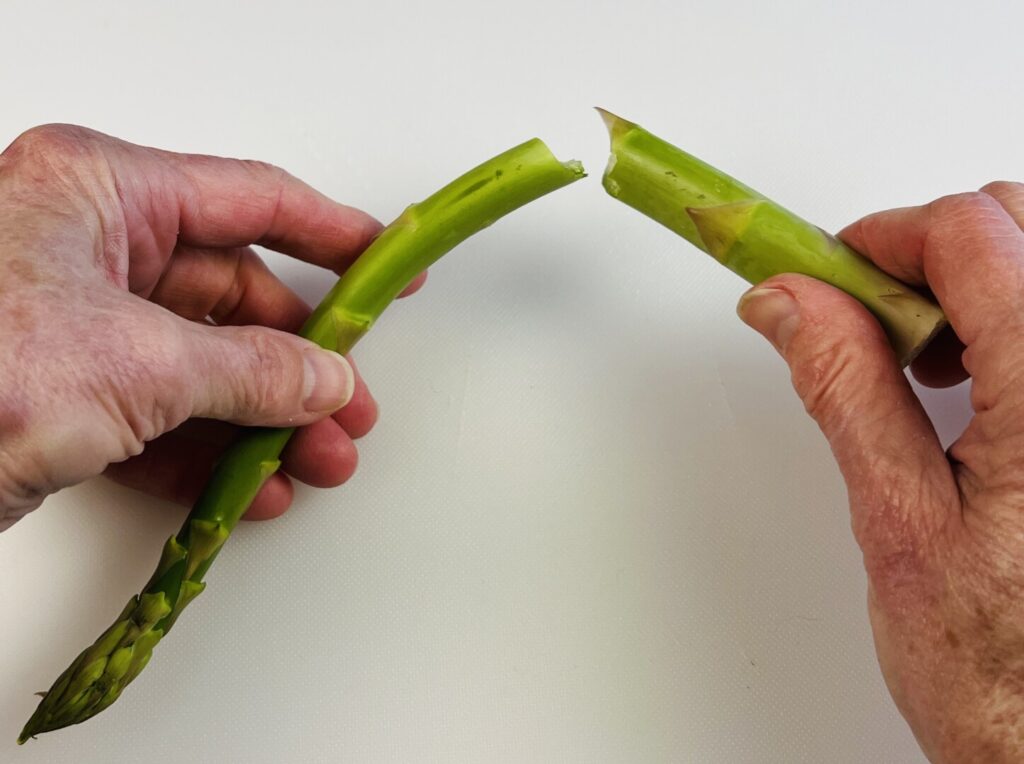
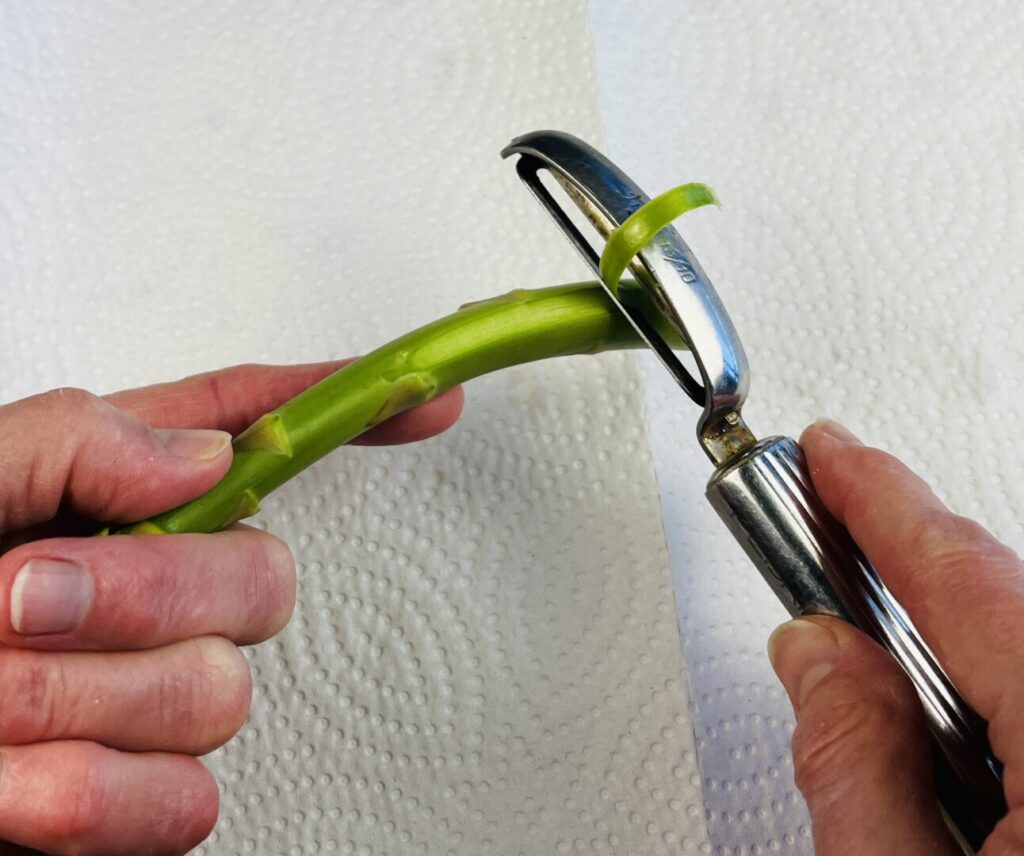
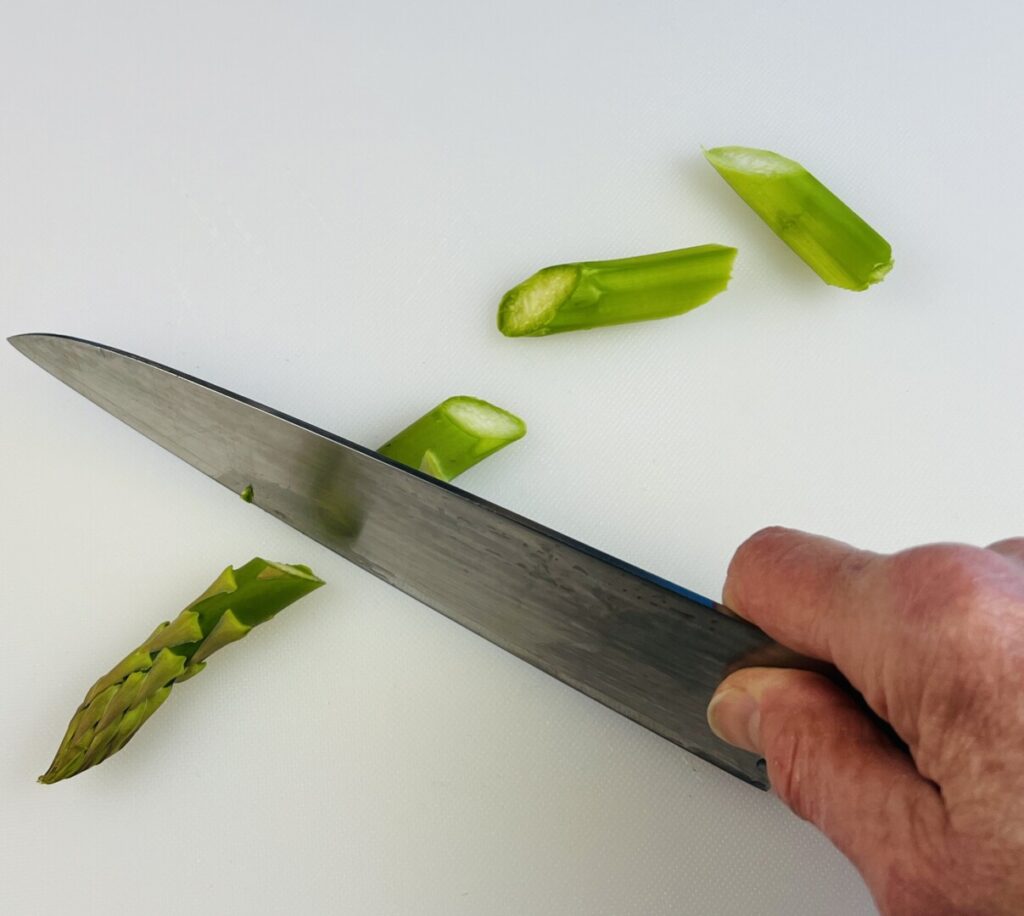
To fabricate the asparagus, first “snap” the spears to remove the tough butt ends. Grasp the two ends of each spear and gently bend it. The spear will break at the point where tough gives way to tender. Discard the butt ends. To ensure even cooking and optimal texture, discerning chefs peel most asparagus. If you have medium to thick asparagus, use a swivel peeler to lightly scrape the skin off of the bottom half of each spear. (Very thin “pencil” asparagus is not peeled.) Cut the asparagus on the diagonal into 1 1/2-inch lengths.
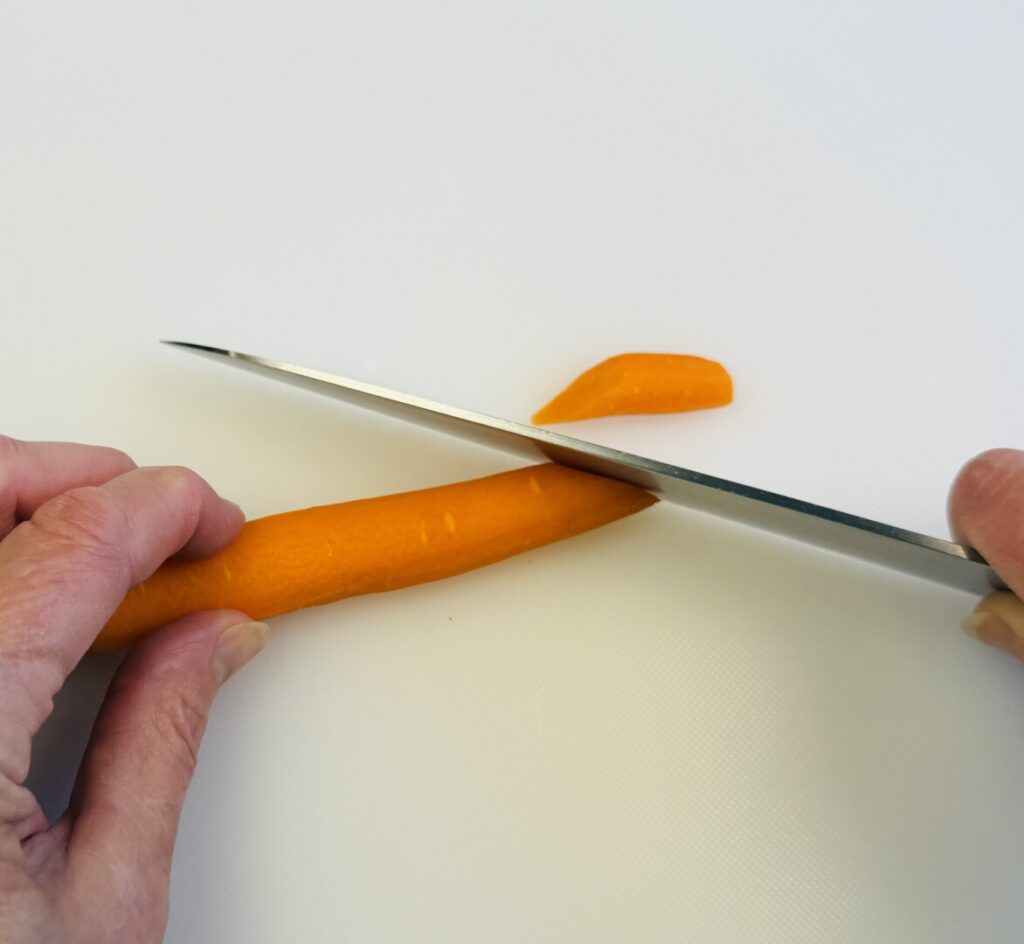
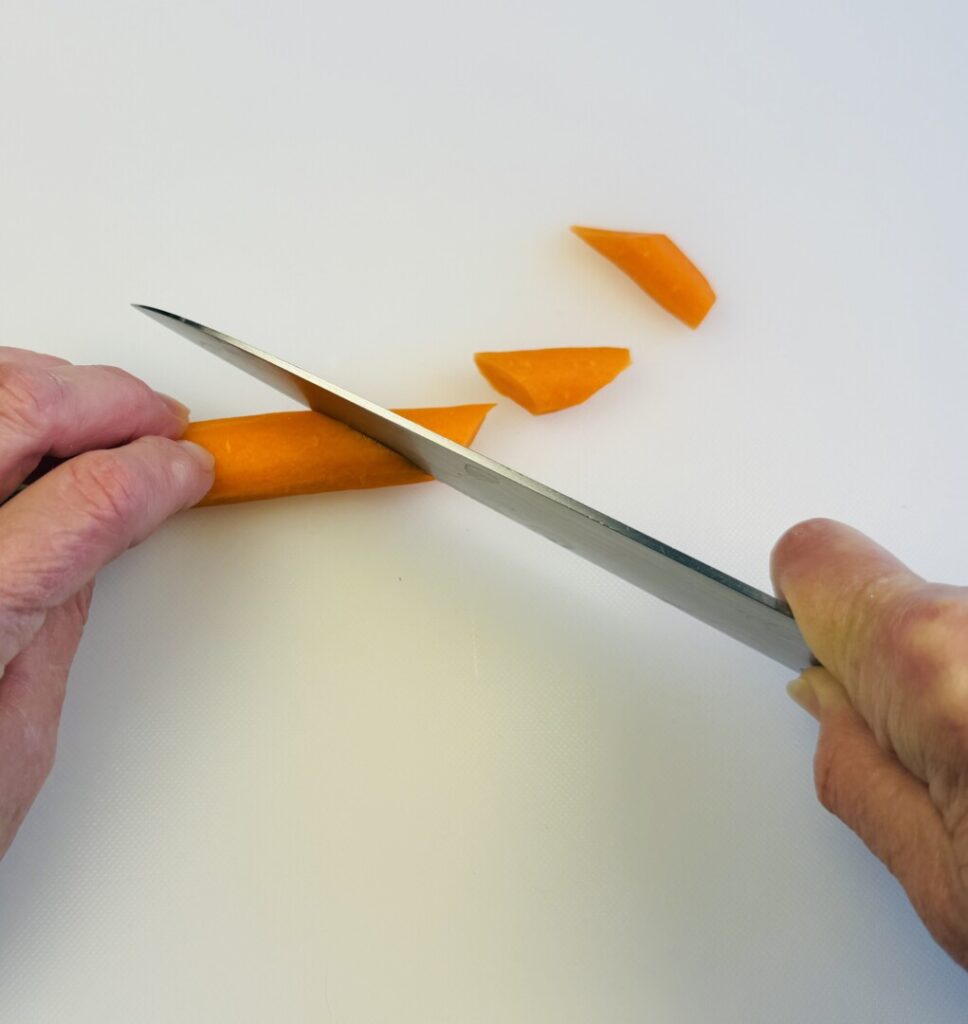
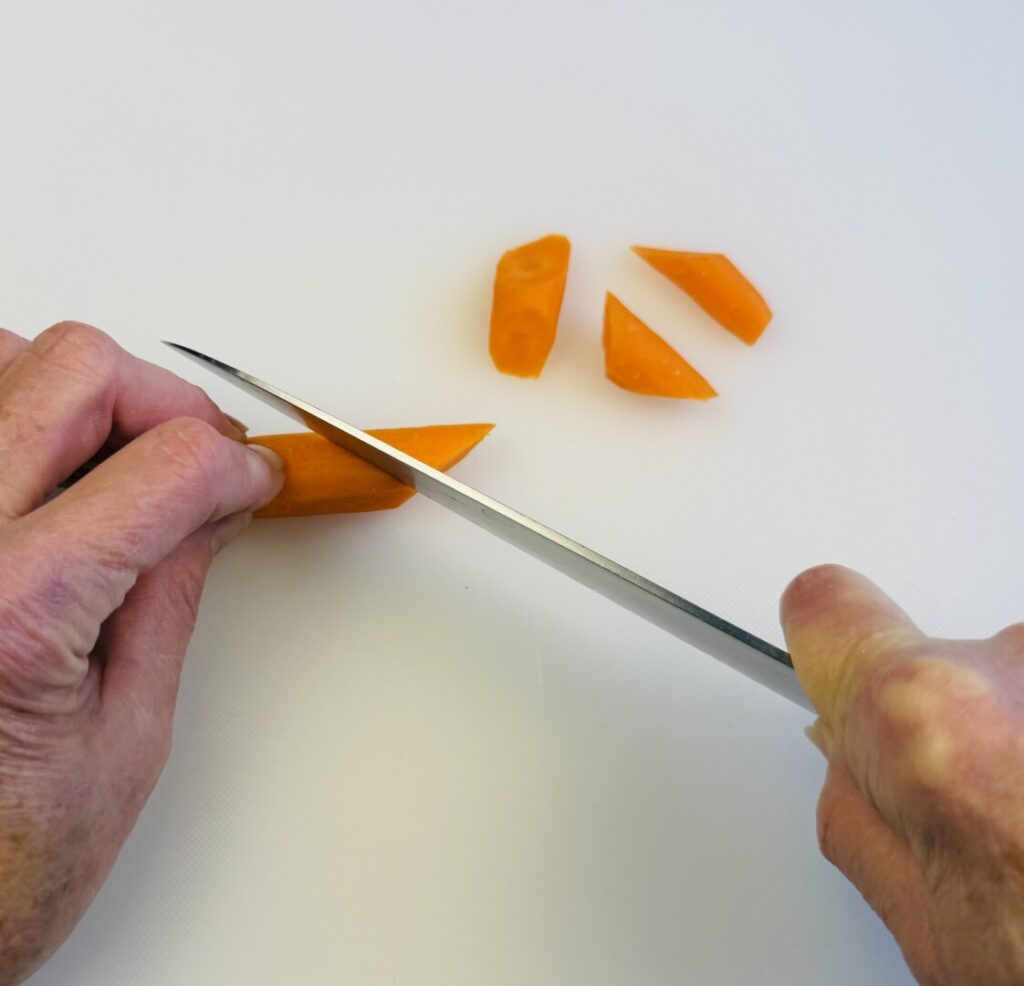
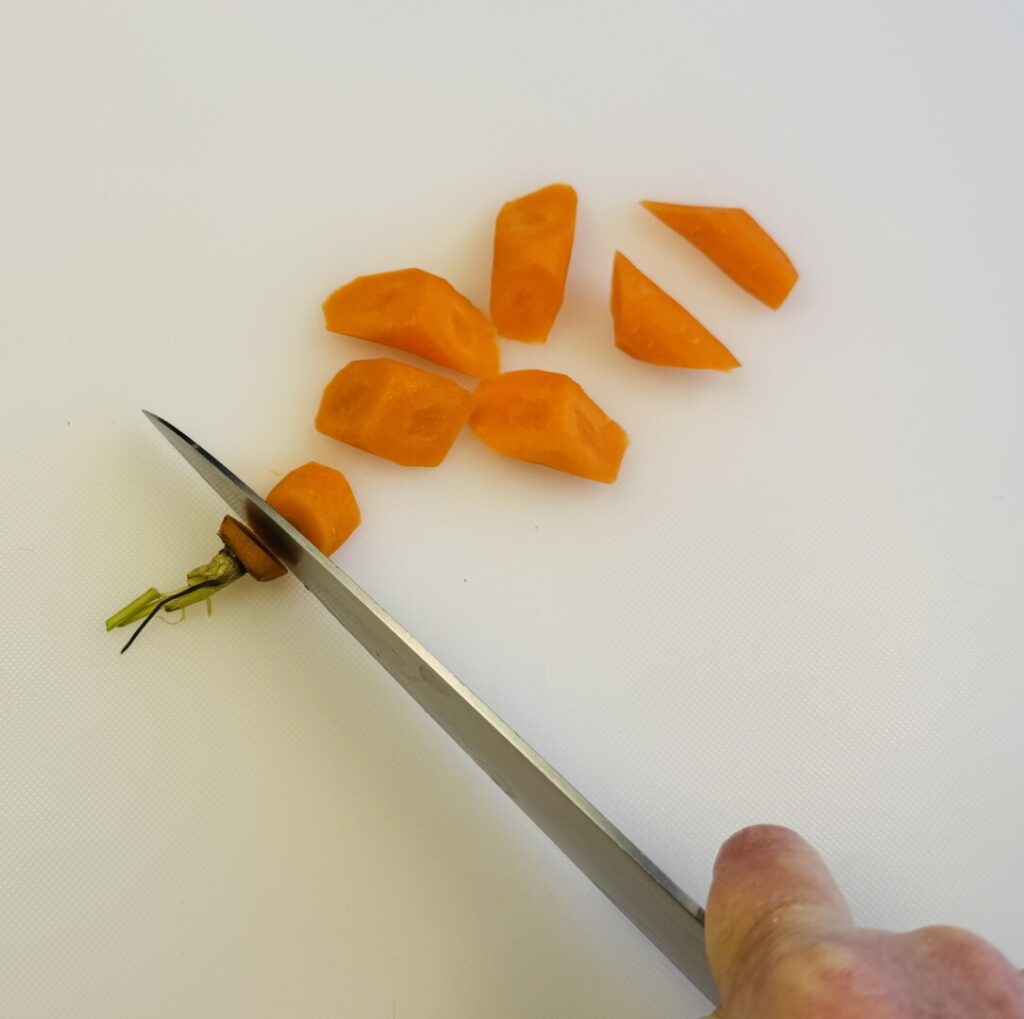
Peel the carrots, and then roll-cut them into 3/4-inch lengths. Starting at the pointed end of each carrot, make a sharp diagonal cut. Roll the carrot away from you, turning it about 1/3 of the way around. Make another diagonal cut, and then repeat until you reach the stem end.
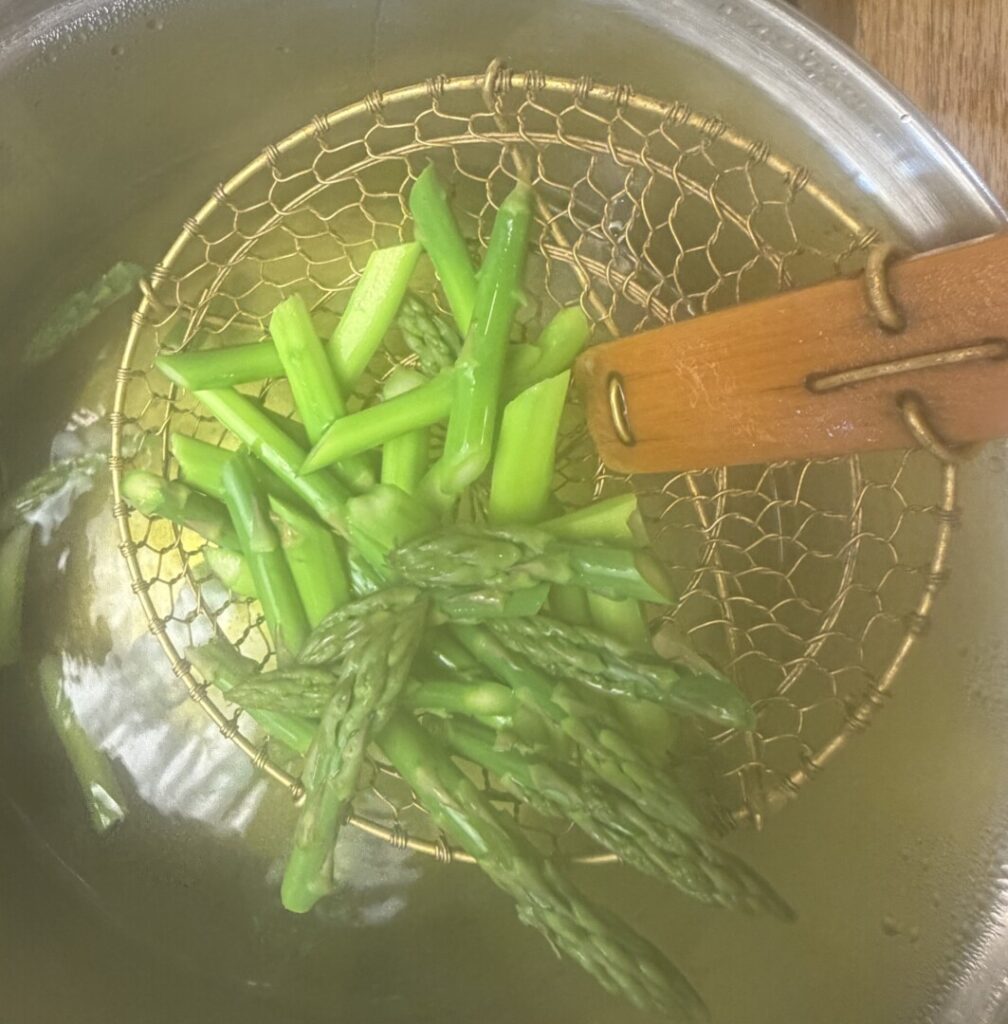
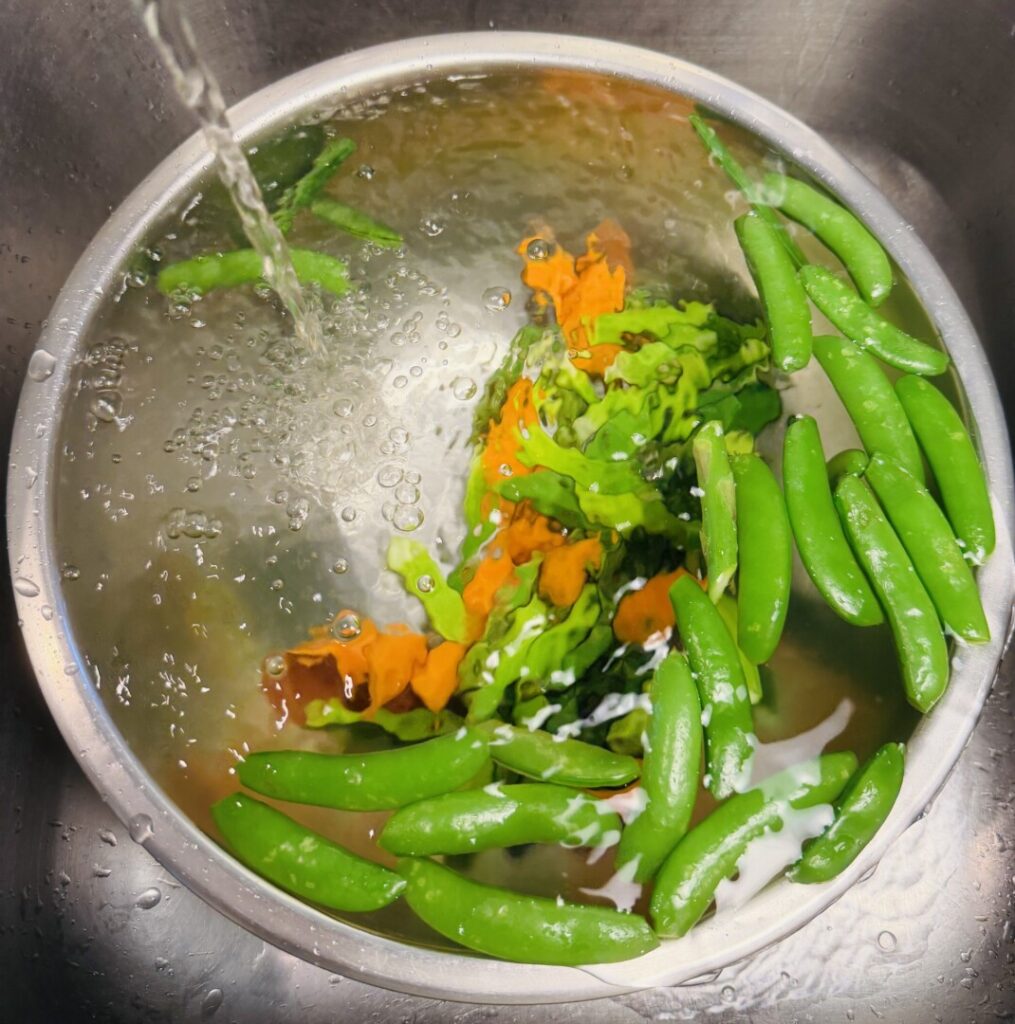
We’ll par-cook the vegetables as part of prep, by the blanch-and-refresh method. Because each has a different texture, and so as not to crowd the pot and drop the temperature, we’ll blanch each separately. Remember, with the green vegetables you’re only blanching to set the color; tenderization will happen later, in the oven. Blanch the snap peas for a 10 seconds and the asparagus for 20 seconds before immersing in cold water. Depending on the maturity and age of your carrots, blanch anywhere from 1 to 2 minutes until a knife inserted in a carrot piece meets with some resistance. Blot the vegetables thoroughly dry on paper towels.

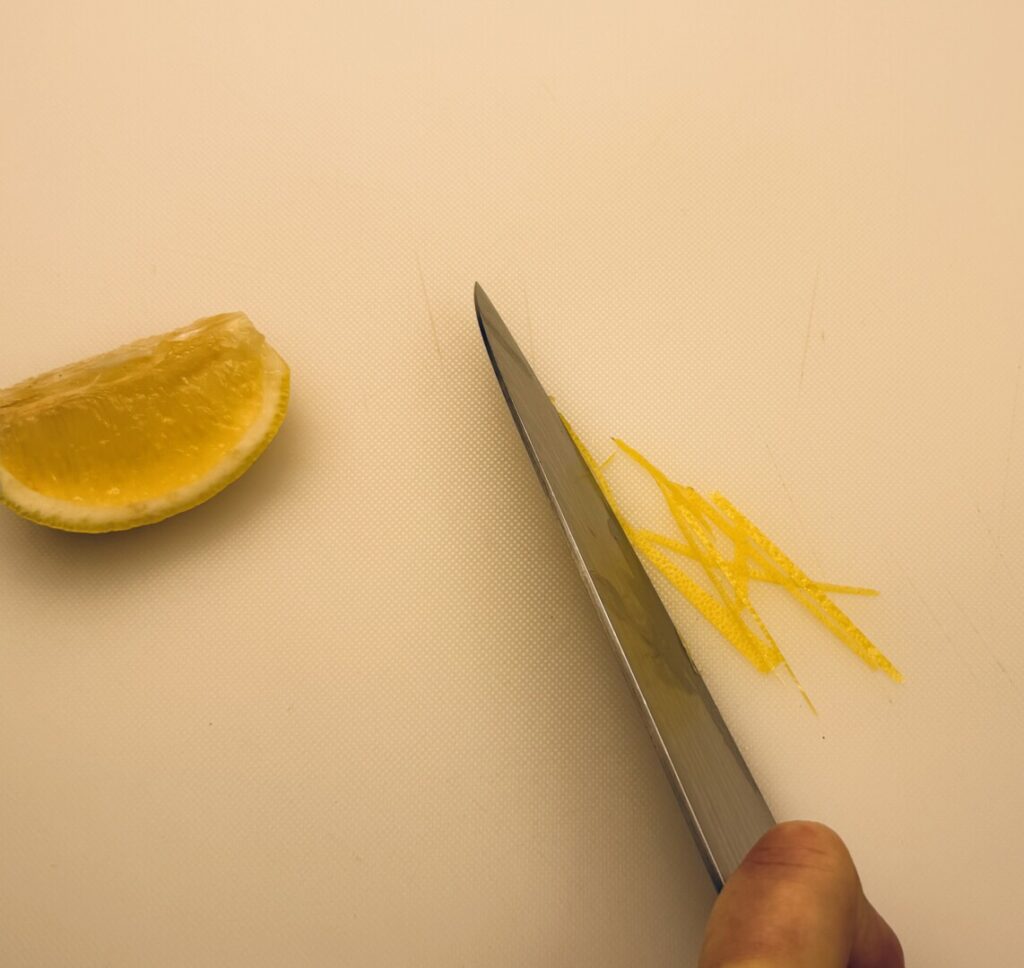
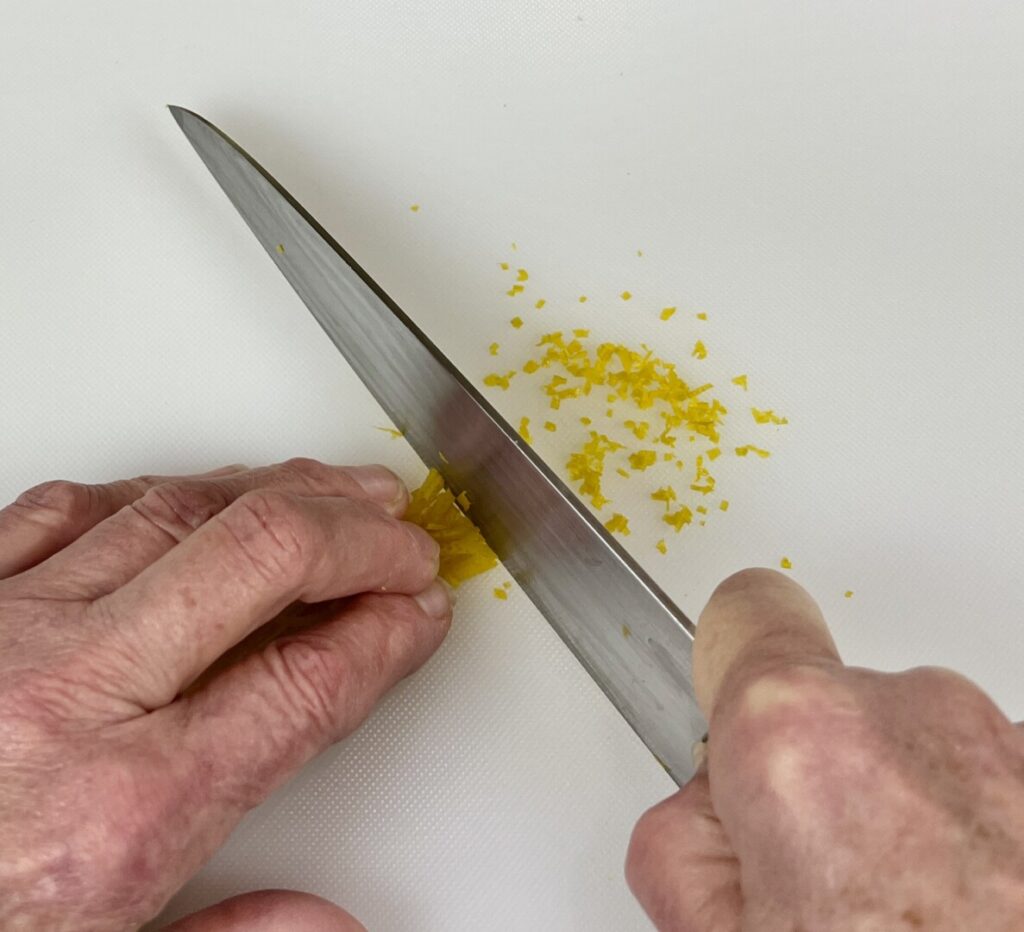
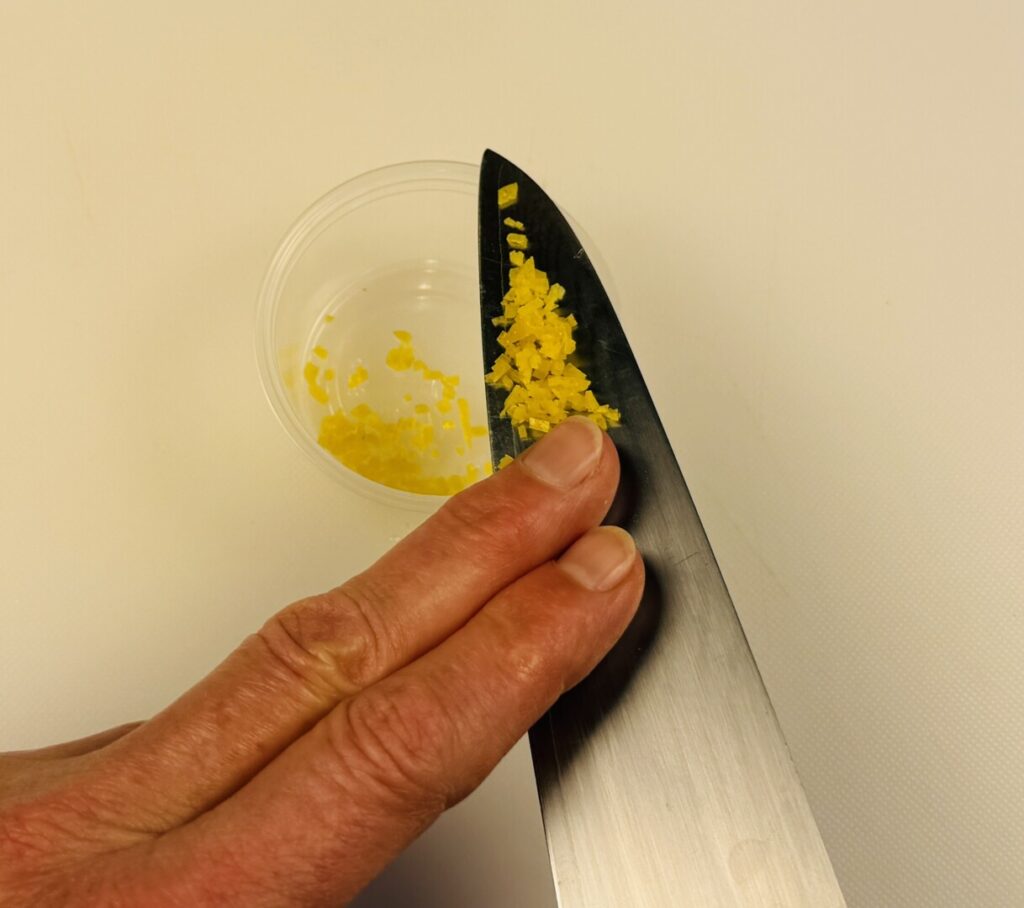
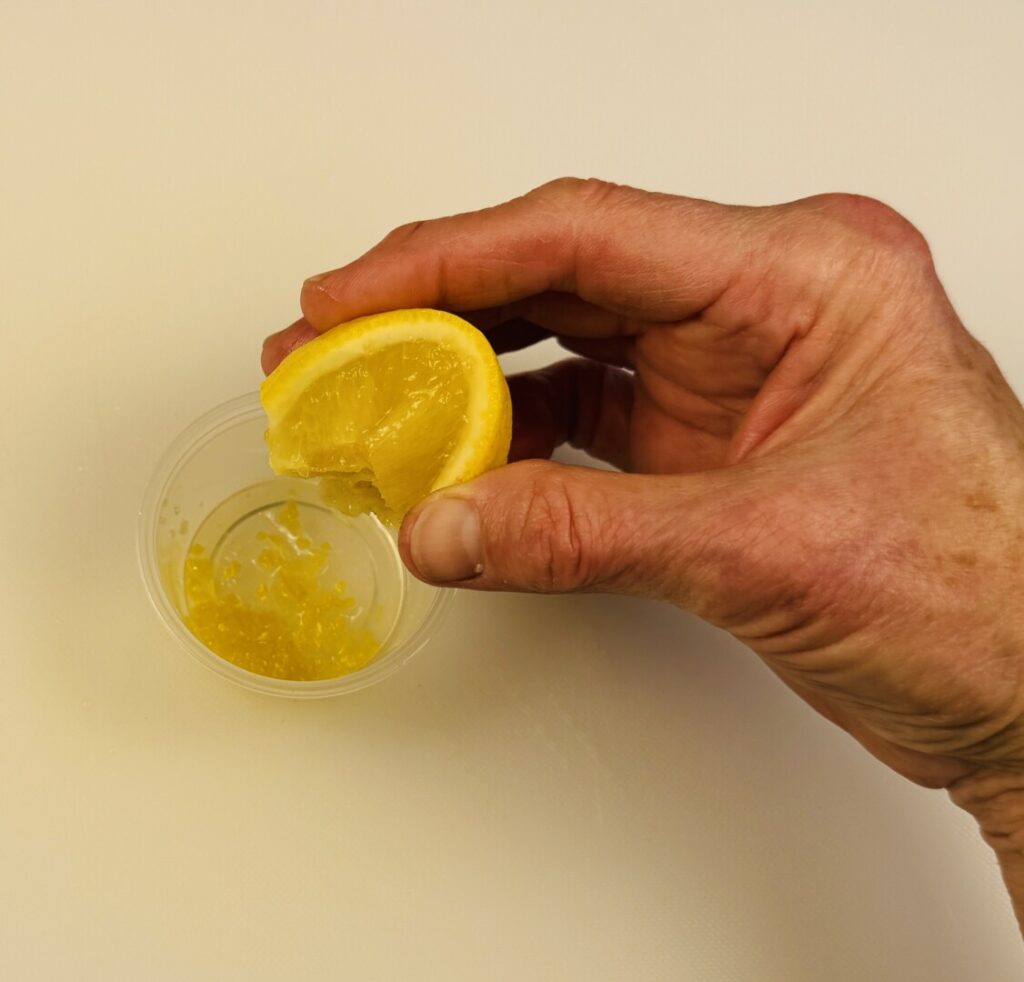
Lemon zest and lemon juice bring out the flavor of your sauce, and help to balance its richness. The chef’s trick is to pare off the thin layer of yellow skin with a swivel peeler, avoiding any of the bitter white pith. Then mince the zest very fine. This is much more efficient than using a grater! To prevent the zest from drying out, place it in a small container and cover it with lemon juice.

Finally, mise the biscuit dough.
Biscuits are a type of quick bread made by the “cutting in” mixing method. Quick breads are called “quick” because they use a chemical leavening agent, such as baking powder or baking soda, rather than yeast (which requires lengthy fermenting and proofing times) to make them rise. “Cutting in” refers to the process of adding chunks of cold butter into flour before mixing in the dough’s liquid element. In this type baked good (as in flaky pie pastry) the pieces of cold butter create an airy, flaky texture in your finished product; as the dough bakes the butter melts, leaving behind a network of open spaces within the biscuit topping.
Biscuits can be divided into two categories: rolled and dropped. For this recipe we’re using the faster, easier drop-type biscuit dough.
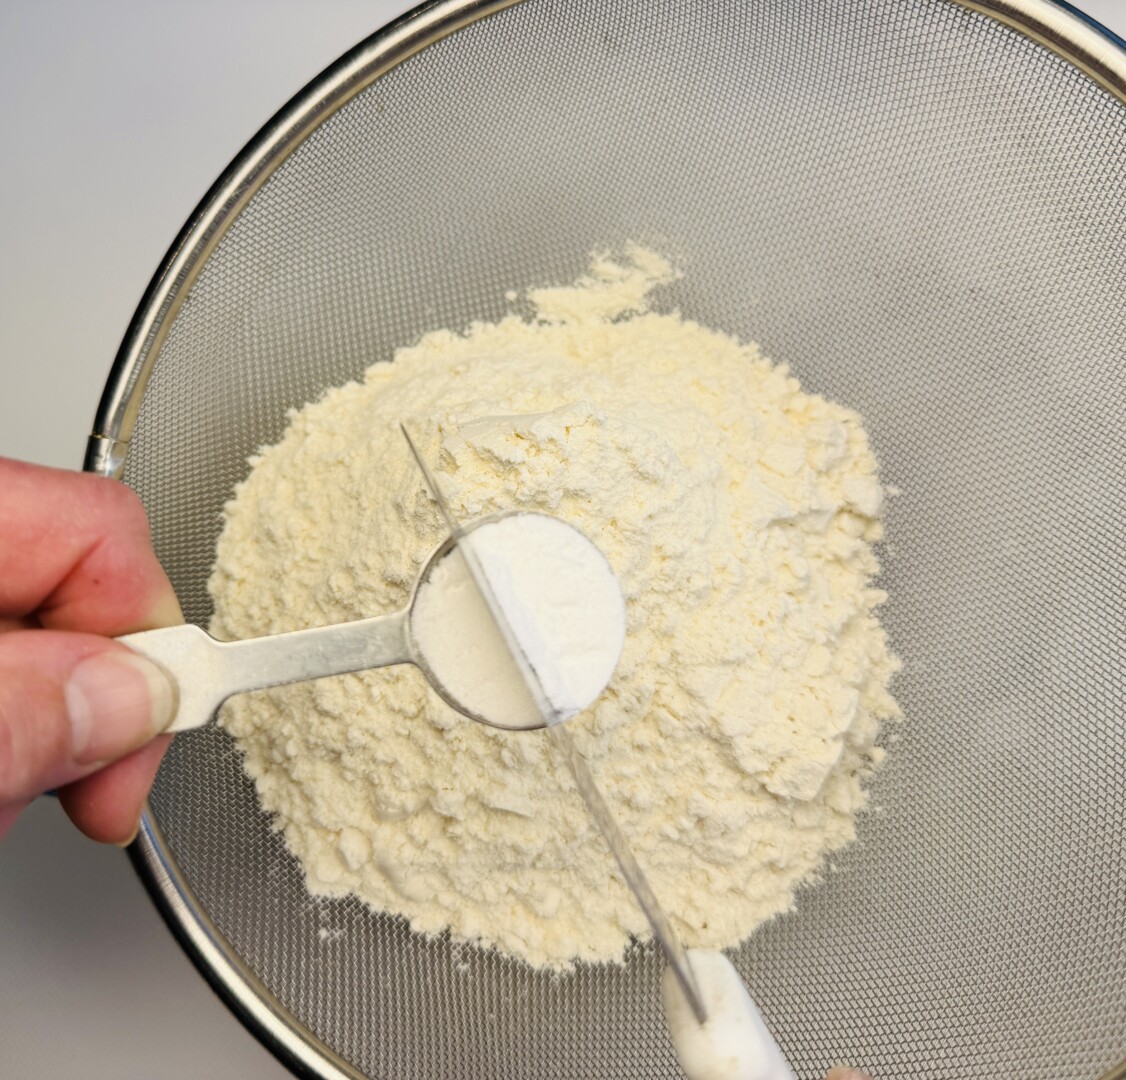
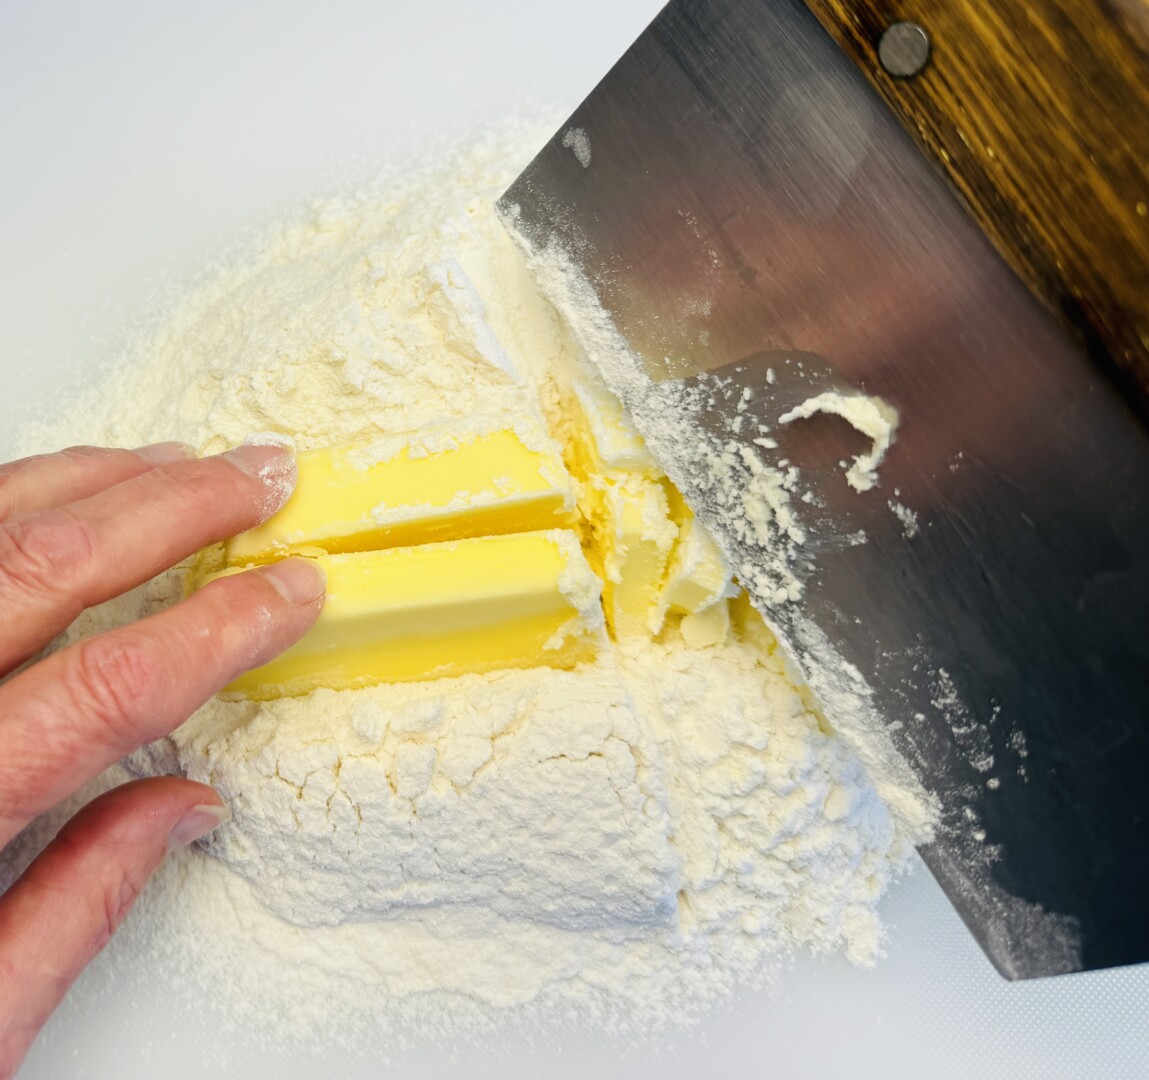
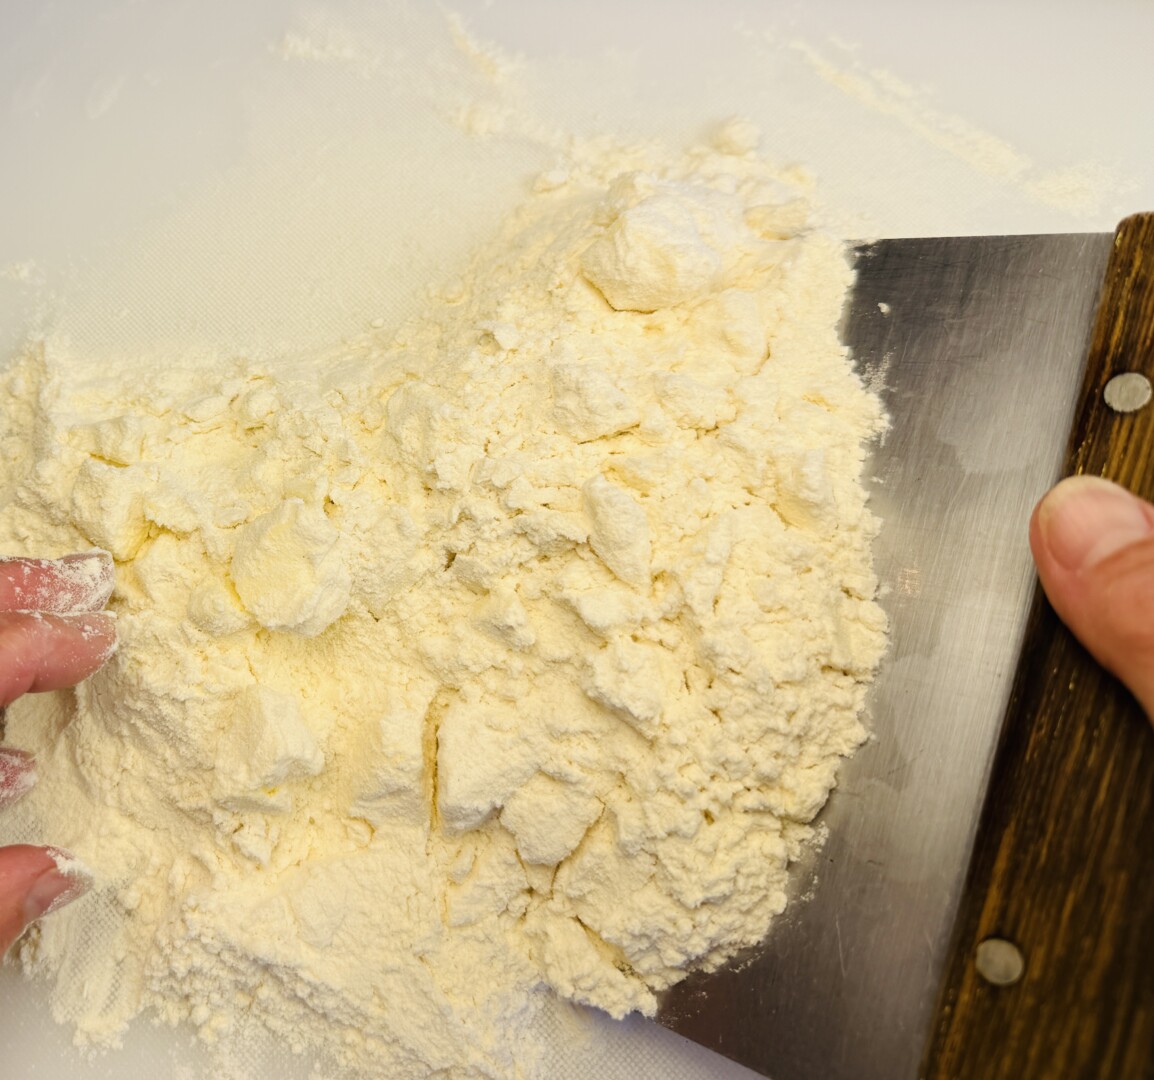
Place a strainer on a dry cutting board and measure the flour, sugar, and baking powder into it. Sift the ingredients into a mound on the board, and then sprinkle the salt over top. Cut in the butter: Pace the cold butter onto the mound and use a bench scraper (or a chef knife) to chop it up into pieces about the size of a pencil eraser. As you chop, mix the pieces into the flour. Work quickly to keep the butter cold. Transfer the flour mixture into a plastic bag and refrigerate it. For convenience, measure out the milk. With this prep done, at dinnertime you can mix the biscuit dough in as little as one minute’s time!


Assemble the remaining ingredients and your prep is complete. Here’s your mise tray:
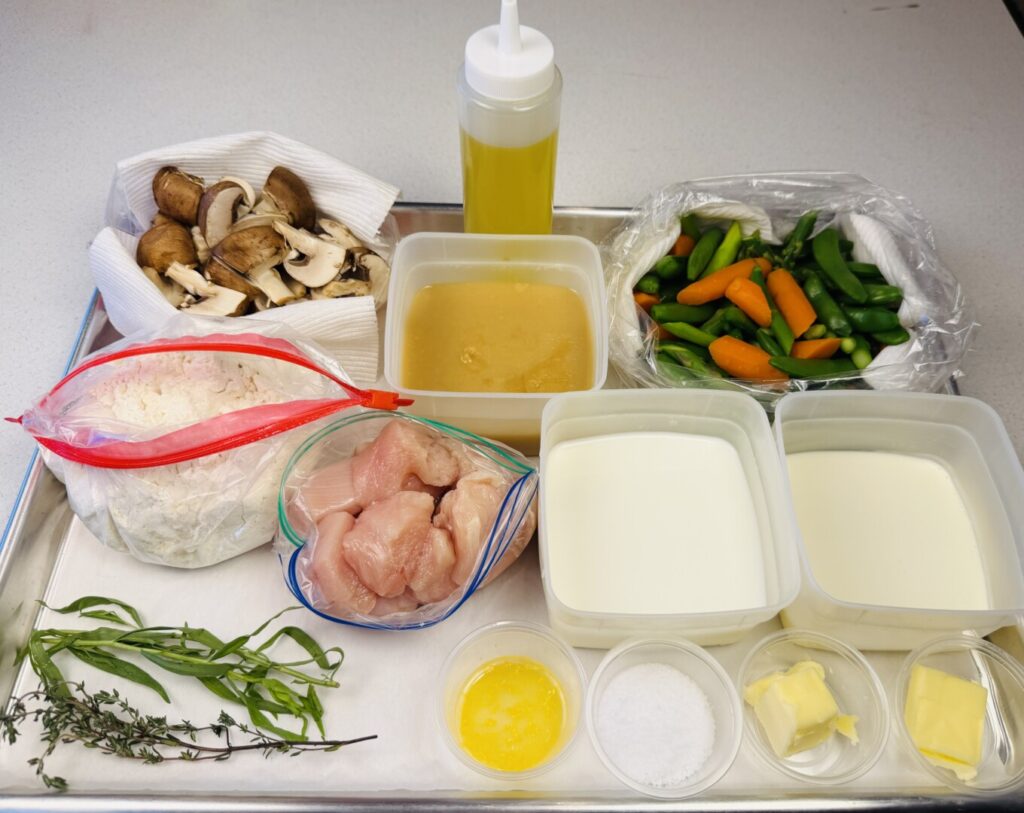
It’s dinnertime—let’s COOK!
Preheat your oven to 400°F and prepare your casserole dish.
It’s important to choose a dish of the right size and shape. If you’re making the recipe as written, for 2 (generous!) portions, you need a dish with a 1-quart capacity. If you’re scaling x 2, use a 2-qt dish, and so on. (To determine the capacity of your dish, use a 1-cup dry measuring cup filled to the brim with water. Pour in cups of water, counting every cup, until the dish is filled almost to the brim, leaving 1/2 to 3/4 inch of rim.) To ensure that the cobbler dough topping fully covers the surface, a deeper dish works better than a shallower one.
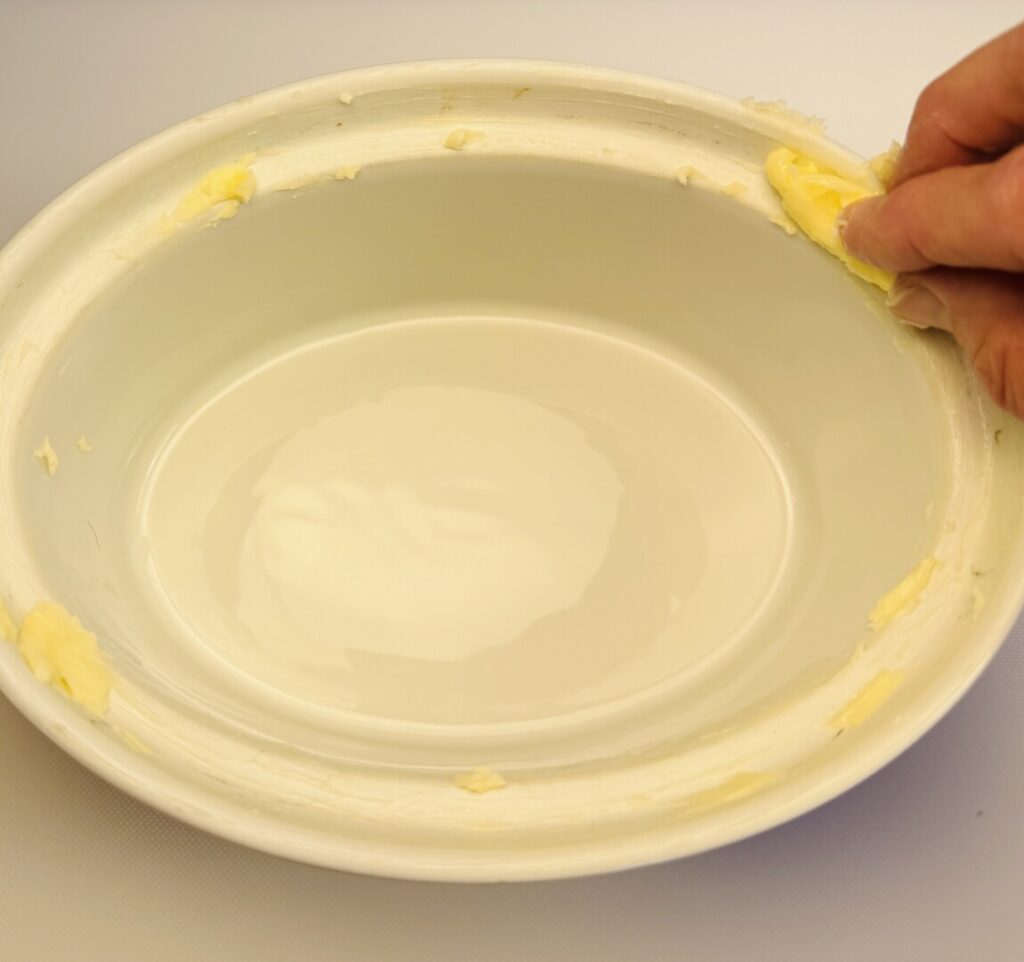
Rub the inside of the dish with softened butter, and then place it on a sheet-tray lined with aluminum foil.
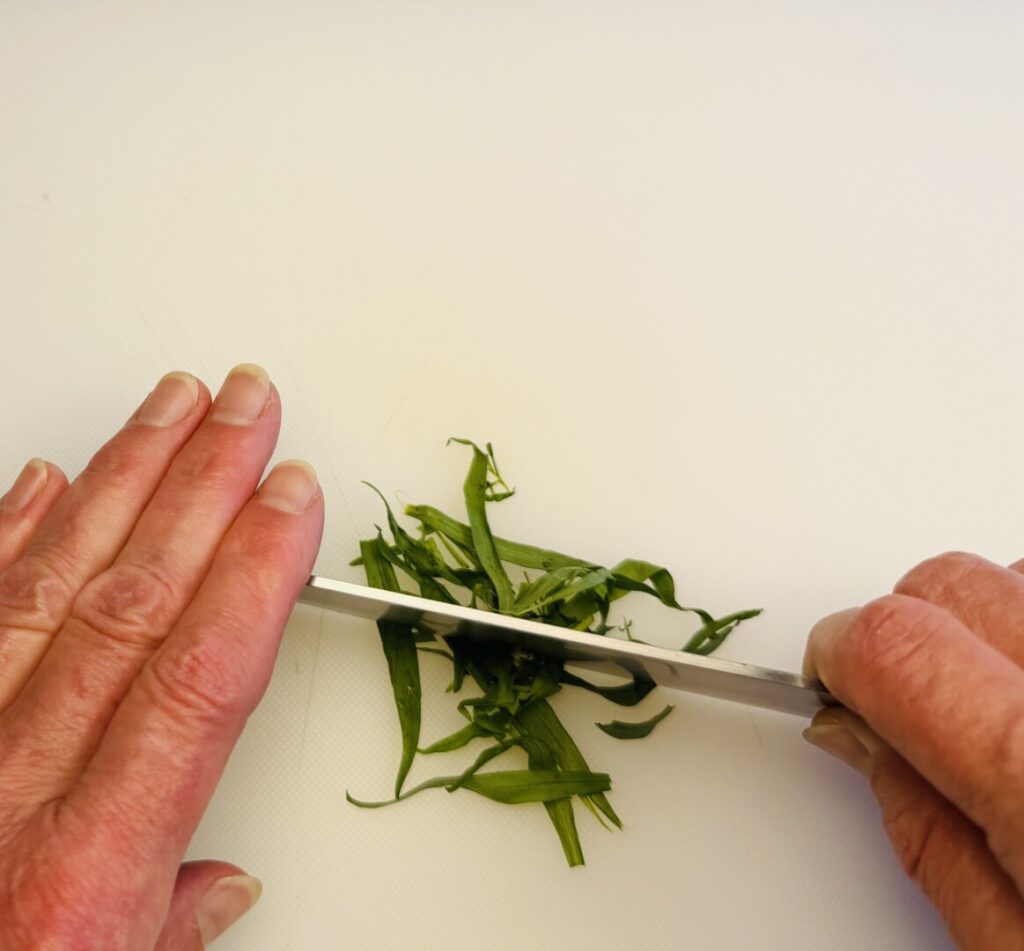
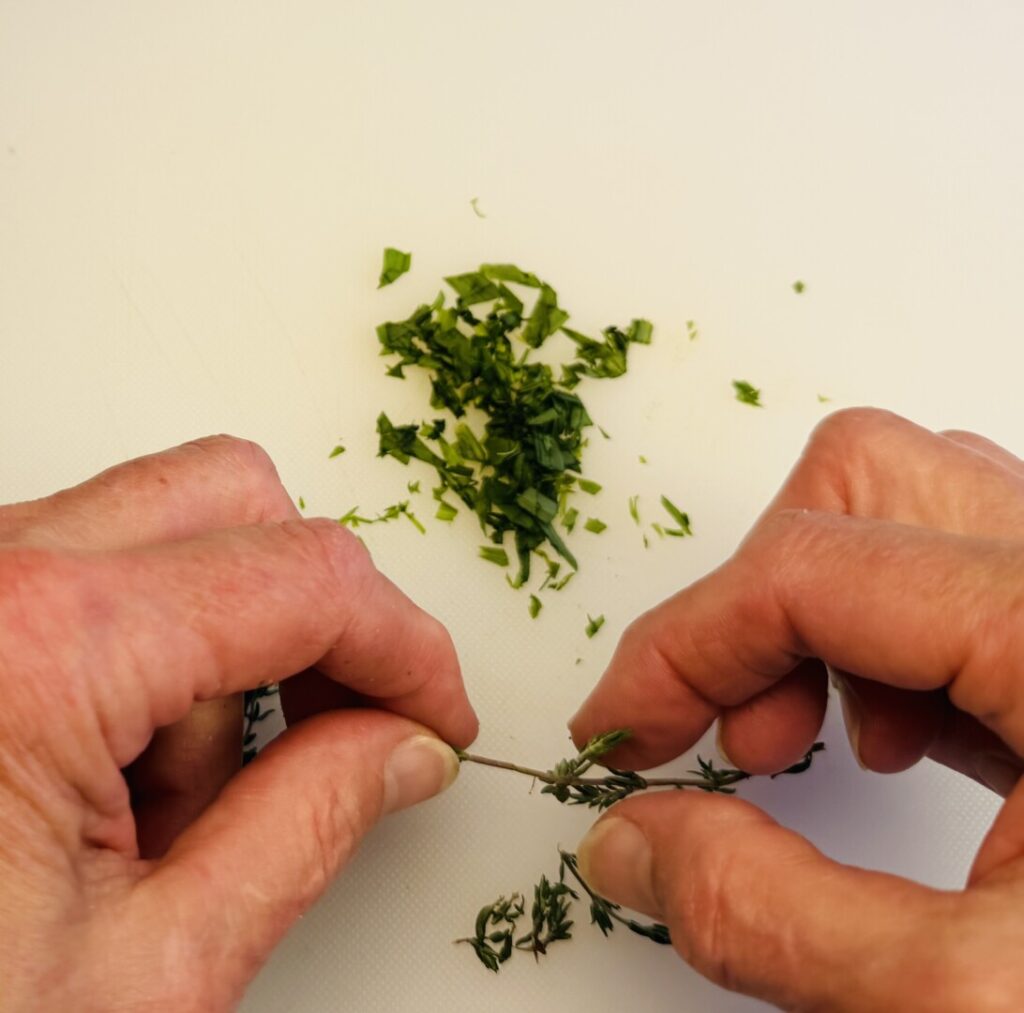
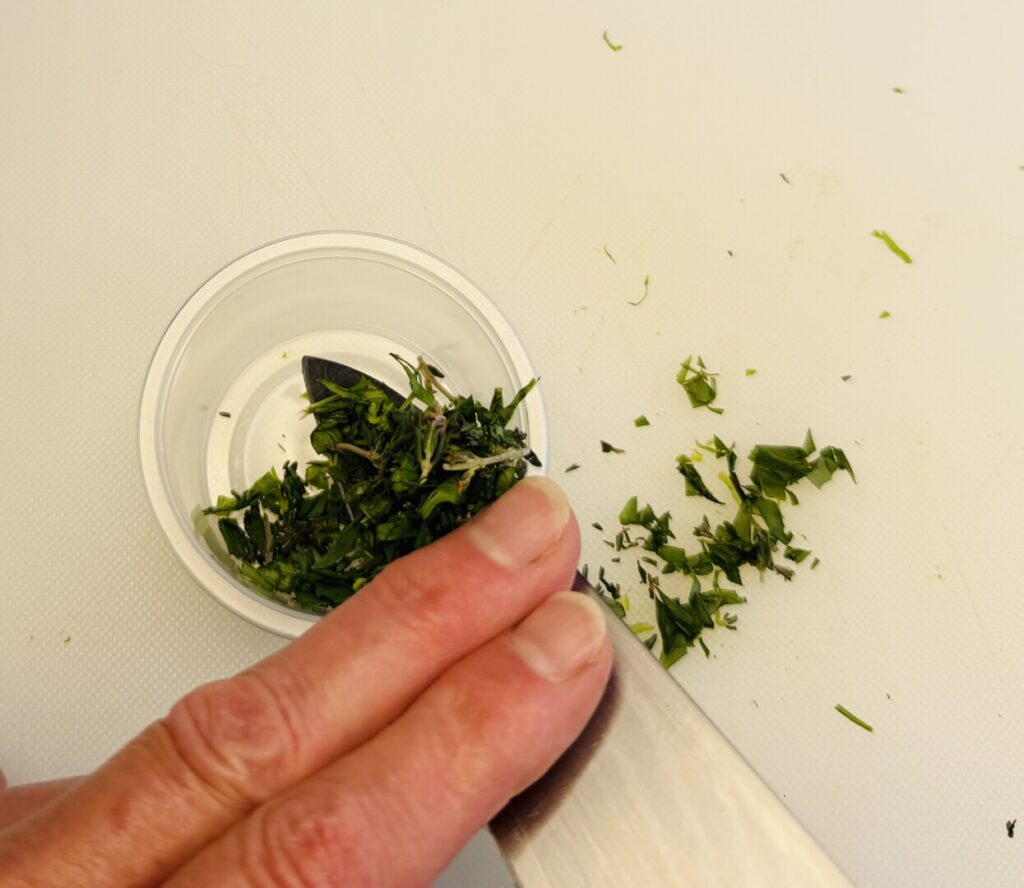
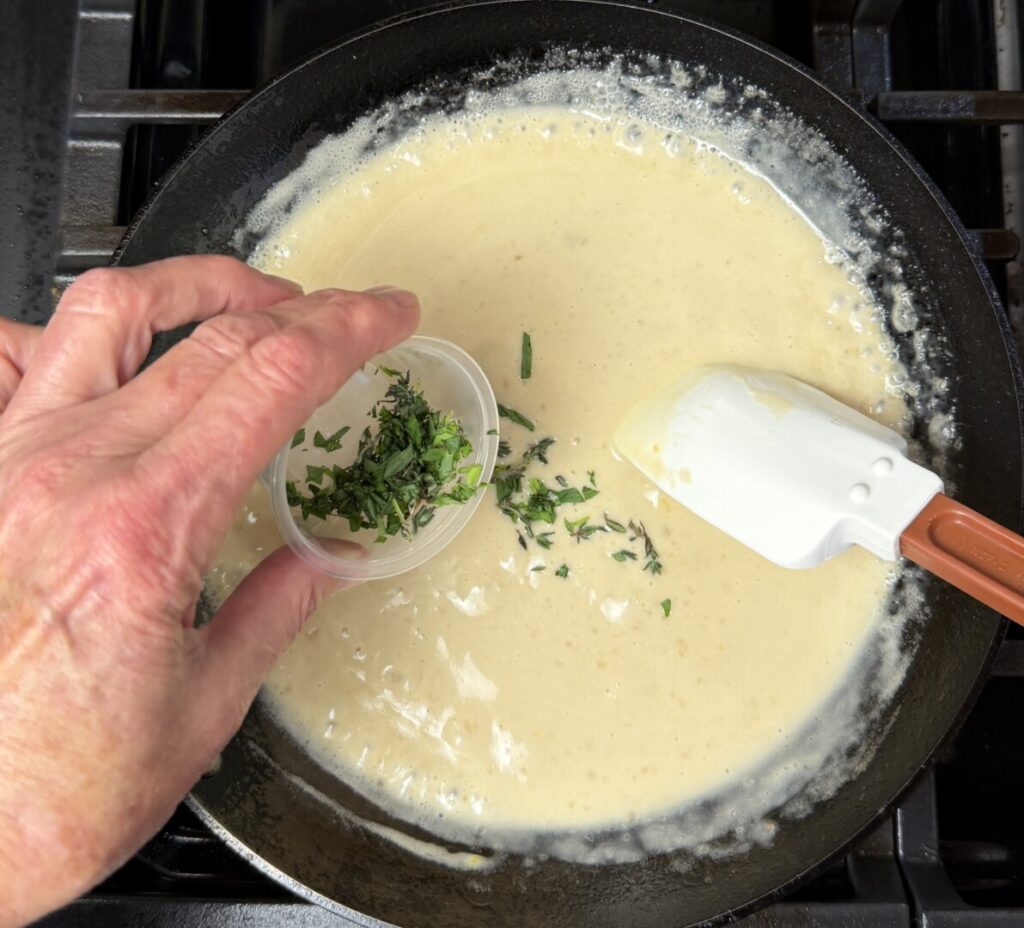
Fresh herbs are the essence of springtime; adding them to this dish makes it truly special. Remove the leaves from the tarragon sprig and chop them. Use your fingers to strip the thyme leaves off of the stems—no need to chop, as they’re tiny. Combine the herbs in a small container.

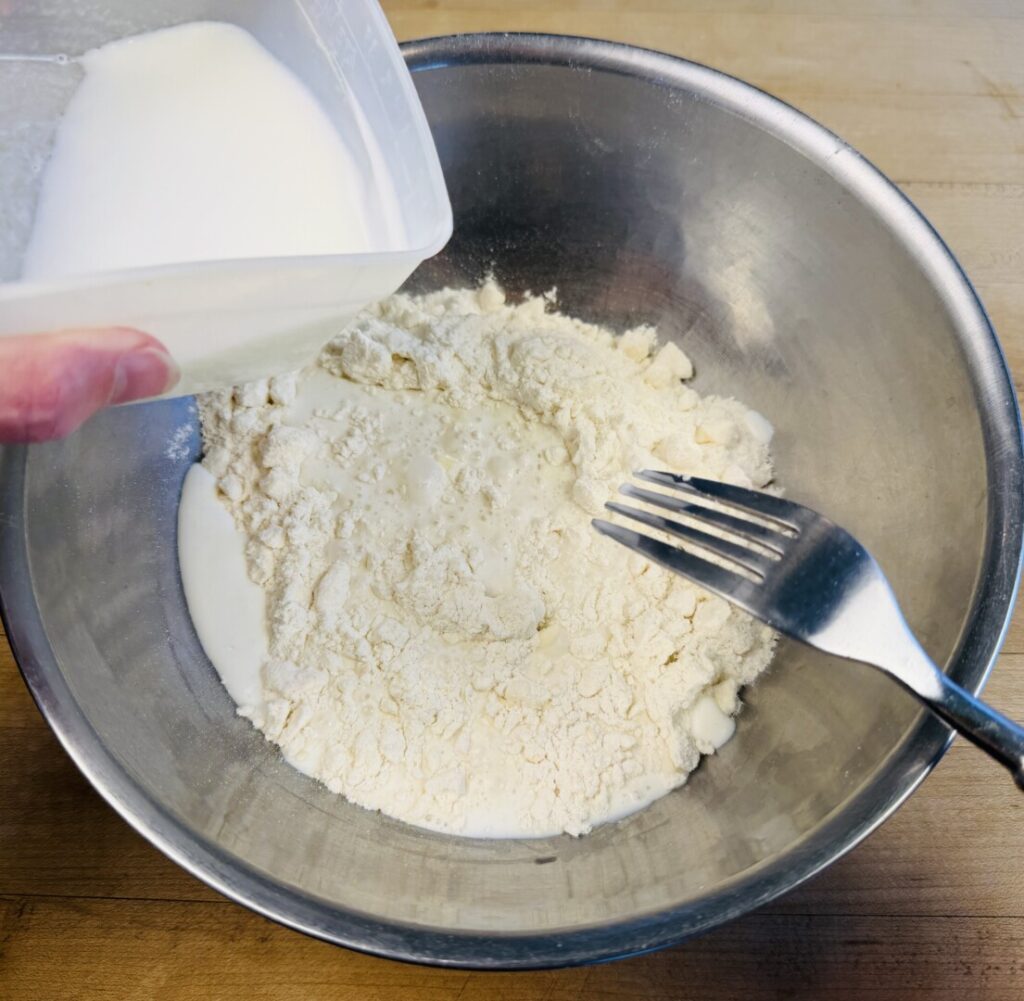
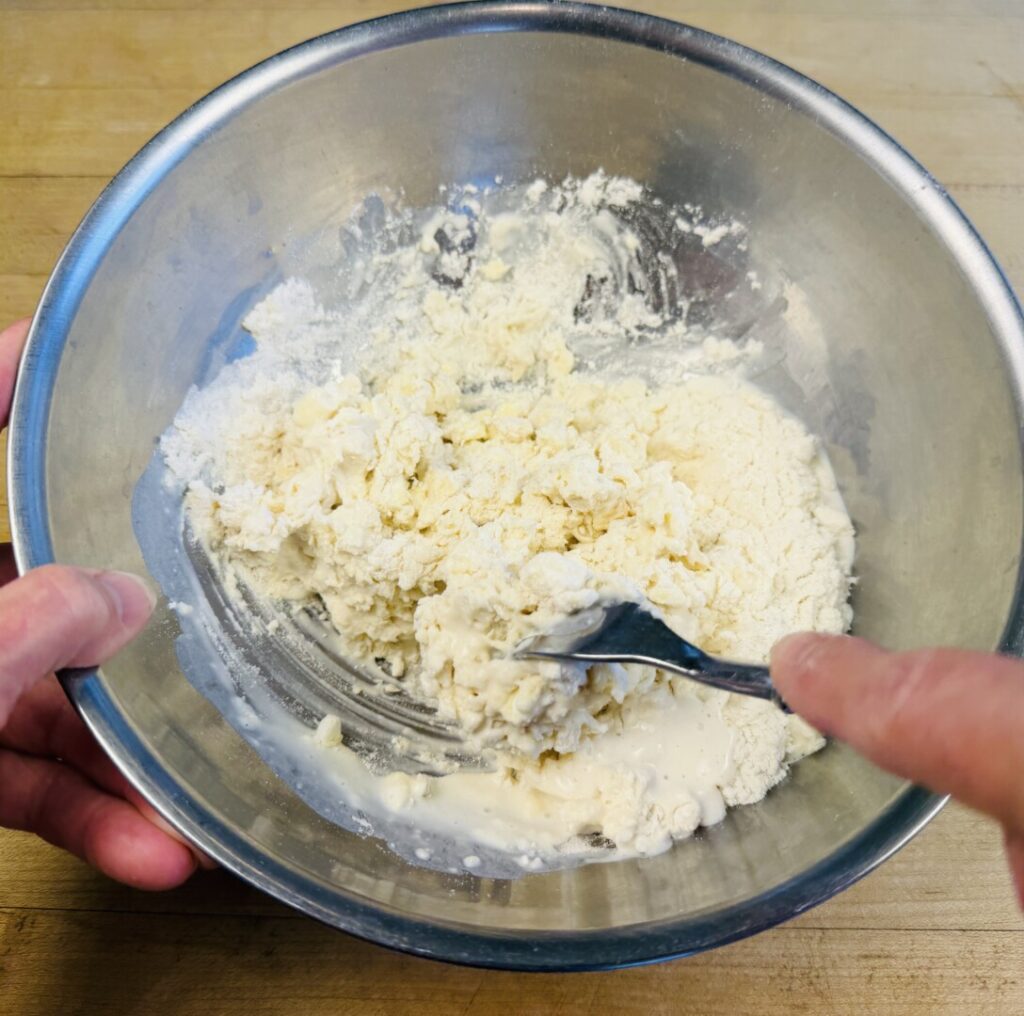
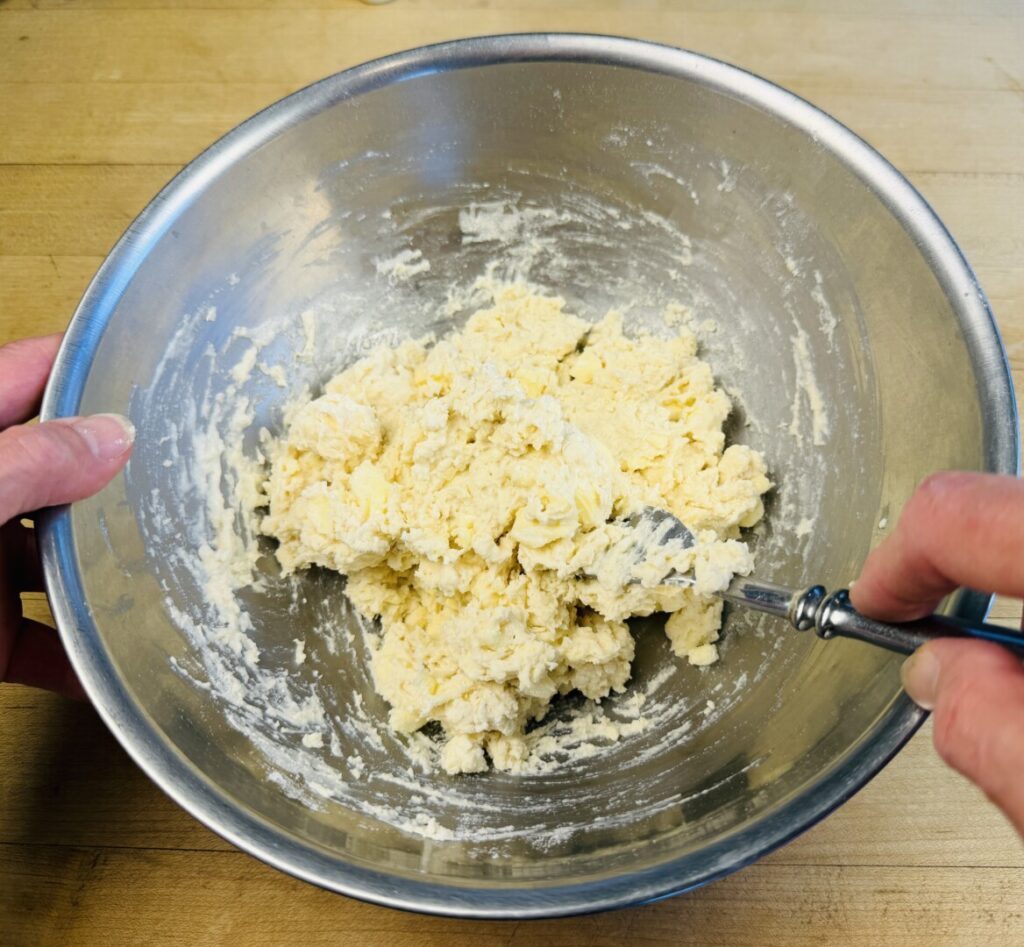
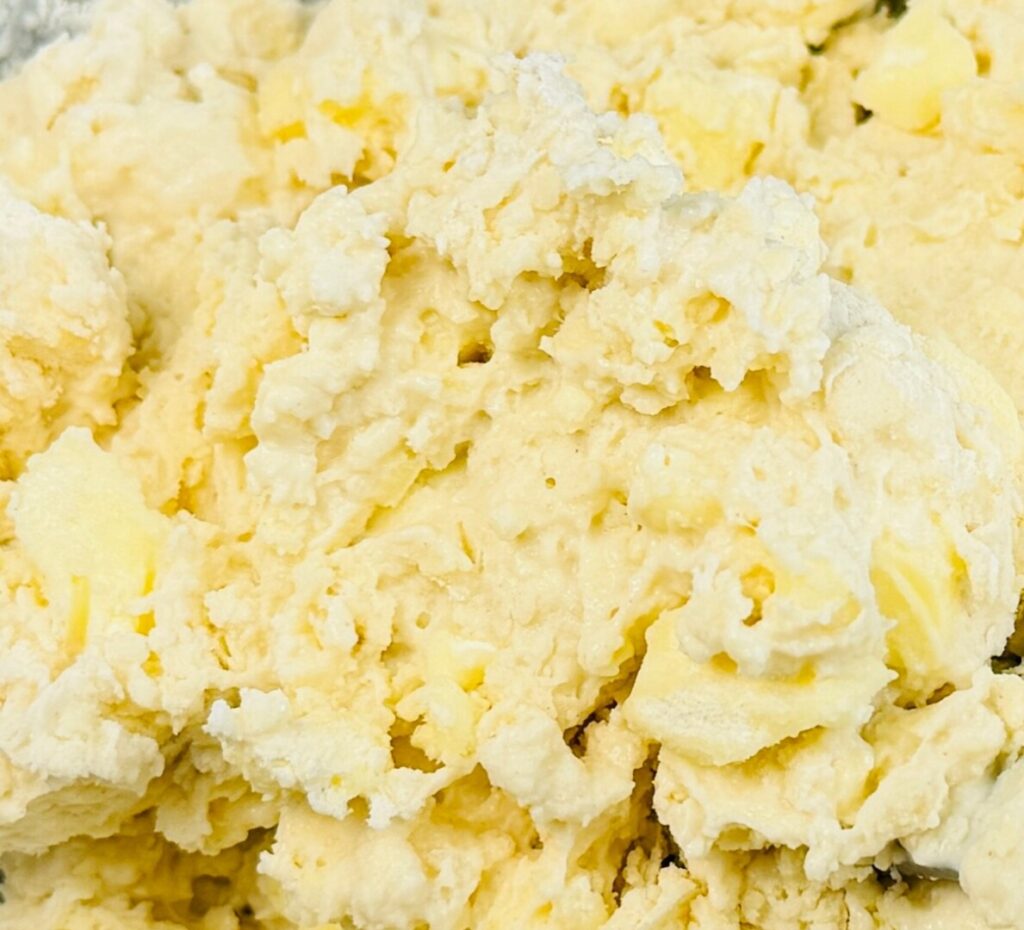
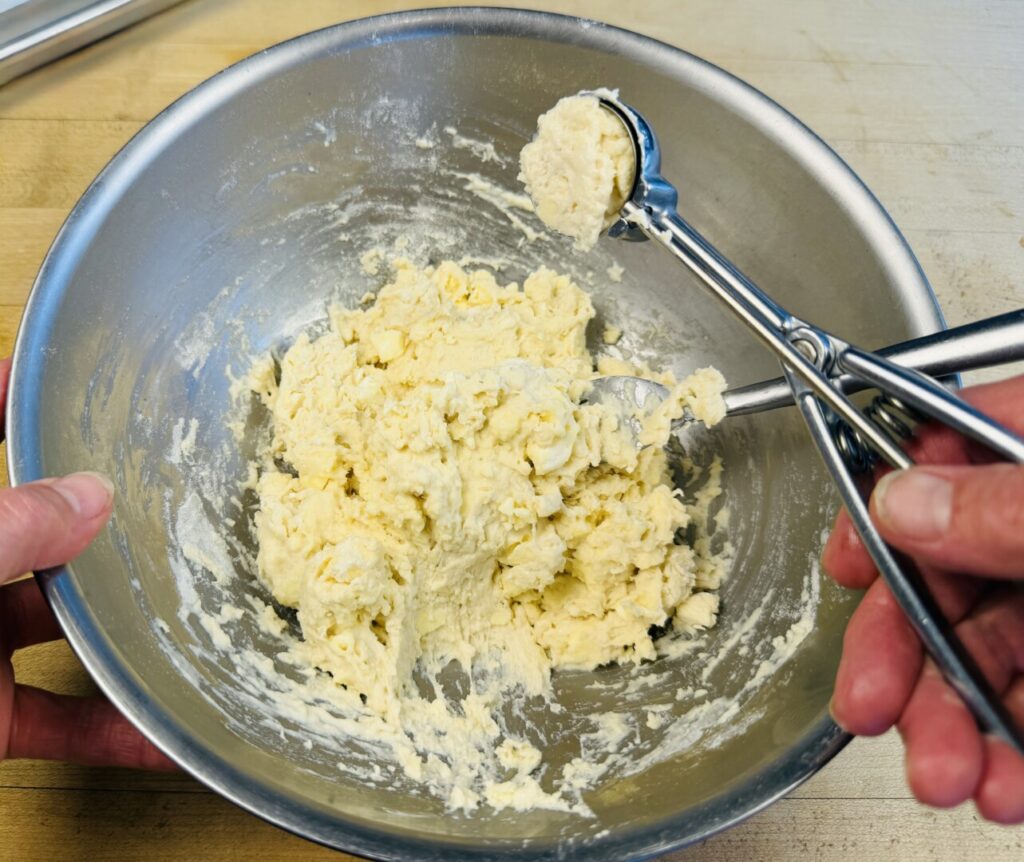
Next, mix the biscuit dough. Place the cold flour-butter mixture into a bowl and pour in the cold milk. Stir with a fork for a few strokes only, just until combined. Don’t overmix! The mixed dough should look lumpy and shaggy, as shown in the close-up below right. If you mix too much, until the dough is smooth, your topping will be tough and chewy. Refrigerate the dough to keep the butter cold and to allow the flour to become fully hydrated with the milk.
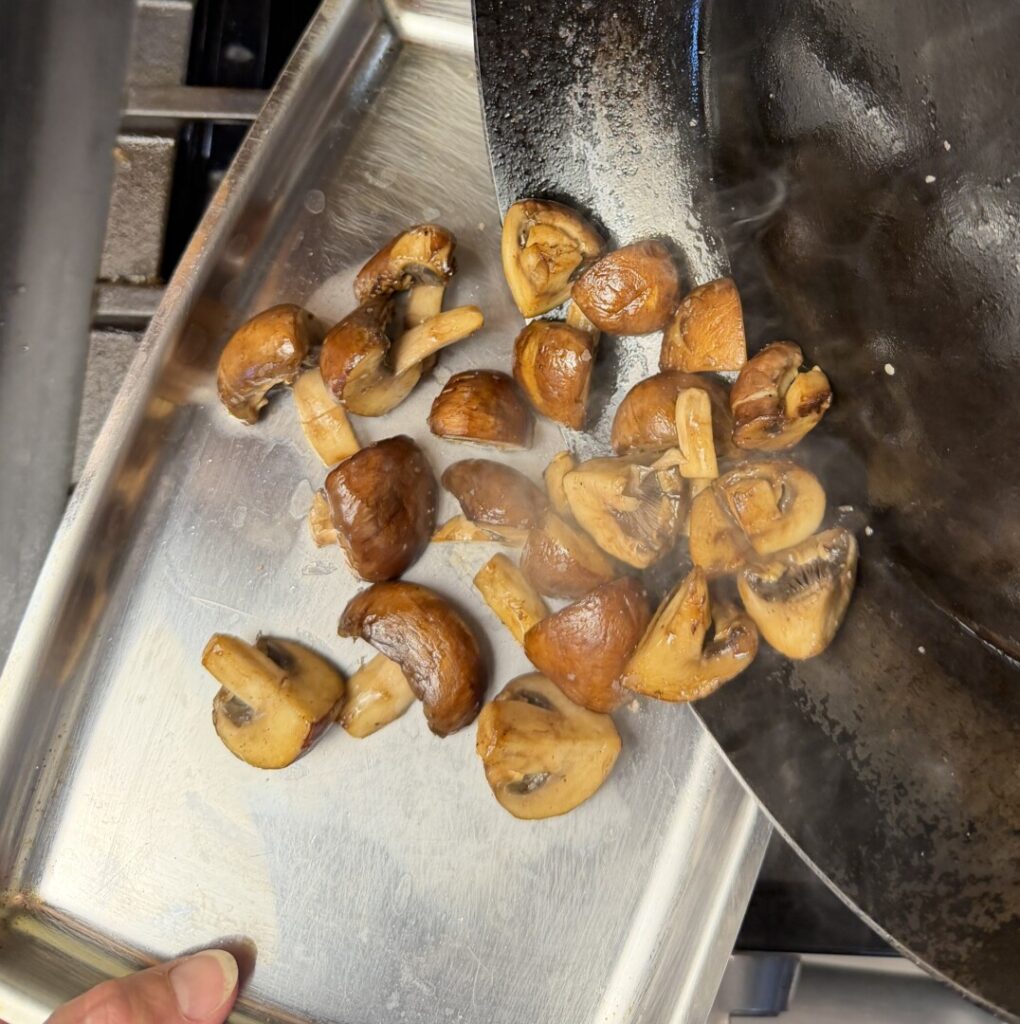
Next we’ll cook the mushrooms. Mushrooms are like sponges: They have a porous cell structure that soaks up any liquid with which they make contact. When freshly picked, mushrooms are full of moisture from the growing medium. The presence of this moisture in raw (or improperly cooked) mushrooms results in a watery texture and diluted flavor. So when cooking mushrooms, we need to force out their moisture and concentrate their texture and flavor using a dry heat method, such as sautéing, grilling, or high-heat roasting.
When sautéing mushrooms it’s essential to use the highest possible heat to sear the exteriors while forcing out the internal moisture through evaporation. To achieve this effect, a carbon steel sauté pan works best because it becomes very hot very quickly. Make sure the pan is large enough to accommodate the mushrooms in a single layer; crowding the pan lowers the temperature and results in watery mushrooms.
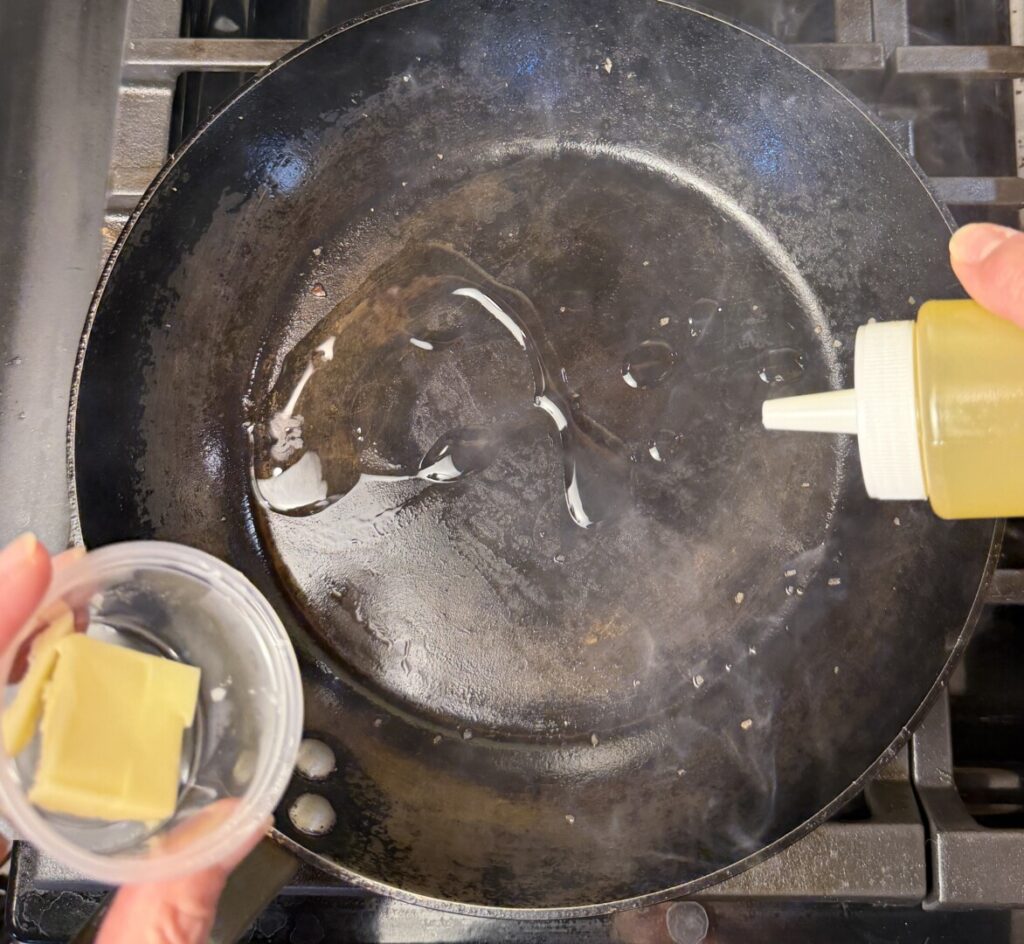
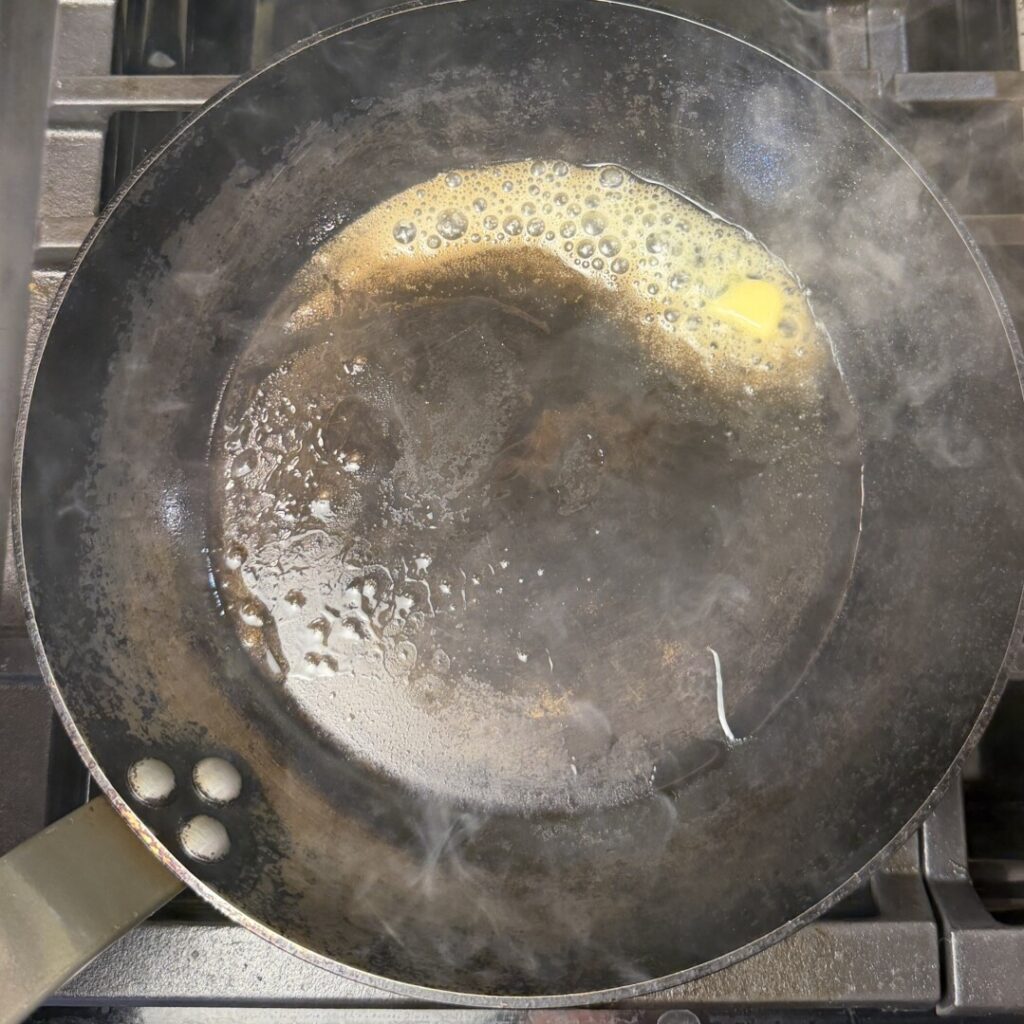
I prefer a mixture of oil and butter as the sauté cooking medium: Canola oil withstands high heat; butter browns beautifully and adds flavor. But you need to work quickly so that the butter doesn’t burn! A pinch of salt adds flavor and helps draw out moisture. Because of the mushrooms’ sponge-like texture, when the internal moisture evaporates out the fats are drawn in through the process of osmosis. Mushrooms are notorious for needing a lot of fat! But it makes them taste great.
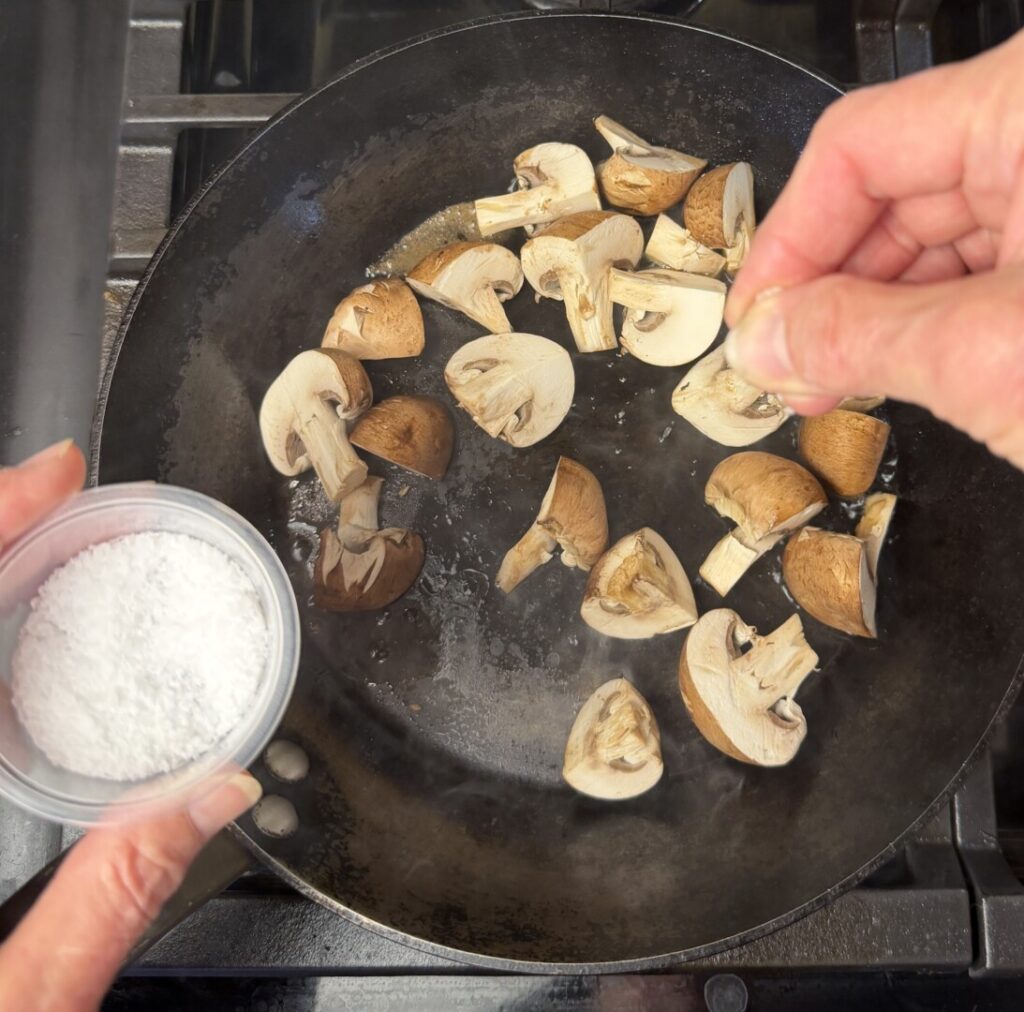
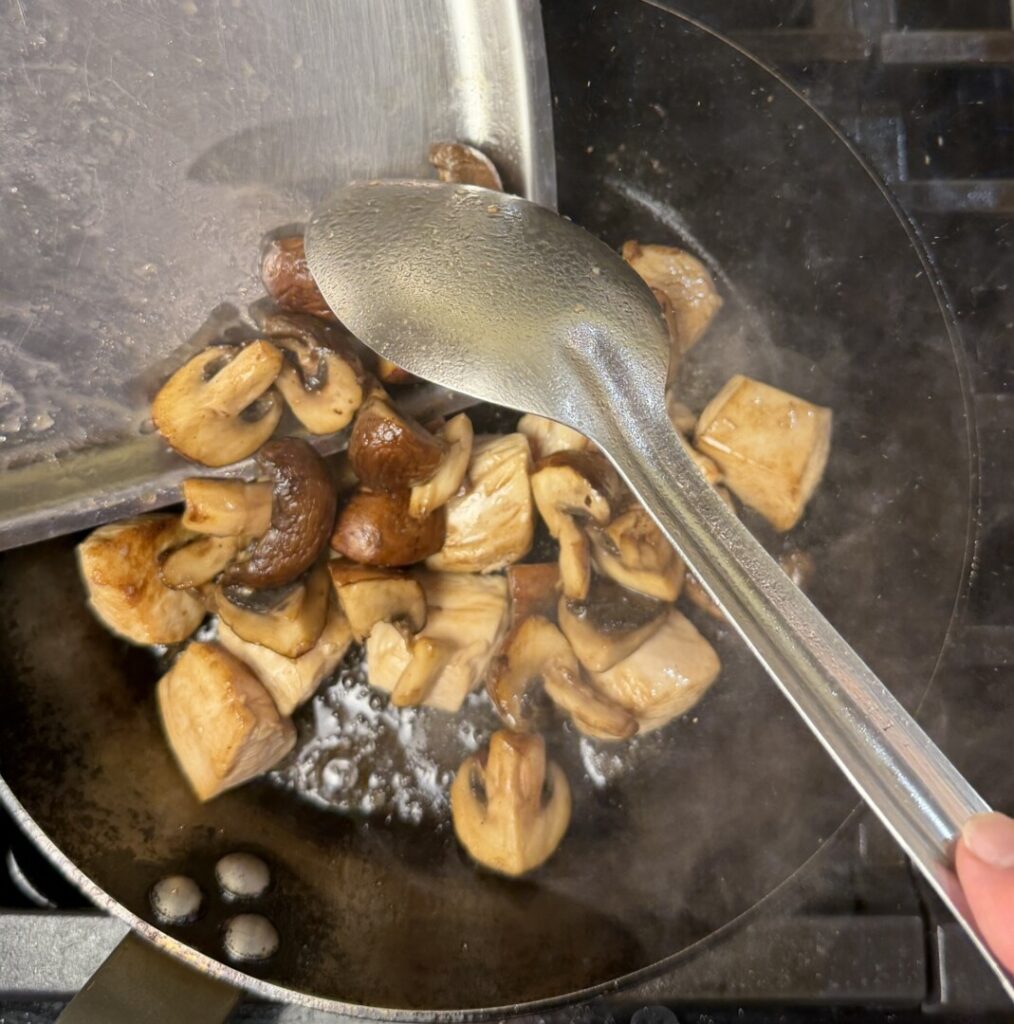
So, heat the pan very hot, add the oil and butter, quickly add the mushrooms and a pinch of salt, and sauté for about 30 seconds. The mushrooms should sizzle and sputter, absorb the fats, shrink, and turn golden brown. You should not see any liquid in the pan. Remove them to a sizzle pan or small tray to clear the pan for the chicken.

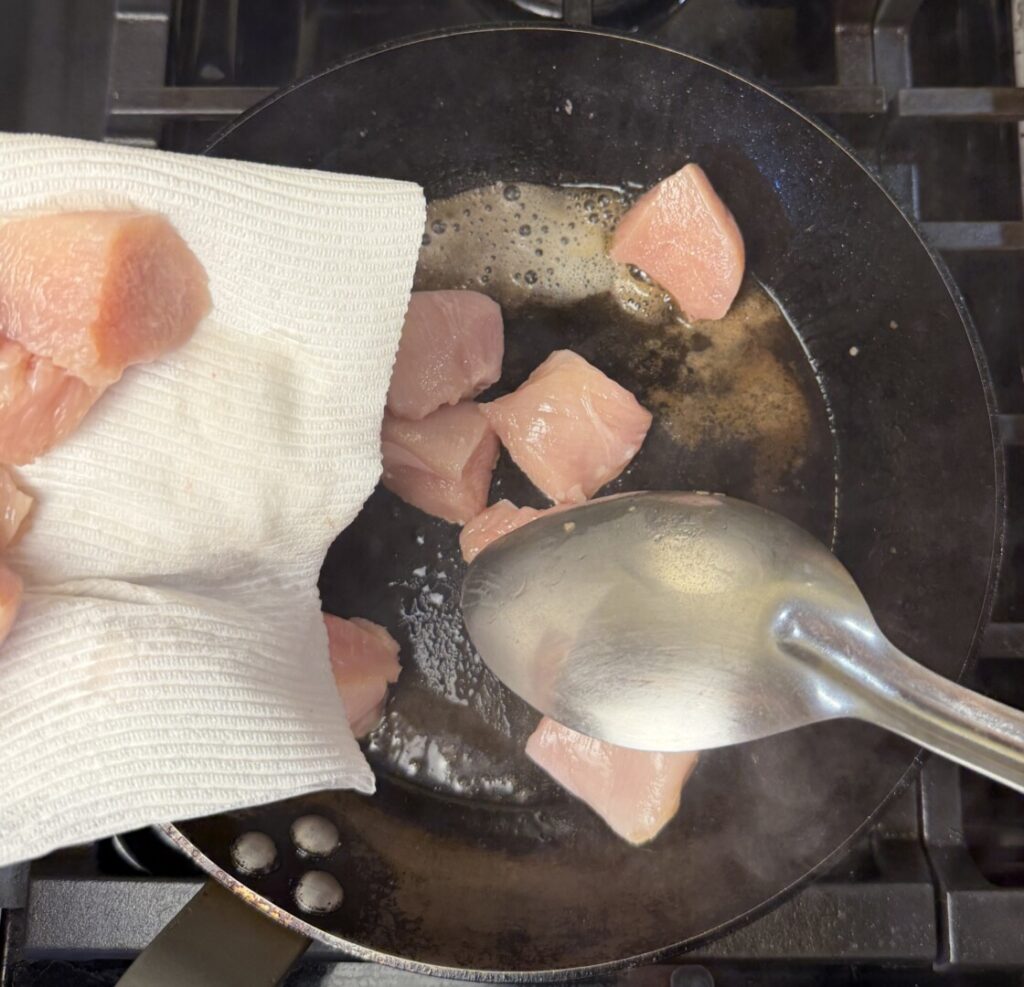
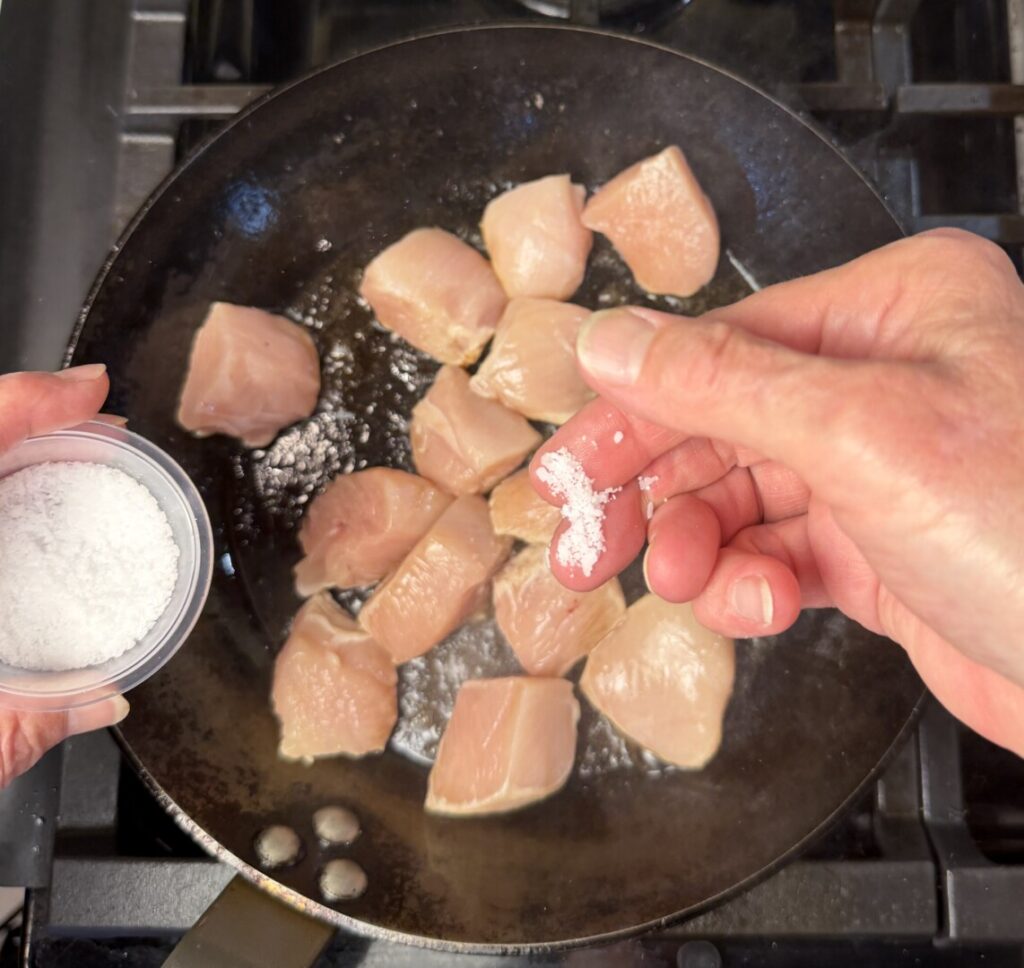
Add the remaining oil and butter to the sauté pan, blot the chicken cubes dry on paper towels, and and then carefully add them to the pan. (If the chicken is wet or if you toss the cubes in too forcefully, the hot fat can spatter.) Sauté for about 30 seconds, just until the exteriors of the cubes turn golden brown. The chicken cubes must remain raw inside. Turn off the heat and return the mushrooms to the pan.
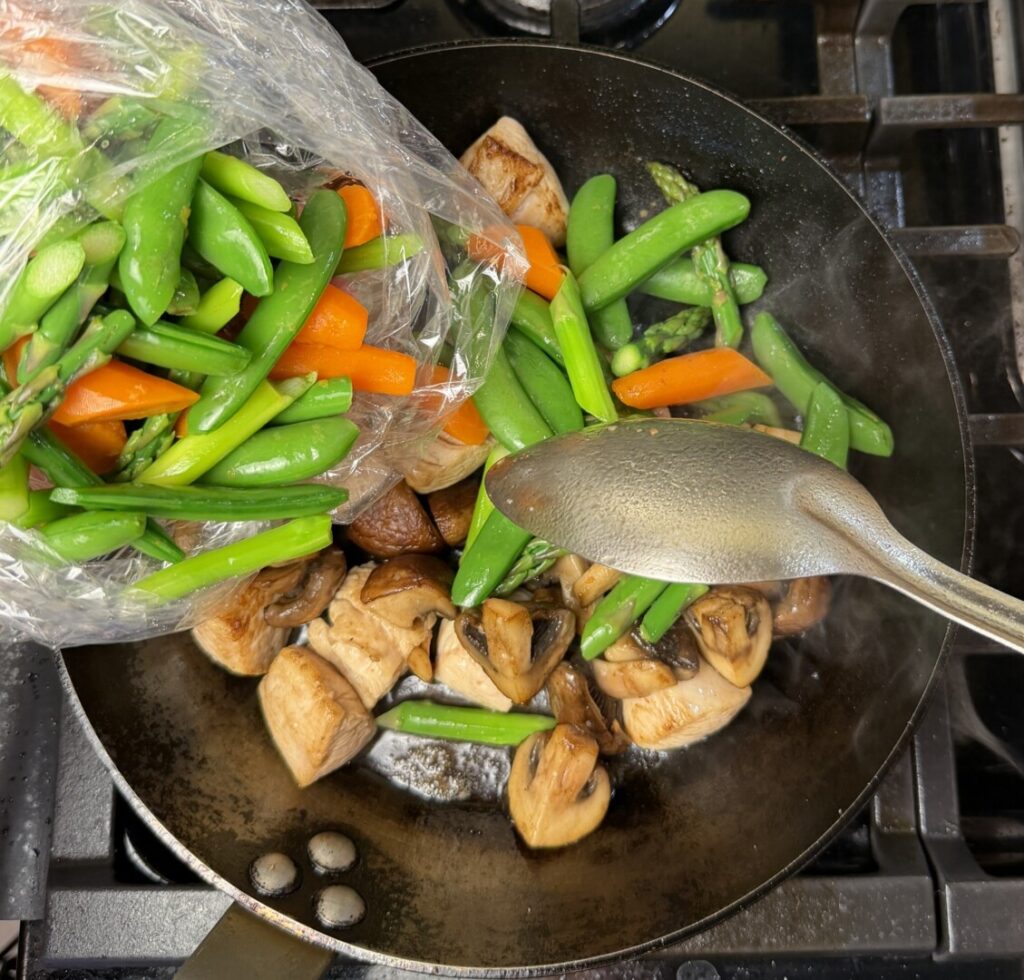
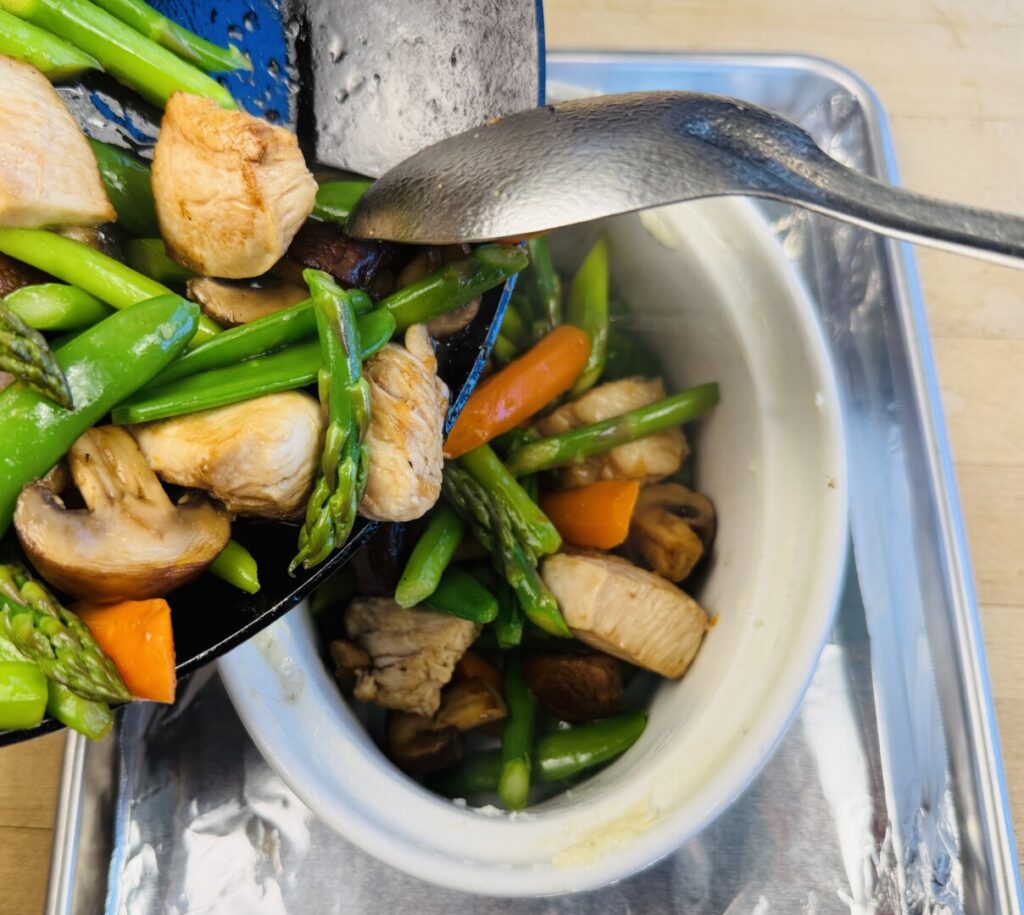
Add the par-cooked vegetables to the sauté pan and toss to combine. Transfer the vegetables, mushrooms, and chicken to the prepared casserole dish.
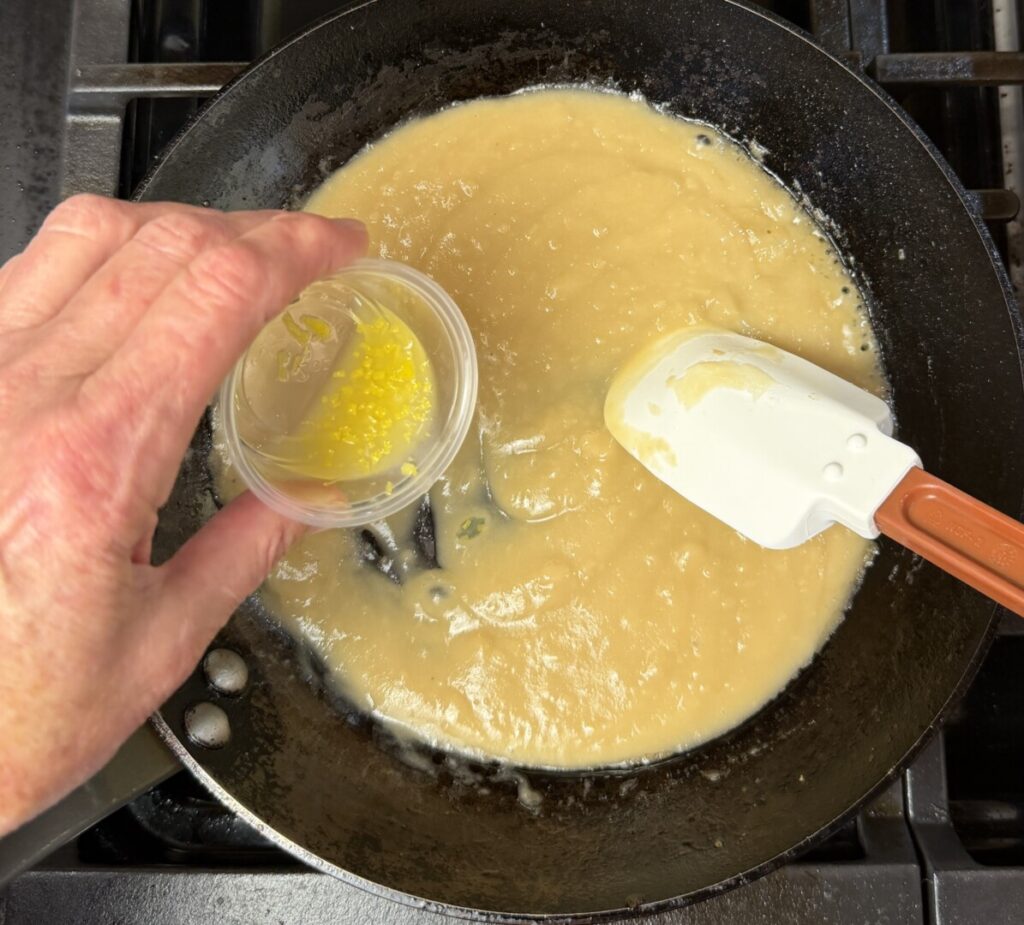
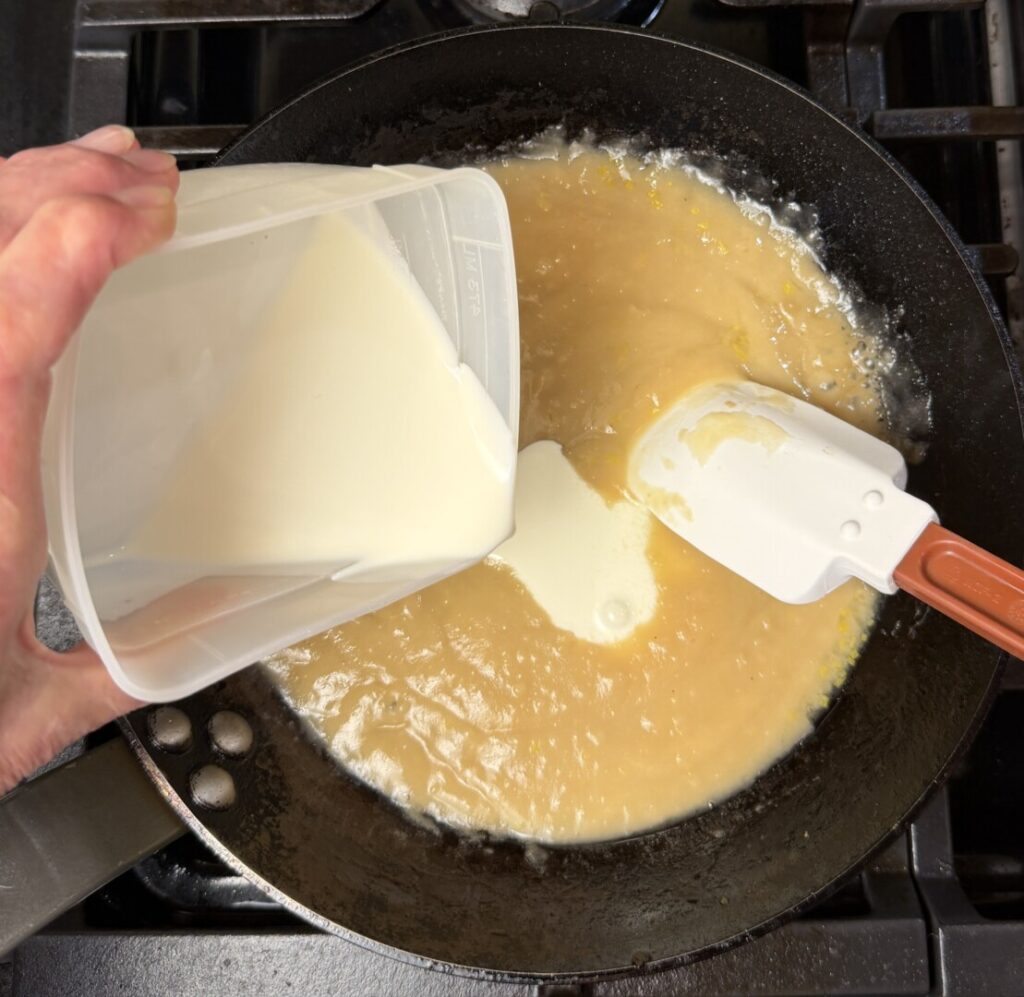
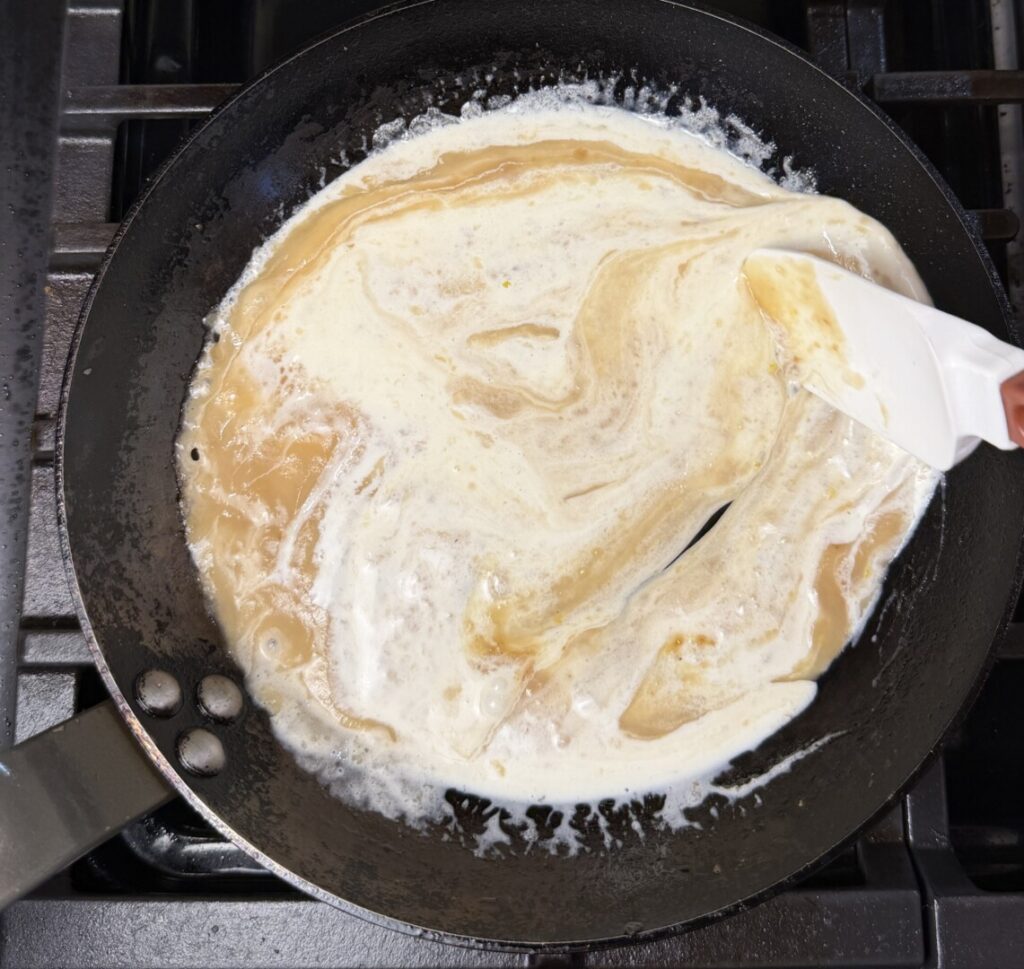
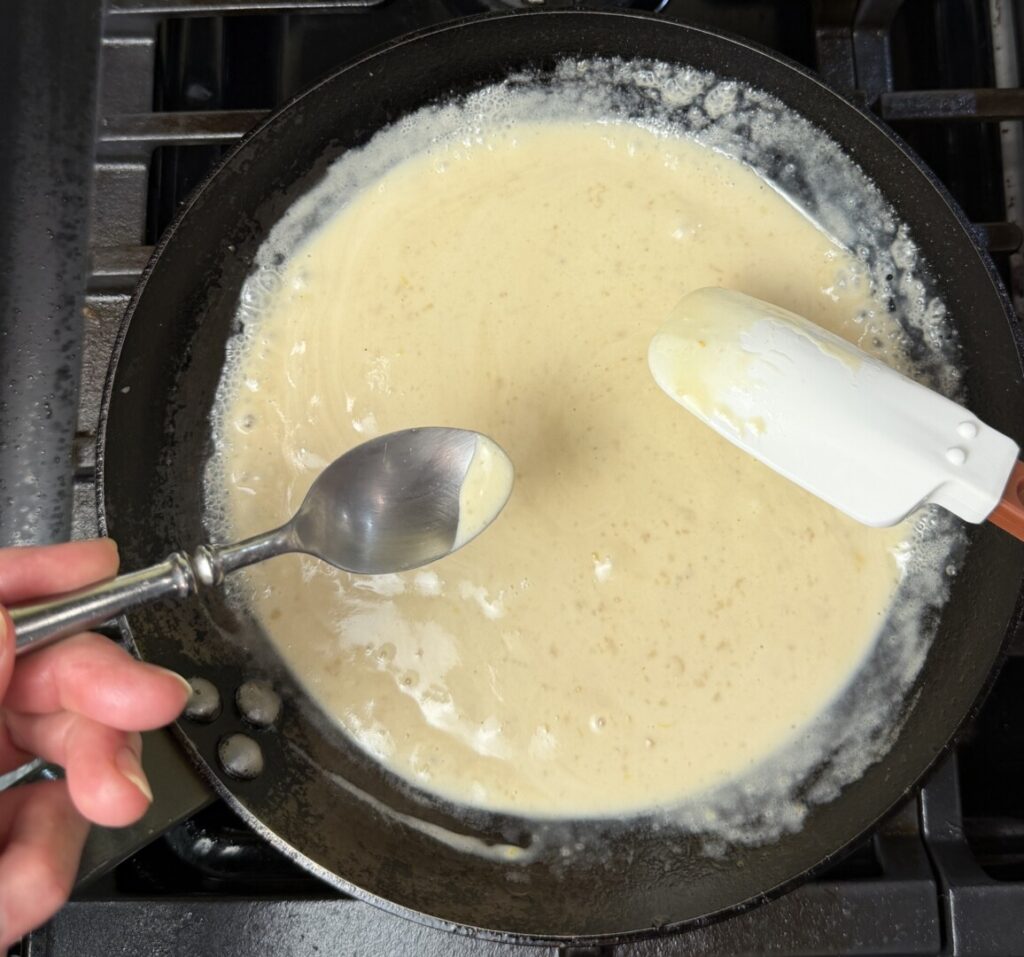
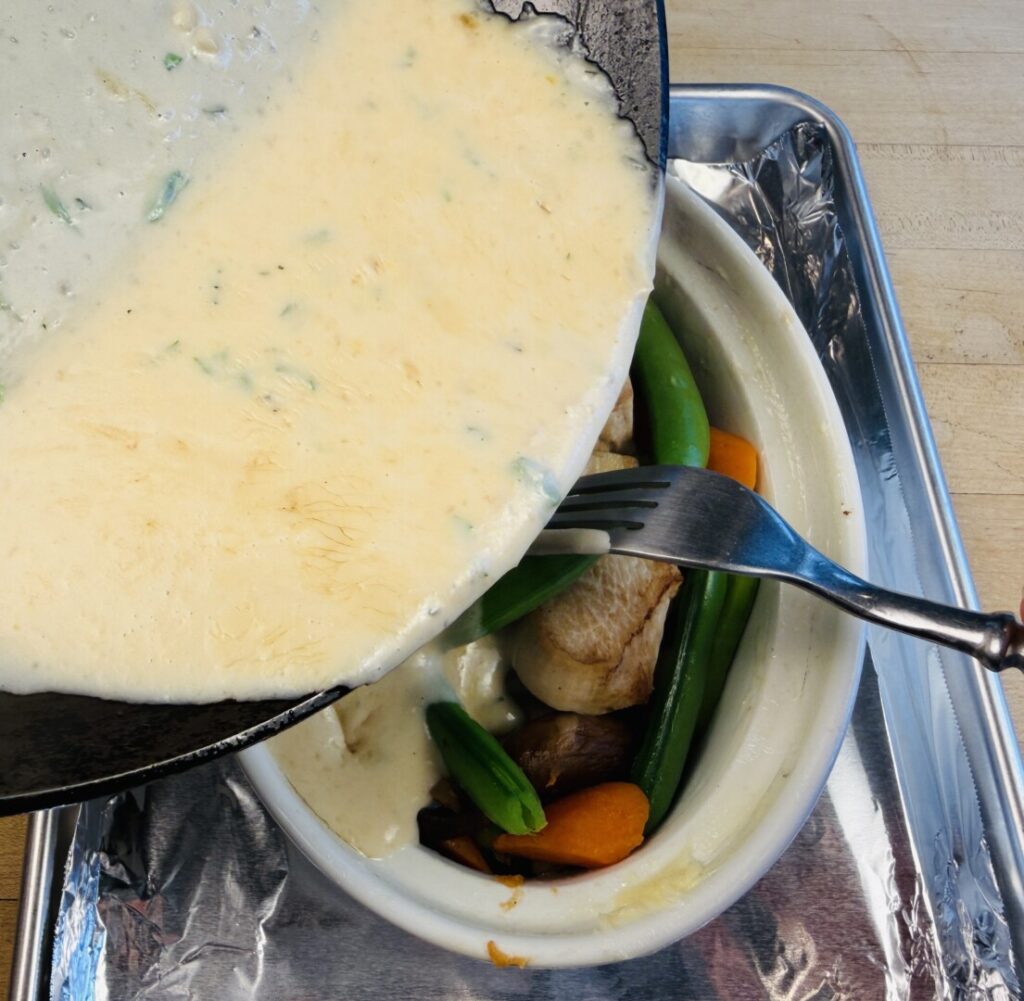
Scrape the prepped sauce base into the sauté pan, turn on the heat, and stir until it liquifies. Stir in the lemon zest and juice, and then the heavy cream. Bring the sauce to the simmer. The sauce should have a nappé consistency: thick enough to coat a spoon but thin enough to flow on a plate. If too thick, thin it with a little chicken stock or water; if too thin, raise the heat a little and reduce it. Evaluate the seasoning and add a little more salt if needed.

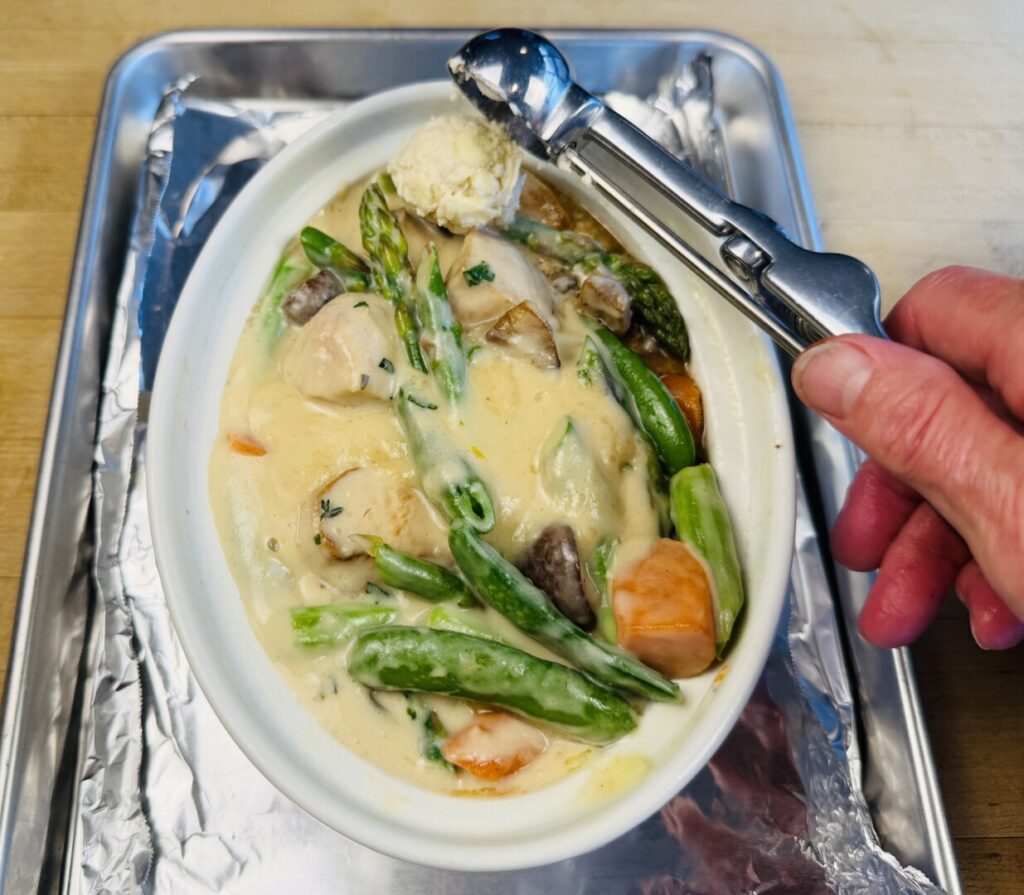
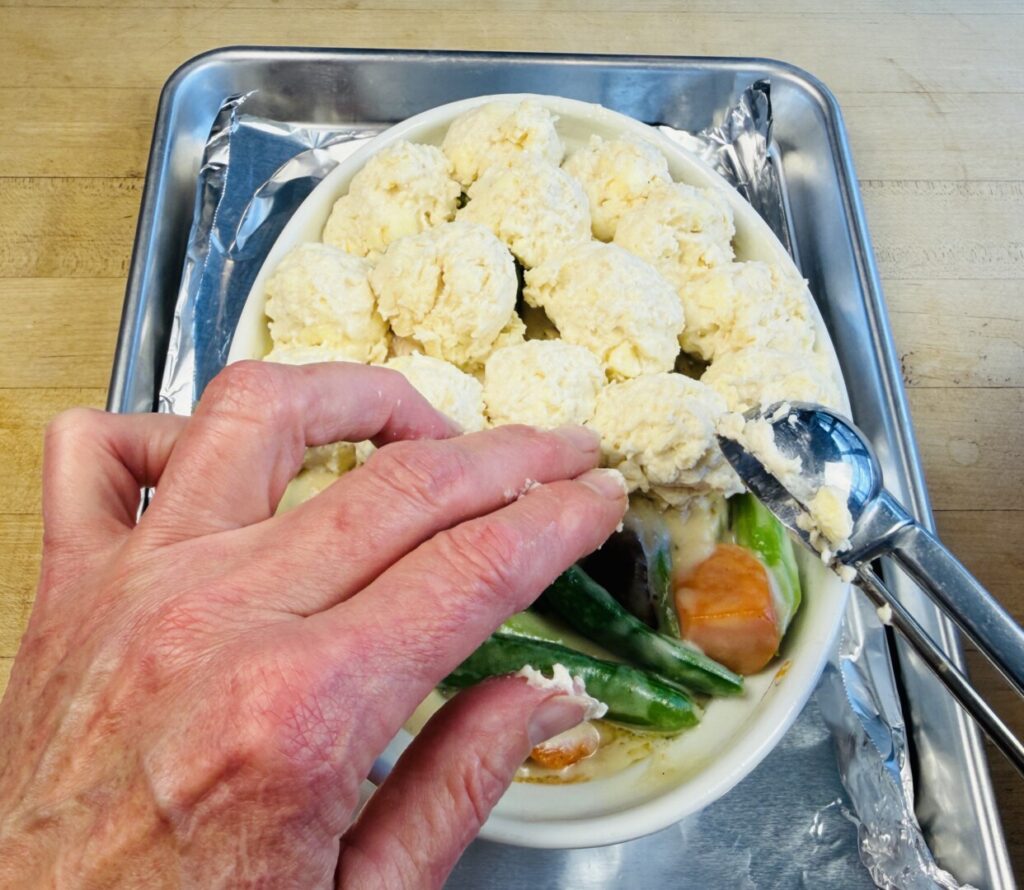
Slowly pour the sauce into the casserole dish, using a fork to separate the chicken and vegetables in various places to ensure that the sauce penetrates throughout. Use a #60 portion scoop (or two tablespoons) to cover the top of the casserole with spheres of biscuit dough. Immediately place the casserole in the oven and bake for about 30 minutes until the biscuit topping is golden brown and the casserole is hot through.
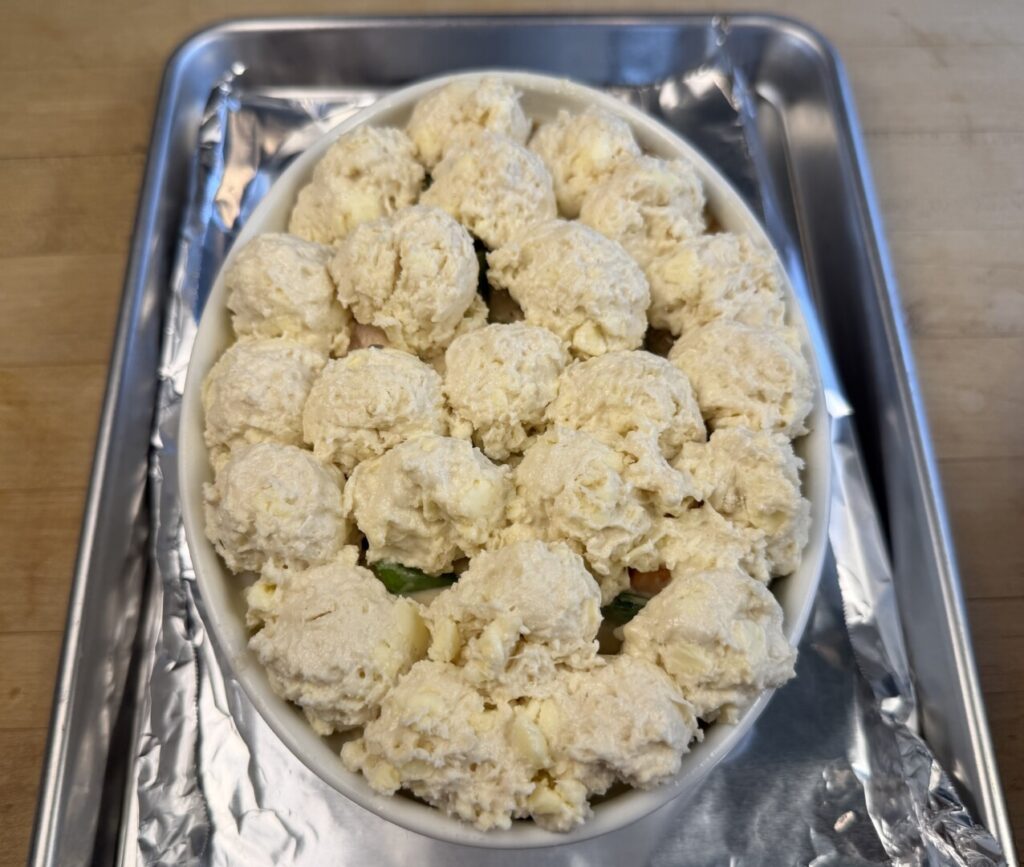
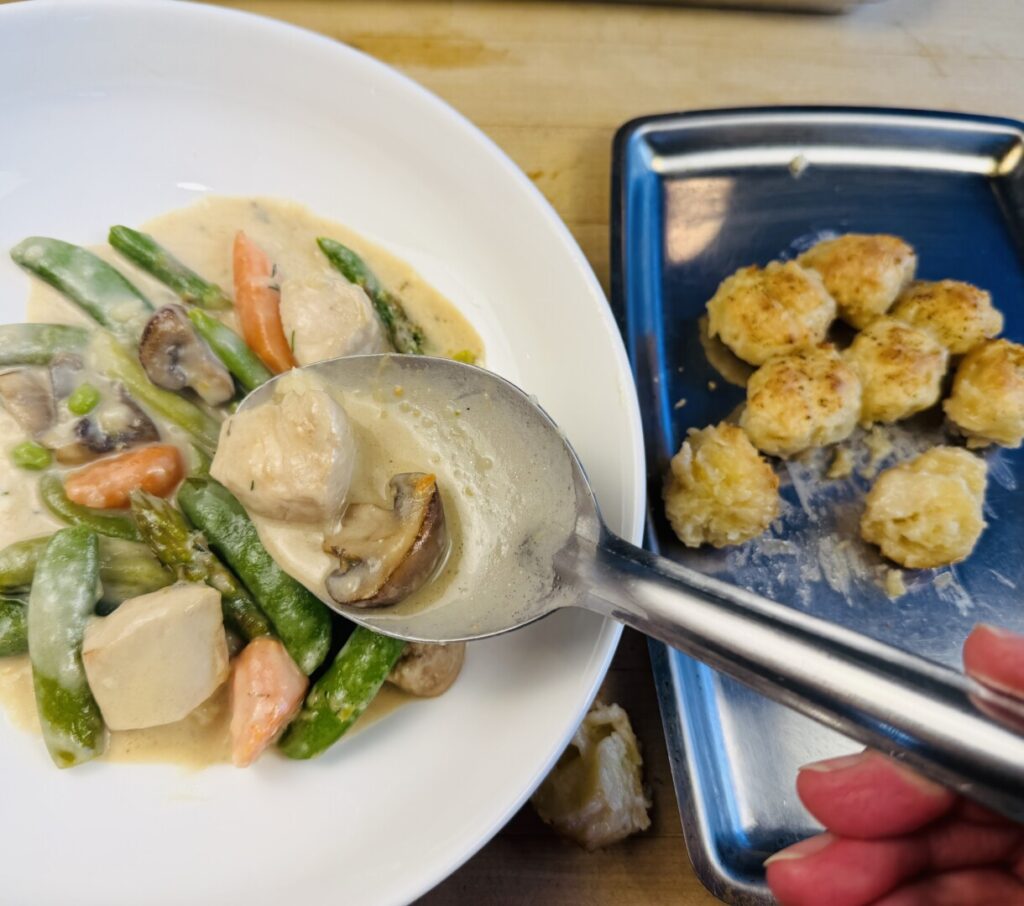
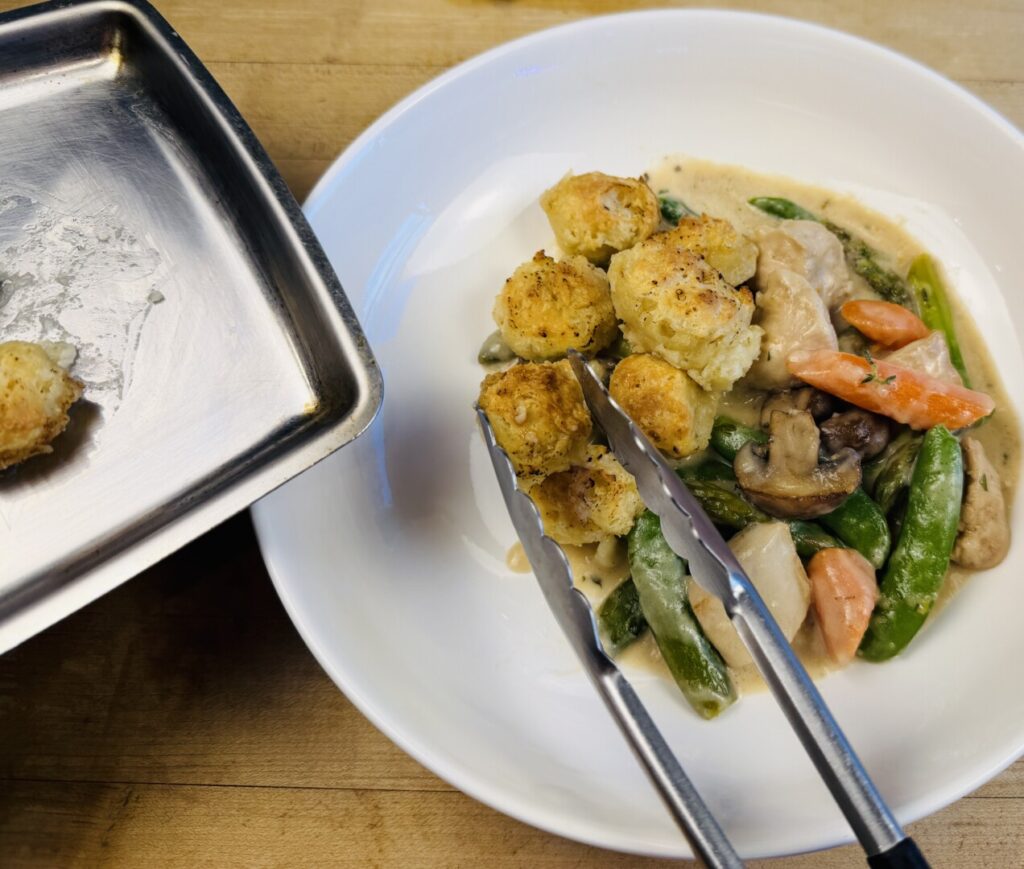
To create an attractive plate presentation, use a spoon and a flexible spatula to lift off the biscuit topping onto a sizzle pan or small tray. Spoon a portion of chicken, vegetables, and sauce into each warmed shallow bowl or plate, and then place a portion of biscuit topping across the back of the plate.
Alternatively, put the casserole on the table and invite everyone to dig in!
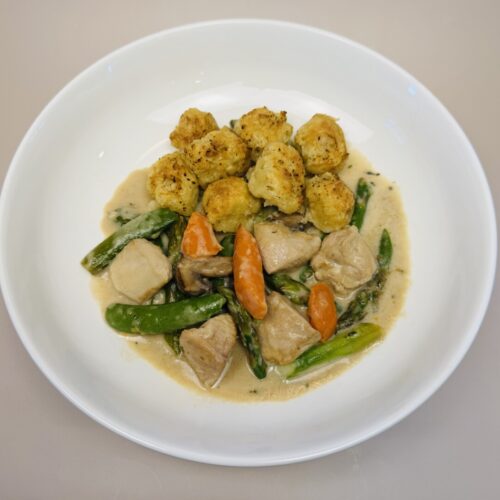
Creamy Chicken Cobbler with Mushrooms and Spring Vegetables
Ingredients
step 1 ingredients
- 3 Tbsp butter
- 3 Tbsp flour
- 1/4 c white wine
- 2 c chicken stock or chicken bone broth
- to taste kosher salt
step 2 ingredients
- 10 oz boneless, skinless "jumbo" chicken breast
step 3 ingredients
- 4 oz mushrooms, preferably creminis (aka baby bellas)
- 4 oz snap peas
- 8 oz medium or thick asparagus
- 3 oz young carrots, preferably with tops
step 5 ingredients
- 1/6 lemon
step 6 ingredients
- 1 1/2 c flour
- 2 tsp baking powder
- pinch sugar
- 1 tsp kosher salt
- 3 oz butter, cold
- 3/4 c milk
step 8 ingredients
- 1 tsp butter, soft
step 9 ingredients
- 1 tarragon sprig
- 1 thyme sprig
step 11 ingredients
- 2 Tbsp canola or other neutral oil
- 2 Tbsp butter
- to taste kosher salt
step 12 ingredients
- 1/2 c heavy cream
Instructions
PREP: Mise the recipe ahead of time.
1. Make the velouté sauce:
- Melt the butter in a saucepan placed over low heat, then add the flour and stir to make a roux. Cook, stirring constantly, for 1 to 2 minutes until the roux becomes light tan in color.
- Whisk in the wine and stock in a thin stream to avoid lumping. Cook at a simmer for about 20 minutes until thickened.
- Season with a little salt.
- If prepping ahead, cool to room temperature and store in a container.
2. Fabricate the chicken: (Photos of this process appear in the lesson section of this recipe post.)
- Trim the chicken breast of silverskin (connective tissue membrane) and any visible fat.
- Cut the chicken into 1 1/2-inch cubes.
- If prepping ahead, place the chicken in a plastic bag.
3. Fabricate the vegetables: (Photos of these processes appear in the lesson section of this recipe post.)
- Wash the mushrooms, blot dry, and trim off the hard, discolored stem ends. Cut large mushrooms into quarters and smaller ones in half. If prepping ahead, loosely wrap the mushrooms in paper towels and place in an unsealed plastic bag.
- Use a paring knife to cut diagonally into the stem end of each snap pea, and then use the knife and your thumb to pull downward, removing the string that runs along one side. Turn each snap pea over and remove the string from the other side. (Not all snap peas have strings, but check just in case.)
- Snap each asparagus spear by holding the tip end with one hand and the butt end in the other, and then bending the spear until it breaks. Discard the tough butt ends. Use a swivel peeler to gently scrape off the outer layer of skin from the lower half of each asparagus spear. Cut the asparagus spears on the diagonal into 1 1/2-inch lengths.
- Peel the carrots and roll-cut into roughly ¾-inch pieces.
4. Par-cook the vegetables:
- Bring at least 3 qt water to a full boil. Place a bowl of cold water next to the stove.
- Drop the snap peas into the water and boil for about 10 seconds. Use a “spider” strainer to remove the asparagus into the bowl of water, and then place the bowl in the sink under a stream of cold water for a minute or so. Remove from the water and drain on paper towels.
- Blanch the asparagus for about 20 seconds, and then refresh and drain in the same way.
- Blanch the carrots for minute or longer, until a paring knife inserted into a carrot section meets with just a little resistance. Refresh, and drain the carrots in the same way.
- If prepping ahead, combine the par-cooked vegetables in a plastic bag with a folded paper towel in the bottom.
5. Prep the lemon zest and lemon juice:
- Use a swivel peeler to shave off two strips of yellow zest from the lemon. Mince the lemon zest and place it in a small container. Squeeze about 1 tsp lemon juice into the container with the zest.
6. Mise the biscuit dough:
- Sift the flour, sugar, and baking powder onto a cutting board. Sprinkle the salt overtop.
- Place the step 6 cold butter onto the flour mixture and use a bench scraper or chef knife to cut the butter into small pieces the size of a pencil eraser, mixing it into the flour as you cut. Work quickly to keep the butter cold.
- Measure the milk.
- If prepping ahead, place the flour-butter mixture into a plastic bag and the milk into a container.
7. Assemble the remaining ingredients.
HOLD: Refrigerate the ingredients up to 4 days.
COOK! Finish and plate your dinner.
8. Prepare the oven and casserole dish:
- Preheat an oven to 400°F.
- Rub the inside rim of a 1-qt casserole or baking dish with the step 8 butter, and place the dish on a sheet tray lined with aluminum foil. (If you’ve doubled or tripled the recipe, use a proportionally larger casserole.)
9. Chop the tarragon leaves and strip the thyme leaves off of the stems.
10. Mix the cobbler dough:
- Place the cold flour mixture into a bowl.
- Add the milk to the bowl all at once. Use a fork to mix the milk into the flour mixture with a few strokes, to create a lumpy, shaggy dough. Don’t over-mix.
- Place the dough in the refrigerator until needed.
11. Sauté the mushrooms and chicken:
- Place a sizzle pan or small tray near the stove.
- Blot the chicken dry on paper towels.
- Place a sauté pan, preferably carbon steel, over high heat and wait for it to become very hot.
- Add half the oil and half the step 11 butter, and then add the mushrooms and a little salt. Sauté, shaking and tossing, for about 30 seconds until the mushrooms are browned and slightly shrunken. Transfer to the sizzle pan.
- Add the remaining oil and butter to the pan, and then add the chicken with a little salt. Sauté for about 30 seconds until the exteriors of the cubes are browned but the interiors are still raw. Turn off the heat, and add the mushrooms back into the pan.
12. Finish the sauce and assemble the cobbler:
- Add the par-cooked vegetables to the sauté pan, and toss to combine.
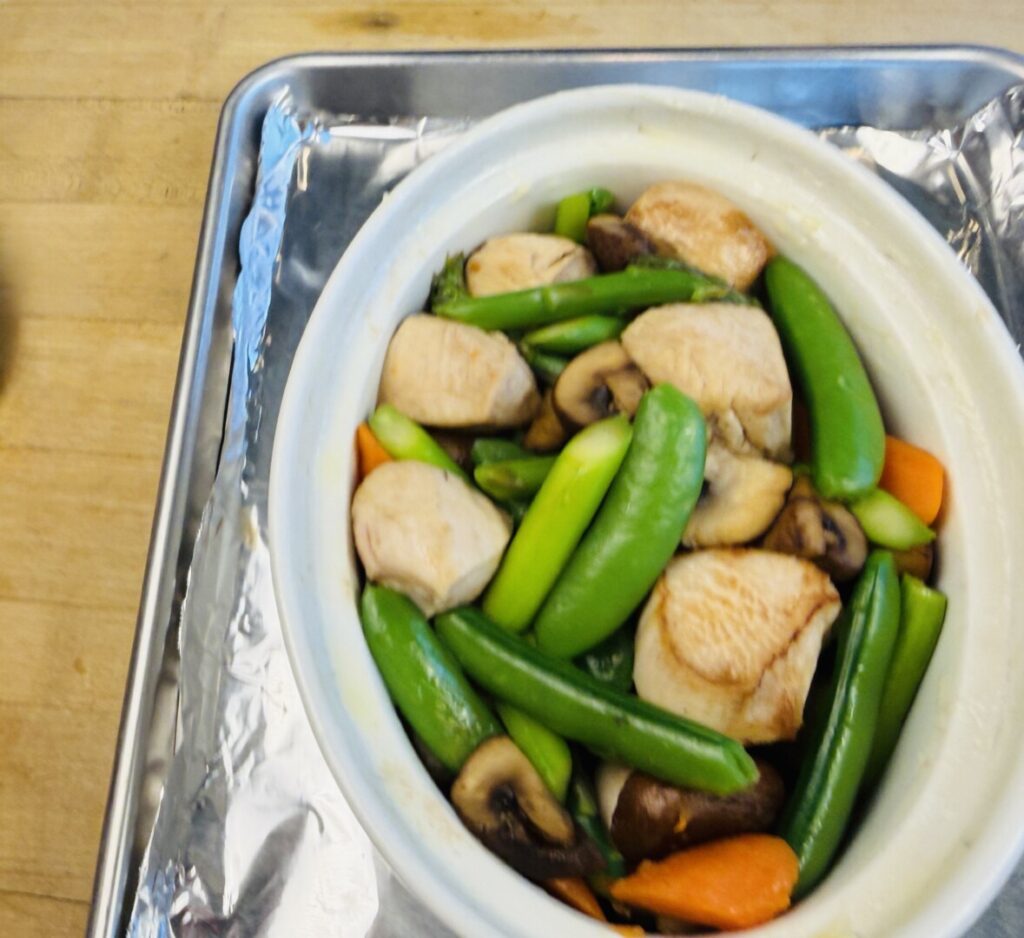
- Transfer the chicken, mushrooms, and vegetables to the casserole and press gently to settle them into it.
- Scrape the velouté sauce into the sauté pan, turn the heat on to low, and heat the sauce until it liquifies. Raise the heat and bring to the simmer. Stir in the lemon zest and juice, and then stir in the cream.
- Evaluate the seasoning and, if necessary, correct the salt and/or lemon.
- Stir in the chopped tarragon and thyme leaves.
- Slowly pour the sauce over the contents of the casserole, while using a fork to gently separate the contents so that the sauce penetrates to the bottom.
- Use a #60 portion scoop, or 2 tablespoons, to top the chicken and vegetables with scoops of biscuit dough. Ensure that the dough scoops extend to the rim and are tightly packed together.
13. Bake the cobbler:
- Place the baking dish on its tray in the oven and bake for about 30 minutes until the biscuit topping is golden brown.
14. Plate:
- For each portion, use a serving spoon and a flexible spatula to separate and lift off a portion of the biscuit crust and place it on a sizzle pan or plate.
- Spoon a portion of chicken, vegetables, and sauce into each warmed pasta plate or wide bowl.
- Arrange a portion of crust across the back of the plate.