

Your Cooking Lesson
Advice, explanation, and in-depth information to help you achieve recipe success.
Sometimes food names are misleading. For example, English muffins aren’t actually muffins, and were invented in America. The egg cream, a classic New York City beverage, contains neither eggs nor cream. Likewise, today’s Cornish game hens are not from Cornwall, and they aren’t wild game. Moreover, about half the birds sold as Cornish game hens aren’t hens. So what’s the deal?
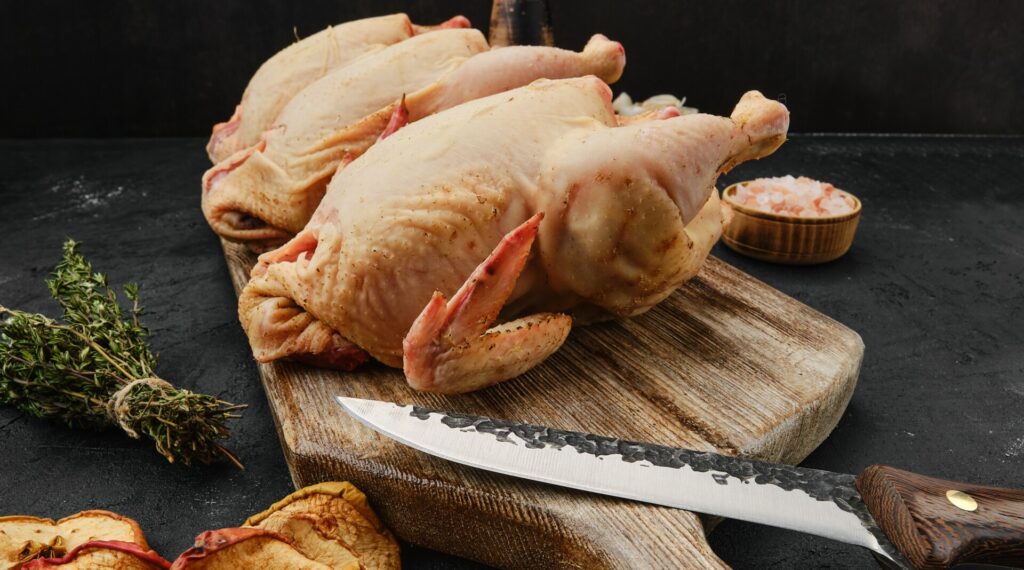
In Europe, young chickens harvested at around 1 month of age and weighing about 1 lb dressed out for cooking are called poussins. Small, tender, and tasty, poussins are popular single-serving birds that roast quickly and fit whole on a standard dinner plate. Historically, US poultry farmers were loathe to harvest birds that small. But in the 1950s, a team of Connecticut poultry breeders developed a type of chicken originally cross-bred from English fighting cocks and selected domestic hens. These birds, both female and male, are today’s Cornish game hens. One of their best traits is plump, thick breast meat that remains moist after cooking. At a dressed weight of 1 1/2 to 2 lb, today’s Cornish hens actually are a bit large for single-serving birds—but we Americans are known for large portions. Roasting Cornish hens offers all of the pleasures of roast chicken but with shorter cooking time and no need for carving at the table.
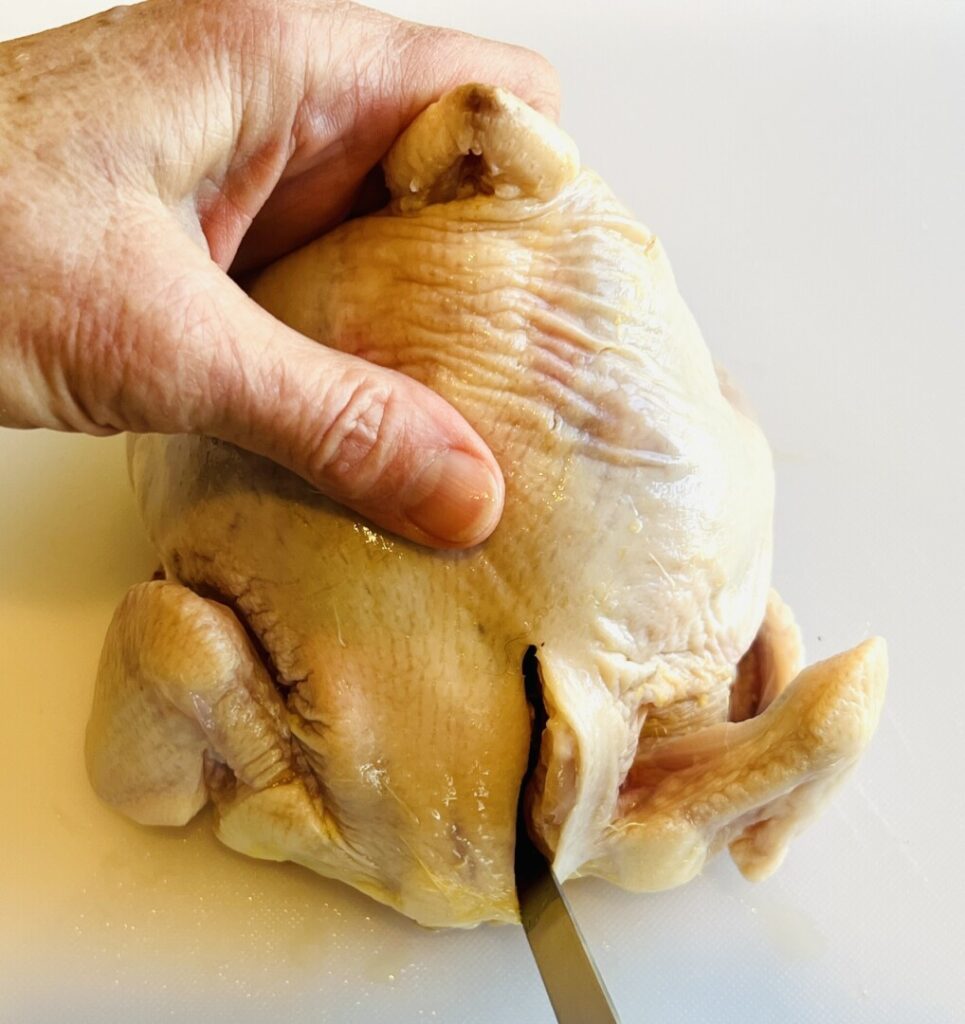
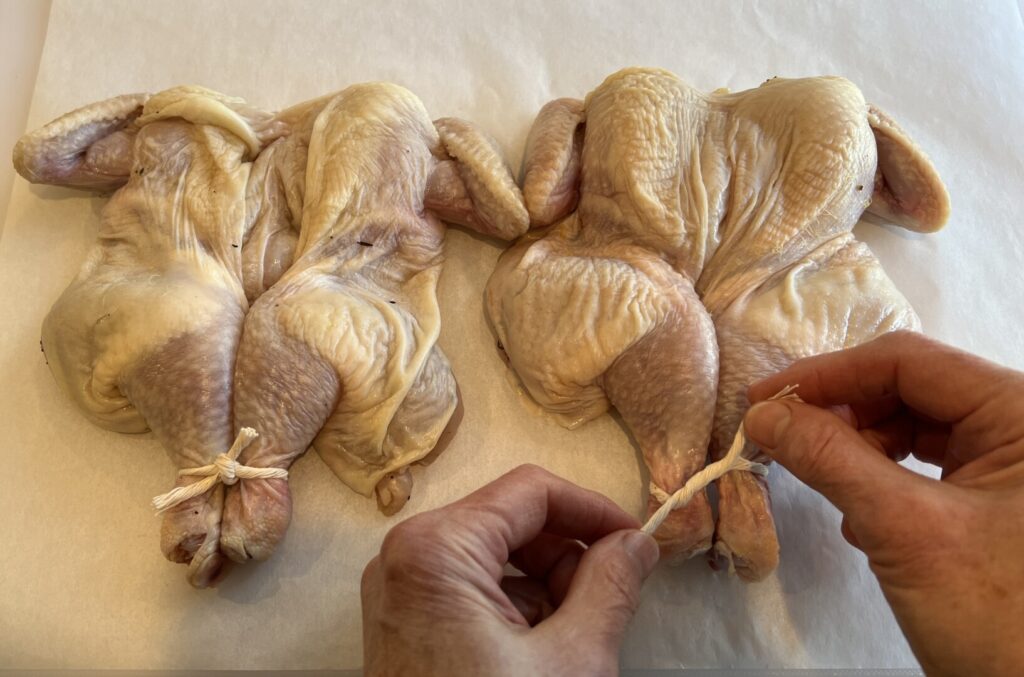
Cornish hens can be trussed like a chicken and roasted whole, with or without stuffing. But if you take the time to butterfly and semi-bone them, they’re even faster to roast and easier to eat. This technique requires some effort and practice, but it’s a good skill to have in your repertoire. Once you’ve done it a few times it becomes second nature—and you can apply the technique to chickens, ducks, and even turkeys. Review the photos below to help you follow the recipe directions, and refer to the video tutorial, as well. https://prepholdcook.com/tutorials/how-to-butterfly-a-cornish-hen/
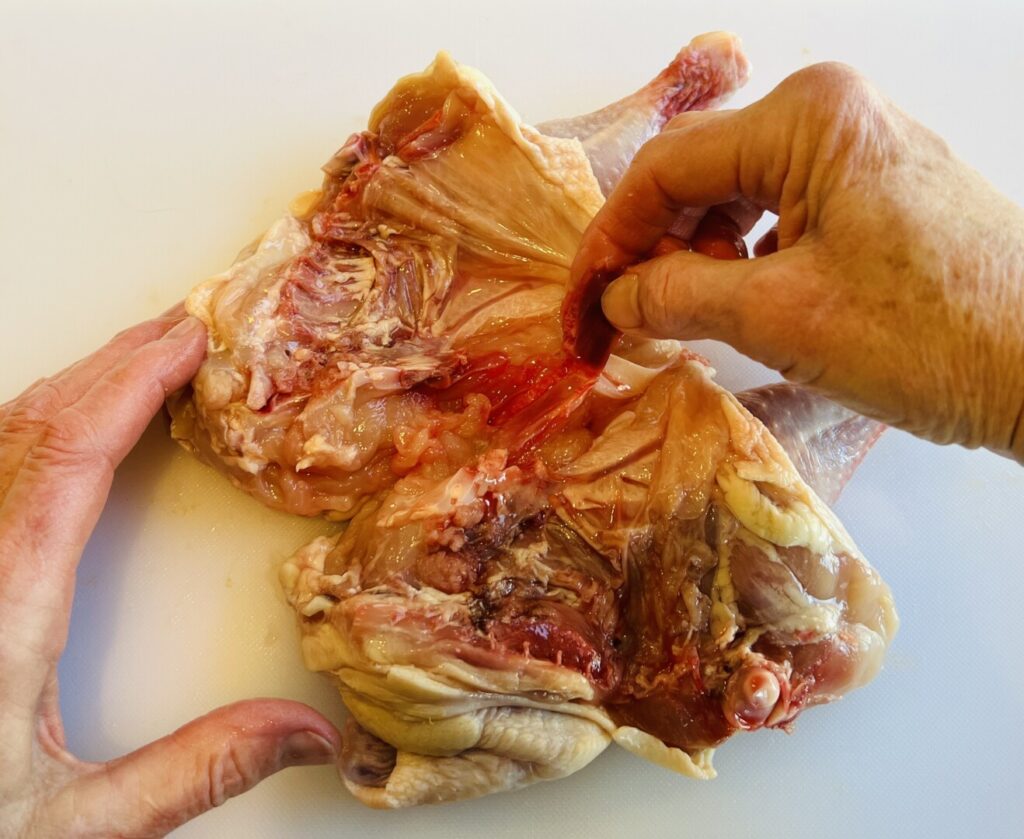
First, cut away the backbone at the neck end of the carcass. Then, turn the bird upside-down and cut away the backbone at the tail end, sliding the knife through the hip joints.
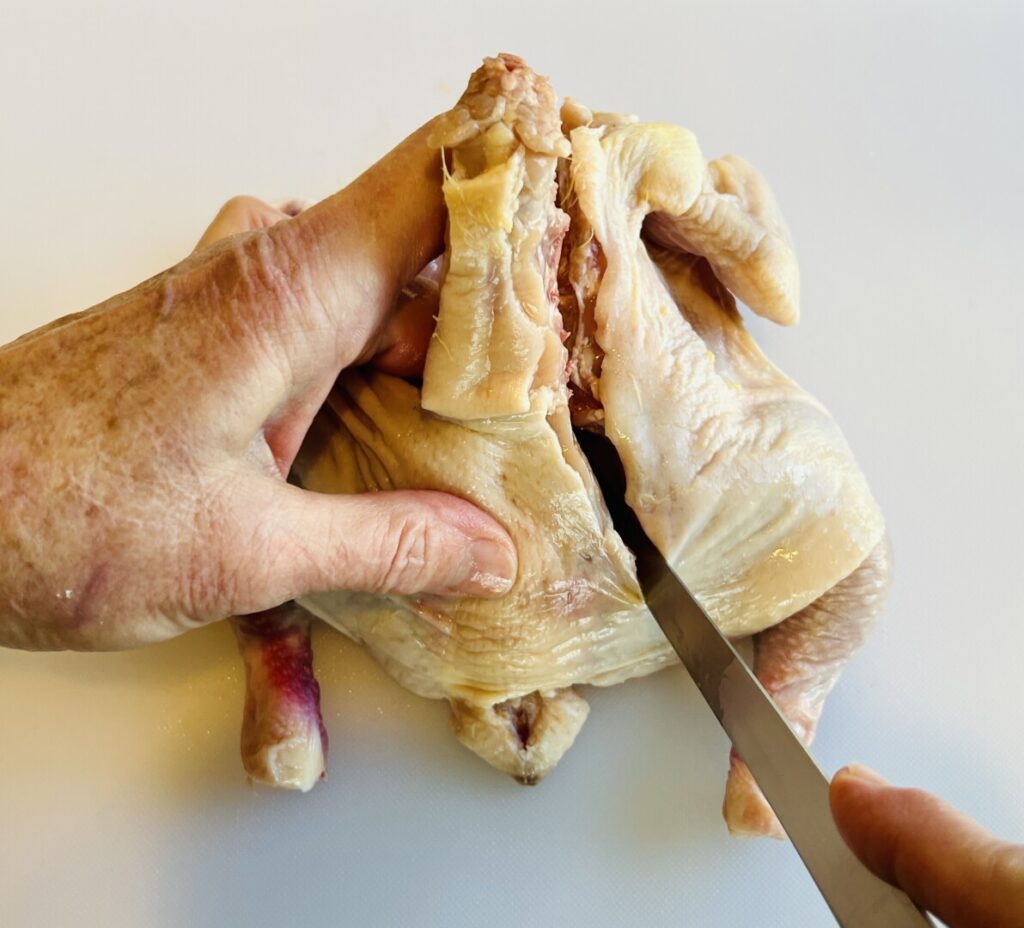
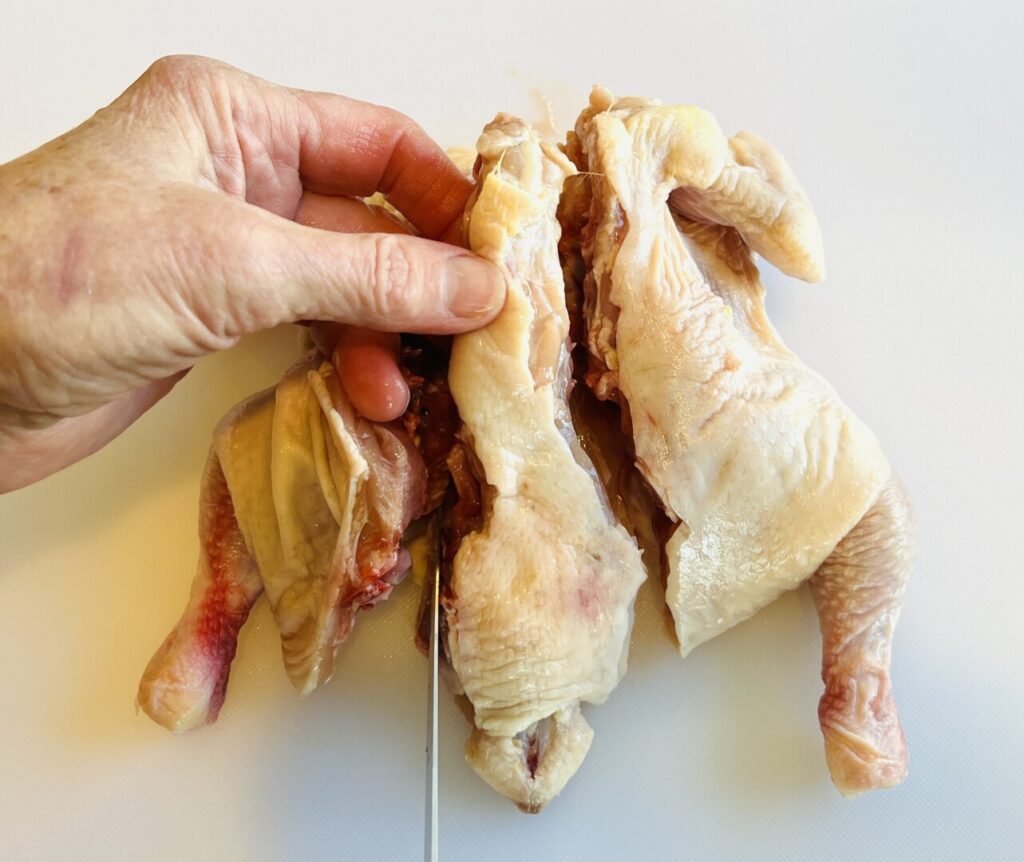
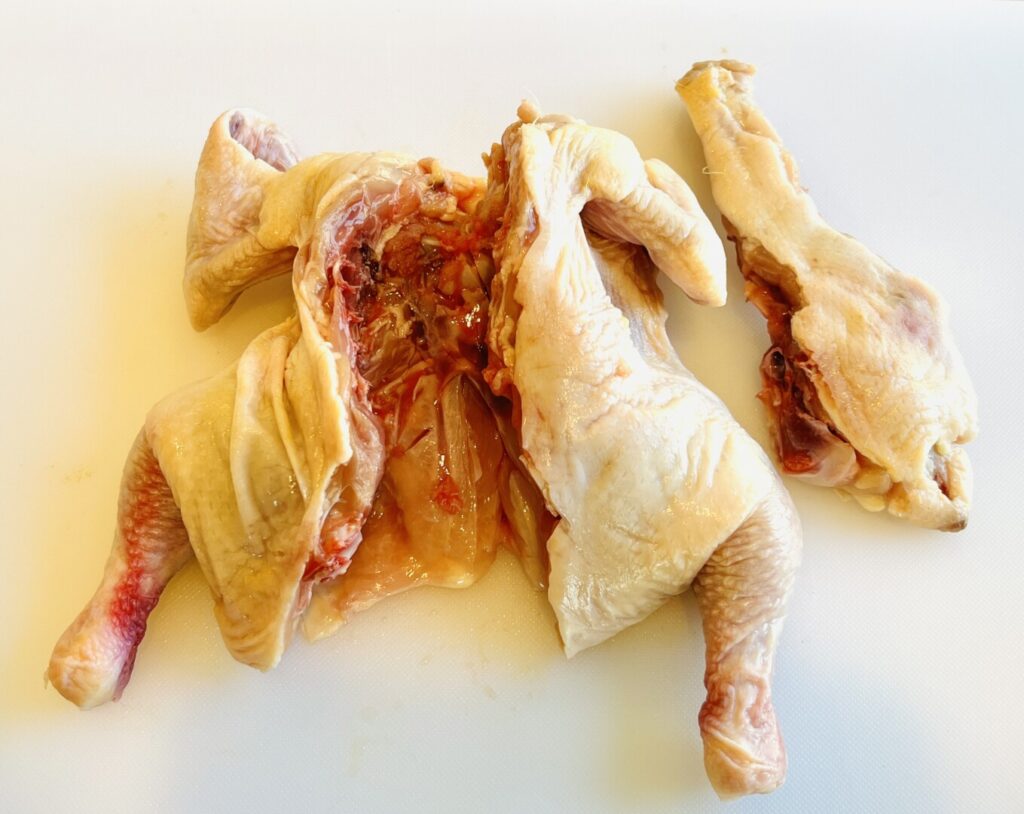
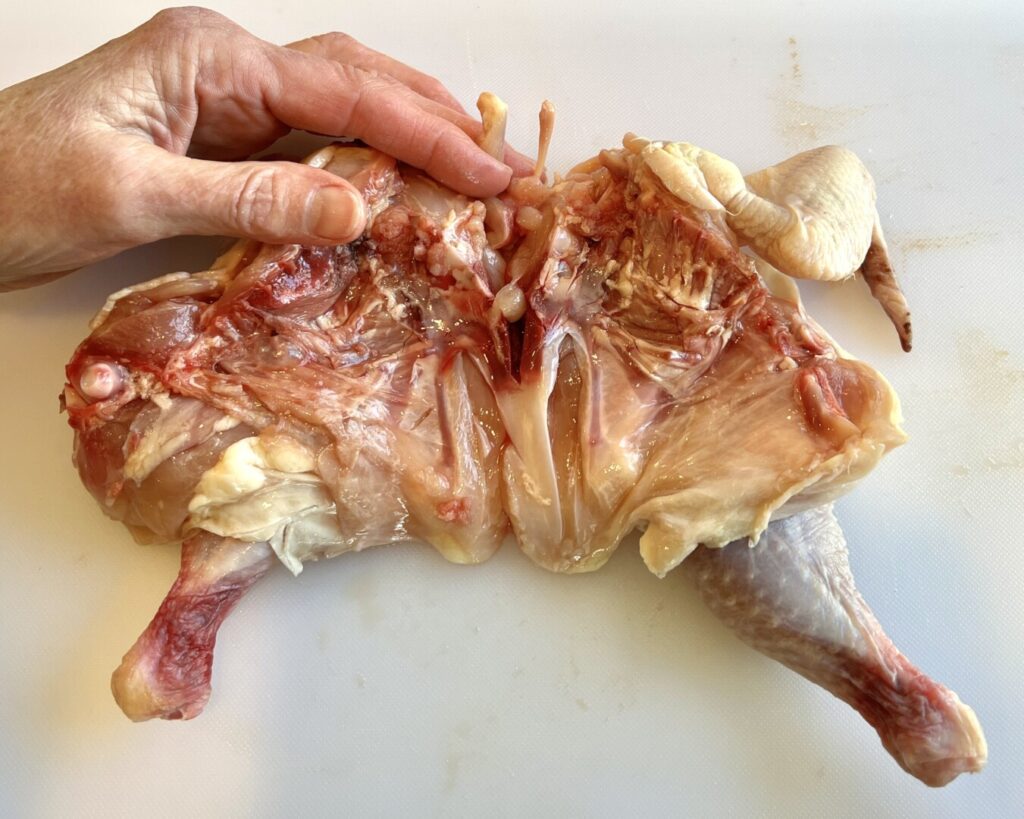
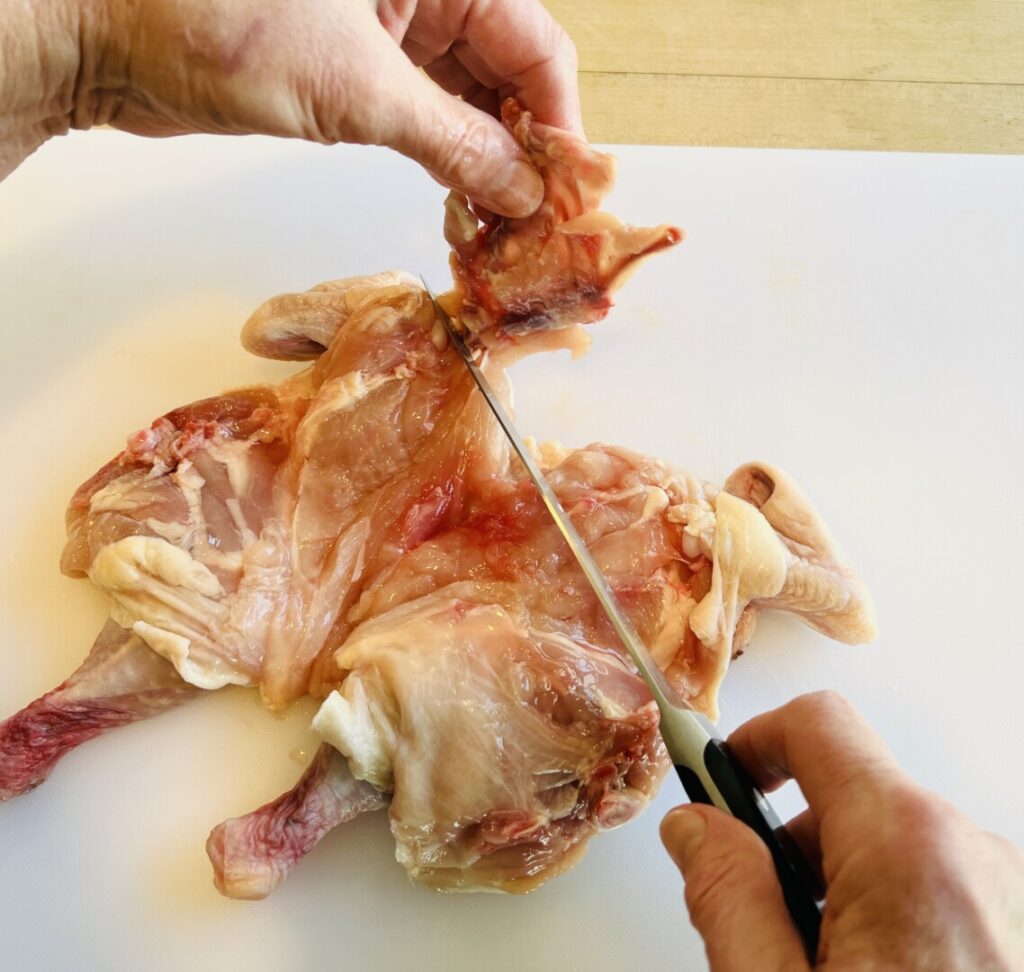
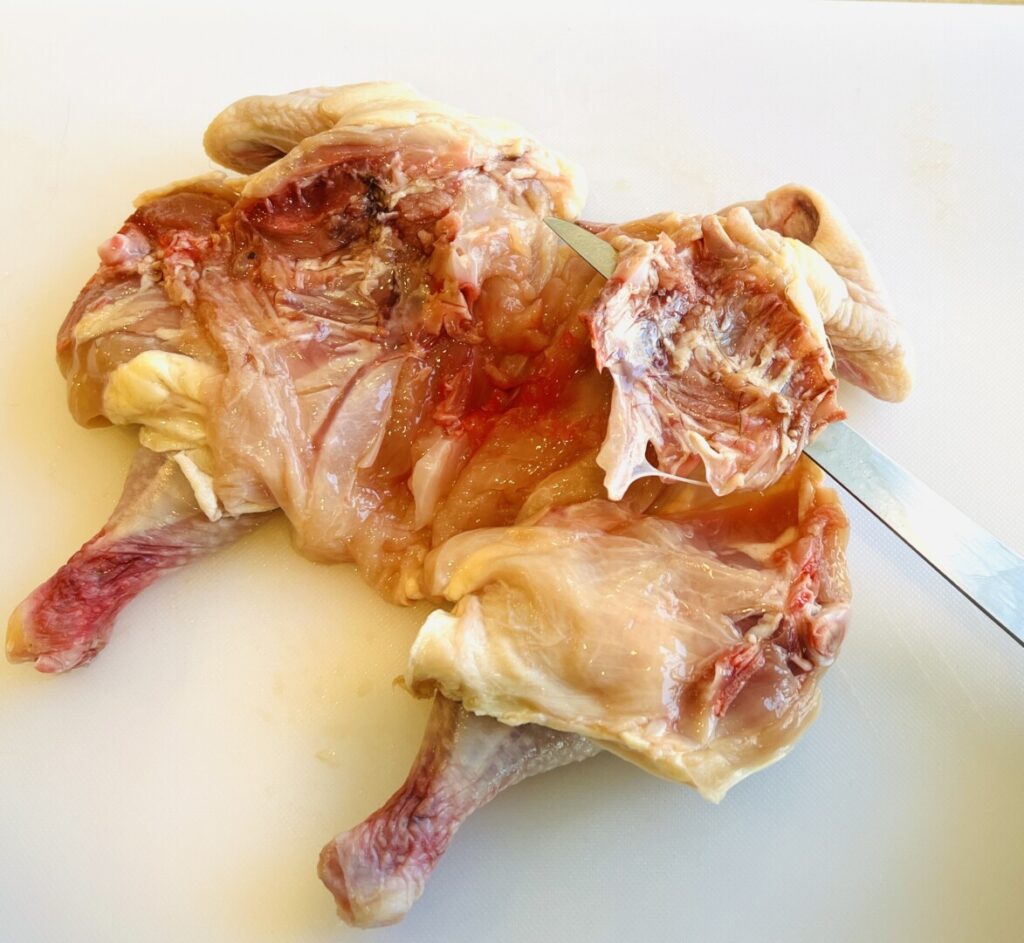
“Butterfly” the bird by opening out the carcass and flattening it. Remove the wishbone, then pull out the breastbone. Insert the blade of a flexible boning knife under the ribs on each side, and remove them. The bird is now ready to grill or roast.
Brining is a method of moisturizing, tenderizing, and flavoring proteins. A brine is a liquid in which salt has been dissolved: for chicken typically at a ratio of 2 to 4 Tbsp kosher salt to 1 qt water. (The higher the salt amount, the shorter the brining time required.) Brining introduces additional moisture into meat proteins through the process of osmosis. When the salt concentration outside the protein cells is higher than inside, the brine is absorbed into the cells until equilibrium is reached. The salt in the brine denatures some of the protein chains, tenderizing the meat muscles. The additional moisture absorbed results in juiciness. And any flavors infused into the brine are drawn into the meat along with the salt. Although brining requires extra time and effort, it’s really worth it!
To make a brine, kosher salt is dissolved in water along with flavorings such as sugar, aromatic vegetables, herbs, and spices. Heating the water just under the boil makes the salt dissolve faster and releases the flavors of the seasonings more quickly; however, for food safety the brine must be brought back to room temperature before applying it to the meat.
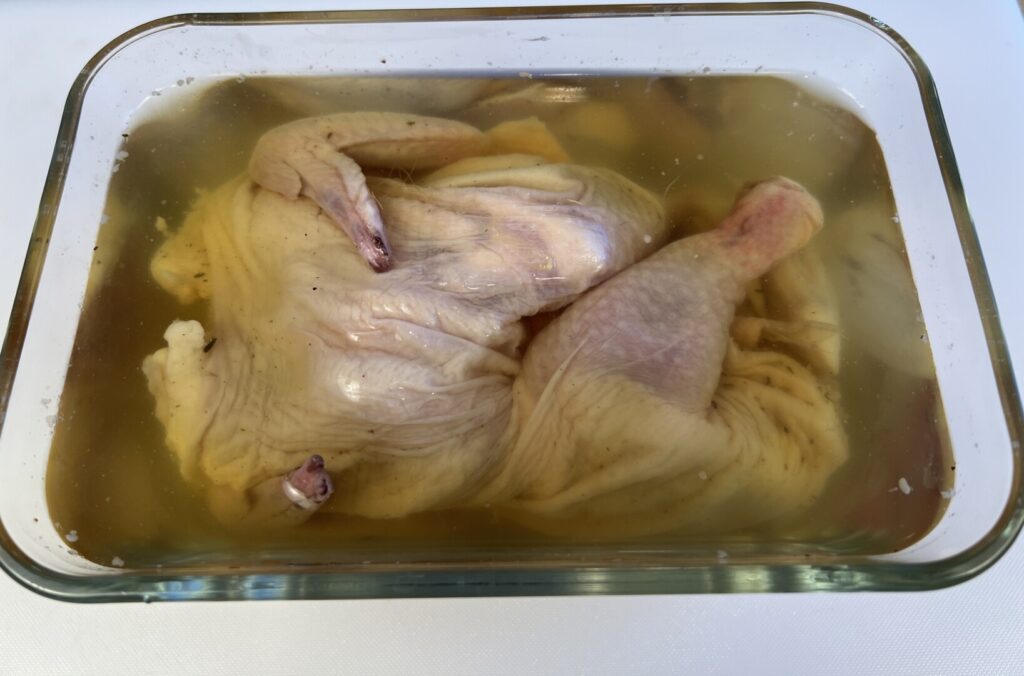
To store the raw hens in brine, use a container made from a non-reactive material (glass or plastic—not aluminum), and make sure it’s not too large. The hens must be completely submerged. Don’t allow any meat to remain in its brine longer than the time recommended in the recipe; over-brined meats are too salty and have a “cottony” mouthfeel because the proteins have broken down too much.
In the American South, bread stuffing is called “dressing”—not to be confused with the liquid dressing we use on salads. Bread dressing/stuffing is an economical way to “stretch” the expensive protein part of a meal. When stuffed into the cavity of roasting poultry, the starchy mixture soaks up the flavorful juices that exude out of the meat. Stuffing a whole bird and then trussing it shut can pose some food safety hazards. https://www.psu.edu/news/agricultural-sciences/story/stuffing-turkey-and-other-thanksgiving-food-safety-mistakes Yet baking a dish of stuffing separately doesn’t capture those delicious juices. A good solution is to roast a butterflied bird on top of the dressing. That way the meat and the dressing reach safe internal temperatures at the same time.
For Southern dressing cornbread is the bread of choice. Down South, there’s an ongoing debate about cornbread—sugar, or no sugar? In the past, Southern cooks with access to fine-milled, naturally sweet cornmeal used no sugar, whereas Northerners made sweetened cornbread to compensate for lesser quality ingredients. With industrialization and migration, some Southern people in general and African-Americans in particular grew to like cornbread made with sugar. Today it’s a matter of personal taste….
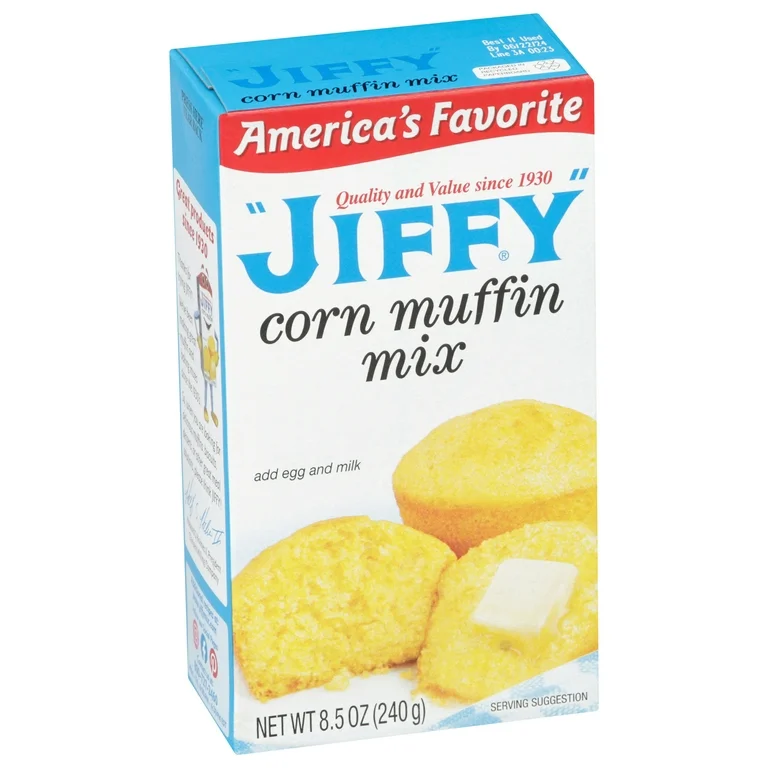
For speed and convenience, our recipe uses a cornbread mix: specifically, Jiffy brand cornmeal muffin mix. This stuff is legendary down South and throughout the African-American diaspora. And it’s decidedly, unapologetically sweet! But, mixed with savory juices and seasonings to make the dressing, it gives this entrée a unique sweet-salty-savory flavor that, I think, works with the rest of the plate. But if you prefer, you can mix up a batch of “scratch” cornbread and use some of it for dressing. Here’s a good recipe from the website Serious Eats: https://www.seriouseats.com/southern-unsweetened-cornbread-recipe
You can bake the batter in a small cake pan as cornbread, or in a muffin pan. Muffins bake faster, are easier to portion, and have more tasty brown crust.
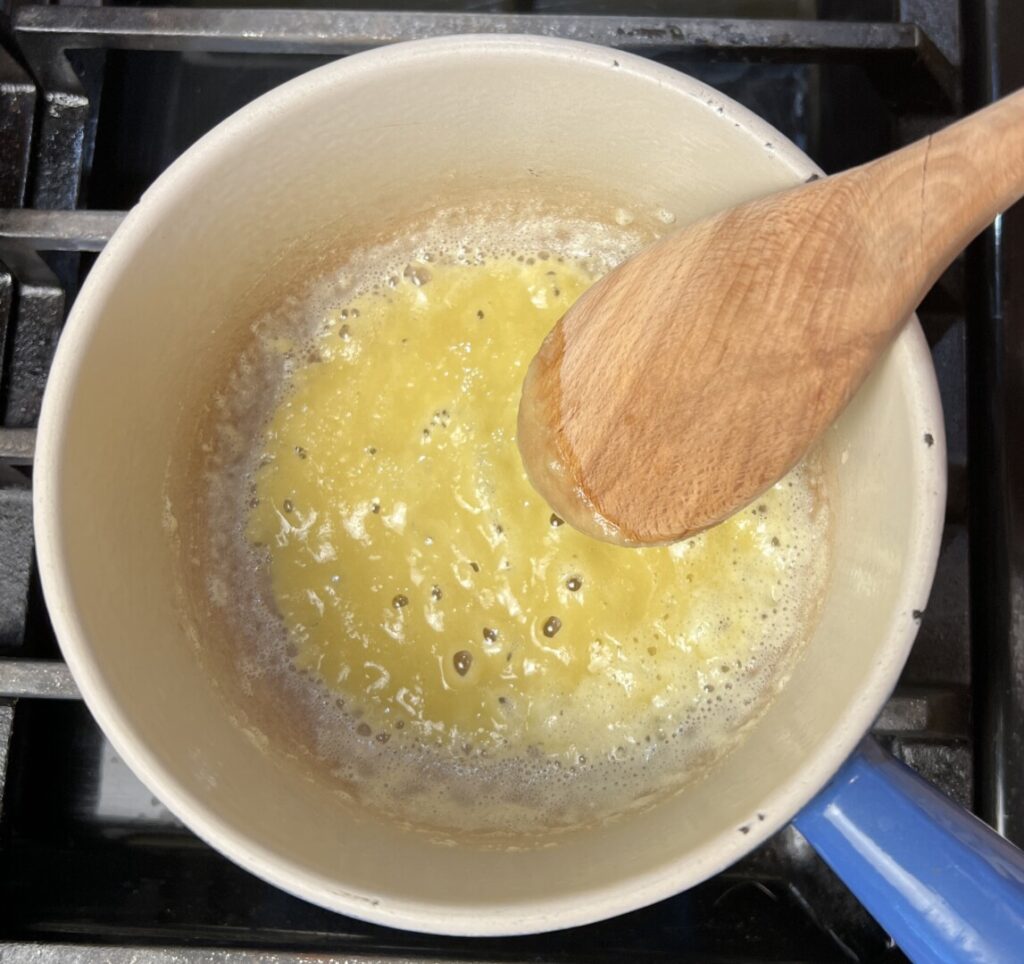
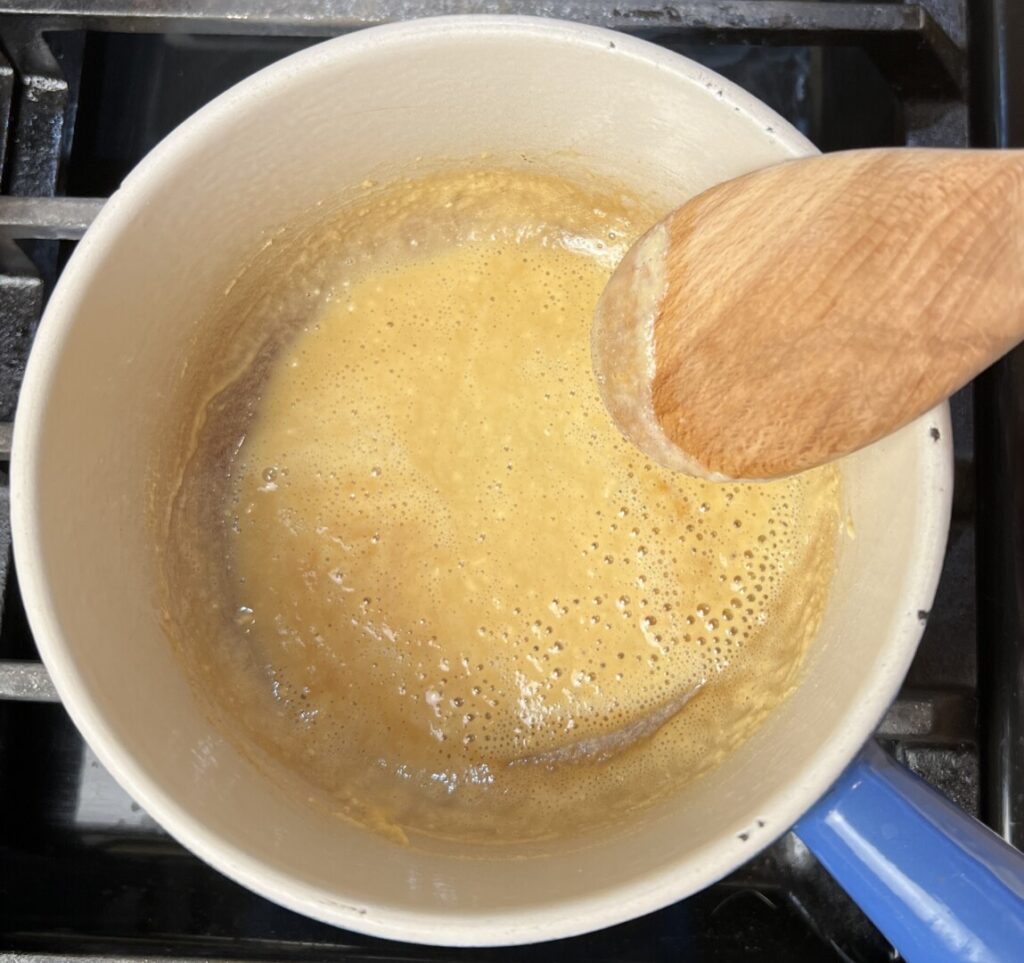
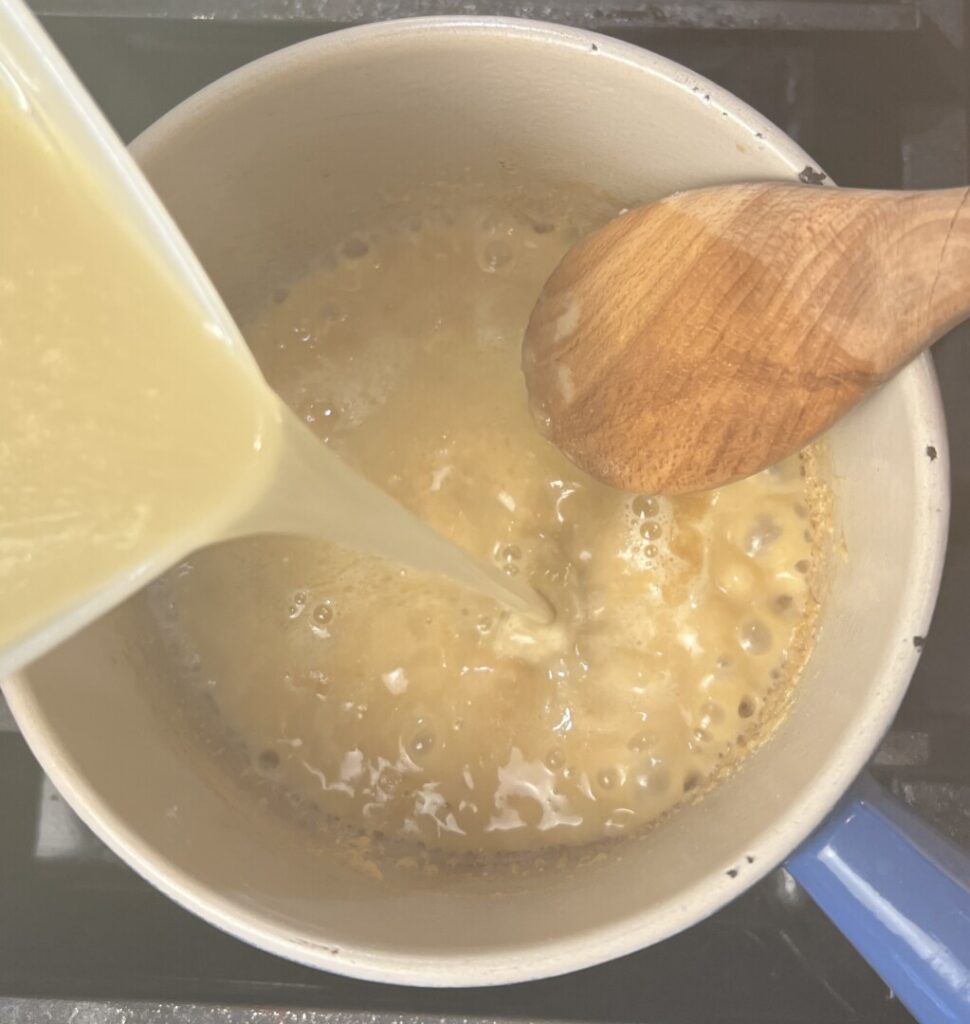
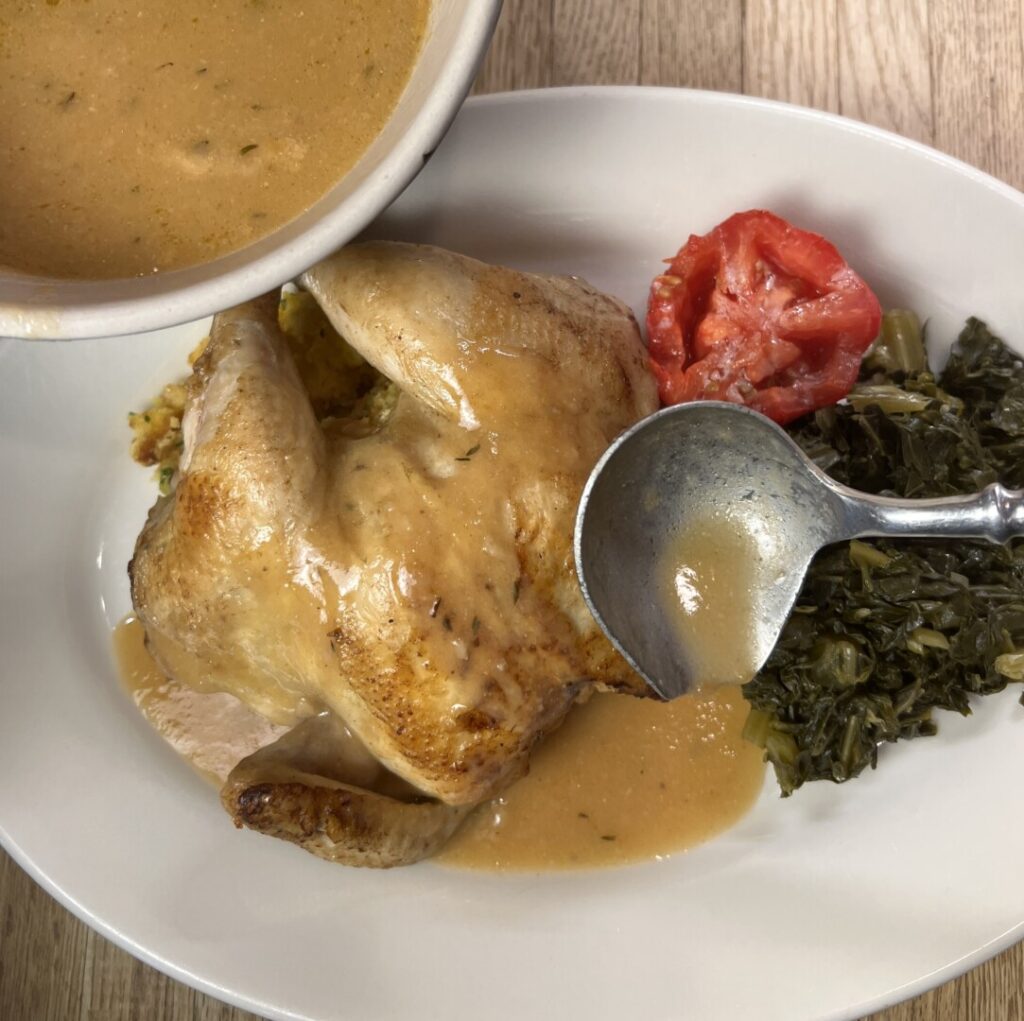
The gravy for our roasted hens begins as a classic chicken velouté sauce: butter and flour cooked to a blonde (light tan-colored) roux, and simmered with chicken bone broth or stock. For a little Southern sparkle, we’ll finish it with a dollop of spicy, vinegary, not-too-sweet barbecue sauce.
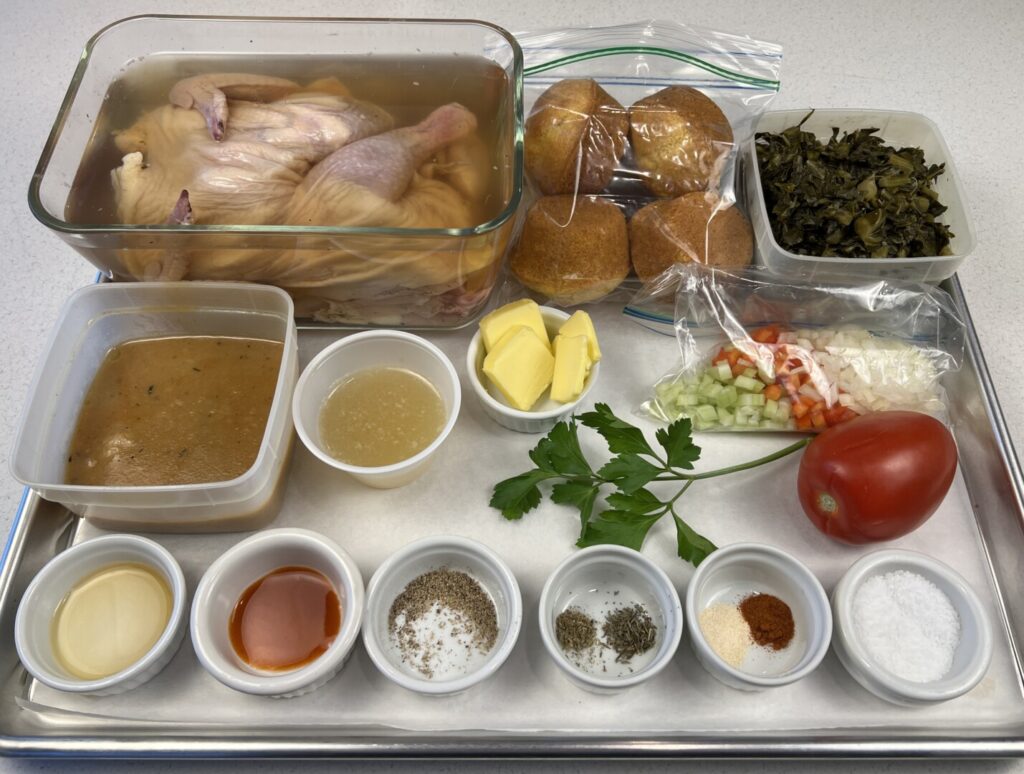
Just a few more tasks and your prep is complete. Here’s your mise tray:
It’s dinnertime—you’re ready to COOK!
Dressing, especially made from cornbread, needs to be fluffy and light. To that end, it’s best to mix it just before baking it. You’ll sauté aromatic vegetables and seasonings in butter just until softened, add some chicken broth, and then toss the mixture into crumbled corn bread.

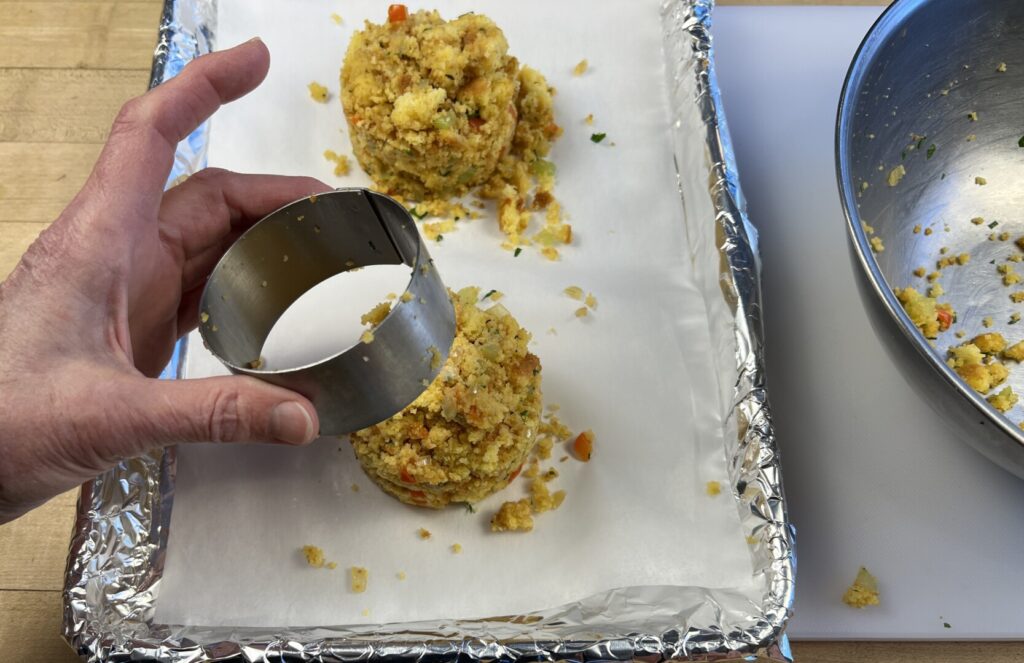
You’ll roast each hen on a mound of dressing. An entremet ring—otherwise known as a cake ring or food ring—is effective for making firm, cohesive cylinders of dressing. https://amzn.to/42FFTy1
Alternatively, form mounds by hand.
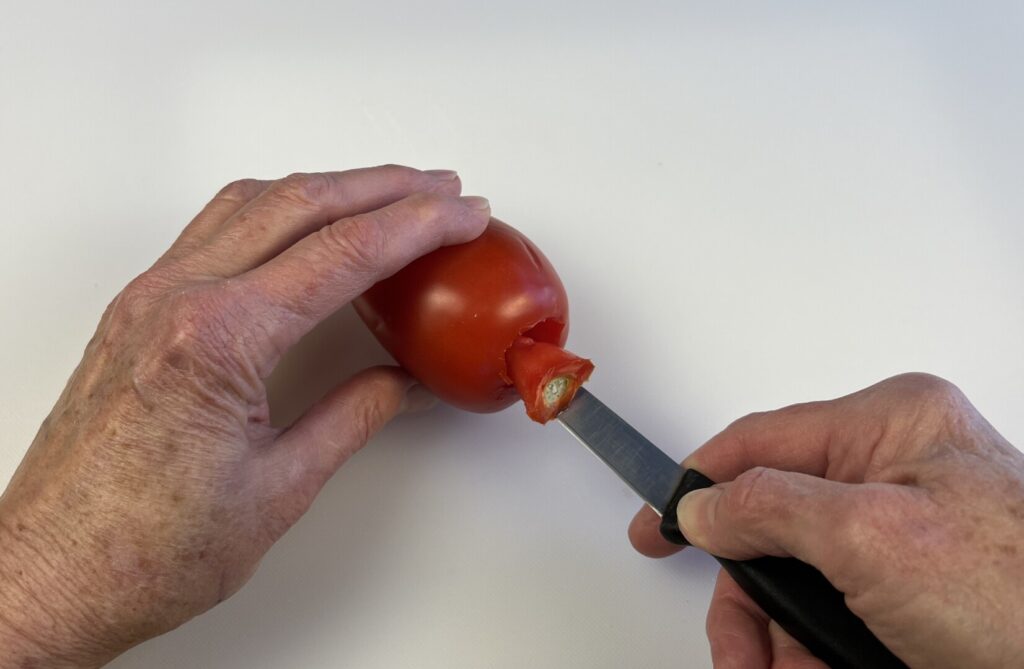
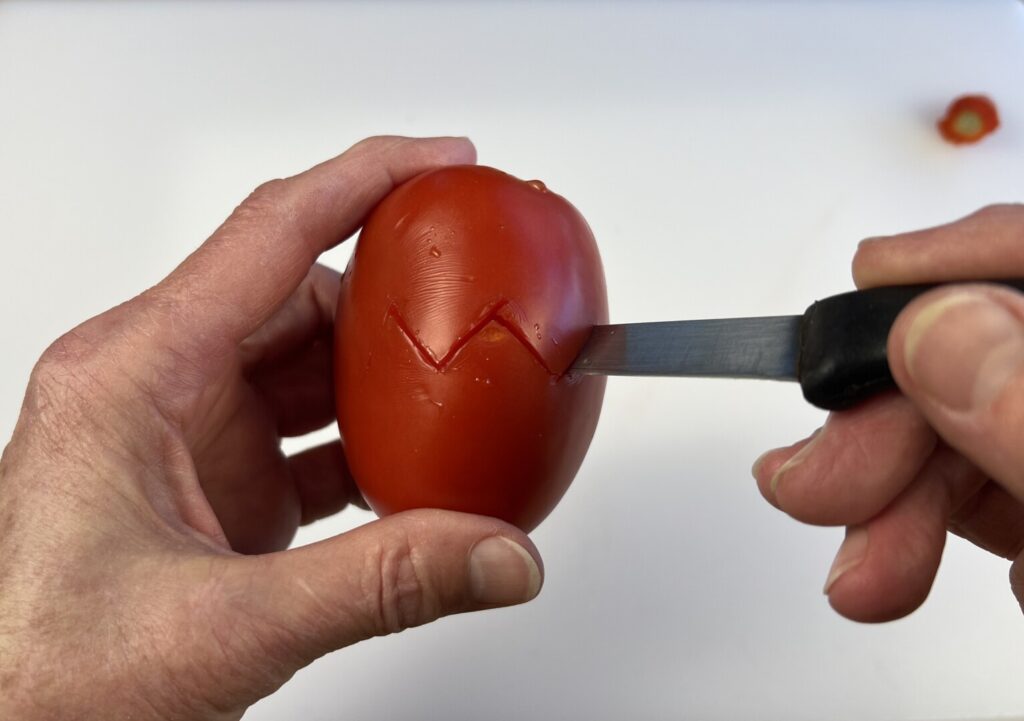
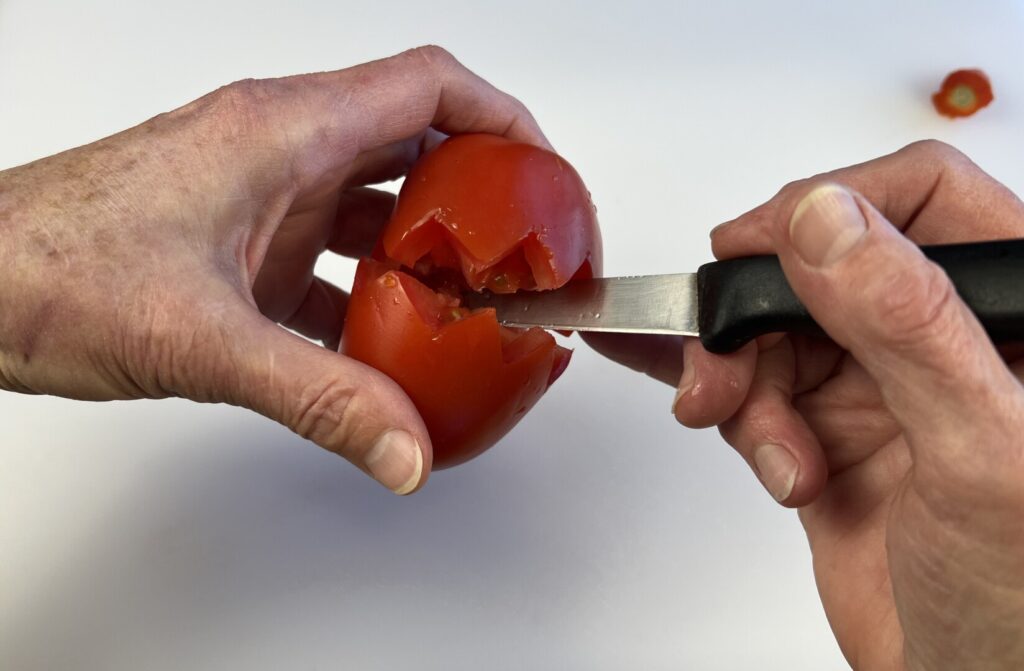
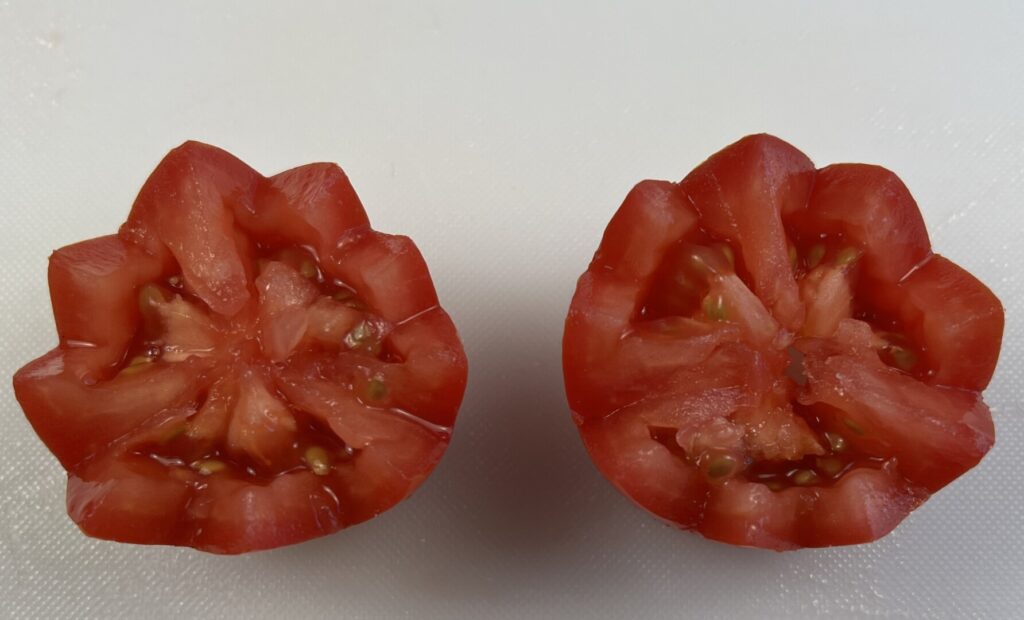
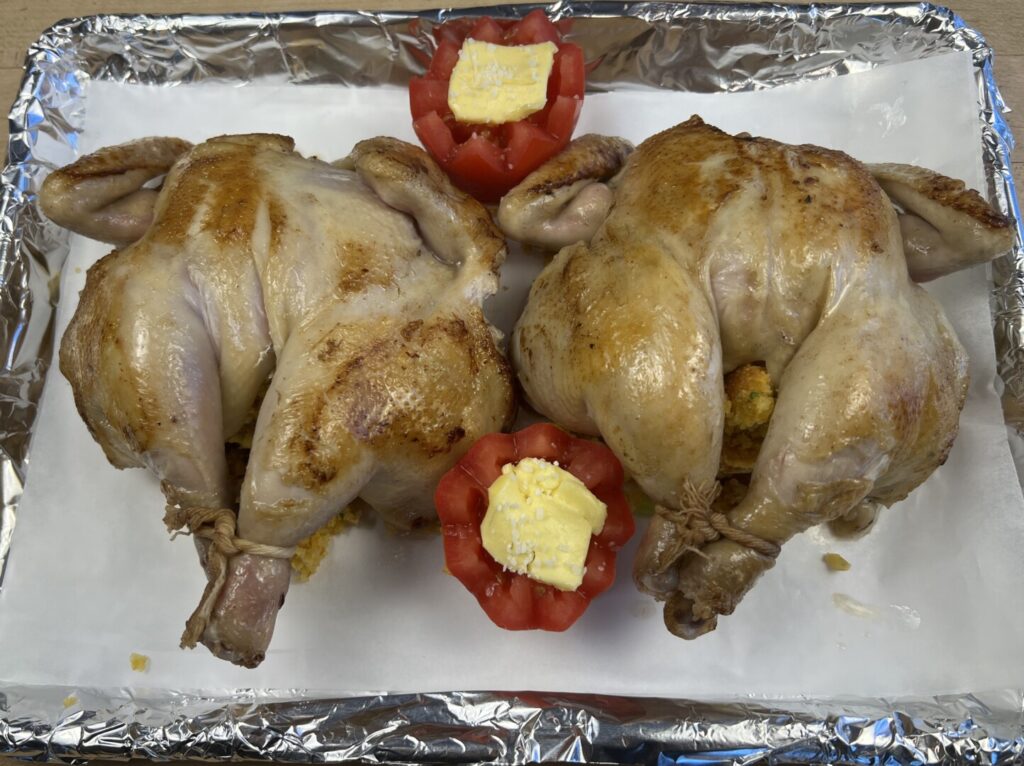
A tomato crown functions both as a fresh-tasting, tangy side vegetable and as a garnish, adding bright-red color and height to the plate. Versatile and easy to make, tomato crowns can be used raw on salads and cold entrées or baked, as in this recipe. With a little practice, yours will look great.
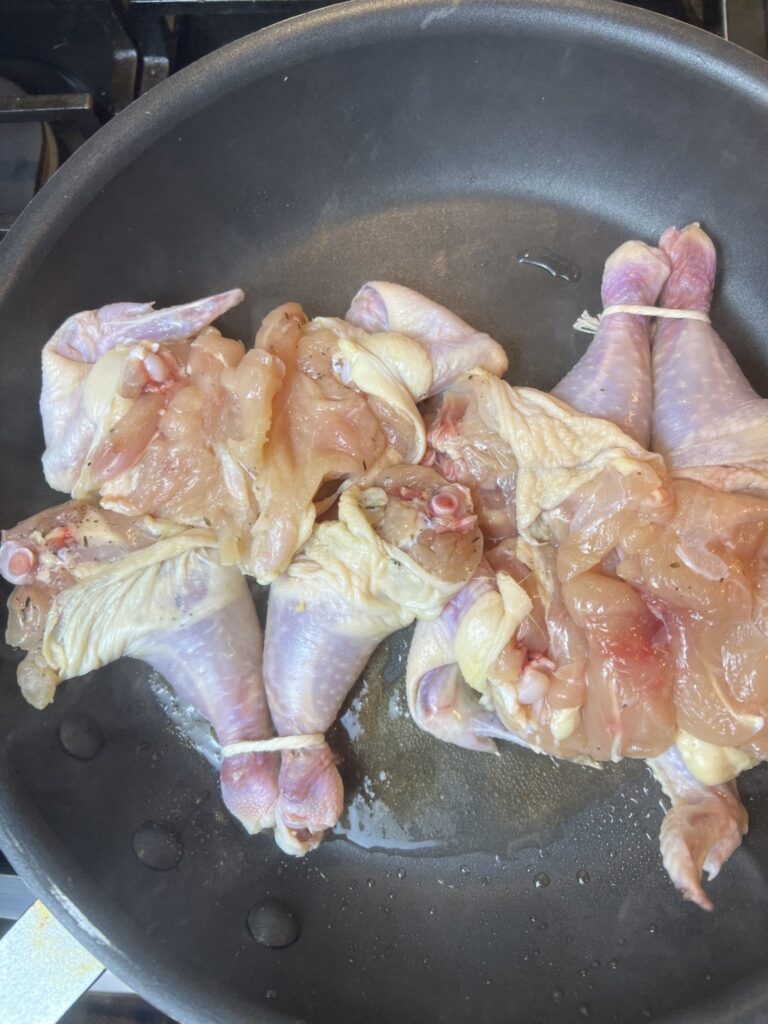
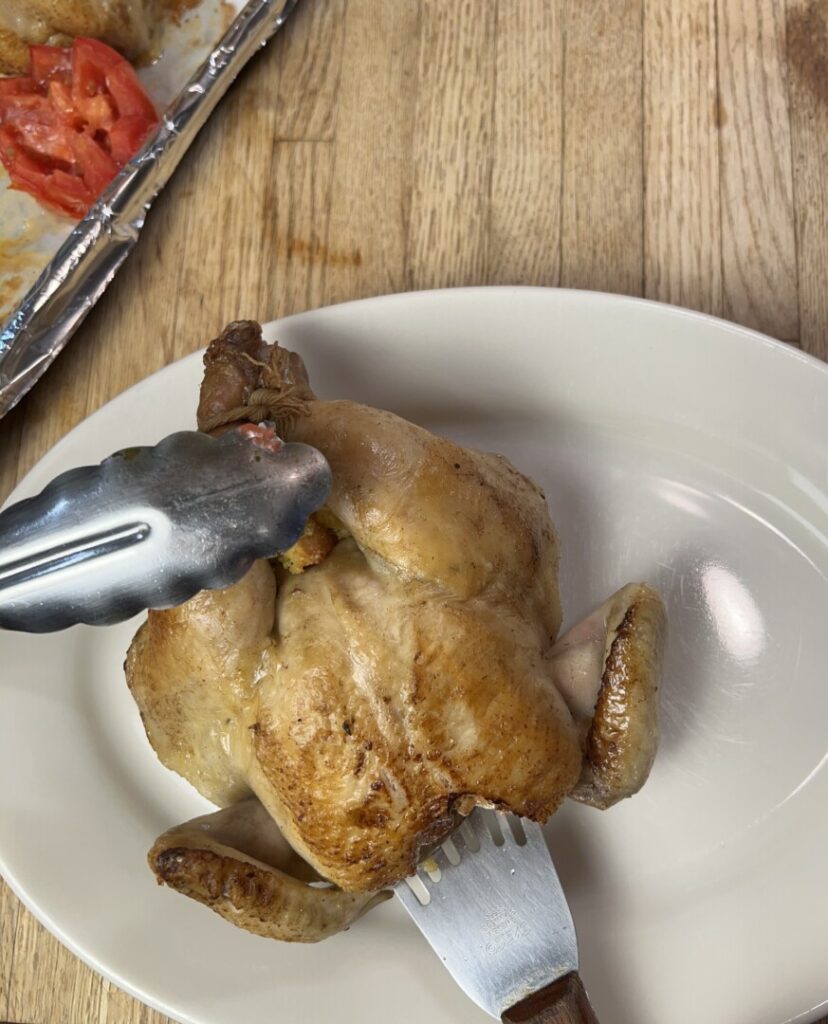
Pan-roasting is the perfect cooking method for butterflied Cornish hens. Because they’re small and tender, if cooked by roasting only the flesh will be overcooked by the time the exterior browns. But a quick sear in a sauté pan gives them a rich, golden color that deepens during brief finishing in the oven. Tying the legs together before cooking ensures an attractive shape on the plate.
Collard greens are a mainstay of the Southern kitchen, enjoyed on their own or mixed with other greens. Even fresh from the garden, collards require long-simmering to reach sumptuous tenderness. The special flavor of traditional Southern greens comes from “seasoning meat,” typically a smoked pork product such as a ham hock, neck bones, or the ends and scraps of a ham. Simmered in water with the greens and some aromatic vegetables, seasoning meat produces “pot likker,” a delicious smoky, porky broth. All that said, cooking up a pot of collards is no small undertaking. If you have the time and inclination to make your own, here’s another good recipe from the website Serious Eats: https://www.seriouseats.com/collard-greens-ham-hocks-recipe
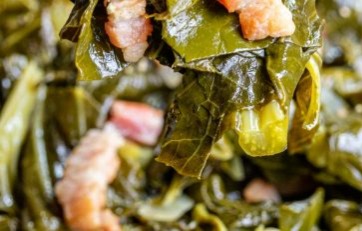
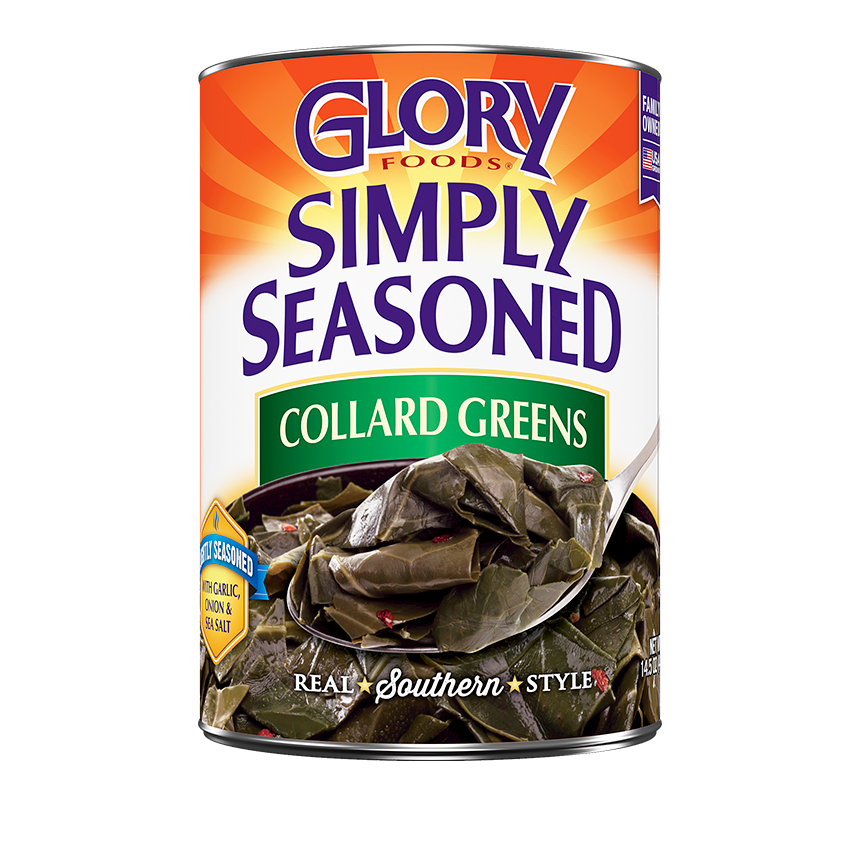
If you’re too busy to make your own, I can recommend a pretty good substitute: canned collards from Glory brand or Sylvia’s brand. Glory offers “seasoned” greens with pork flavoring but, to me, they’re too sweet, especially as an accompaniment to our cornbread dressing. Their “simply-seasoned” variety has less sodium and sugar, but are pork-free. Enjoy these as-is, or dress them with a dollop of home-rendered bacon drippings. While still a bit sweet for my taste, Sylvia’s “specially-seasoned” greens are already flavored with bacon drippings and have more zip from vinegar. Whichever you choose, just before serving heat up your collard greens and fix up the seasoning to your taste.
While the hens and tomato crowns finish roasting, reheat the gravy and, if necessary, adjust its consistency. It should be a little thicker than our usual nappé sauces, but still flow freely from your spoon or ladle. Check the hens’ doneness by inserting a thermometer in the meaty part of a thigh; internal temperature should reach 165°F, and the juices should run clear.
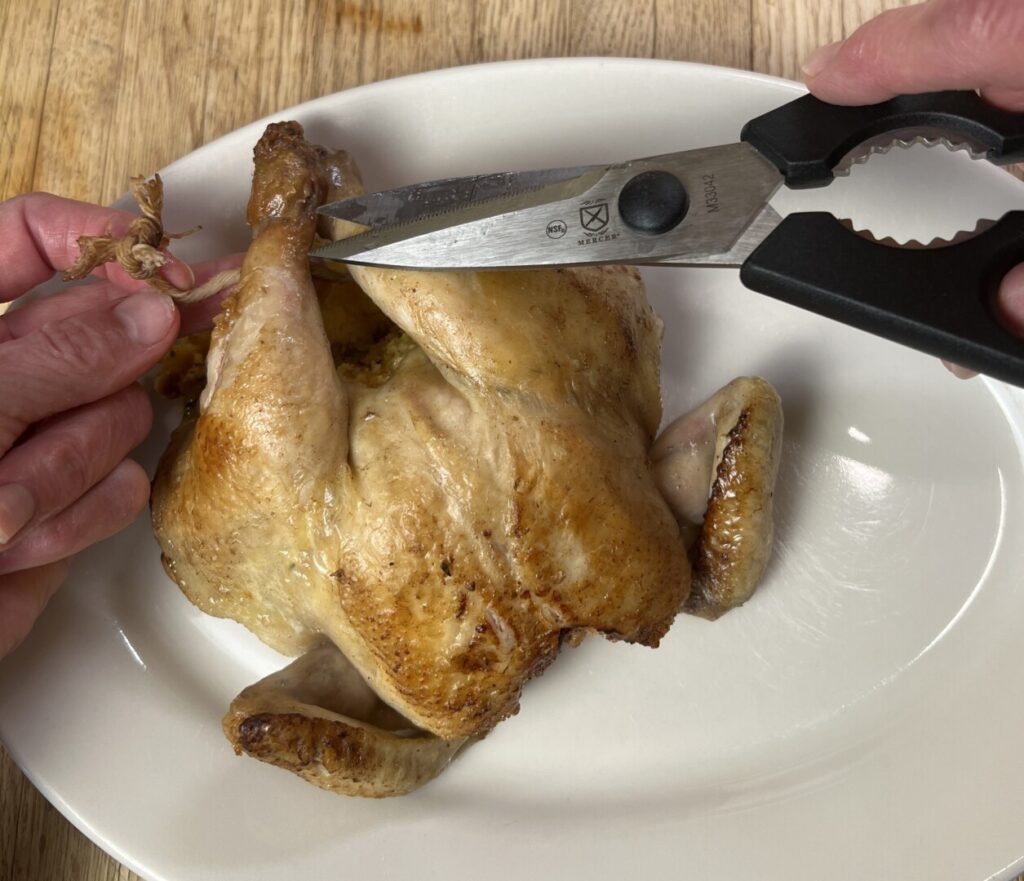
Now you’re ready to plate! The tricky part is lifting both a hen and the dressing underneath at the same time. A flexible fish spatula really helps. https://amzn.to/3WN4Cgh Don’t forget to snip the kitchen string off the hens’ legs.
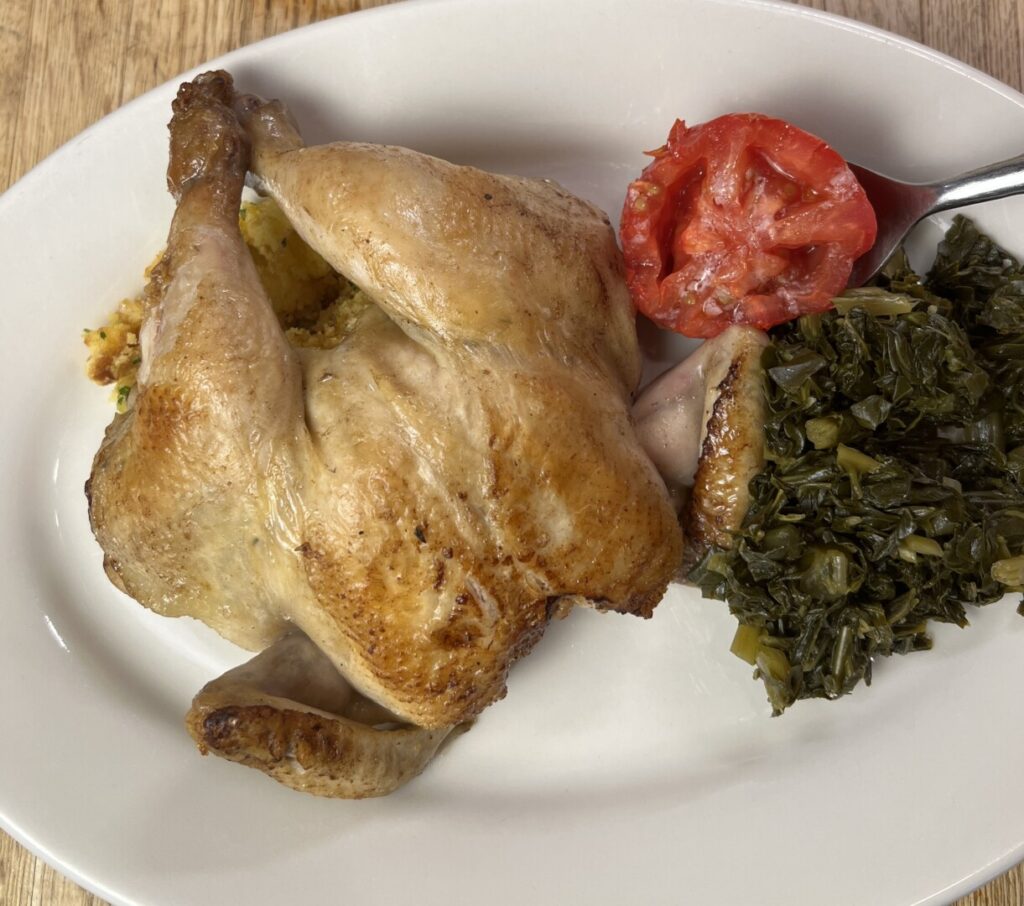
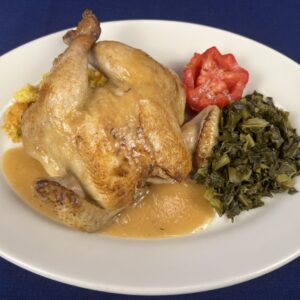
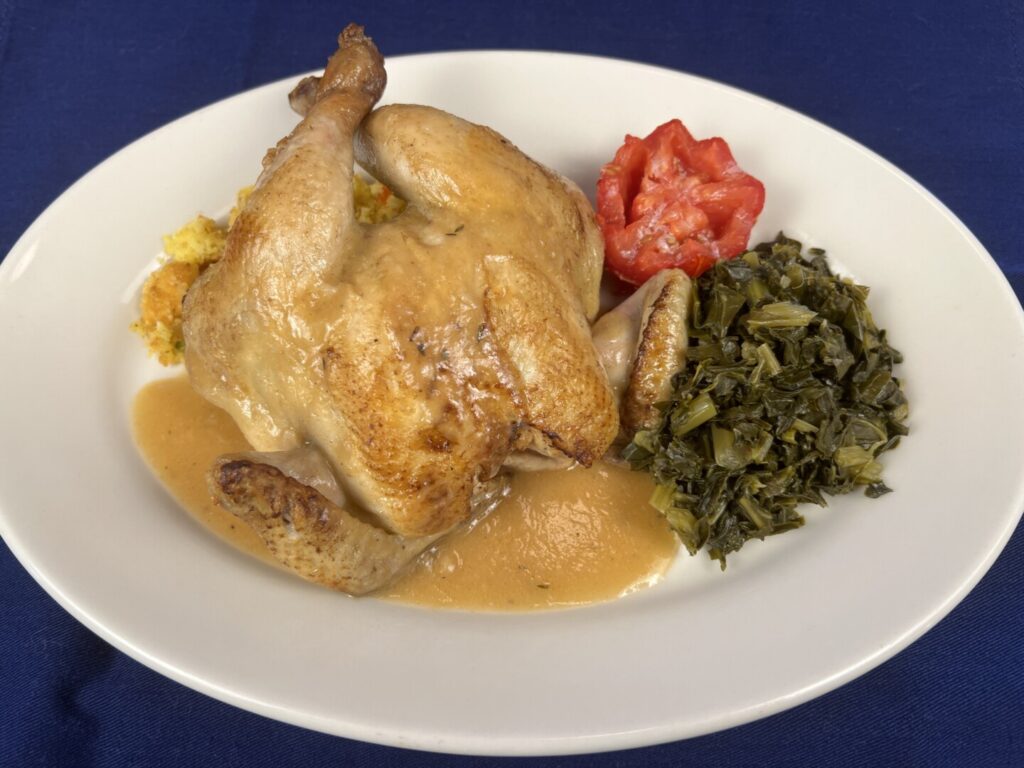
Carolina Cornish Hens with Cornbread Dressing, Country Gravy, and Collard Greens
Ingredients
step 1 ingredients
- 1 qt water
- 2 Tbsp kosher salt
- 1 Tbsp brown sugar
- 1/2 tsp dried thyme
- 1/2 tsp dried sage
step 2 ingredients
- 1 tsp bacon drippings, melted, or pan coating spray
- 1 8.5-oz box Jiffy corn muffin mix
- 1 egg
- 1/3 c milk
step 3 ingredients
- 2 1 3/4 lb Cornish hens
step 4 ingredients
- 2 Tbsp butter
- 2 Tbsp flour
- 1/4 tsp granulated onion
- 1/8 tsp granulated garlic
- 1/8 tsp dried thyme
- 1 1/2 c chicken bone broth or chicken stock
- 2 tsp barbecue sauce, preferably Stubb's Spicy
- to taste kosher salt
step 5 ingredients
- 1/8 yellow onion
- 1/4 celery rib
- 1/8 red bell pepper
step 6 ingredients
- 1 Italian parsley sprig
- 2 Tbsp butter
- 1/4 tsp granulated onion
- 1/8 tsp dried thyme
- 1/8 tsp dried ground sage
- 1/8 tsp paprika
- 1/4 c chicken bone broth or chicken stock
- to taste ground black pepper
step 7 ingredients
- 1 large plum tomato
- 2 tsp butter
- to taste kosher salt
step 8 ingredients
- 2 tsp canola oil
- 1 tsp butter
step 9 ingredients
- 1/2 27-oz can seasoned or simply-seasoned collard greens
- 2 tsp bacon drippings, melted (optional)
- to taste apple cider vinegar
- to taste bottled hot sauce, preferably Crystal brand
Instructions
PREP: Mise the recipe ahead of time.
1. Make the brine:
- Combine the water, salt, sugar, thyme, and sage in a saucepan and bring to the boil. Immediately remove from the heat and cool to room temperature. (If you’re in a hurry, set the saucepan in an ice bath for faster cooling.)
- Pour the brine into a glass or plastic container just large enough to accommodate the hens.
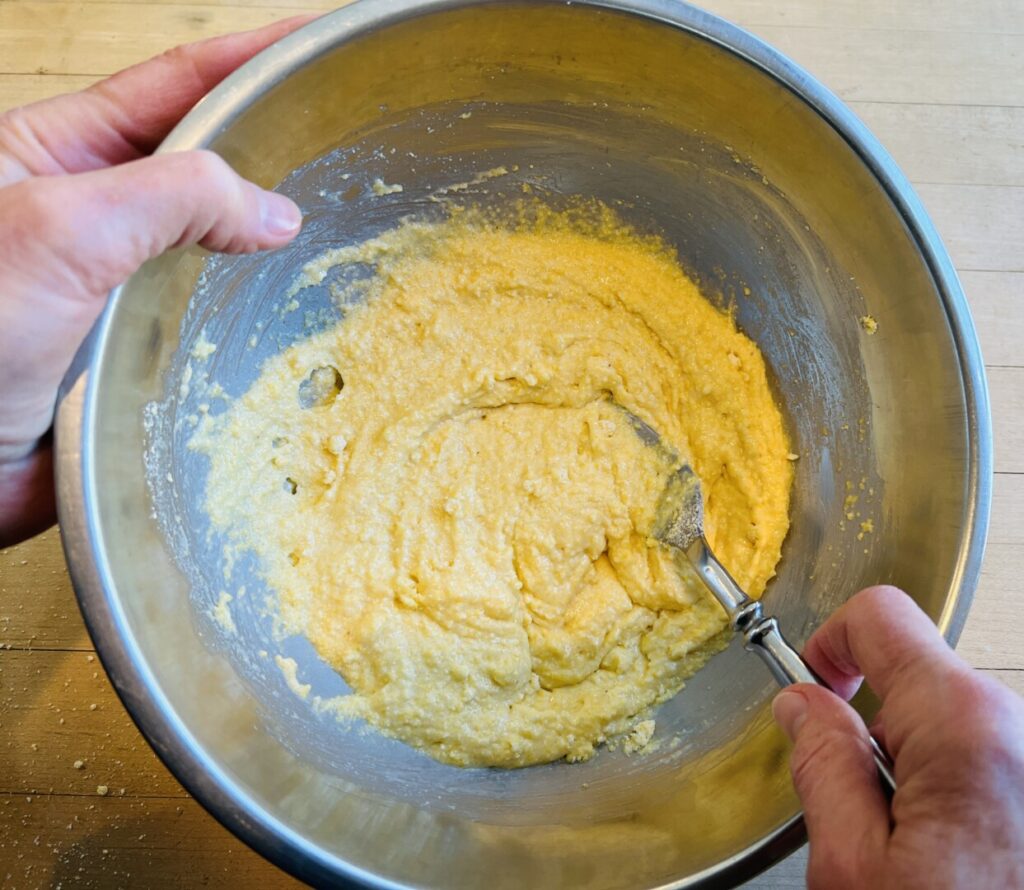
2. Make corn muffins:
- Preheat an oven to 400°F. Grease the 6 central cups of a standard muffin pan with bacon drippings or with pan coating spray.
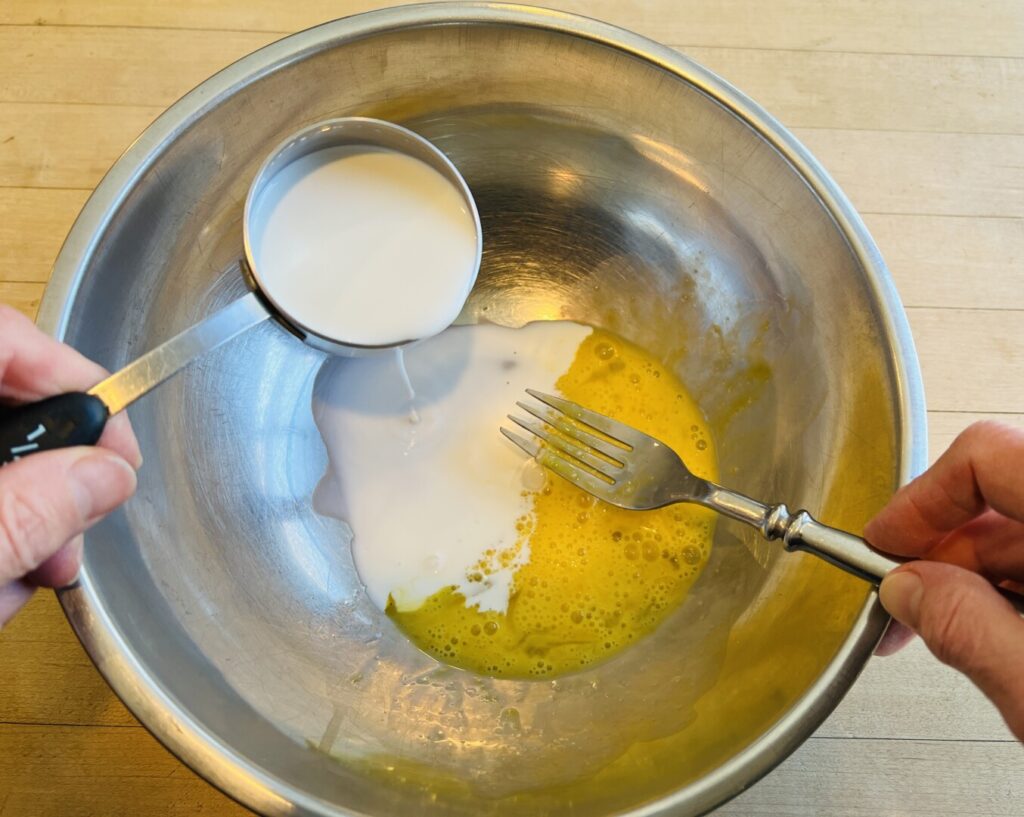
- Crack the egg into a bowl, beat until yolk and white are combined, and then stir in the milk.
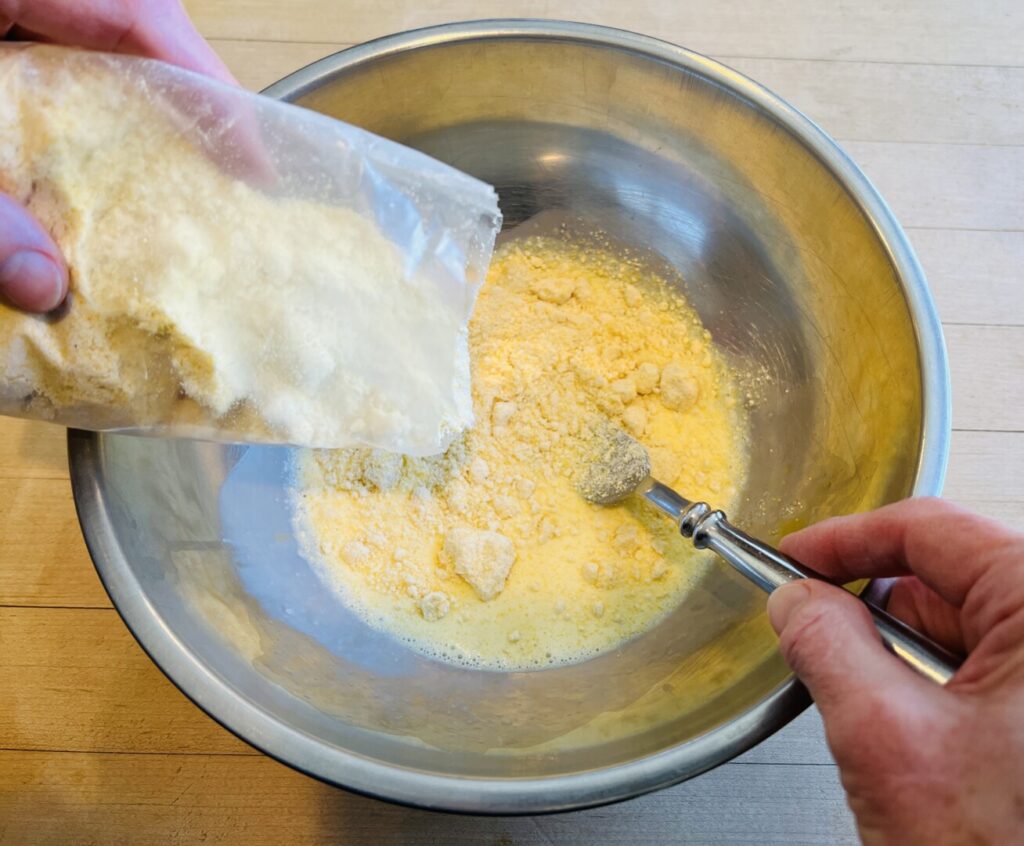
- Stir in the muffin mix just until the mixture is homogenous.
- Rest the batter at room temperature for 10 minutes.
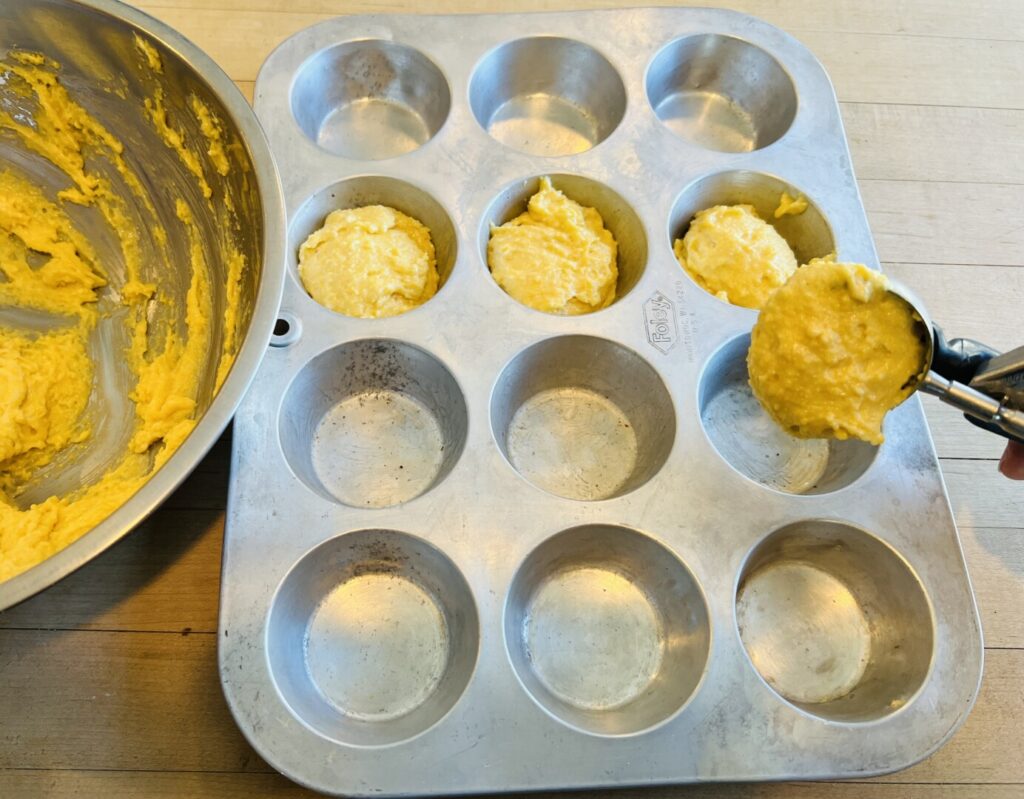
- Stir the batter to re-combine, and then fill the muffin pan cups ¾ full with batter.
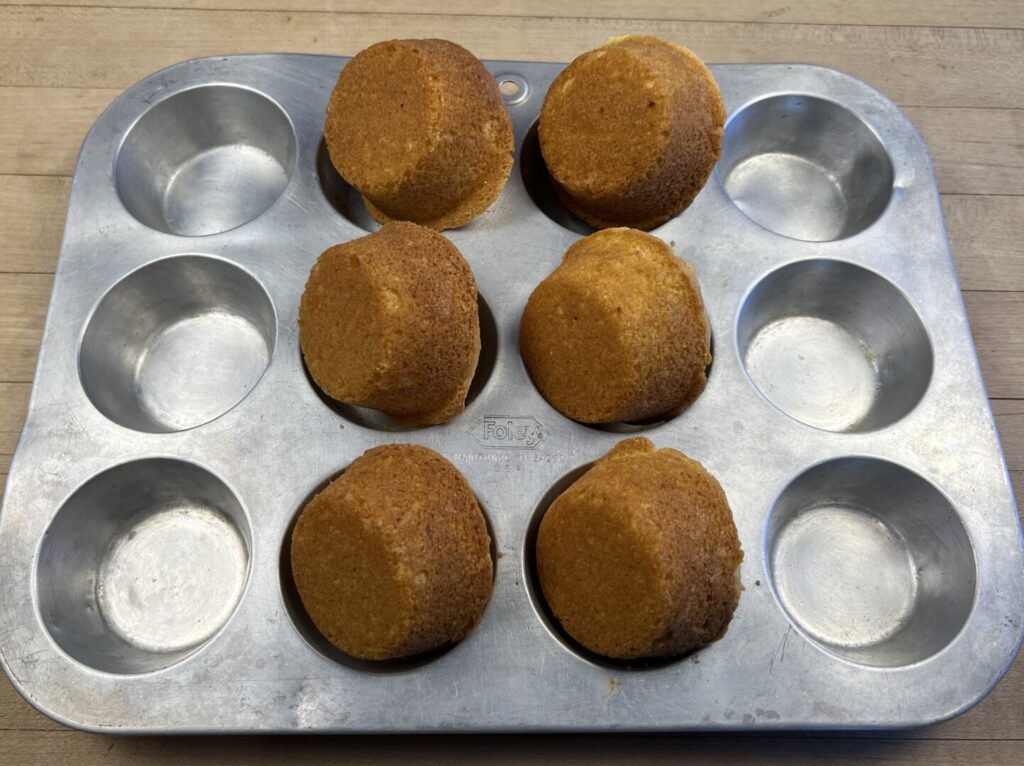
- Bake 20 minutes until risen and set.
- Cool the muffins minutes in the pan for 10 minutes, and then lift them out and turn them on their sides to completely cool.
- You’ll need about 2 muffins per person for the stuffing. If prepping ahead, place these in a plastic bag. Reserve the remaining muffins for another use—or eat them!
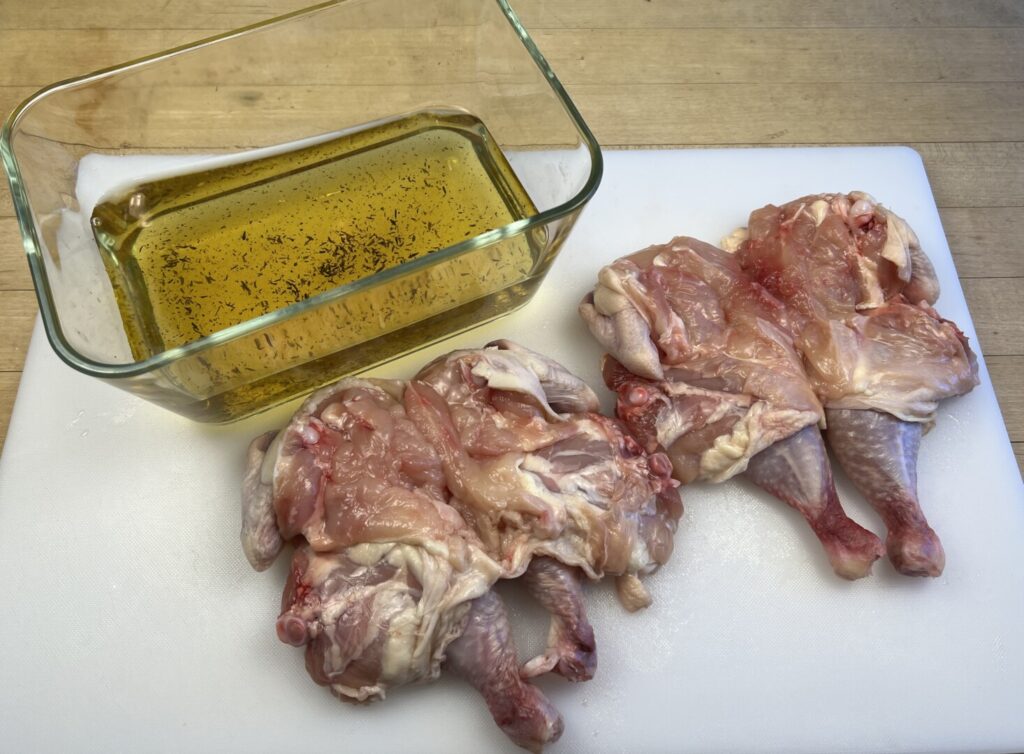
3. Butterfly, semi-bone, and brine the hens.
- Remove the hens from the vacuum packaging and rinse under cold water, allowing the water to run through the cavity. Blot dry inside and out with paper towels.
- To remove the backbone of each hen, stand it on a cutting board tail-side-up, with the backbone facing you. Insert the tip of the knife on the right side of the backbone about halfway down from the top. Cut downward to the board’s surface. Repeat on the left side of the backbone. Now turn the hen tail-side down. Cut downward and slightly to the left to cut through the joint where the thigh connects to the backbone and then straight down to the board. Repeat on the left side.
- Lay each hen breast-side-down on the cutting board, and gently flatten it. Use the tip of the knife to cut between the breastbone and the flesh, loosening the breastbone. Gently pull the breastbone off of the flesh.
- Slide the blade of the boning knife under the rib bones of each hen and, pushing upward as you cut, remove them.
- Reserve the bones for stock or discard them.
- Place in the brine, ensuring it completely covers them.
- Refrigerate the hens in the brine for at least 3 hours and up to 12 hours.
- If prepping ahead, be sure to remove the hens from the brine after 12 hours. Blot dry with paper towels and store in a plastic bag.
4. Make the gravy base:
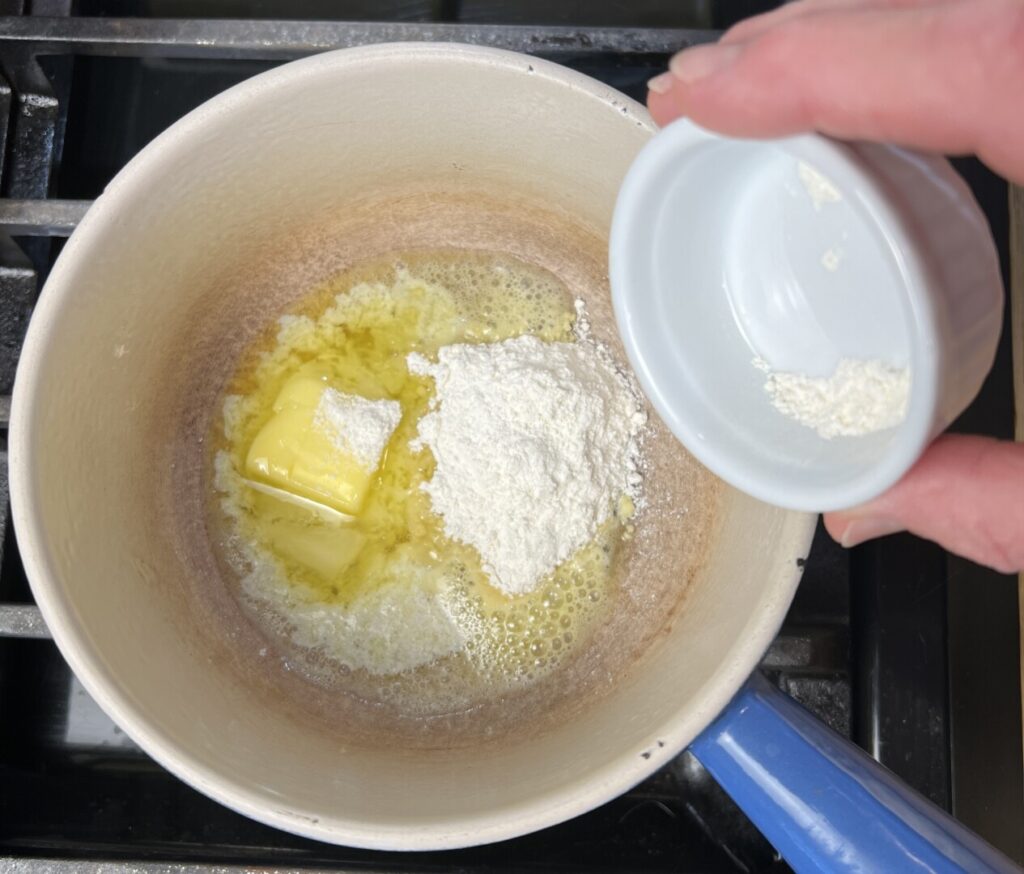
- Combine the step 4 butter and flour in a saucepan and place over medium heat. Cook, stirring constantly, to make a tan-colored roux. Stir in the step 4 granulated onion, granulated garlic, and dried thyme.
- Slowly whisk in the step 4 broth in a thin stream to prevent lumping. Bring to the simmer and cook, stirring often, for about 20 minutes until the sauce thickens to a nappé consistency.
- Add the barbecue sauce and then evaluate the seasoning. Add salt if needed.
- If prepping ahead, cool to room temperature and store in a container.
5. Fabricate the stuffing vegetables.
- Fine-chop the onion.
- Peel and fine-dice the celery.
- Remove the seeds and membranes from the red bell pepper and fine-dice it.
- If prepping ahead, combine the stuffing vegetables in a plastic bag.
HOLD: Refrigerate all ingredients up to 4 days.
COOK! Finish and plate your dinner.
6. Prepare the stuffing:
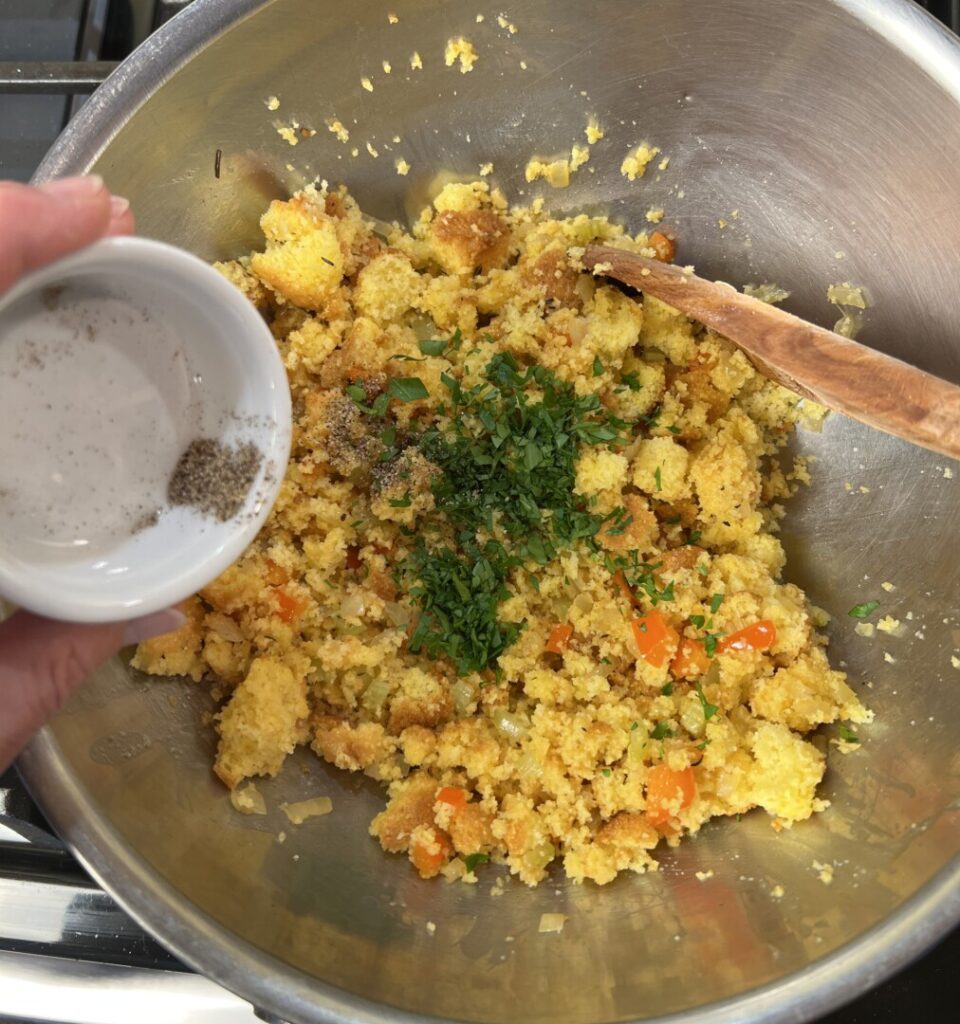
- Chop the parsley leaves.
- Crumble the corn muffins into a bowl.
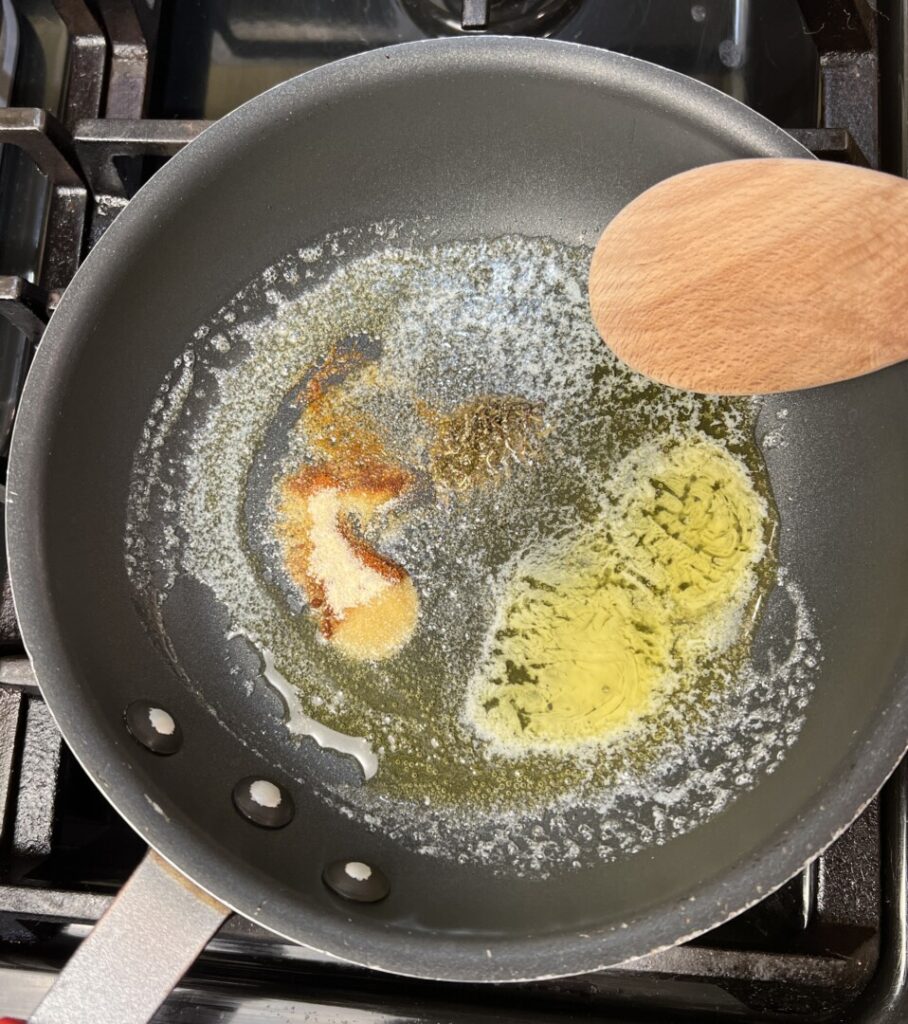
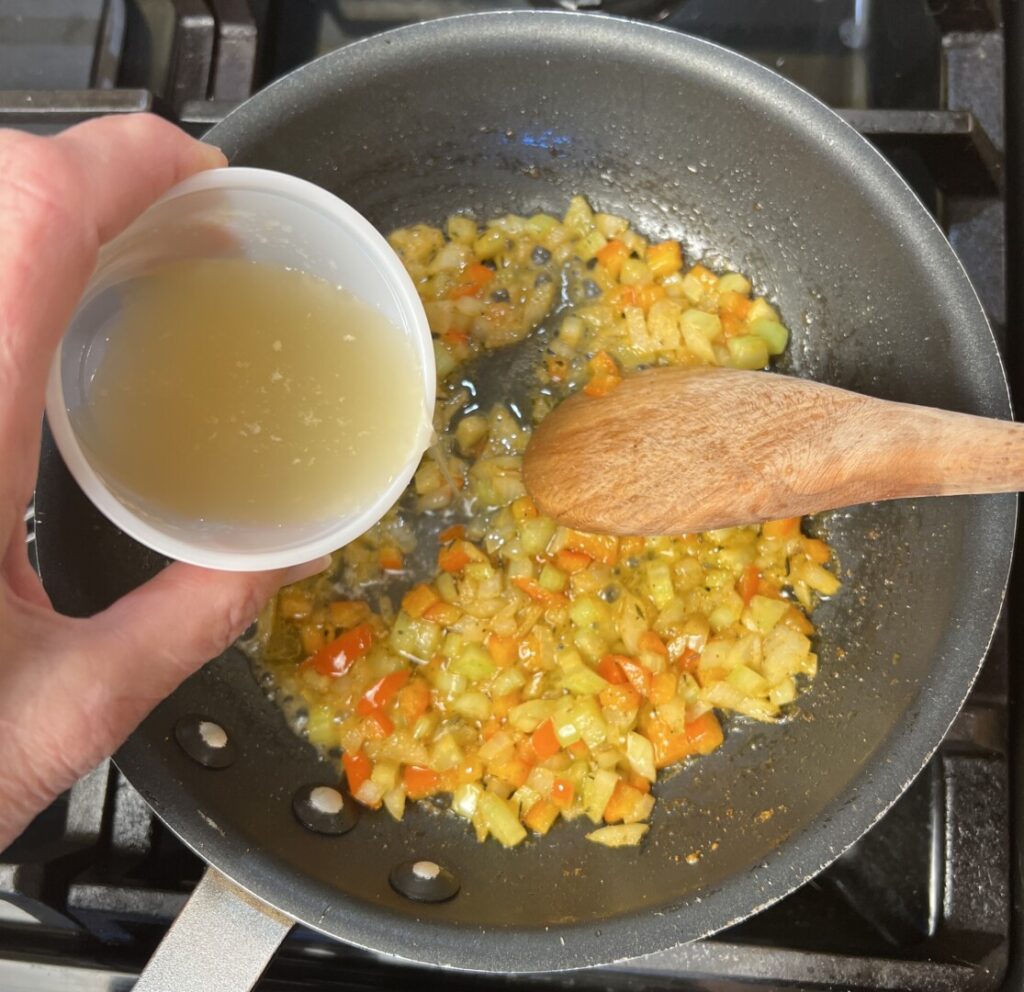
- Melt the step 6 butter in a sauté pan. Stir in the step 6 granulated onion, the step 6 dried thyme and dried sage, and the paprika. Stir to steep the seasonings in the butter, and then add the onion, celery, and peppers. Cook over medium-low heat, stirring often, until the vegetables soften. Don’t allow them to brown.
- Add the step 6 broth to the vegetables and bring to the simmer.
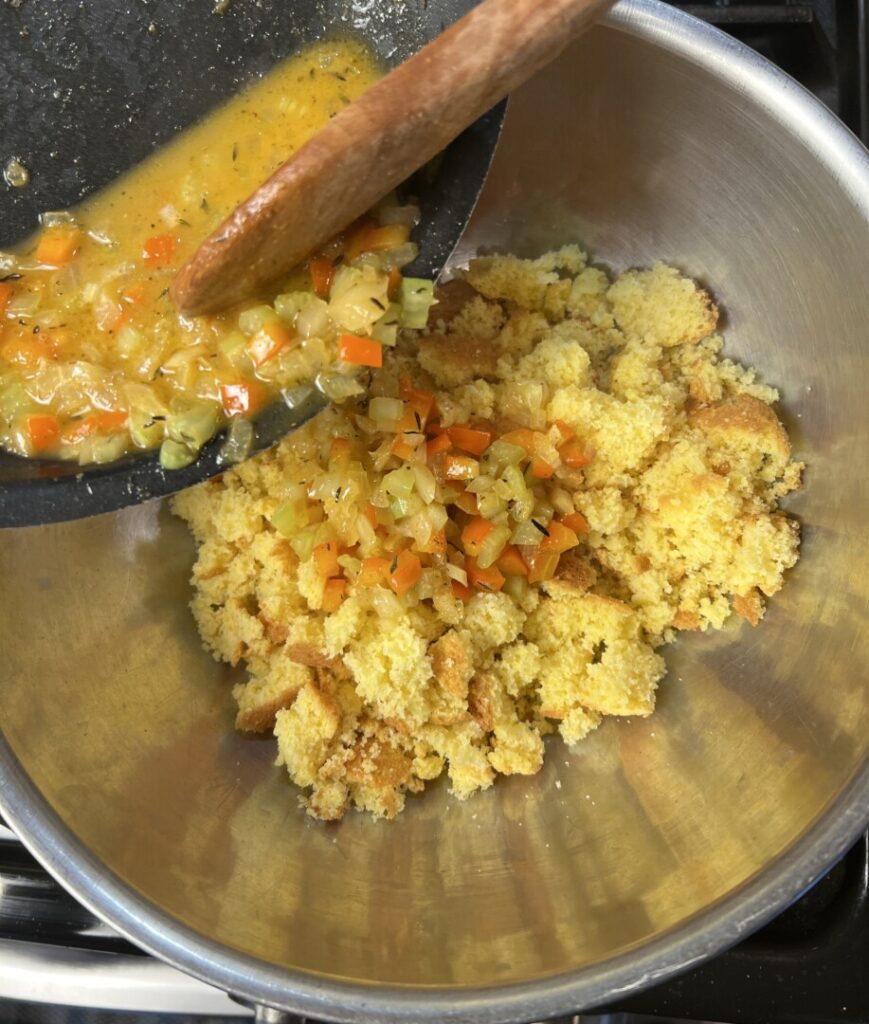
- Add the vegetables and their liquid into the corn muffin crumbs and toss lightly to evenly moisten them, then toss in the parsley and pepper.
- Line a sheet tray with aluminum foil and place a sheet of parchment on the foil. For each hen, form a mound of stuffing on the tray. (A 3 ½-inch diameter x 1 ½-inch tall food ring is helpful for this if you have one.)
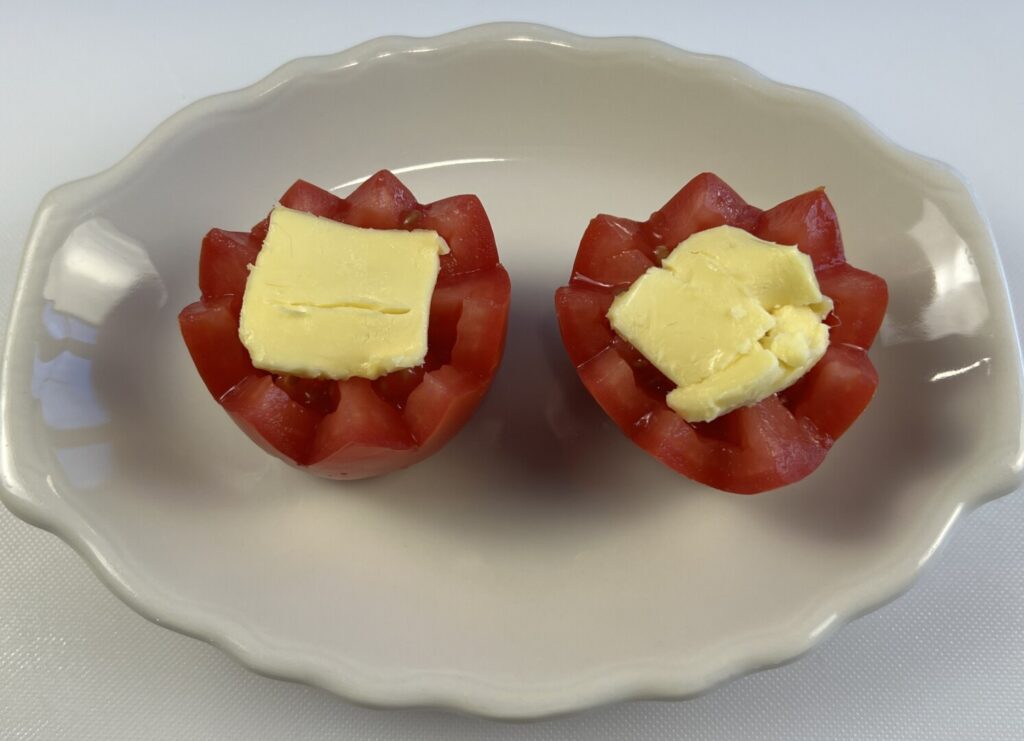
7. Fabricate and season the tomato crowns:
- Remove the core from the tomato.
- Use a paring knife to make zig-zag cuts around the middle of the tomato—in doing so, cutting it in half.
- If necessary, shave off a bit of the rounded bottoms so that the tomato crowns sit steadily upright.
- Season the tomato crowns with salt and place a slice of the step 7 butter on top.
8. Pan-roast the hens and tomato crowns:
- Preheat an oven to 425°F.
- If necessary, remove the hens from the brine. Blot the hens dry on paper towels.
- For each hen, tie the ends of the drumsticks together with kitchen twine.
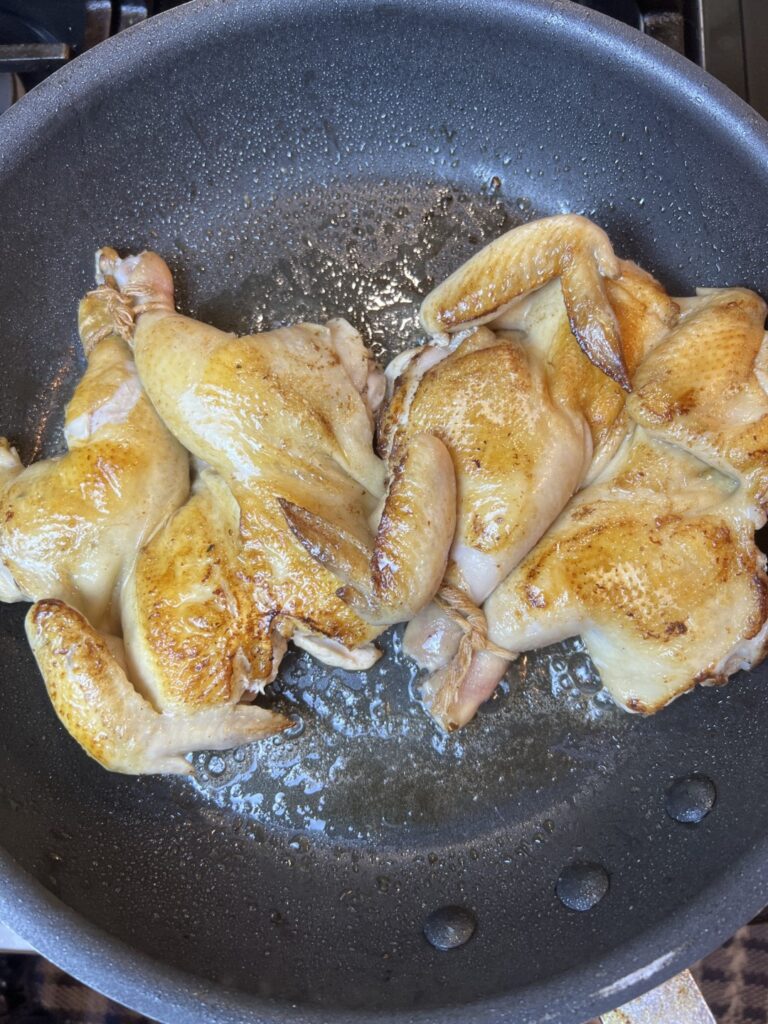
- Place a sauté pan over high heat until hot, then turn down to medium heat. Add the oil and step 8 butter, then add the hens skin-side-down. Sauté for between 1 and 2 minutes until the skin sides are golden brown.
- Turn over the hens and sauté them for 1 minute longer.
- Place a hen, skin-side up, on each mound of stuffing and press gently to form it around the stuffing. Add the tomato crowns to the sheet tray.
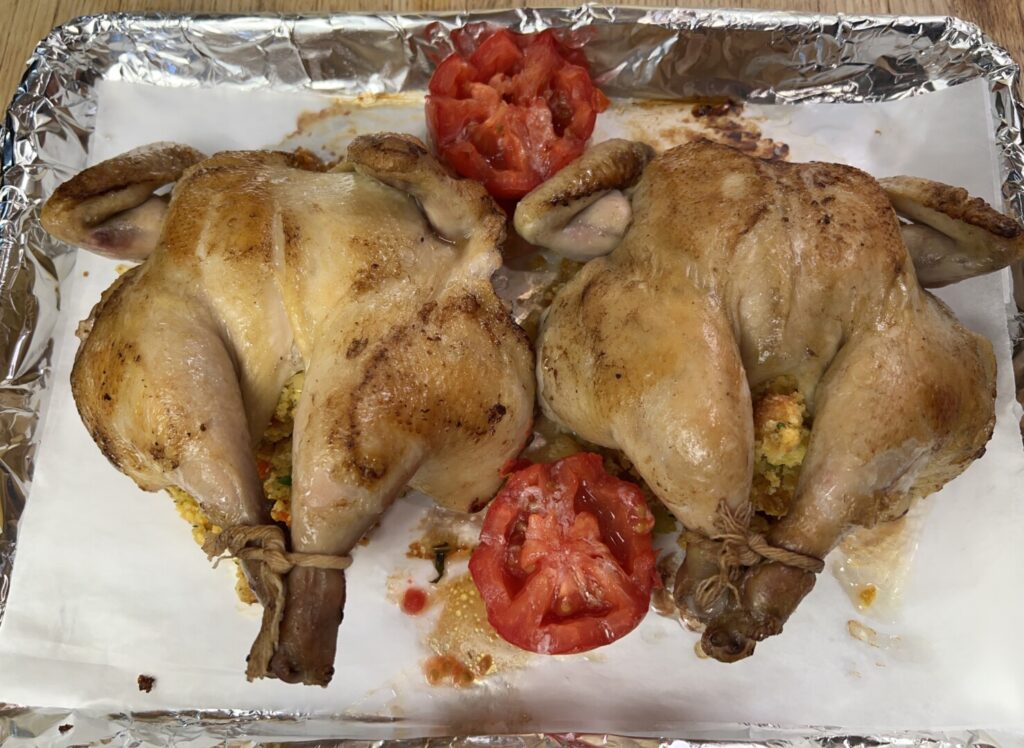
- Place the sheet tray in the oven and roast for 20 minutes, until the tomato crowns are hot an beginning to soften and the hens are just are done through. To test, insert a thermometer deep into one of the thighs; the internal temperature should reach 165°F and the juices should run clear.
9. Heat the collard greens:
- Drain off most of the cooking liquid from the greens.
- Place the greens in sauté pan with the optional bacon drippings, cover, and cook over high heat until hot through. Season to taste with vinegar and hot sauce.
10. Reheat the gravy:
- Place the gravy in a saucepan over high heat until hot. If it’s become too thick, thin it out with a little water.
- Evaluate the seasoning and correct if necessary.
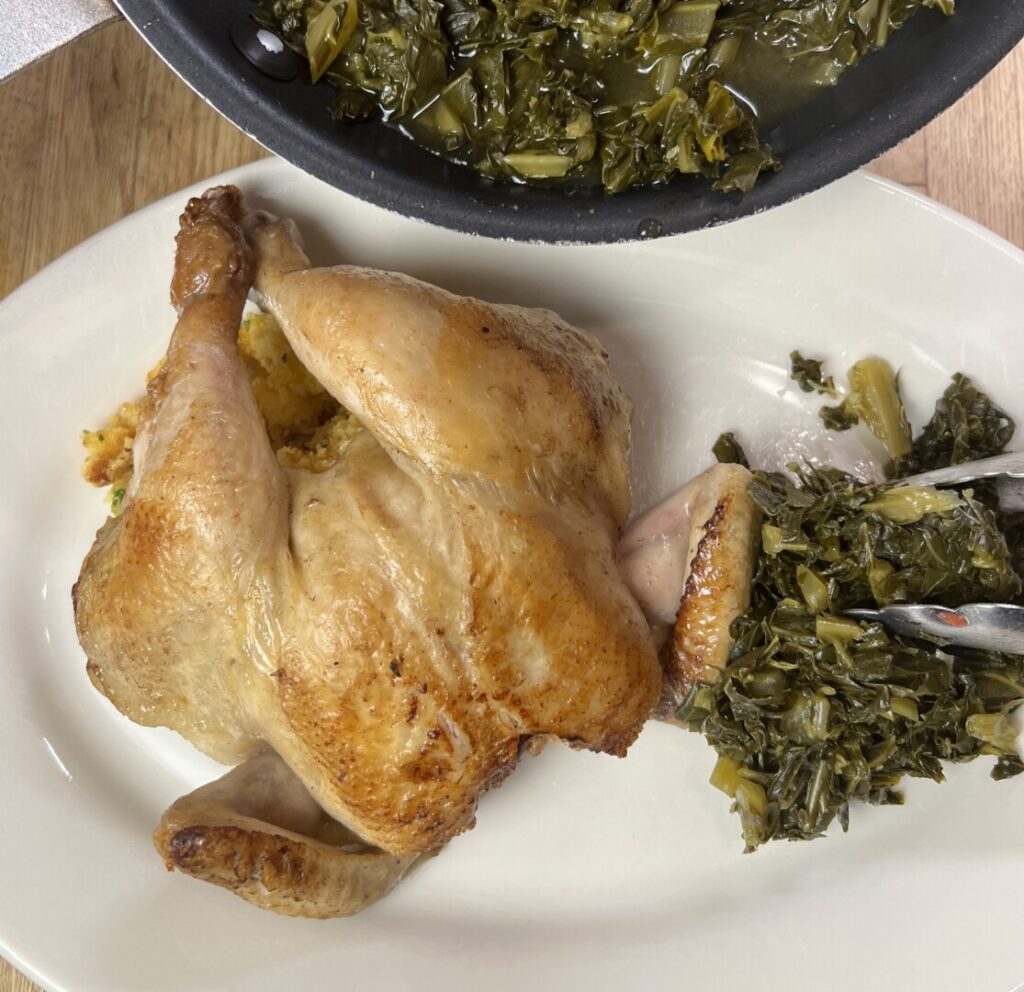
11. Plate:
- Use a flexible fish spatula and tongs to transfer each hen on its mound of stuffing to the left side of warm plates.
- Mound a portion of collard greens on the right side of each plate.
- Place a tomato crown on the back of the plate.
- Nap each hen with some gravy, allowing it to pool in the front of the plate.
- Pass any remaining gravy in a sauceboat.