

Your Cooking Lesson
Advice, explanation, and in-depth information to help you achieve recipe success.

When North Americans think about Mexican cuisine, seafood may not be the first thing that comes to mind. But, with nearly 7,000 miles of coastline, Mexico boasts a huge repertoire of dishes based on fish and shellfish. This recipe borrows Milanesa, a Mexican cooking style usually associated with meat or chicken cutlets, and applies it to flounder fillets.
The Mexican culinary term Milanesa itself is actually borrowed from the Italian alla Milanese—breaded and pan-fried cutlets in the style of Milan.
Because flounder fillets are thin and have very tender, quickly-cooked flesh, they’re perfect for pan-frying. The pan-frying cooking method is defined as cooking food at medium-high temperature in fat at a depth of about halfway up the sides of the item. Pan-fried foods are virtually always coated with a layer of breadcrumbs to protect the flesh and to create a crisp coating.
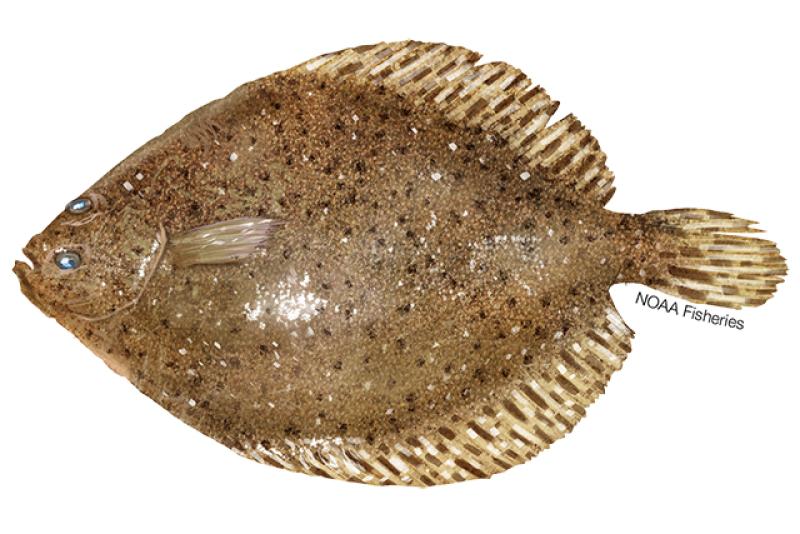
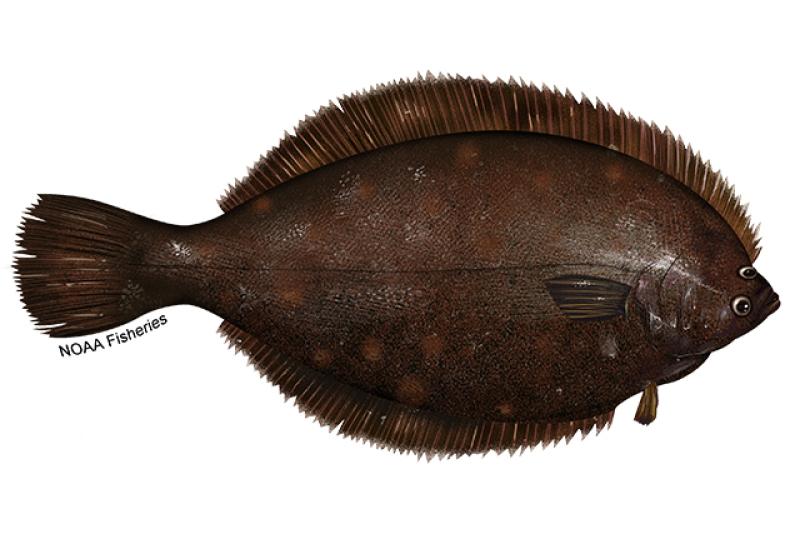
Atlantic flounder spend the fall and winter in the deep waters off the eastern Continental Shelf; in late March and April they migrate back into shallower coastal waters where they’re harvested by local-catch fishers. West coast flounder peaks a little later, in late spring. The culinary term “flounder” actually refers to several species of flatfish, and their names can be confusing. Winter flounder can be caught through spring and into early summer, whereas summer flounder (also called fluke) is available in early spring, as well. The most commonly available flounder species range in weight from one to six pounds.

Flatfish weighing two or more pounds typically are fabricated into four fillets: two larger, thicker fillets from above the lateral line; and two smaller, thinner ones from below. Smaller flounder may be fabricated with top and bottom sections connected. For this reason, when you buy flounder fillets they may vary in size and weight. For restaurant cooks, this can make portioning and plating a challenge. But at home you can cut the larger fillets accordingly and divide the fish equally by weight—or just fight over who gets the largest piece! You’ll also have to adjust cooking times and temperatures, depending on size and thickness. Thicker fillets need longer cooking at a slightly lower temperature, whereas thinner fillets need shorter cooking at a higher temperature. Luckily, flounder cooks quickly and is relatively forgiving about overcooking.
The sauce and side salads are what gives this recipe its Mexican flair.
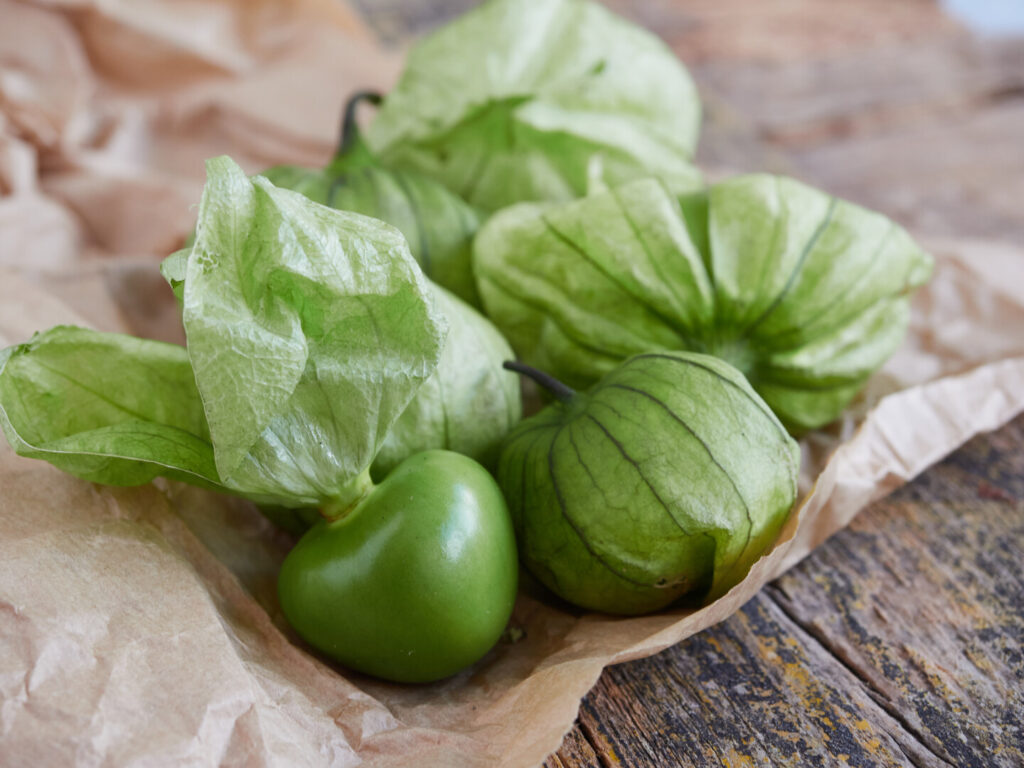
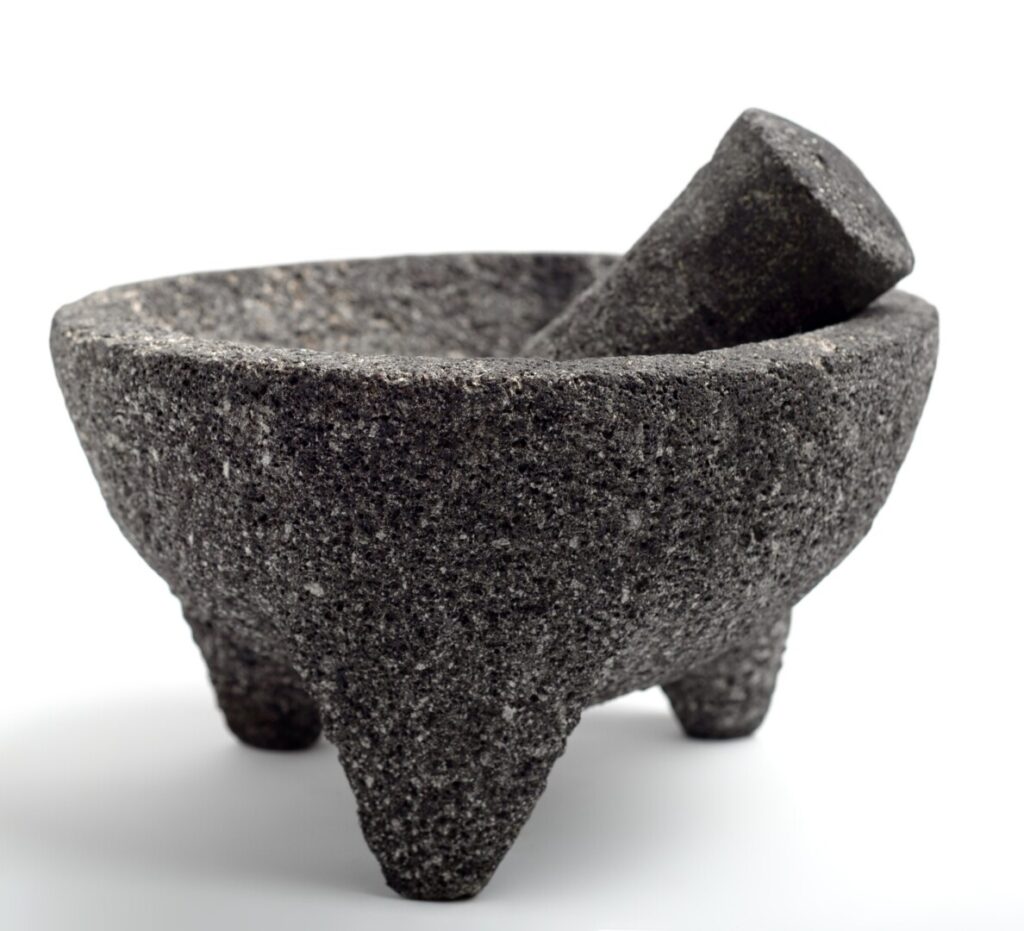
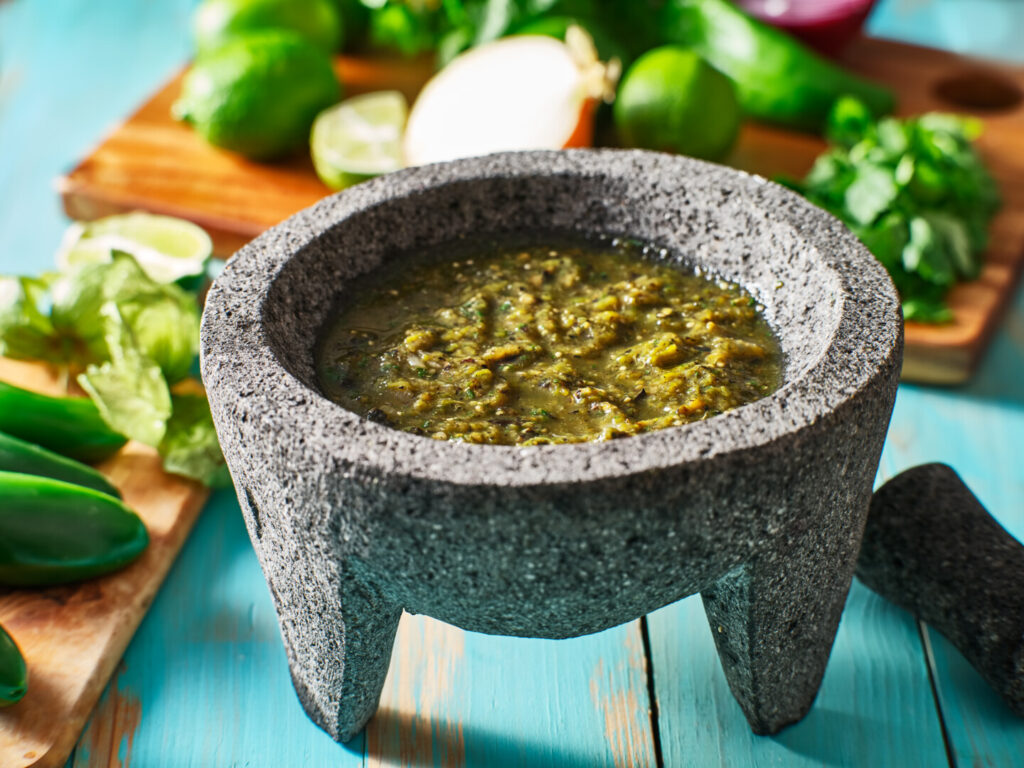
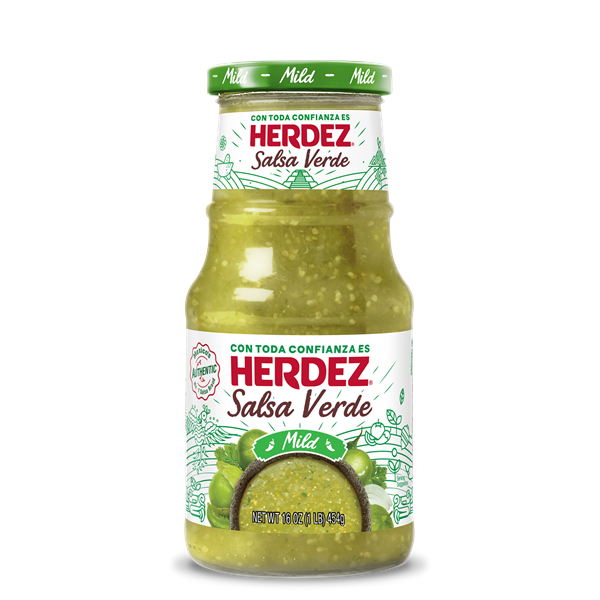
Salsa verde, or green sauce, is a traditional table condiment found in various forms all over Mexico. Its primary ingredient is the tomatillo, a member of the nightshade plant family—related to tomatoes, but quite different. Tomatillos must be husked, washed, and poached before grinding into a sauce with onion, garlic, and various types of chiles. The traditional method for making salsa verde uses a volcanic stone molcajete and mano, or mortar and pestle. Homemade salsa verde is great, but it involves a lot of work. Fortunately, several Mexican food companies make excellent products. Herdez brand is my favorite.
Most people agree that potato salad goes great with fried foods, and Mexicans are no exception. The most popular potato salad throughout Latin America is ensalada Rusa, or Russian salad. This classic salad was created by the French chef Lucien Olivier while working in Moscow in the 1860s, and it soon became the rage throughout Europe. It arrived in Latin America with immigrants, and quickly became subject to many regional variations. Ours is a simple version that, along with potatoes, showcases springtime vegetables.
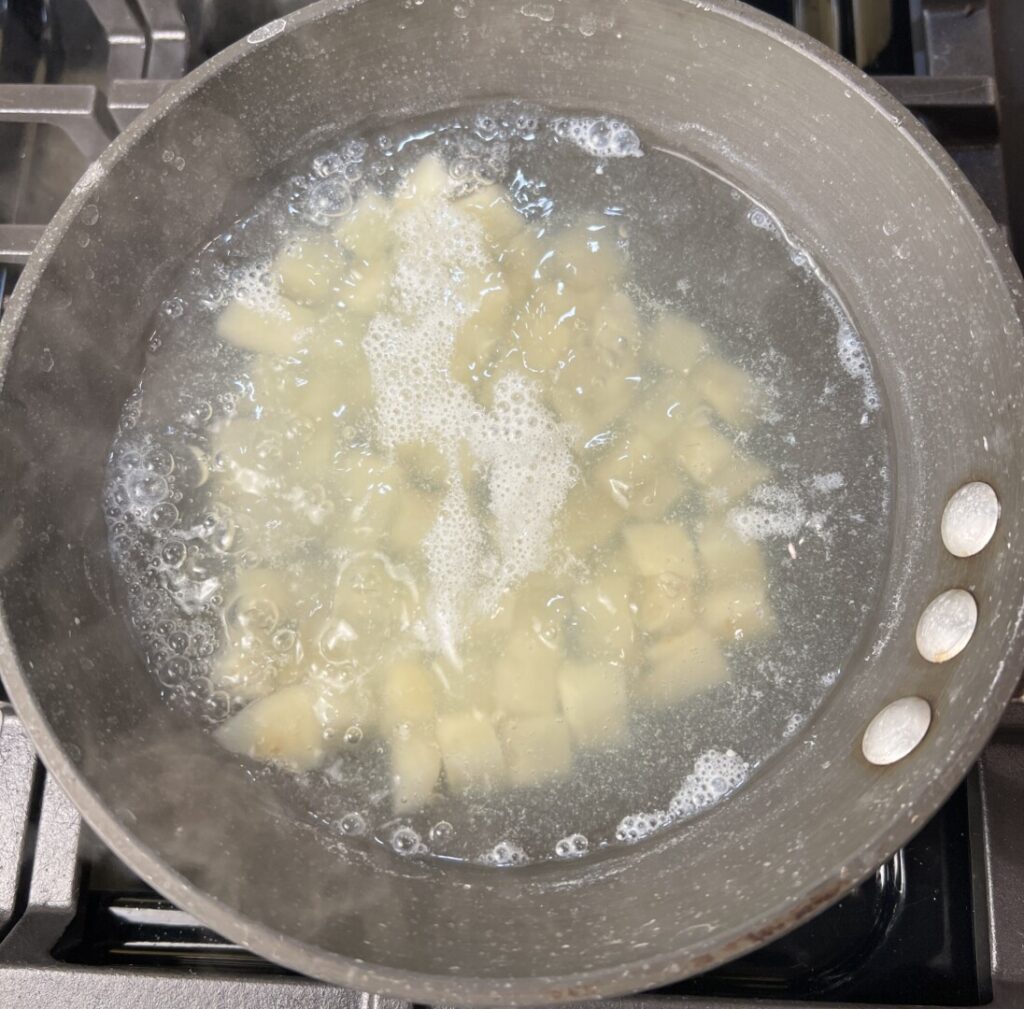
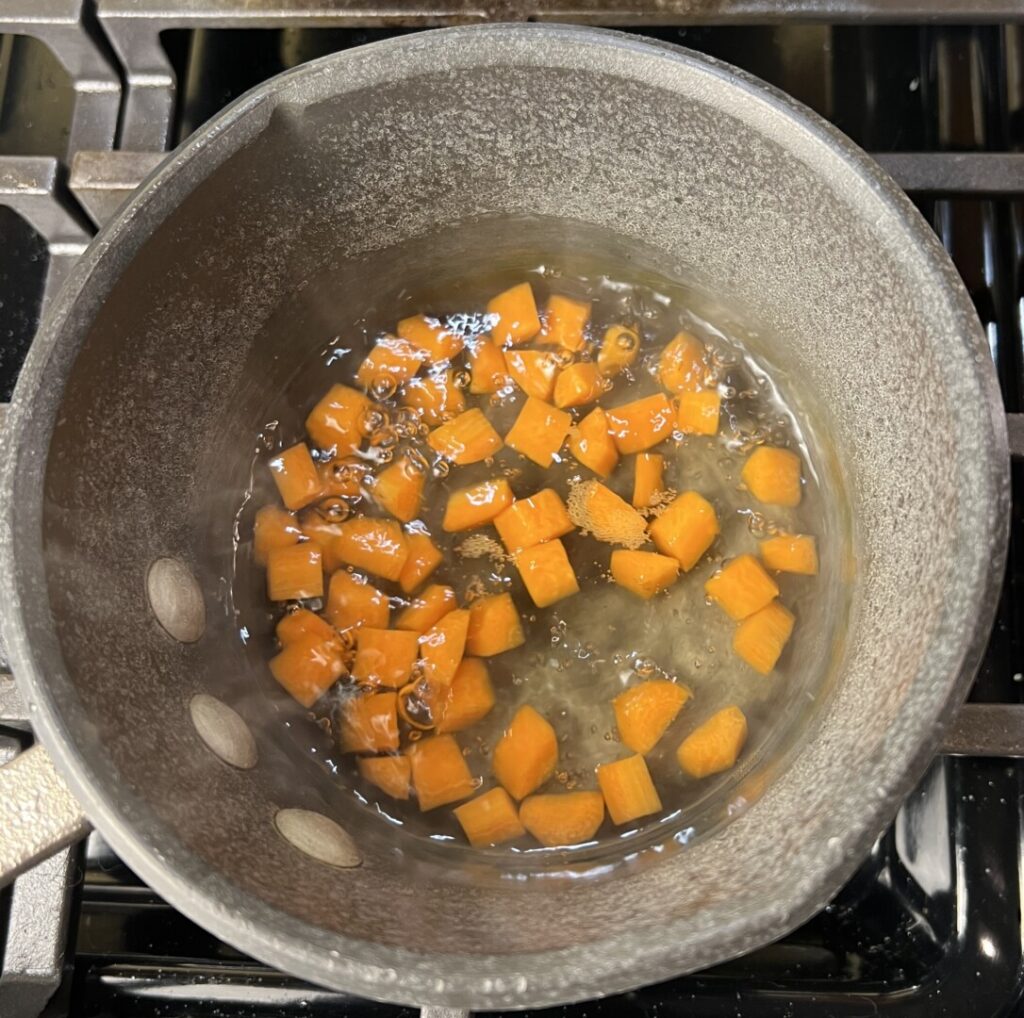
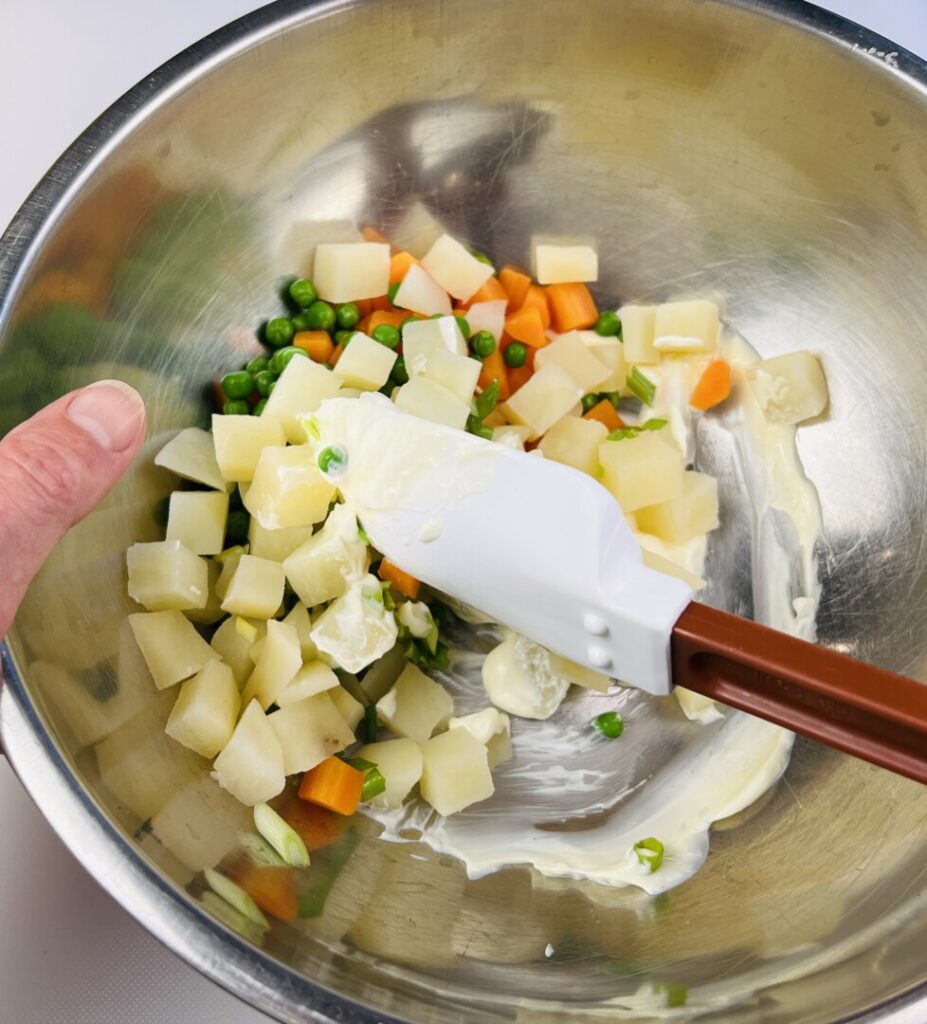
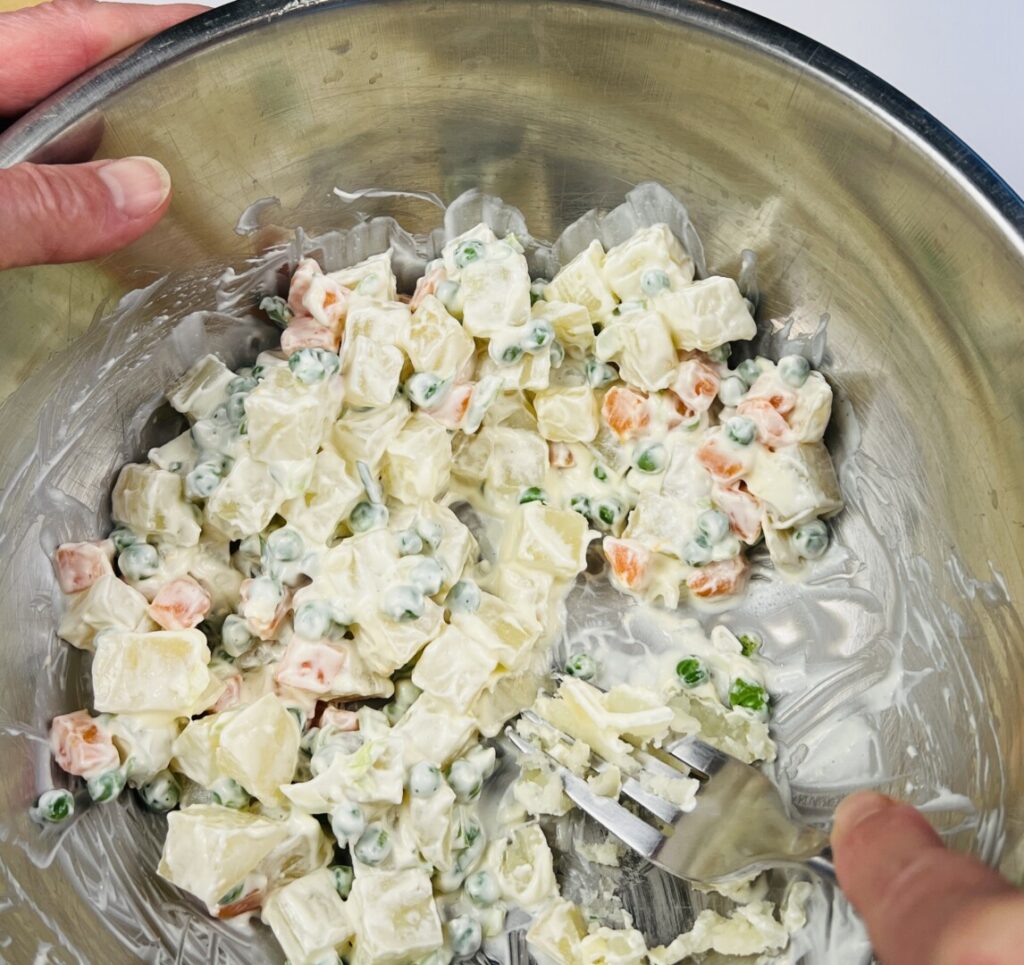
Dice russet potatoes, poach in salted water, and then drain and cool. Chefs generally don’t refresh potatoes to avoid waterlogging them. Cook until just slightly less than tender when pierced with a knife; they’ll continue to soften due to carryover cooking. Poached diced carrots and peas complete this version of Rusa. Fold the room-temperature vegetables into a simple mayonnaise dressing; as you do so, crush a few potatoes to thicken and bind the salad.
The spicy, tangy crunch of springtime radishes en escabeche complements the lush richness of the Rusa salad and the avocado. Escabeche is the Spanish term for a time-honored method of food preservation: pickling. Originating in Persian cuisine, the escabeche method traveled from the Middle East through North Africa and into Spain with the Moors. Spanish cooks then popularized escabeche throughout Latin America and the Philippines. Escabeche has many variations, including dishes of seafood, chicken, or meat doused in a tangy, sweet-and-sour, vinaigrette-like sauce. Escabeche sauce is also used for making pickled vegetables, most popularly jalapeño chiles. For this recipe’s side dish, we’re dressing julienne fresh radishes in a spicy escabeche-inspired salad dressing.
To save time, we’re using our recipe essential Apple Cider Vinaigrette as the base for the escabeche dressing. https://prepholdcook.com/recipes/apple-cider-vinaigrette/ Because of its slightly sweet and mildly tart flavor, this is my go-to dressing for most any North American, Latin American, or Eastern European salad. As we’re doing in this recipe, it can easily be modified to reflect the flavor profile of these cuisines. If you don’t already have a bottle of this dressing in your ‘fridge, and don’t have time to make it, just whisk together 1 part apple cider vinegar to 3 parts canola oil, and go from there.
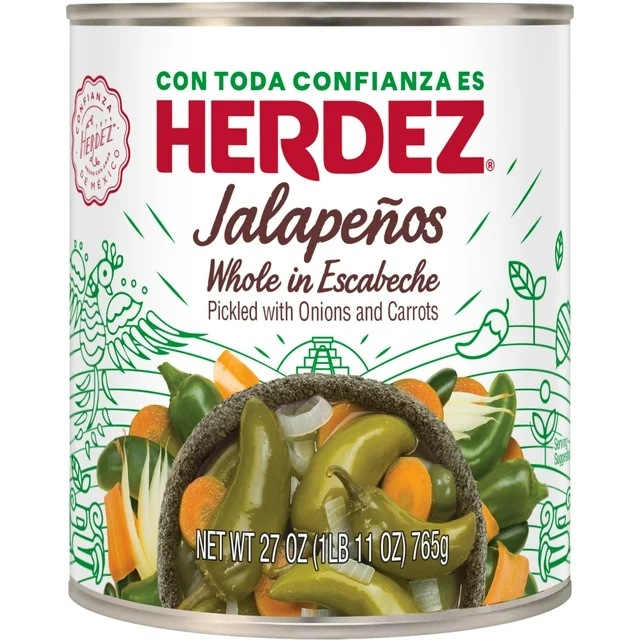
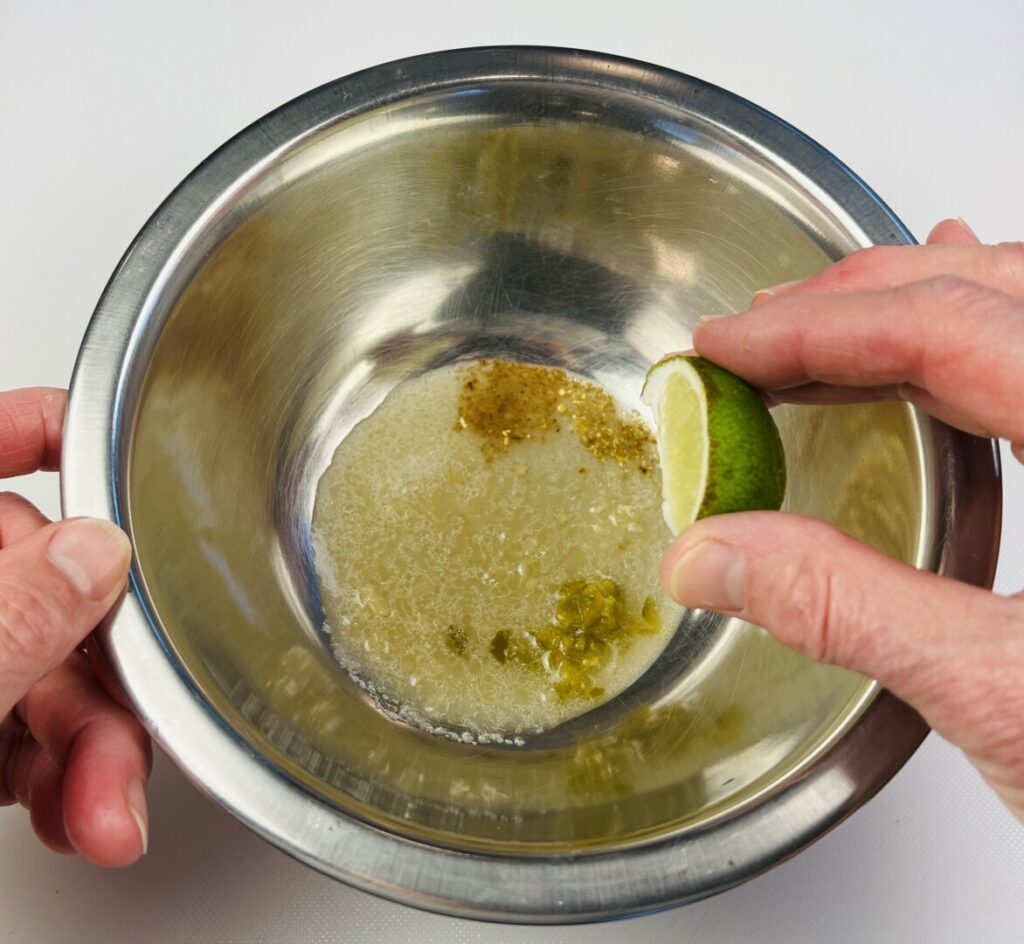
To give our dressing both a spicy kick and that classic escabeche flavor, we’re using canned chiles jalapeños en escabeche—often labeled as “pickled jalapenos” or even (incorrectly) “nachos”—along with some of their pickling liquid. Brands that include onions and carrots have the best flavor. Use more or less as your taste dictates! Sugar, spices, and lime juice complete the dressing. We’ll wait to dress the radishes until just before serving.
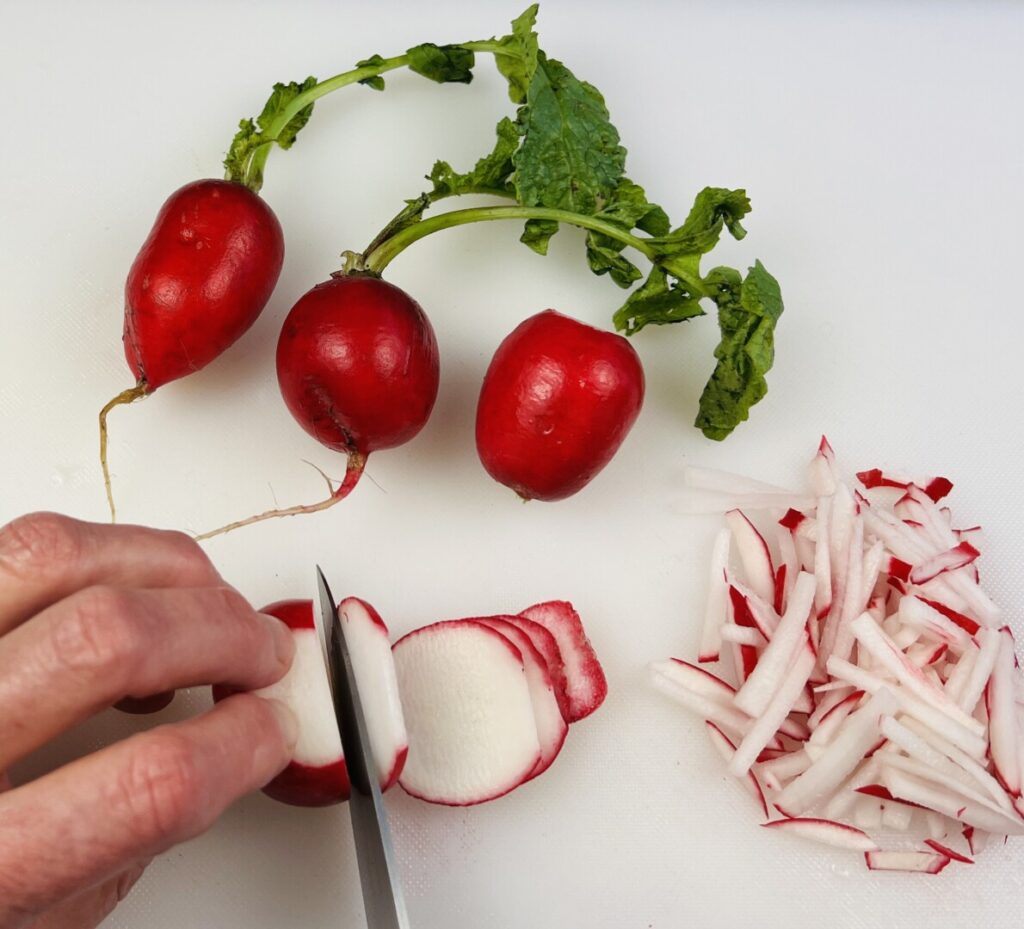
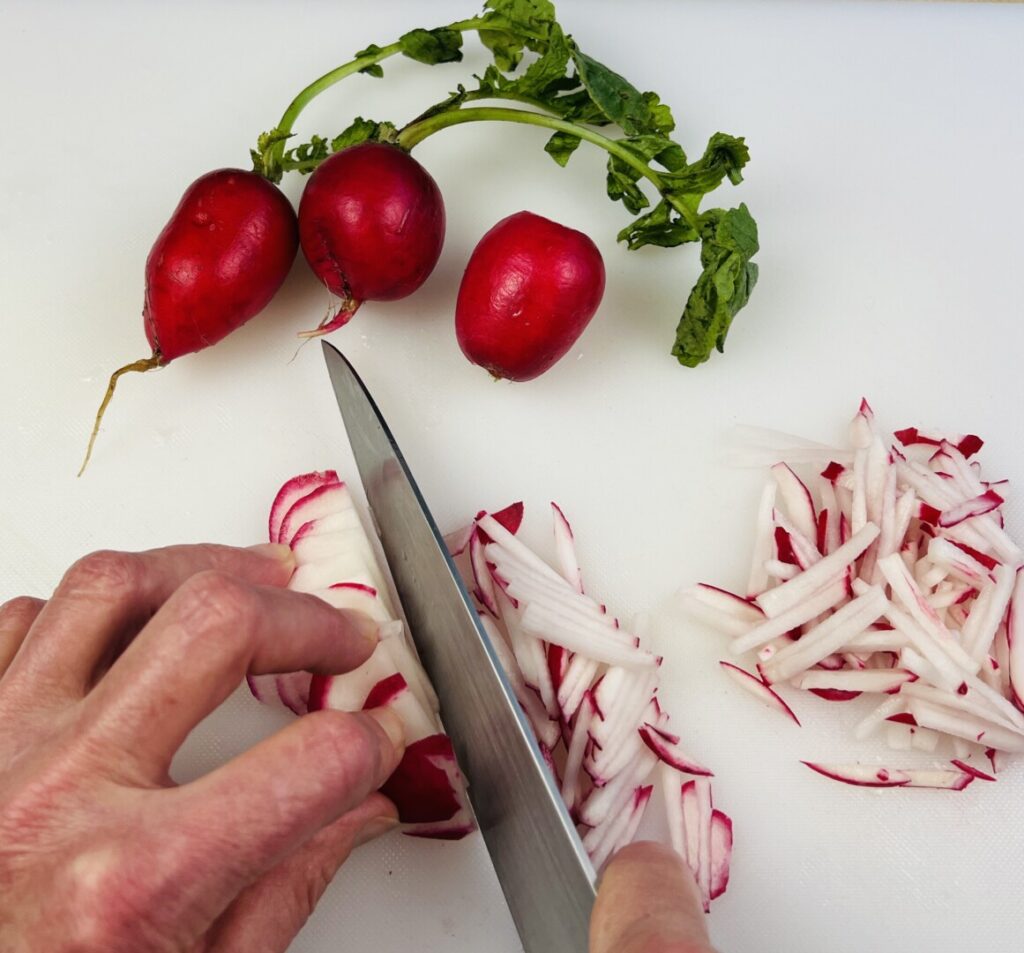
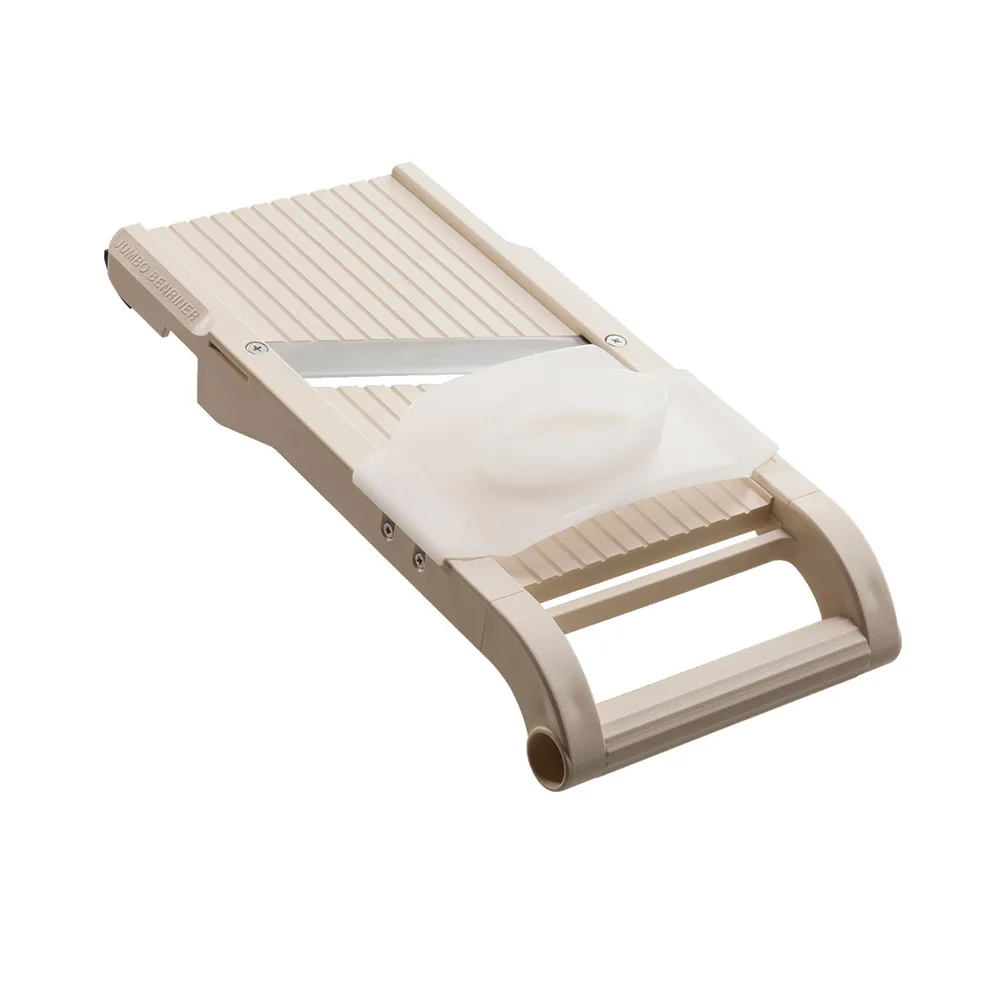
This recipe’s salad features julienne radishes. Julienne is one of the classic cuts: a matchstick shape precisely 1/8 x 1/8 x 1 1/2-inches in size. Culinary students spend hours practicing to get this difficult knife cut perfect. Even if your juliennes are a little rough, they’ll nonetheless look good and have a pleasant mouthfeel. Choosing larger radishes makes the job easier. Simply trim the radishes, cut them lengthwise into thin slices, then stack the slices and cut into matchsticks. Alternatively, you can use a mandoline fitted with the julienne blade. Mandolines are available in many styles, from budget versions made of plastic https://amzn.to/42V4HSg to more expensive stainless steel models. https://amzn.to/3Y7m1km

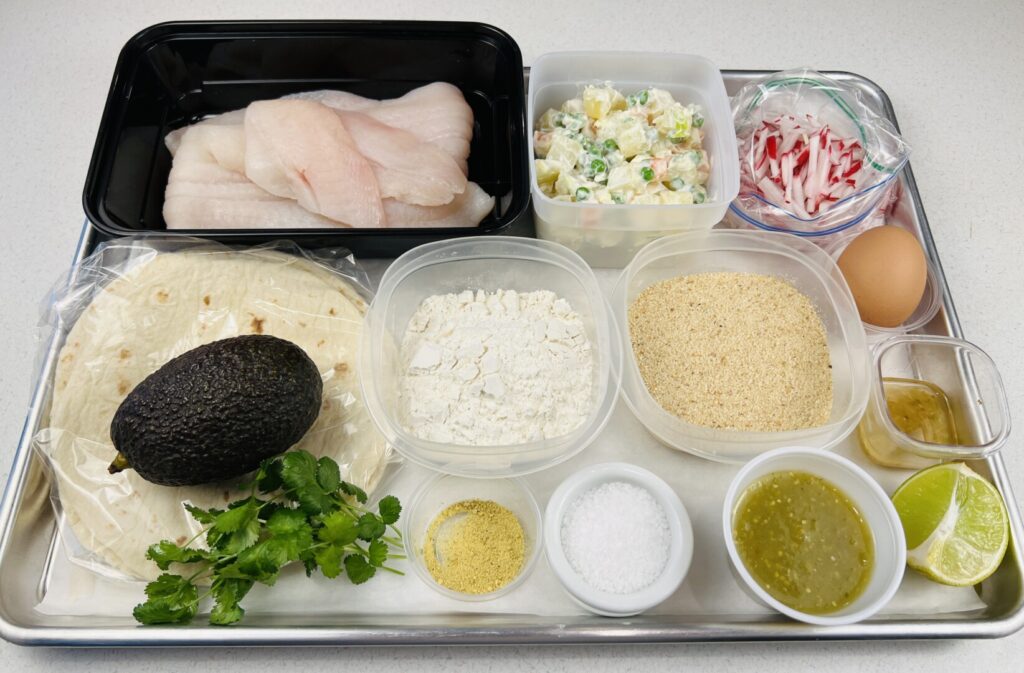
Assemble the remaining ingredients, and your prep is done. Here’s your mise tray (minus the frying oil).
It’s dinnertime—let’s COOK!
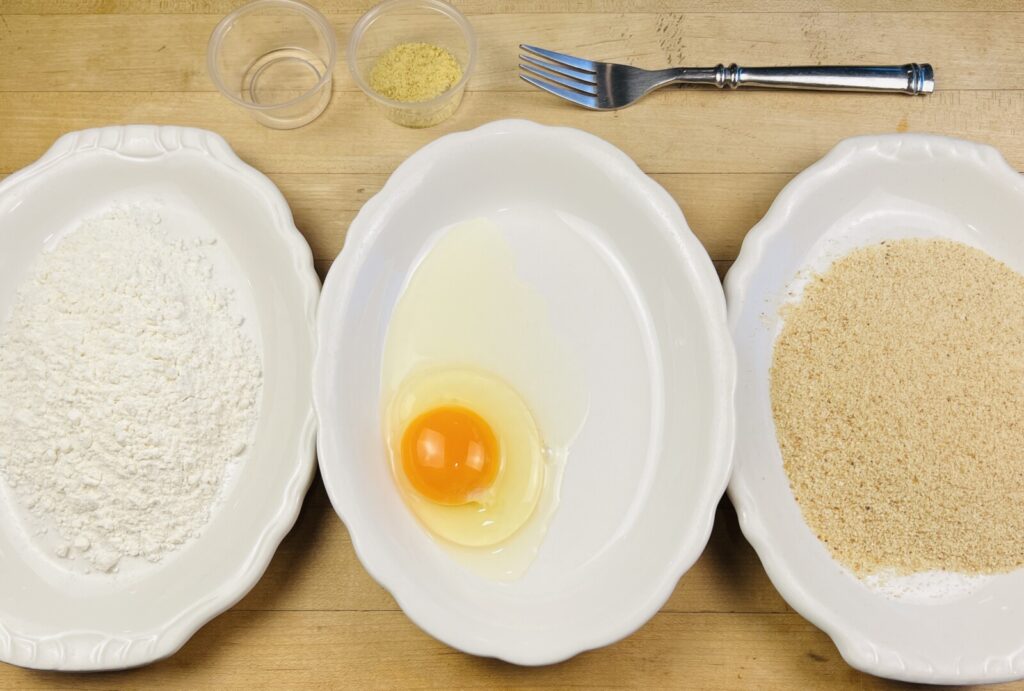
One of the most basic skills an aspiring chef learns in culinary school is setting up a breading station. The arrangement of the breading ingredients is based on understanding how a breading works. The reason for breading foods before frying is to prevent the food from absorbing the frying oil and to create a crispy coating. The crispness comes from breadcrumbs, and the challenge is to ensure that the breadcrumbs stick to the food. Using three ingredients, in the proper order, makes this happen.
Foods, especially protein foods like fish fillets or chicken breasts, are moist—even when thoroughly blotted dry. If you were to dredge these foods directly in the breadcrumbs, the breadcrumbs would absorb the moisture and become soggy, which then would prevent them from absorbing the frying oil and becoming crisp. Moreover, the crumbs wouldn’t tightly adhere, and the crumb coating would separate from the food during or after frying. So, it’s necessary to shield the crumbs from moisture and use some culinary “glue” to make them stick.
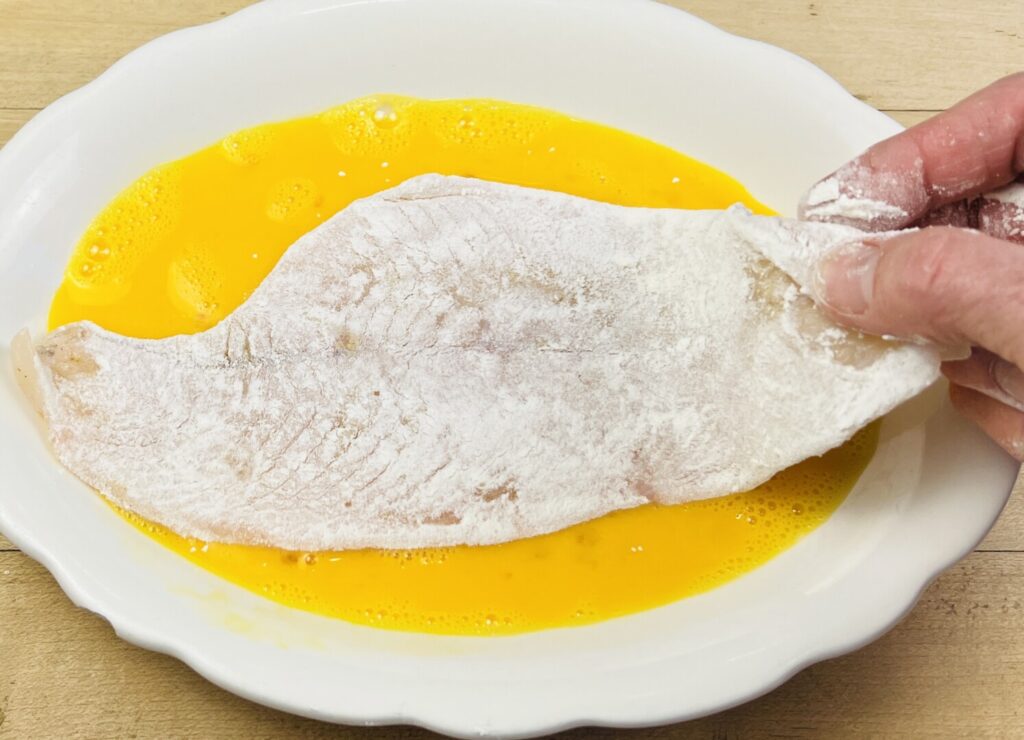
The first element in your breading station is flour. The flour functions to absorb the food’s natural moisture and provide a matte finish to which the “glue” will stick. If you plan to thoroughly season the food to be breaded, you can use plain flour; alternatively, you can highly season the flour with salt, dried herbs and spices, or any type of dry powdered seasoning. In this recipe we’re seasoning the flounder so we’re using plain flour.
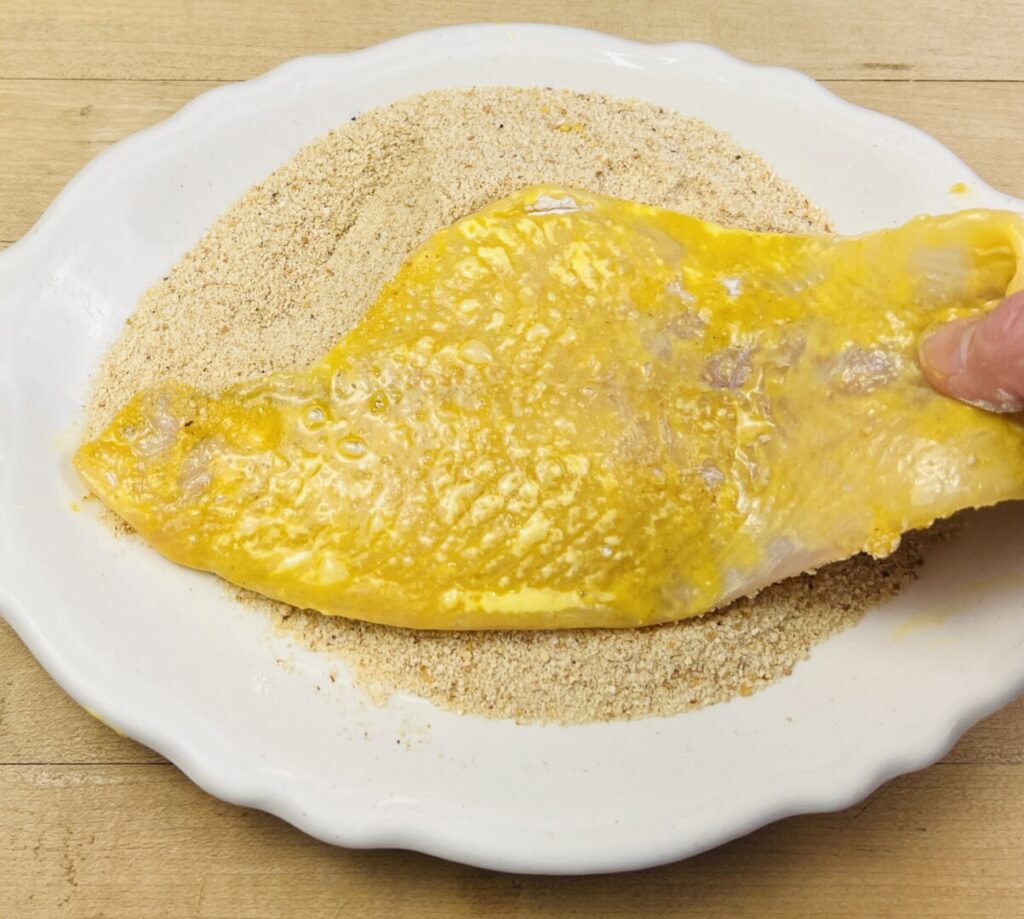
The second element is egg wash: eggs beaten with water in a ratio of 1 large egg to 1 Tbsp water. The liquid egg acts as “glue” to make the breadcrumb coating adhere to the surface of the floured food. Here’s how it works: Eggs contain a high proportion of protein. When viewed with a microscope, the proteins in raw eggs appear as long, supple filaments, or chains. When heated, these protein chains curl into coils and bond together in a process called coagulation. Coagulation causes the egg to stick to the flour on the surface of the food and also makes the breadcrumbs stick to the flour.
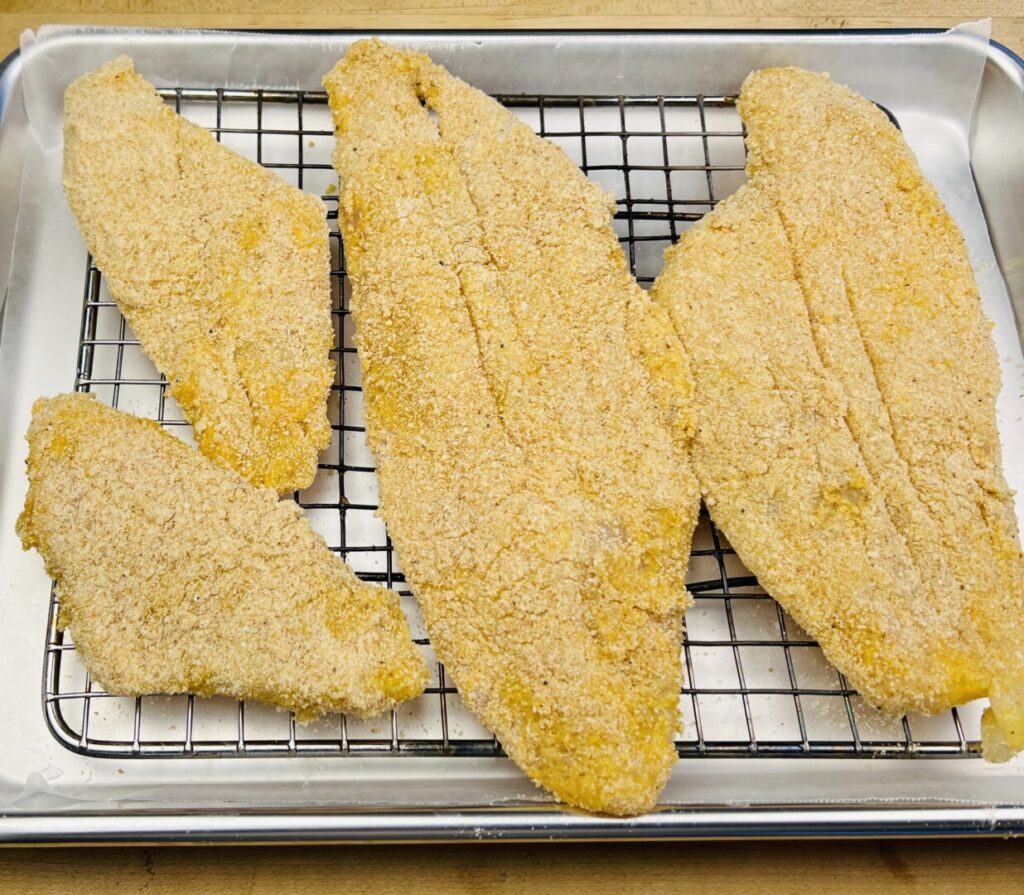
The third element in your breading station is the breadcrumbs (or other coatings, such as cracker crumbs or even ground nuts). Now that you’ve conditioned the food item with the flour and egg, the breadcrumbs will form a cohesive coating and fry up crispy golden brown.
Once you understand how breading works, the sequence of ingredients is easy to remember: flour→egg→crumbs.
Just before breading, we’ll season the flounder fillets with adobo seasoning, a dry spice blend typically comprised of salt, granulated onion, granulated garlic, oregano, paprika, and black pepper. Alternatively, you can use any Latin American-style dried seasonings you wish.
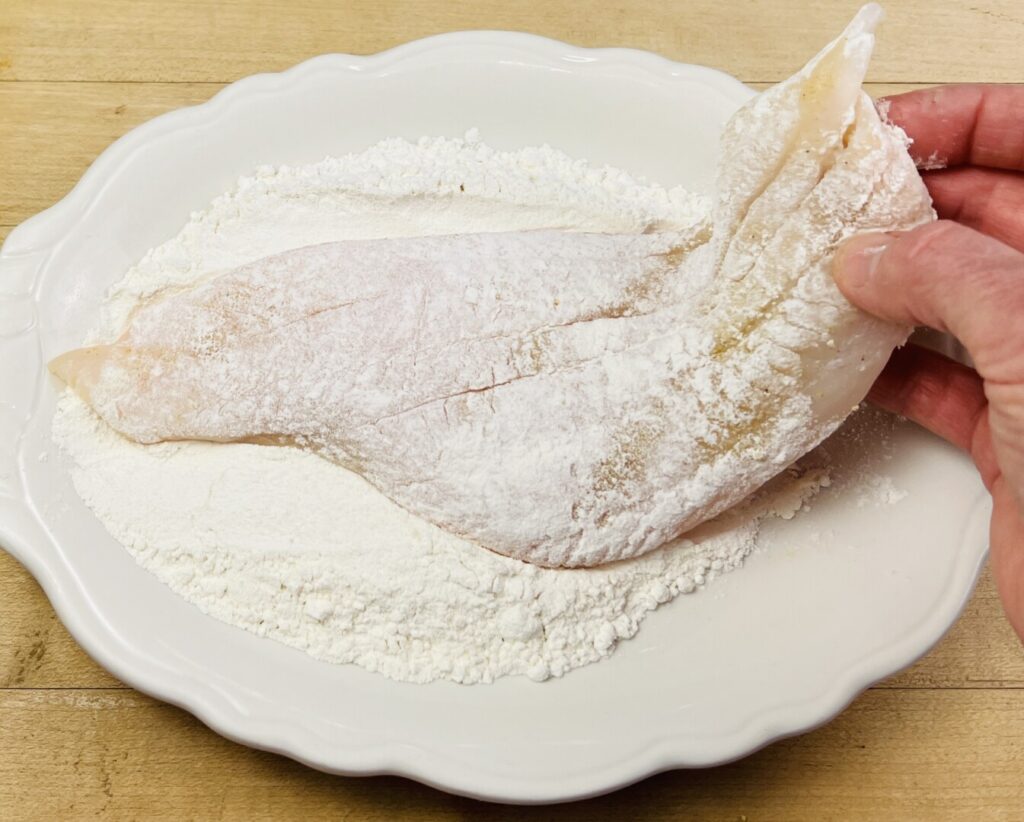
Dredge the flounder fillet in flour on both sides, then shake off any excess. Make sure all surfaces are coated. Then dip the fillet in the egg wash on both sides, and allow excess to drip off. Finally, dredge the fillet in the breadcrumbs, pressing firmly so that they adhere. Use only one hand for dredging, leaving your other hand clean for other tasks. To help set the coating, air-dry and chill before frying. As you work, place each breaded fillet on a rack set over a sheet tray for good air circulation. Refrigerate for at least 10 minutes before proceeding to pan-fry.
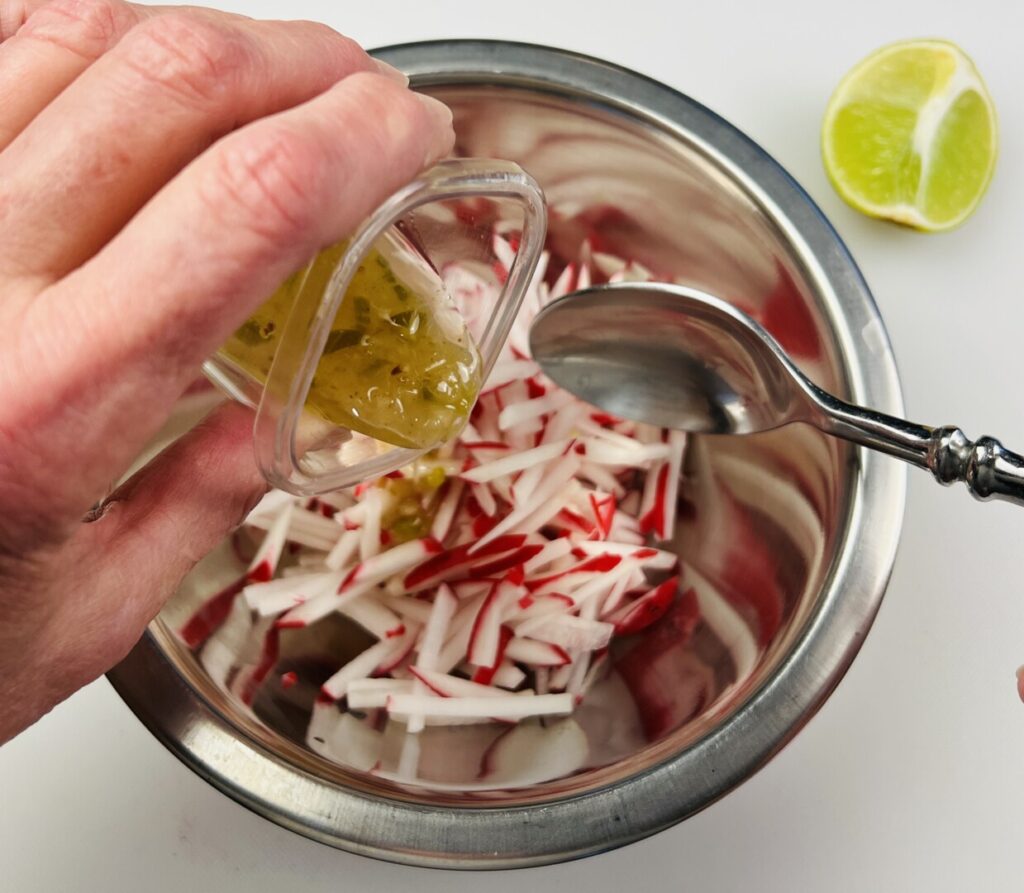
While the breaded flounder fillets rest in the ‘fridge, dress the radishes. Toss with just enough dressing to thoroughly coat them. Don’t dress the radishes too far ahead; if you do, the salt and acid in the dressing can draw out moisture and make the salad watery.
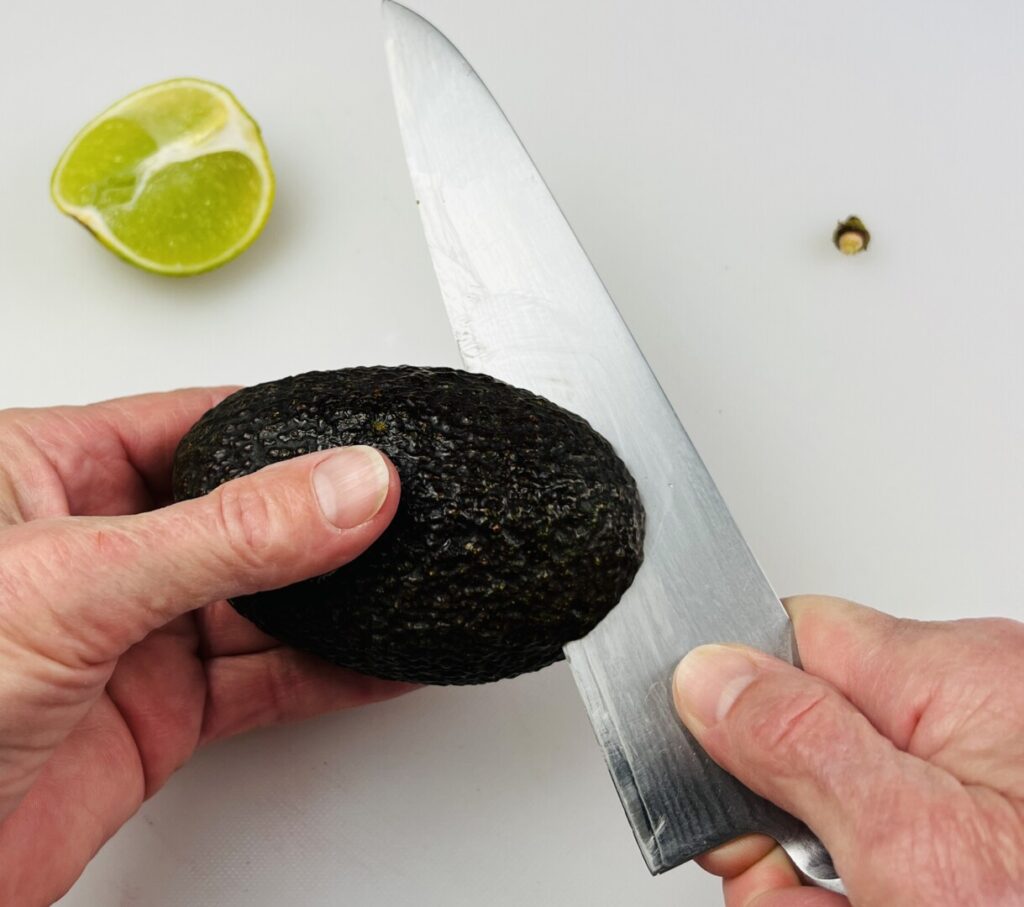
The final task before frying is to fabricate the avocado fans. For an attractive presentation and for a great mouthfeel, you must use firm-ripe avocados—ones that have just a little “give” when gently squeezed. Avocados that are underripe will lack flavor and have an unpleasantly hard texture; but mushy, overripe ones won’t cut precisely and will squash when you press on them. Avocados require some planning ahead! Don’t trust the supermarket to have the ripeness you need. Buy them underripe and ripen them in your kitchen at room temperature. (Placing an underripe avocado in a plastic bag along with a cut-open apple will accelerate ripening, whereas refrigeration will slow it.) Make sure your firm-ripe avocados are cold when you start fabricating them, and keep the fabricated avocados cold until ready to plate.
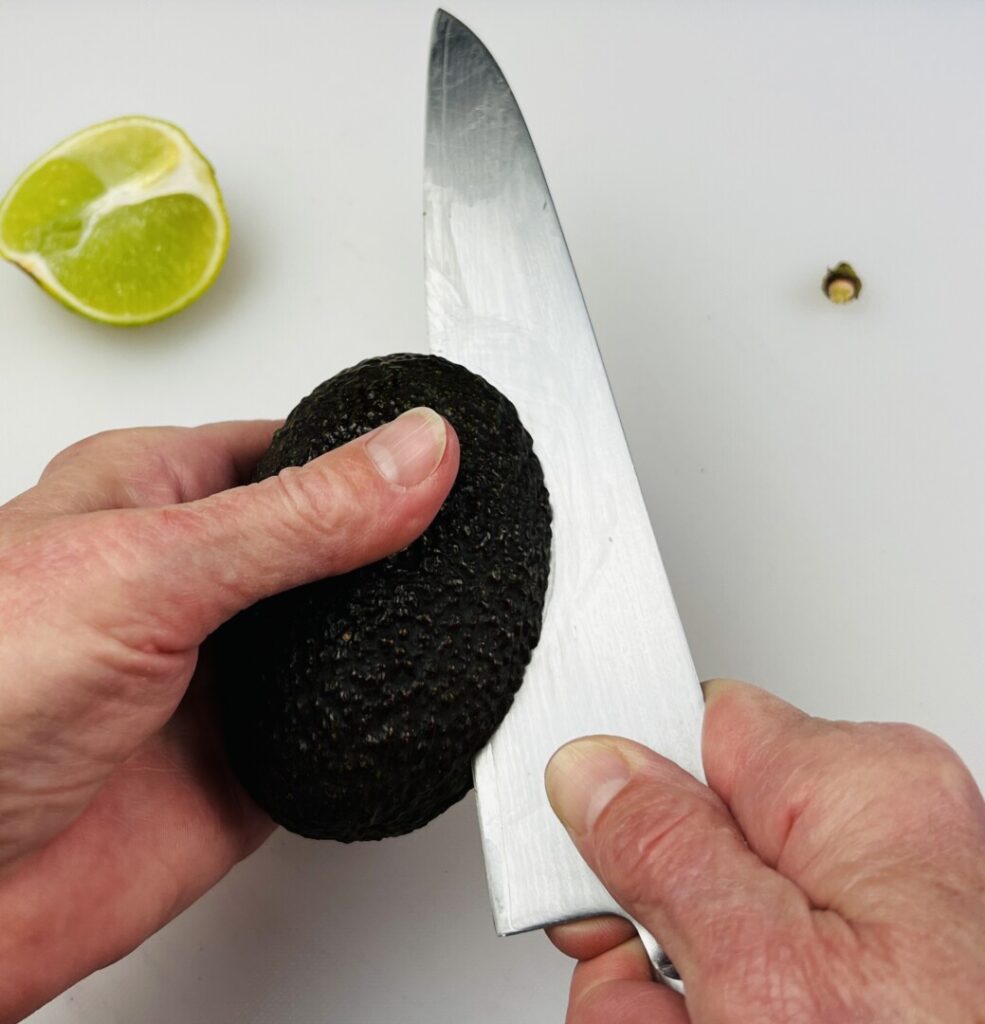
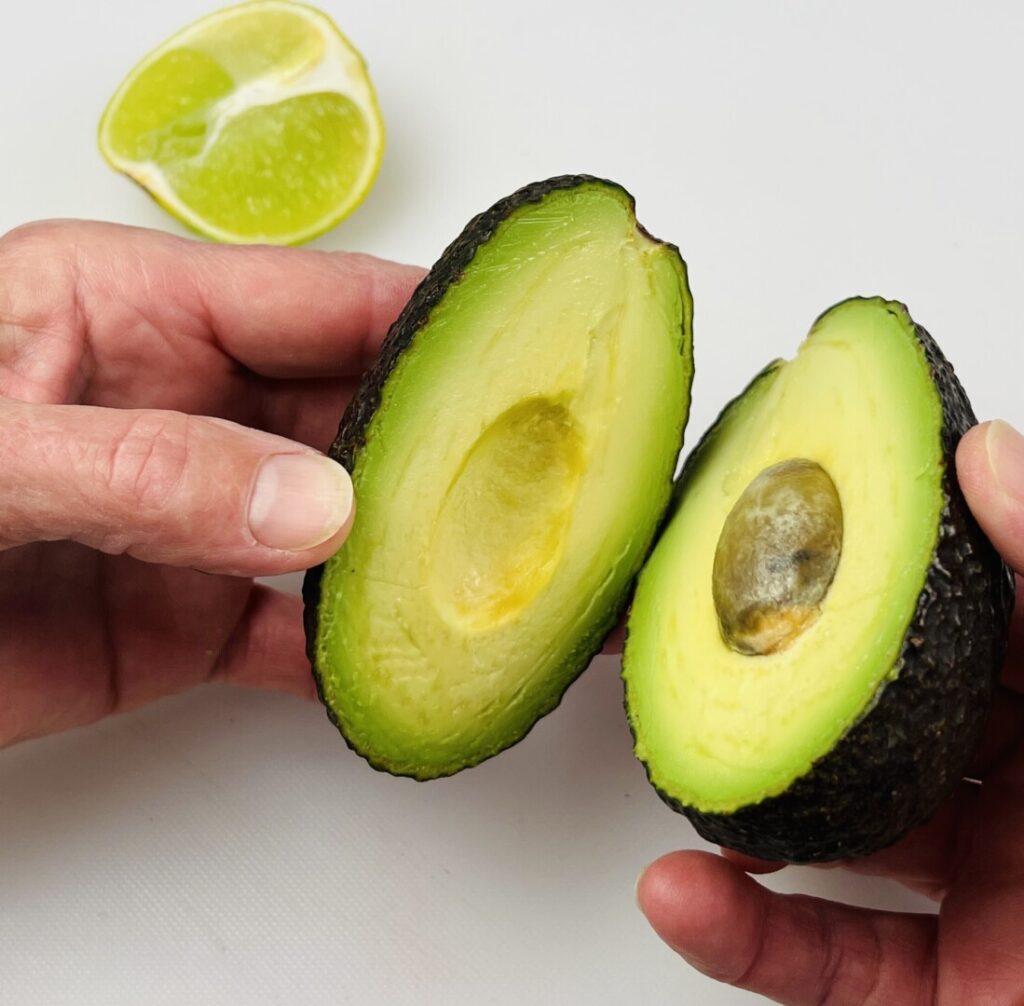
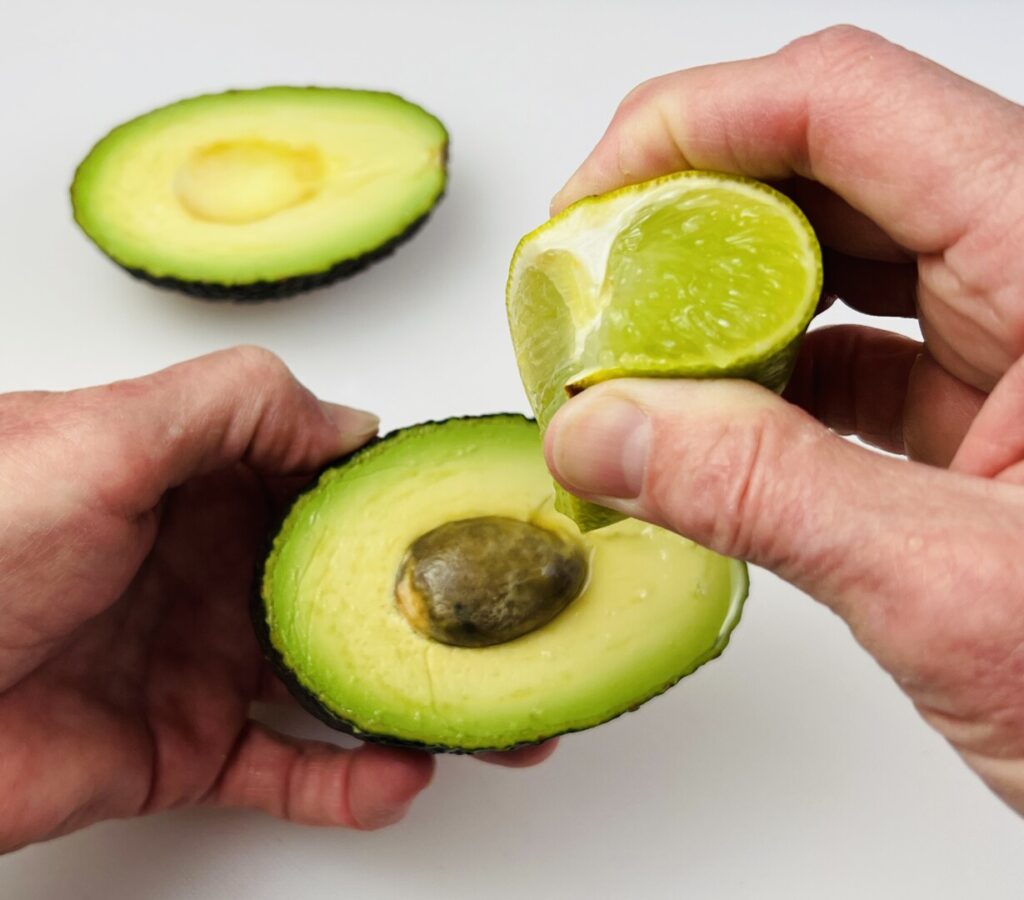
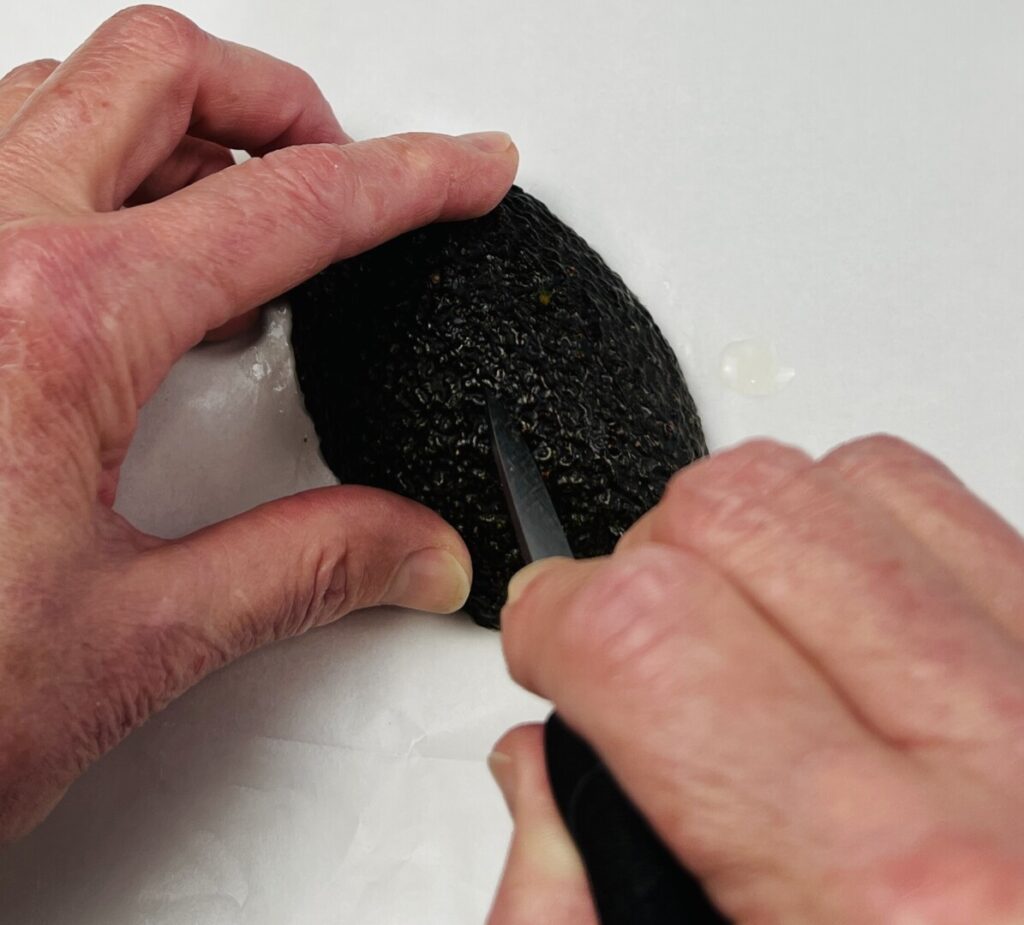
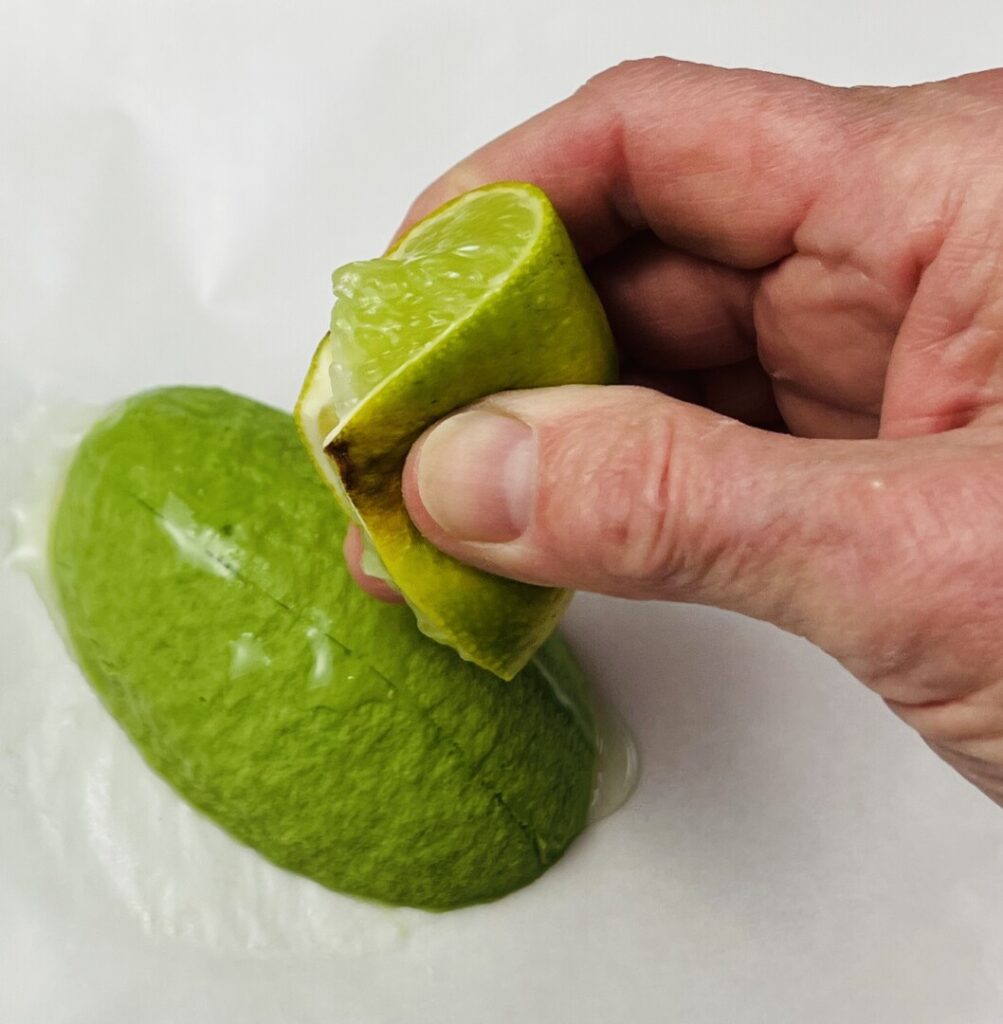
The first step is halving the avocado. The professional technique shown below requires some skill and needs to be endeavored with caution, because it requires cutting with the blade toward your hand. Consider wearing a cut-resistant glove on the hand holding the avocado. Remove the avocado’s stem, and then slice into the avocado from the stem end until the knife reaches the pit. Then, holding the knife still, rotate the avocado 360 degrees, cutting through to the pit all around. Turn the avocado halves in different directions and they’ll separate. Immediately coat the flesh with lime juice to prevent enzymatic browning. To remove the pit, impale it with the heel of your knife, twist the knife, and it’ll come out. Be careful removing the pit from the knife.
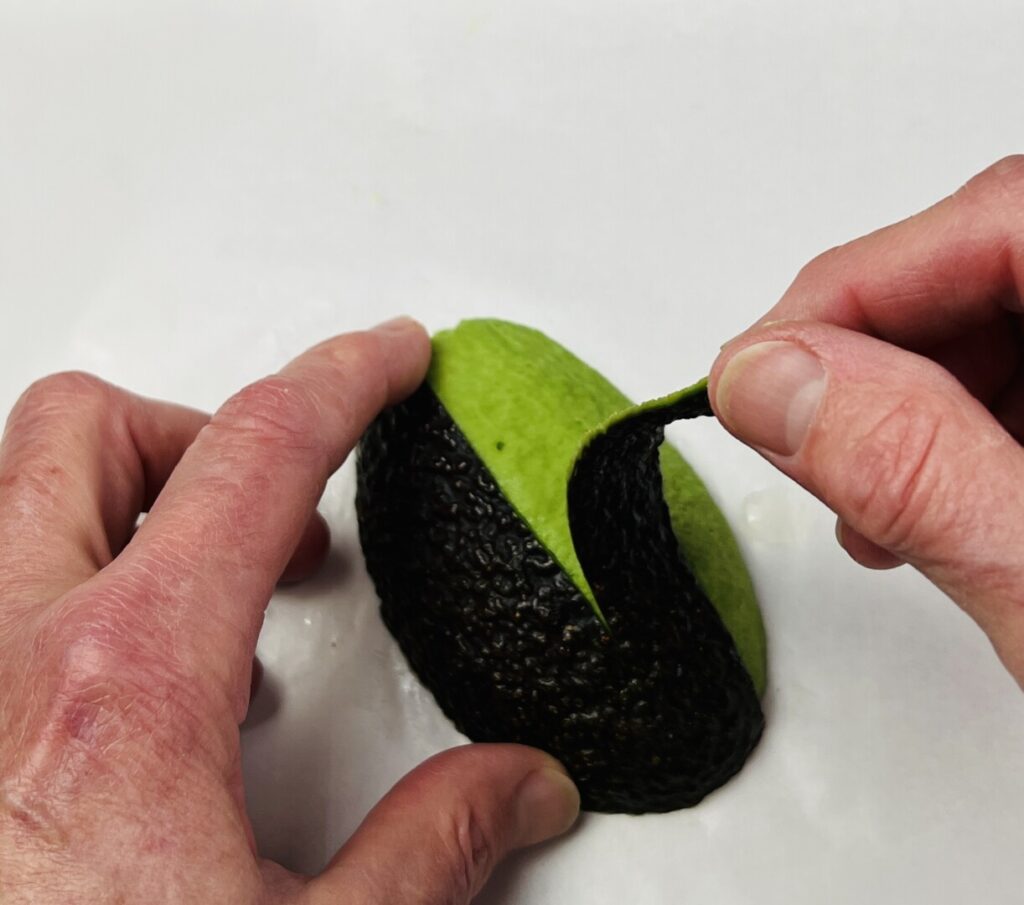
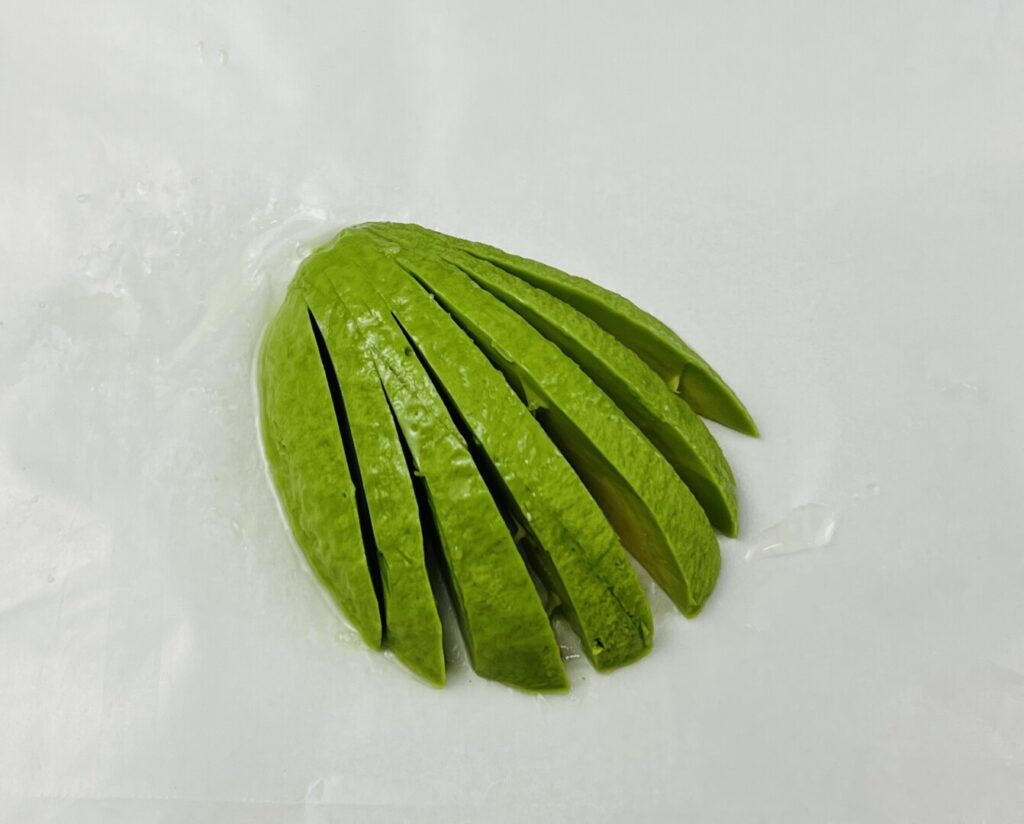
Next, peel the avocado. Place the avocado halves on a sheet of wax paper or parchment, cut-sides-down. Use a paring knife to make two lengthwise slits in the skin, from the pointed stem end down to the rounded end. Cut only the skin, not into the flesh. Grasp the skin sections at the pointed end and lift them off of the flesh. Immediately coat with lime juice.
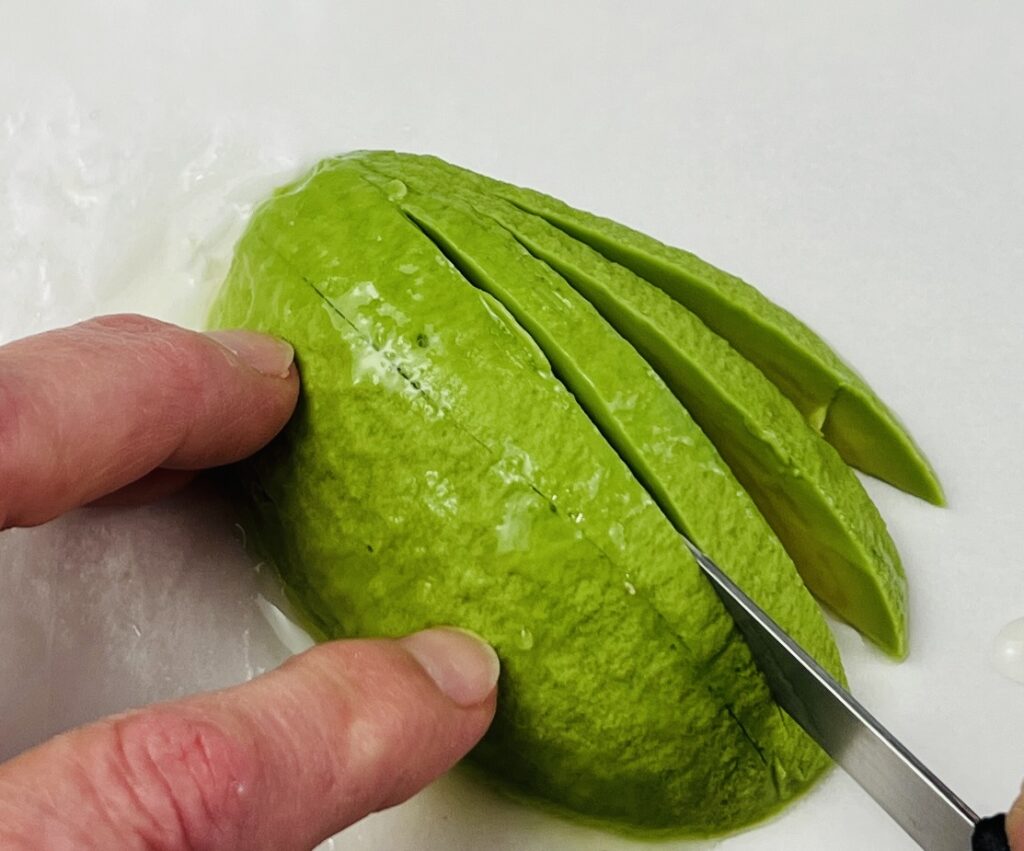
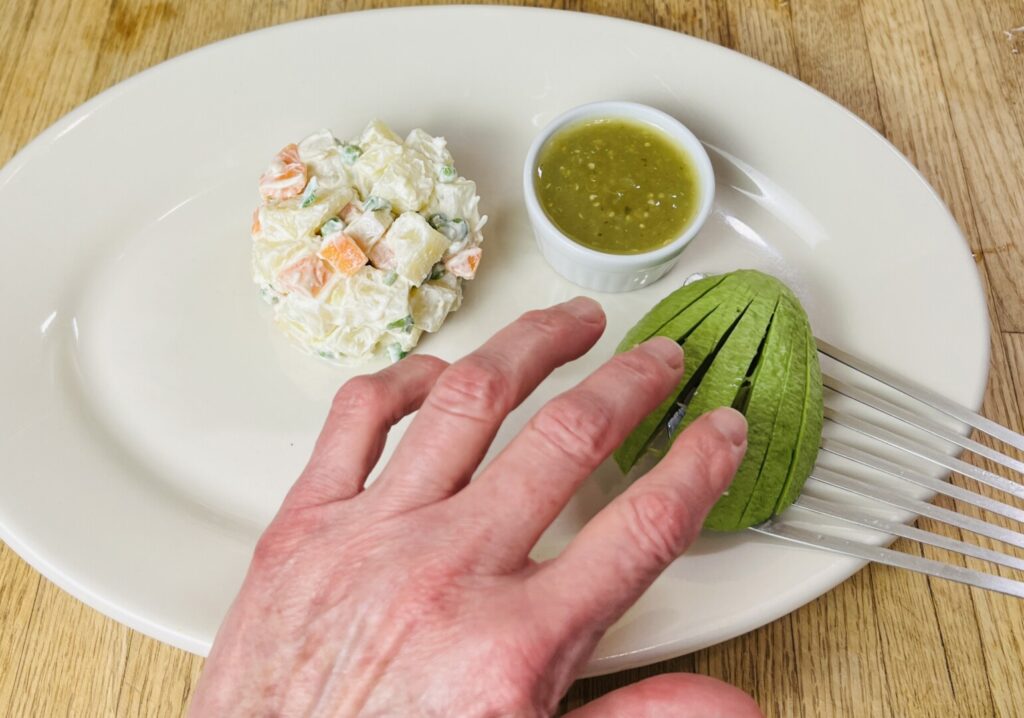
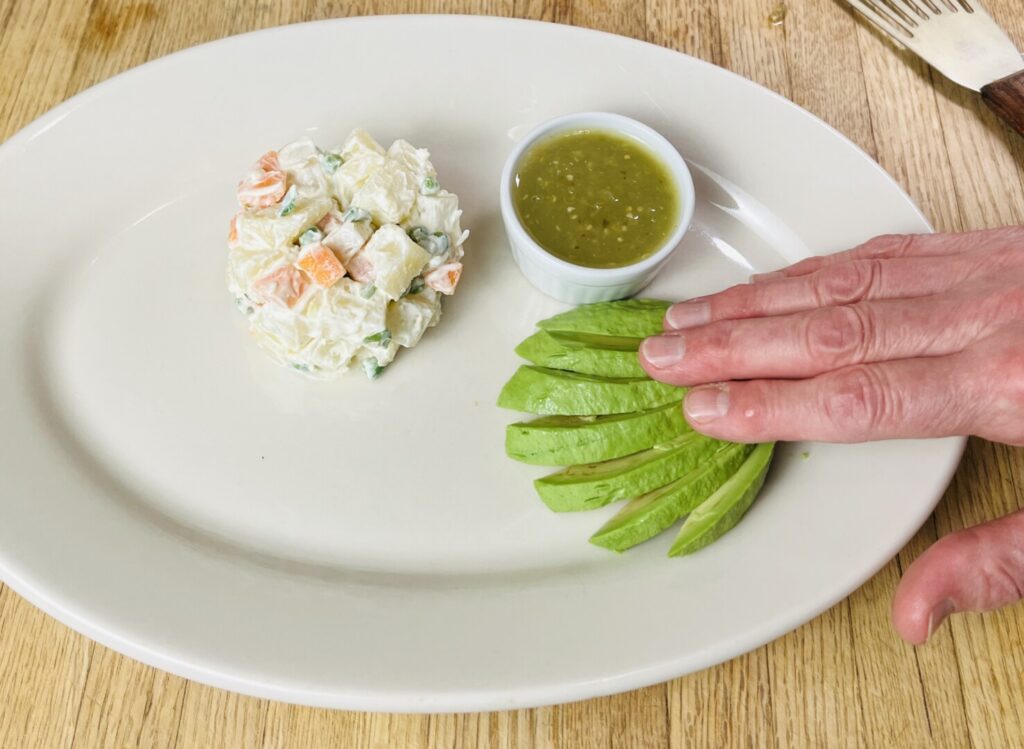
To make the fans, cut vertical slits from near the pointed end through the rounded end. After plating, the avocado half will fan out even more when you gently press on it. Refrigerate your fans until needed.
Pan-frying, like deep-frying, is a last-minute cooking method that requires constant attention. That’s why it’s a common practice to accompany fried foods with cold side dishes that need no finishing work.
The amount of oil needed to pan-fry a particular food depends on its dimensions: the level of oil should come about halfway up the sides of the food. Make sure to use a heavy sauté pan or cast-iron skillet just large enough to hold your breaded fillets with at least 1/4 inch space between them. (If you’re making more than two portions, you may need to work in batches.) The oil temperature should be about 375°F. If you use a thermometer, you’ll have to carefully tilt the pan to pool enough oil for an accurate reading. Alternatively, drop in a tiny piece of breading; at the proper oil temperature it should take about 20 seconds to fry golden brown.
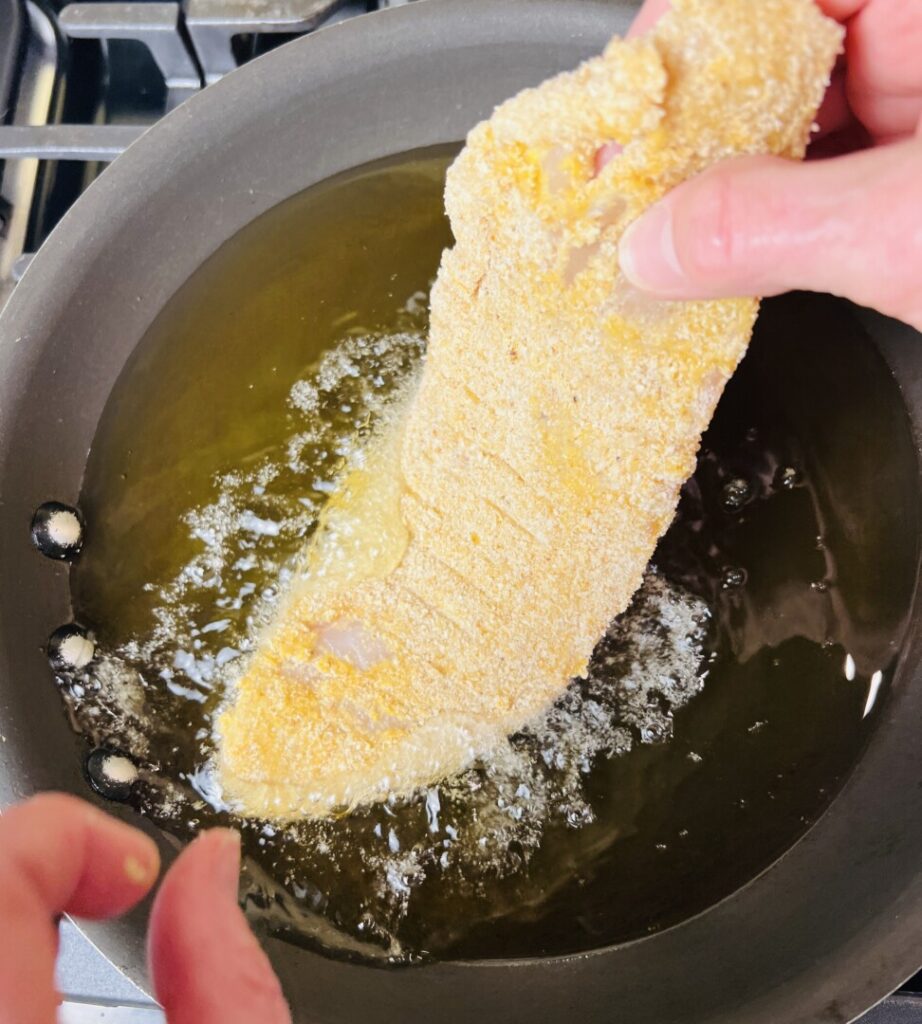
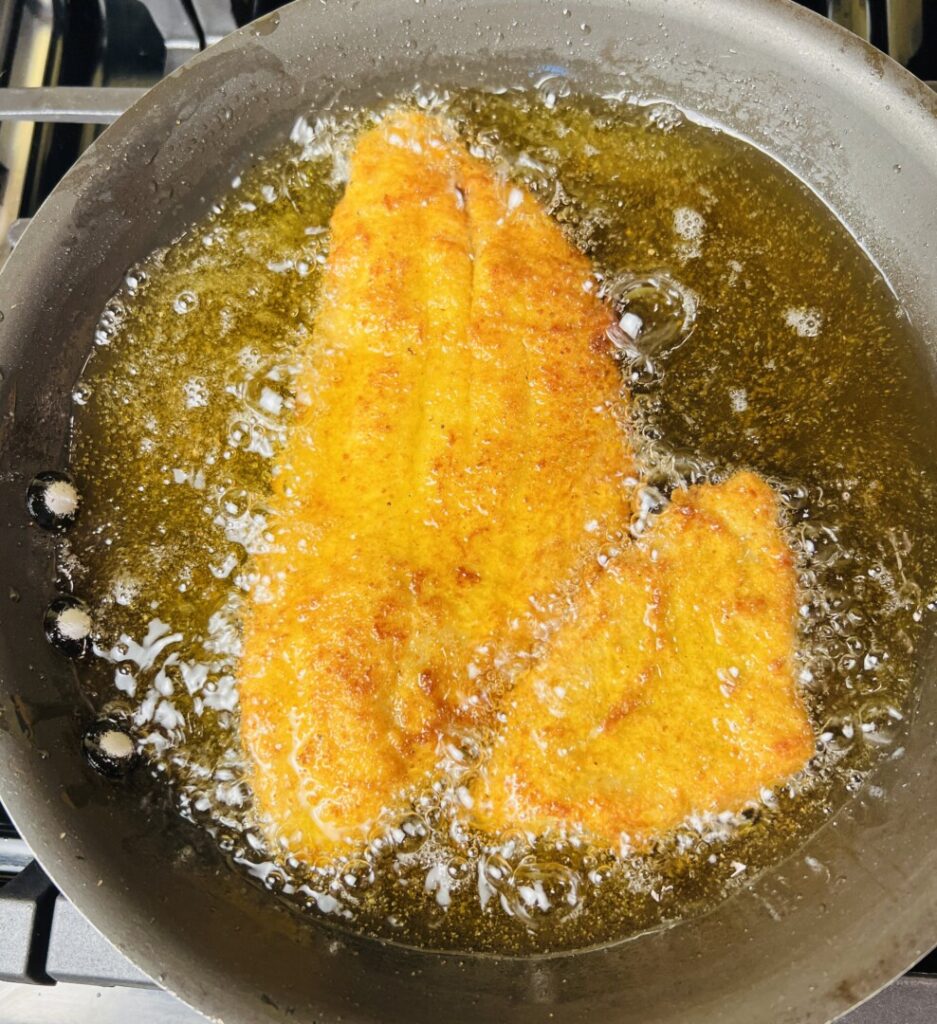
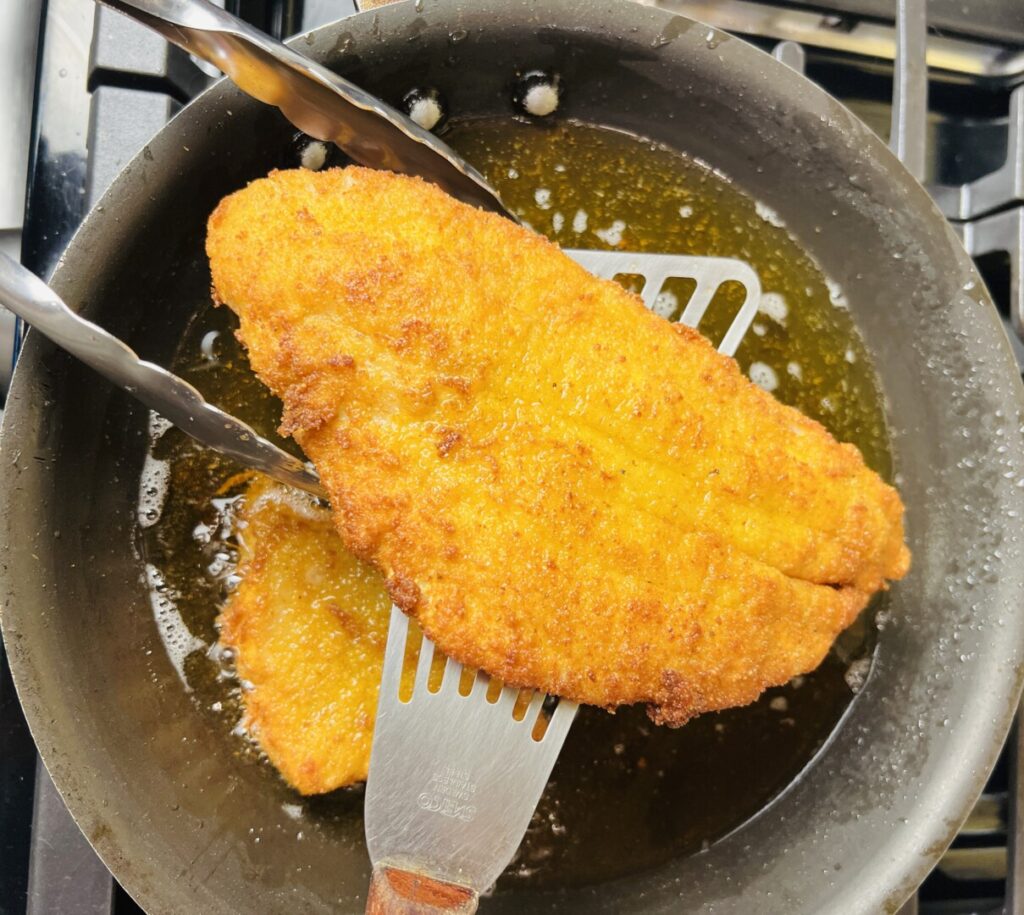
Gently and carefully lower in the breaded fillets, with the convex presentation sides down. Flounder fillets of average 1/2-inch thickness should become golden brown and their interior become halfway cooked in about 1 minute. Thinner fillets will need higher heat and less cooking time, whereas thicker ones need slightly lower heat and longer cooking time. Use a fish spatula https://amzn.to/4lzPRrX and tongs to turn over the fillets. Be very careful so as not to drop a fillet and splash hot oil. Second-side frying time is slightly less. Flounder cooks through very quickly, so there’s not much worry about undercooking. Briefly drain your crispy, golden flounder fillets on a rack and season with salt.
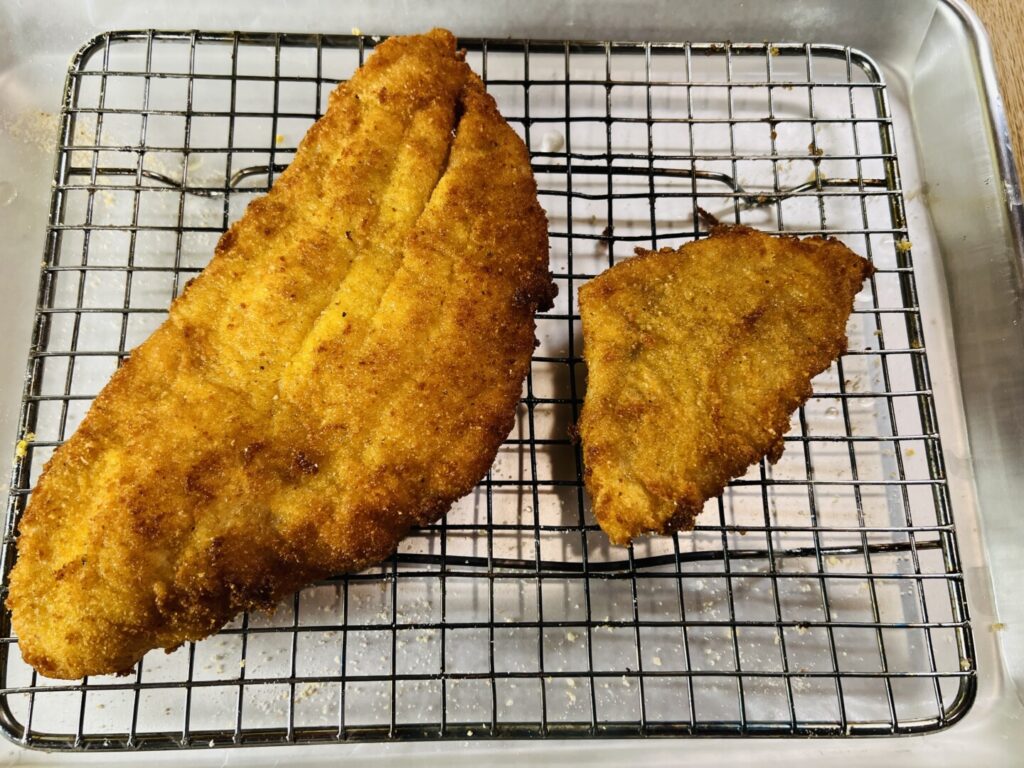
Now you’re ready to plate!
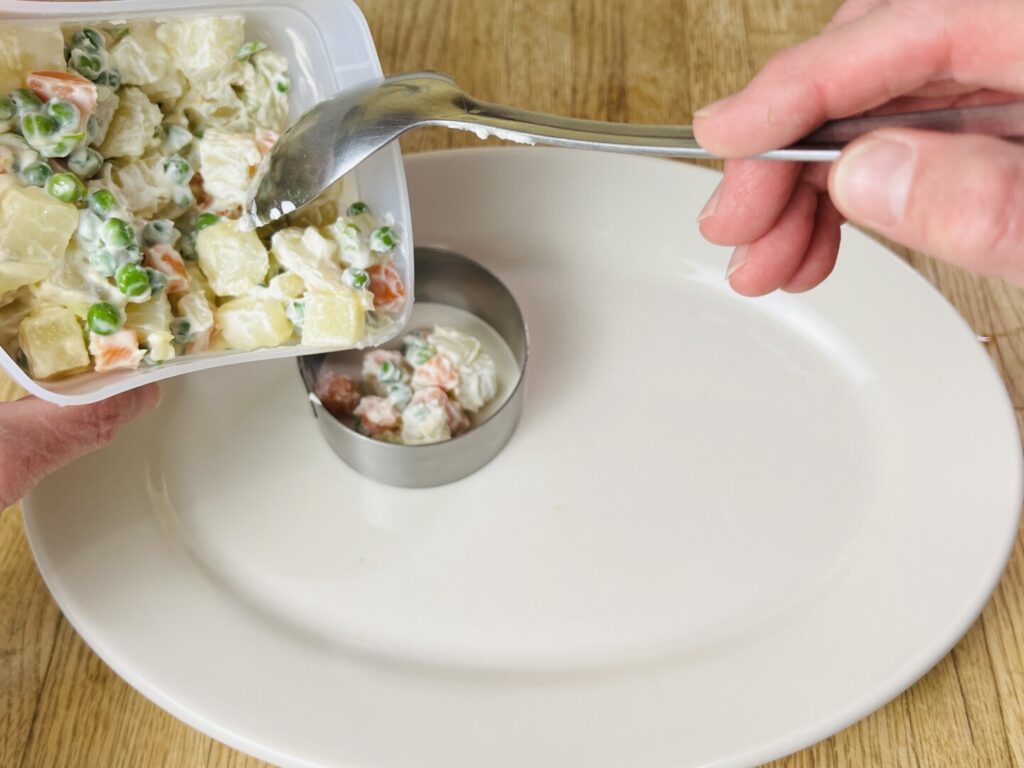
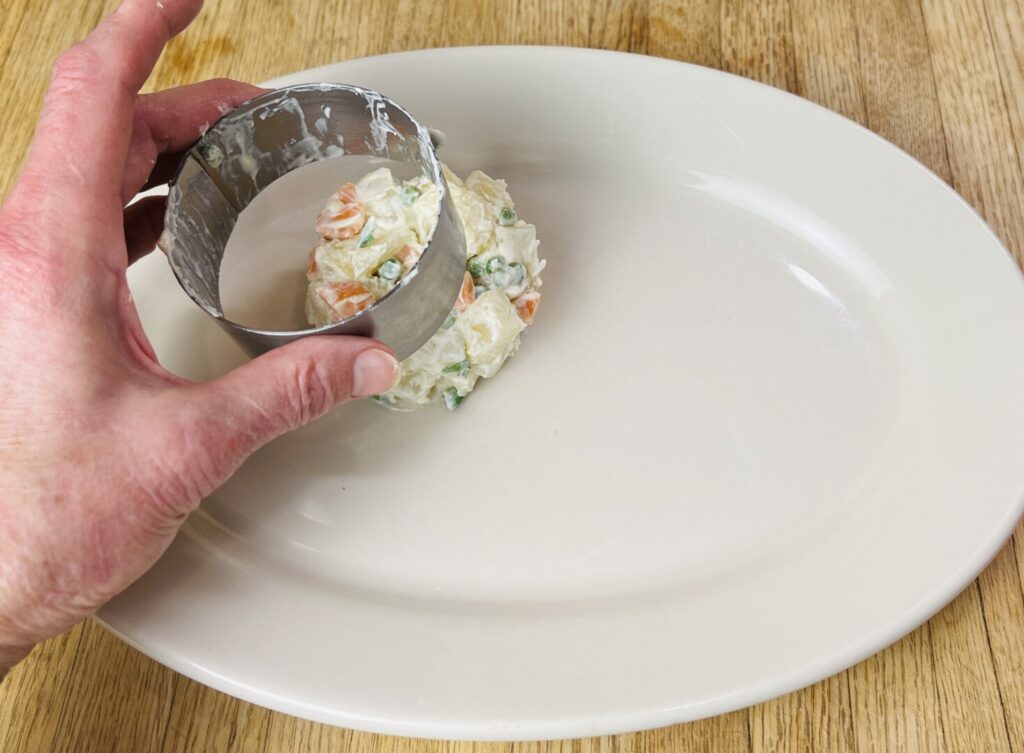
For an attractive, professional presentation it’s nice to use an entremet ring (aka food ring) for the Rusa Salad. https://amzn.to/4jJ2sXX But it’s certainly not necessary! Mound the Rusa on the back left of the plate, and proceed.
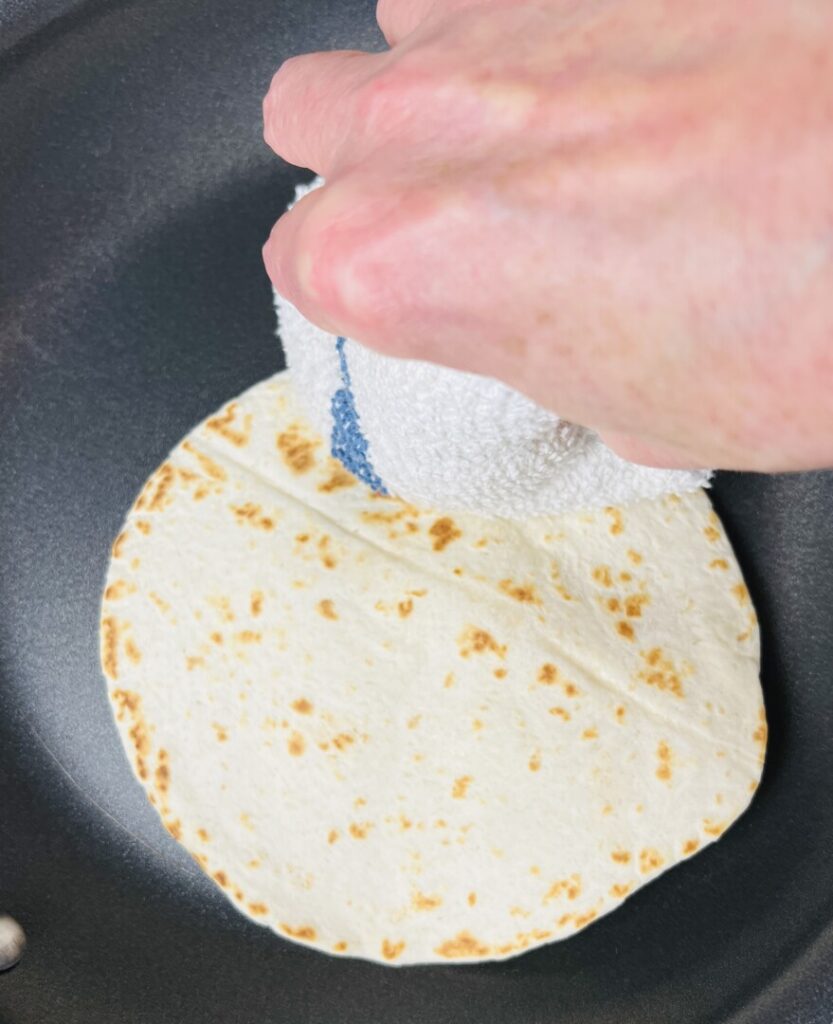
One final last-minute task is to toast the flour tortillas, fold them, and tuck them into place on the plate. Do this after plating the flounder fillets. Place each tortilla in a hot, dry sauté pan, heat for a few seconds, and then turn over. After a few seconds in the pan press gently with a clean, dry kitchen towel to encourage puffing. This makes the tortilla light, airy, and flexible. Fold in quarters and add to the plate. (One tortilla fits nicely as a plate garnish. For a hungry family you may want to serve additional tortillas in a basket.) Enjoy!
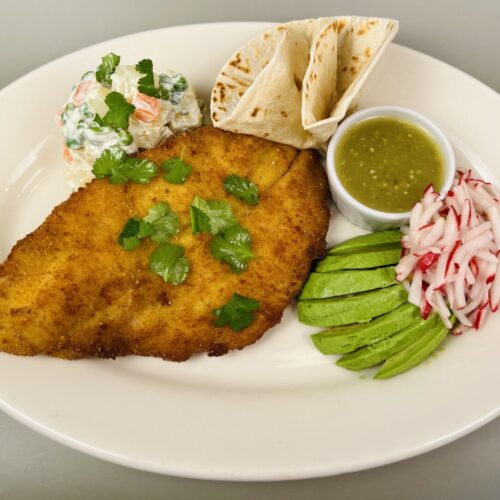
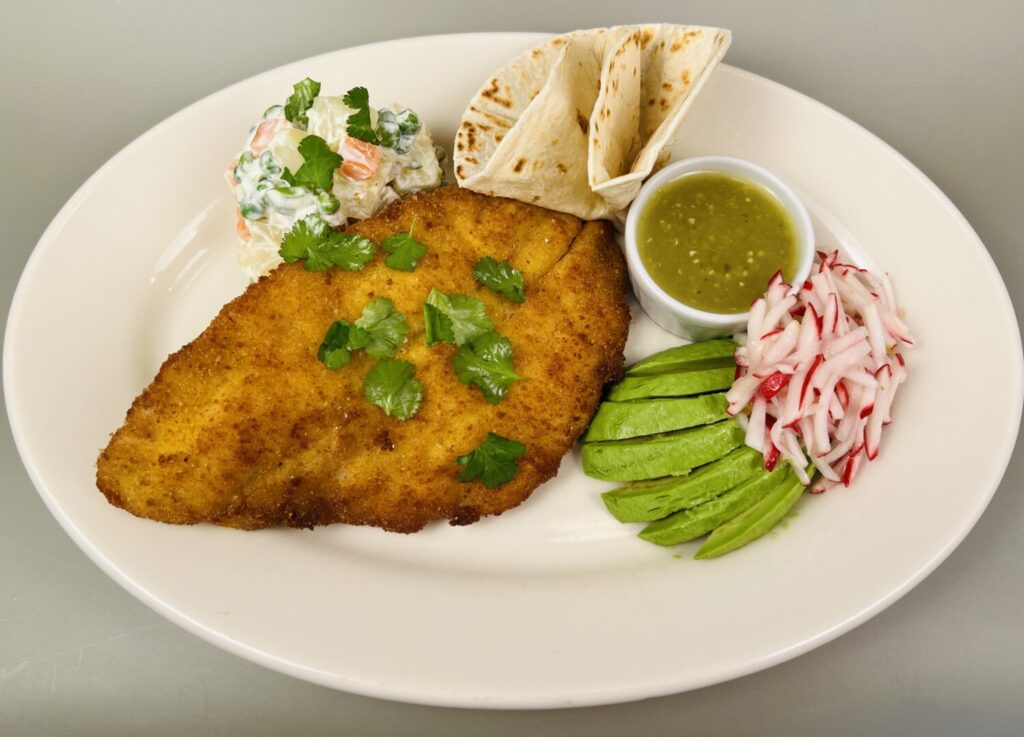
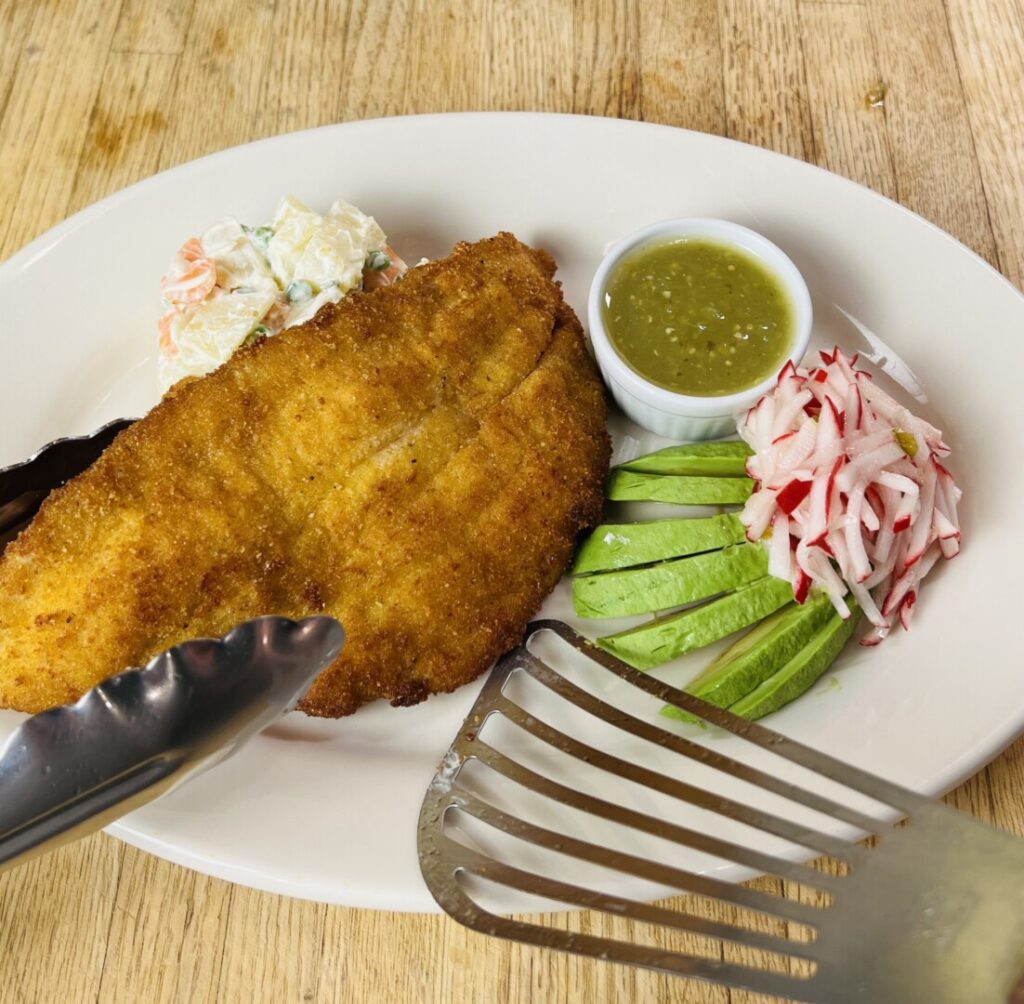
Flounder Milanesa with Salsa Verde, Rusa Potato Salad, Avocado, and Escabeche Radishes
Ingredients
step 1 ingredients
- 1 tsp pickled jalapeños (with pickling liquid)
- 1/8 tsp sugar
- pinch ground coriander
- pinch ground cumin
- to taste kosher salt
- 3 Tbsp Apple Cider Vinaigrette (or other vinaigrette dressing)
- 1/8 lime, wedge
step 2 ingredients
- 10 oz fresh peas in the pod (or 1/6 c frozen peas per person)
- 1 small carrot, the type with top and/or stem
- 1 (6-oz) russet potato
- to taste kosher salt
- 1 scallion
- 1/4 c mayonnaise, preferably Duke's brand
- 2 Tbsp sour cream
- 1/2 tsp Dijon mustard, preferably Maille original
- 1/8 tsp sugar
step 3 ingredients
- 1 radish bunch
step 6 ingredients
- 2/3 c flour
- 3/4 c fine, dry, unseasoned breadcrumbs
- 1 egg
- 1 tsp water
- as needed canola oil (refer to step 6 instructions)
step 7 ingredients
- 12 oz flounder fillets
- to taste adobo seasoning, preferably Goya brand
step 9 ingredients
- 1 large, firm avocado, cold
- 1/4 lime, wedge
- to taste kosher salt
step 11 ingredients
- 1/2 c salsa verde, preferably Herdez brand
- 2 fajita-size flour tortillas (or more)
- 4 cilantro sprigs
Instructions
PREP: Mise the recipe ahead of time.
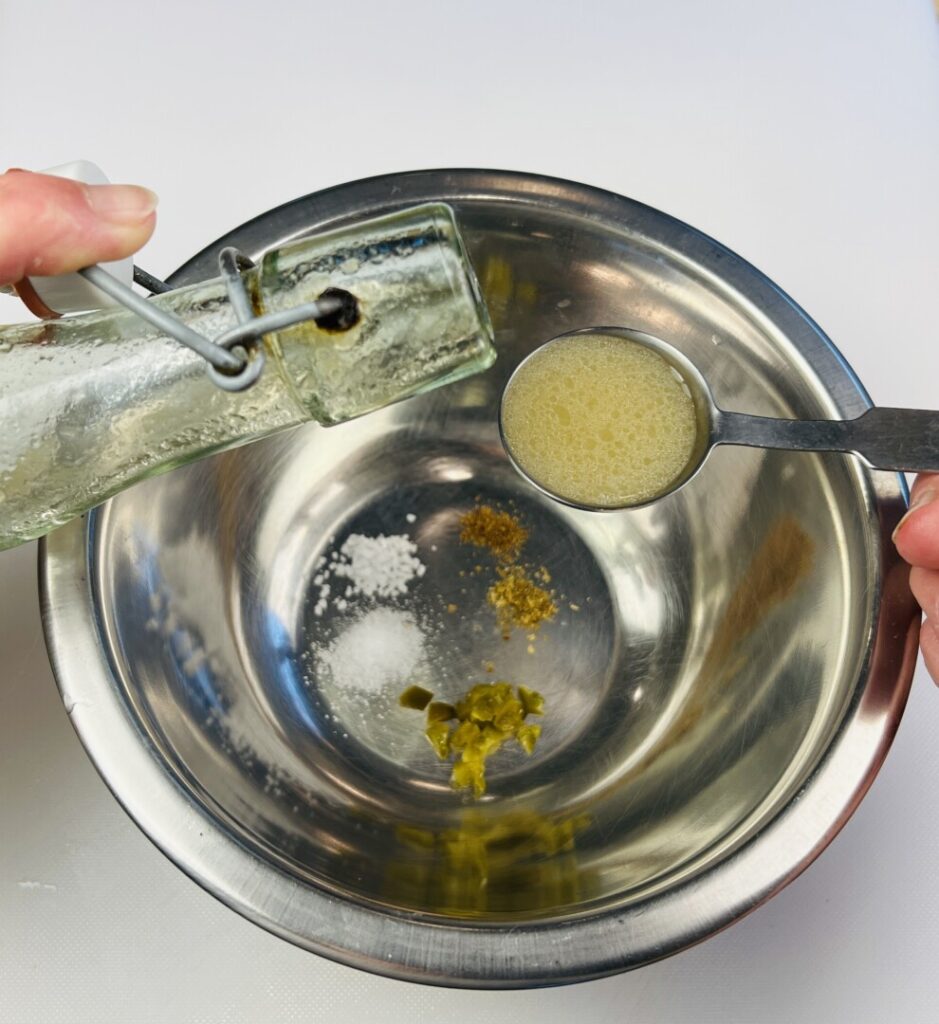
1. Make the escabeche dressing:
- Mince the pickled jalapeño and place it in a bowl.
- Add the sugar, coriander, cumin, and some salt.
- Vigorously shake the vinaigrette to re-emulsify it, and then measure it into the bowl.
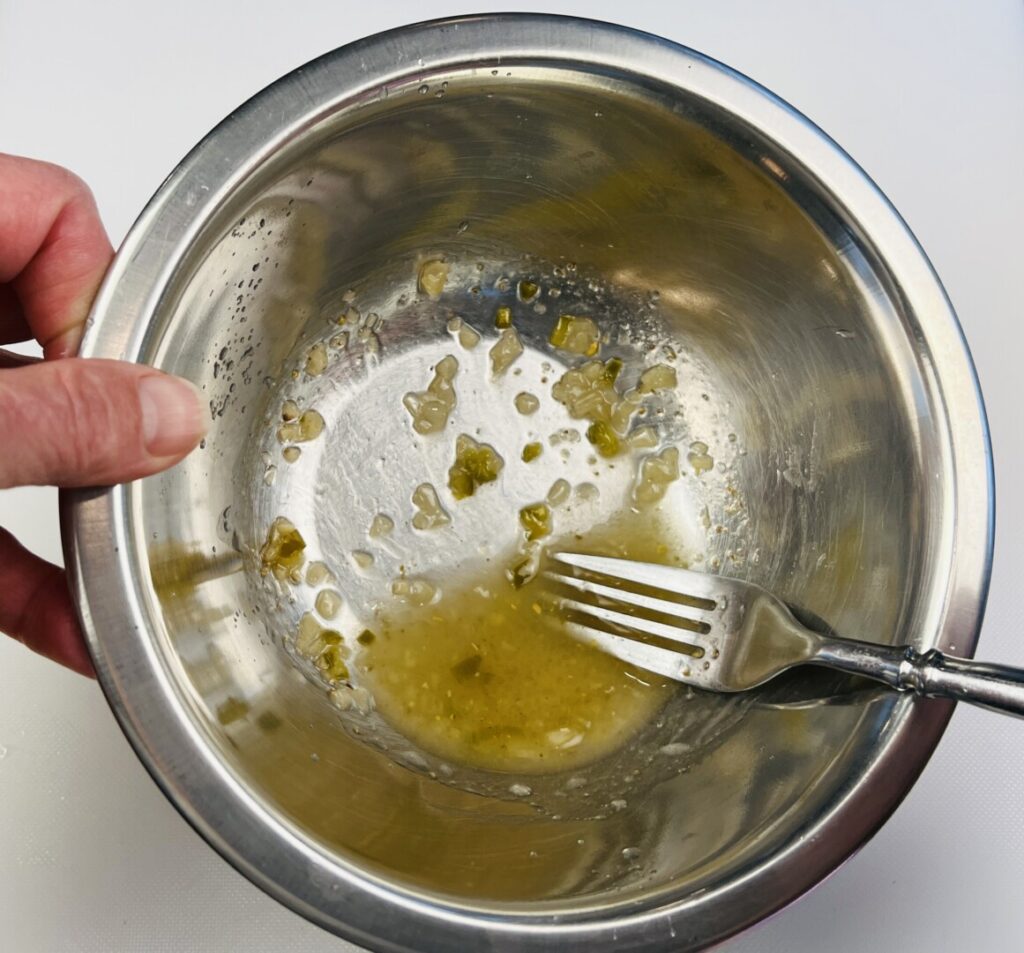
- Squeeze in the lime, and then whip the dressing together with a fork.
- Evaluate the flavor and correct if necessary. For a spicier dressing, stir in a little pickling liquid from the jalapeños.
- If prepping ahead, place in a container.
2. Make the Rusa potato salad:
- If using fresh in-pod peas, shell them. If using frozen peas, place them on a doubled paper towel and thaw them.
- Peel the carrot and cut into rough dice about ¼-inch in size.
- Bring about a quart water to the boil in a saucepan. Line a sheet tray or plate with a paper towel.
- If using raw peas, blanch them about one minute until tender and then transfer them to the cold water. Frozen peas need no cooking.
- Blanch the carrot for about 1 minute until tender, drain off the water, and refresh the carrot under a stream of cold water for 1 or 2 minutes. Drain and blot dry on the paper towel.
- Peel the potato, cut it into rough ¼-inch dice, and place it in the saucepan. Add water to cover and add some salt. Simmer about 2 minutes until just tender. Use a slotted spoon to transfer the potatoes to the towel-lined tray and cool them to room temperature. Don’t refresh.
- Trim off the root end of the scallion and cut it into fine diagonal slices.
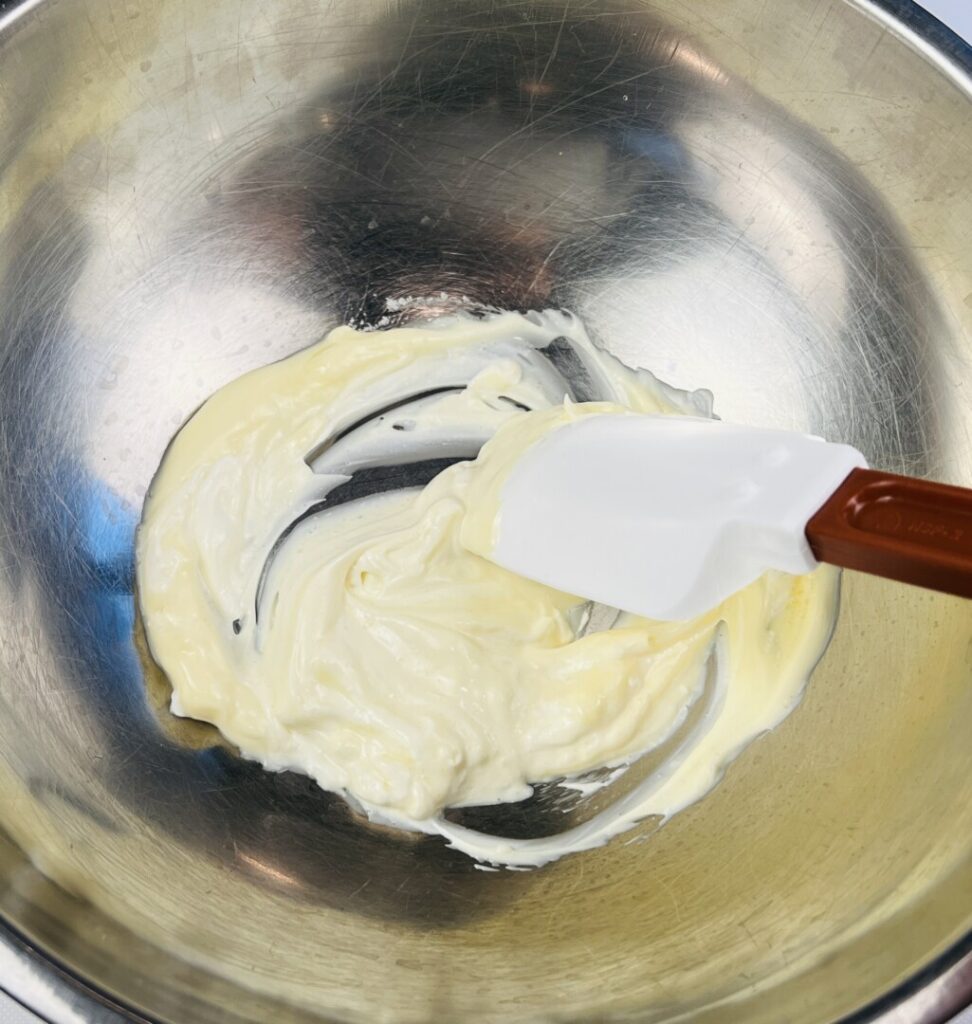
- To make the dressing, combine the mayonnaise, sour cream, mustard, sugar, and some salt in a bowl. Evaluate the seasoning and adjust to your taste.
- Fold the potatoes, carrots, peas, and scallions into the dressing.
- Push a few of the potato dice to one side of the bowl and mash them with a fork. Fold the mashed potato back into the salad.
- If prepping ahead, store the Rusa salad in a container.
3. Fabricate the radishes:
- Trim away the root and stem ends of the radishes and cut them lengthwise into rough julienne.
- If prepping ahead of time, place the radishes in a plastic bag with a folded paper towel in the bottom.
4. Assemble the remaining ingredients.
HOLD: Refrigerate all ingredients up to 4 days; refrigerate the flounder up to 2 days.
COOK! Finish and plate your dinner.
5. Bring the Rusa potato salad and escabeche dressing to room temperature.
6. Set up a breading and frying station:
- Line up three plates on a work surface. Place the flour in the first plate and the breadcrumbs in the third plate. Crack an egg into the second plate, add the step 7 water, and use a fork to beat the mixture until homogenous.
- Line a sheet tray with aluminum foil and place a paper towel on the foil. Position a cooling rack on the tray.
- Place a heavy sauté pan or skillet over low heat and add canola oil to a depth of about ½ inch, depending on the thickness of the flounder fillets.
7. Season and coat the flounder:
- Rinse the flounder fillets under cold water and blot dry on paper towels. Depending on the size of the fillets, you may need to cut some in half to create even-size portions. Flounder fillets typically don’t have pin bones, but run your fingers over the fillets to ensure there are none.
- Generously sprinkle adobo seasoning on both sides of the flounder.
- Dredge one of the fillets in flour on both sides and shake off excess. Dip the fillet into the egg on both sides, and then dredge both sides with the breadcrumbs, pressing to help them adhere.
- Place the breaded fillet on the rack and repeat with the remaining fillets.
- Refrigerate for at least 10 minutes.
8. Dress the radishes:
- Place the radishes in a bowl.
- Vigorously whip or shake the escabeche dressing to emulsify the oil and vinegar.
- Spoon just enough of the dressing over the radishes to lightly coat them. Toss to combine.
- Refrigerate until ready to plate.
9. Fabricate the avocado:
- Place a sheet of wax paper or parchment on a sheet tray. Have the lime wedge ready.
- Halve the avocado lengthwise and remove the pit. Squeeze some lime juice onto the cut surfaces. Place one of the avocado halves flesh-side-down on the wax paper-lined sheet tray.
- Use a paring knife to score the avocado skin, making 2 lengthwise cuts from the pointed stem end to the rounded end. Cut only through the skin; avoid cutting into the flesh.
- Grasp a section of skin at the stem end and pull it off. Repeat until the avocado half is completely skinned. Squeeze lime juice on the surface.
- Use the paring knife to cut the avocado half into a fan: Starting about ¾ inch from the stem ends, make 4 to 5 lengthwise cuts down to the wax paper about ½-inch apart.
- Press gently on the top of the avocado half to fan it out.
- Repeat with the remaining avocado half.
- Season the avocado halves with salt.
- Place the tray in the refrigerator until ready to plate.
10. Pan-fry the flounder:
- Turn the heat under the oil-filled sauté pan to high. Carefully monitor the temperature of the oil until it reaches 375°F. You’ll have to tilt the sauté pan and pool the oil on one side to get an accurate reading. (Alternatively, drop in a small morsel of breading; it should take about 20 seconds to turn golden brown.)
- Gently lower the flounder fillets into the oil with the more convex, presentation side down. If the fillets are large and relatively thick, lower the heat to medium. Fry for about 1 minute until the bottoms are golden brown.
- Use a fish spatula and tongs to carefully turn over the fillets. Fry about 45 seconds longer, depending on thickness, until the new bottoms are browned.
- Transfer the fillets back to the rack to drain. Season with salt.
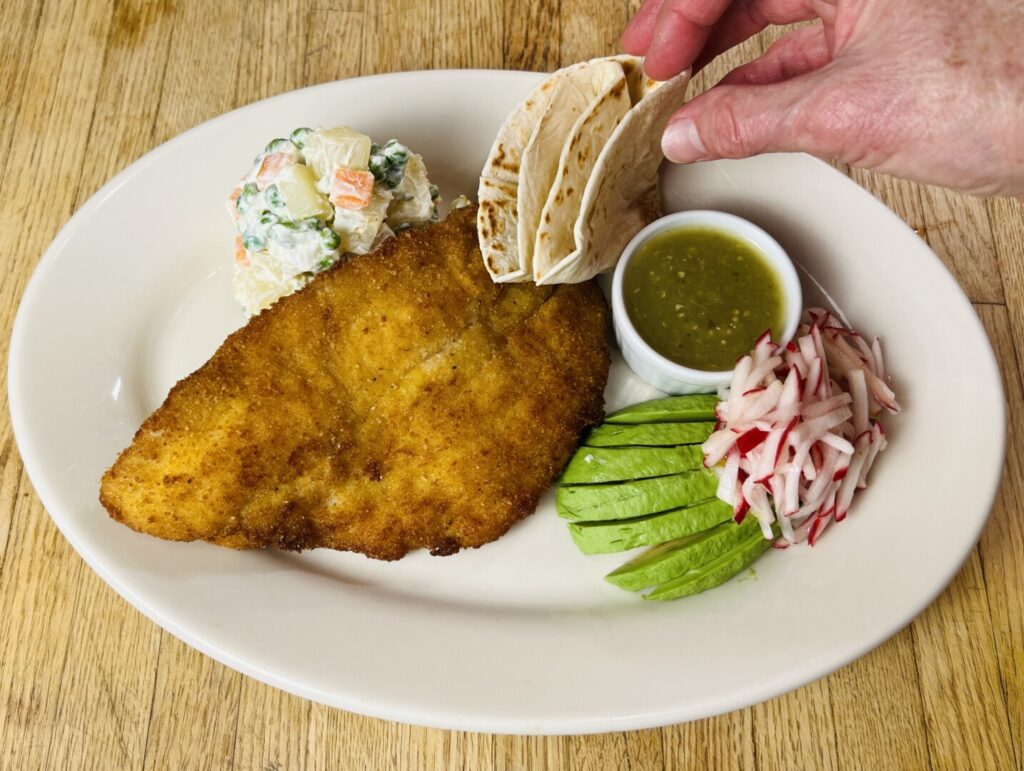
11. Plate:
- Place a sauté pan over high heat.
- Mound a portion of the Rusa salad on the back left of each room-temperature dinner plate. (An entremet ring, or food ring, helps create an attractive presentation.)
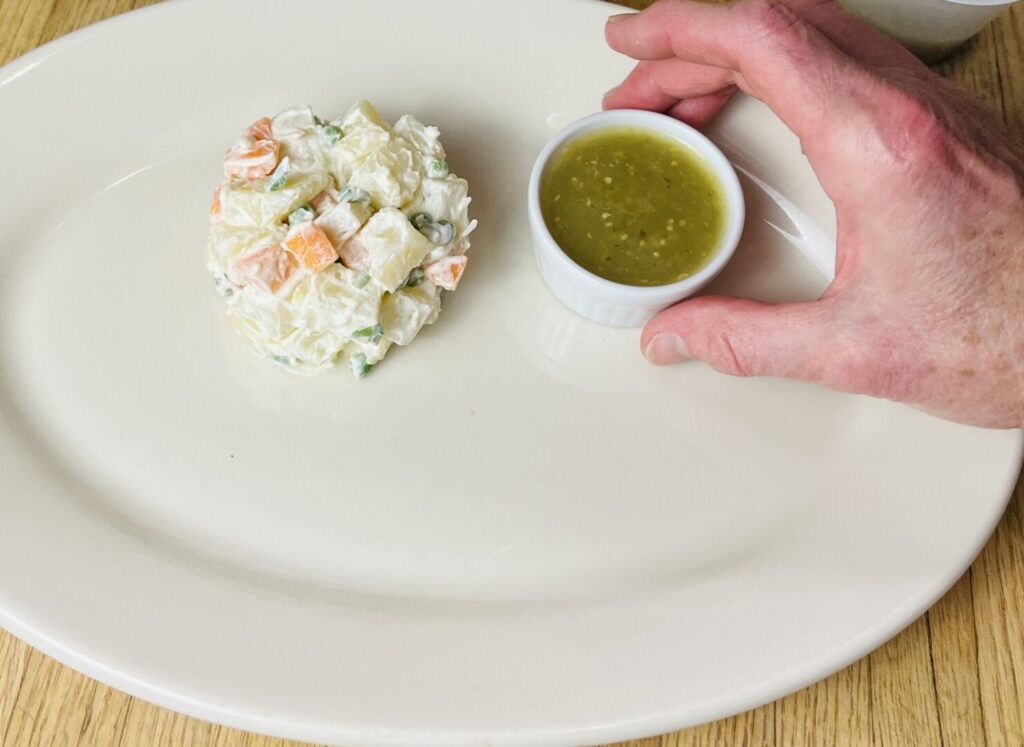
- Spoon a portion of salsa verde into each dip dish and place the dishes on the back right of each plate.
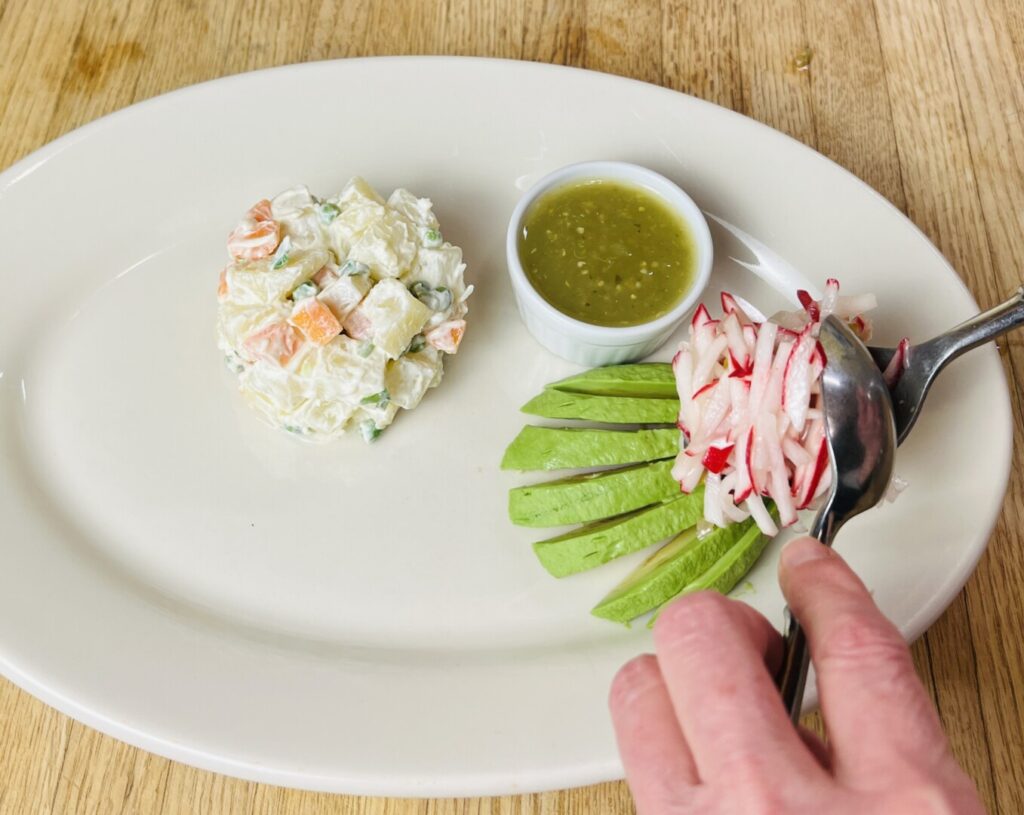
- Use a spatula to lift each avocado fan onto the front right side of each plate. Press gently to widen the fan. Arrange a tall mound of radish salad on the pointed end of each avocado half.
- Toast the tortillas: Place a tortilla in the hot sauté pan and heat it for about 10 seconds. Turn it over and heat for about 5 seconds. Use a dry, folded kitchen towel to press gently on the top of the tortilla to encourage it to puff. Remove the tortilla and fold it into quarters. Repeat with the remaining tortilla.
- Place the flounder fillet(s) on the left center of the plate propped against the Rusa salad.
- Arrange the folded tortilla between the Rusa salad and the dip dish.
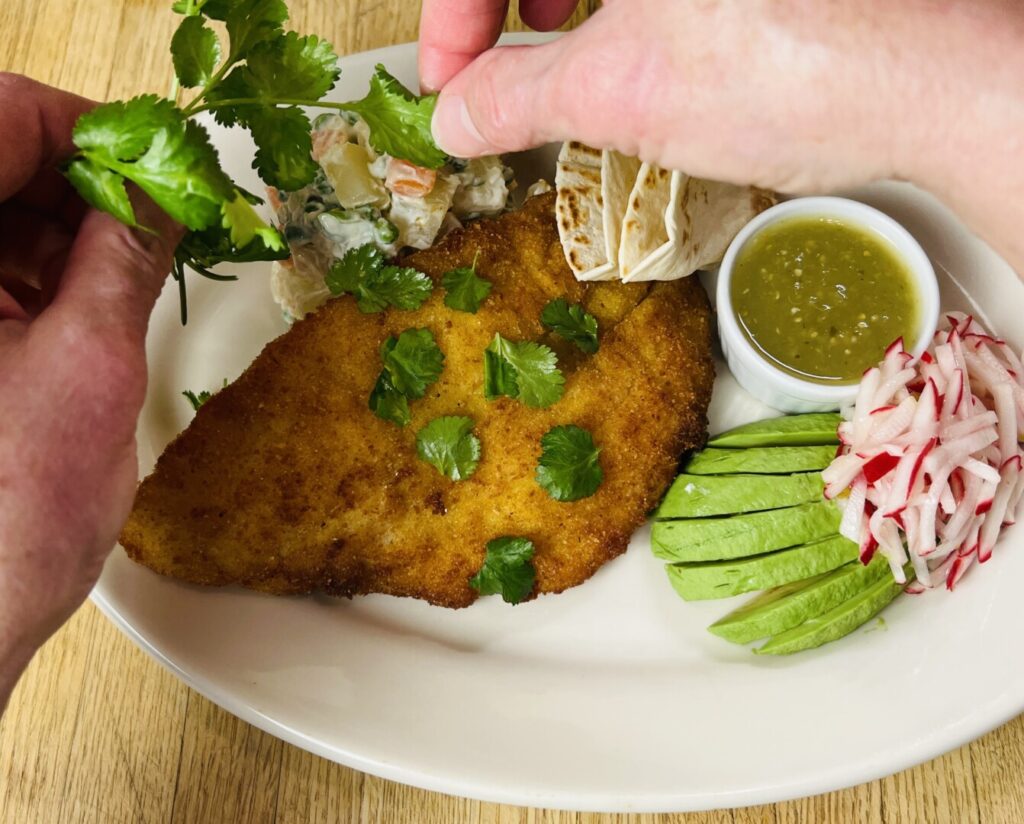
- Pull off pluches, or pieces of leaf, from the cilantro sprigs and scatter over the salad and flounder.